StartUpCheckLibrary.dll Missing? Here's How to Fix It
Delete the task from Task Scheduler
Key notes
- StartUpCheckLibrary.dll is responsible for the execution of different tasks in the Windows Operating System.
- If you are receiving this error, it means the file was deleted or damaged somehow.
- To fix this issue, you need to reinstall the missing DLL file on your computer by uninstalling the most recent Windows update.

When you start your computer, Windows checks for several errors and issues that might have occurred in your system. If it encounters one, it displays an error message to let you know about it.
One of these errors is the StartUpCheckLibrary.dll error. This error message can occur if there are missing DLL files. Windows use this file to run some important tasks, so let’s now delve into possible solutions for this error.
What is Startupcheck dll?
StartUpCheckLibrary.dll is a library file used by the Microsoft Windows operating system. It can be found in either of the following folders, depending on your version. C:\Windows\SysWOW64 or C:\Windows\System32
It is a module used for checking startup programs. If this DLL file is missing from your computer, you may experience problems with the operation of certain applications or system behaviors.
From what we have gathered from users, the StartUpCheckLibrary.dll error appeared after a recent Windows update. This could indicate that the update was corrupt.
Other triggers include:
- Corrupt Registry entries – If your computer has been infected with a virus or malware, there’s a good chance that your registry key has been corrupted as well.
- Malware infection – Malware infections are becoming more common these days, and they can affect your computer in many ways, including making certain files disappear completely.
- Corrupt Windows update – Corrupt updates can cause several computer problems and render it unusable.
How do I recover the StartUpCheckLibrary DLL file?
A few quick workarounds that can save the day include:
- Check whether Windows update components are corrupt and repair them where necessary.
- Ensure your OS is up-to-date.
1. Run a dedicated DLL-fixer
If you are getting a StartUpCheckLibrary DLL is missing error, and your PC is running slowly, a DLL repair tool should be on top of your list.
Such programs are very useful when you want to fix the StartUpCheckLibrary problem so you don’t know how to do it manually.
What’s more, the fix is usually 100% for Windows DLL files such as this one, so you don’t have to jump from solution to solution trying to figure out how to resolve DLL errors.
2. Run the DISM and SFC scans
- Hit the Start Menu icon, type cmd in the search bar, and click Run as administrator.

- Type the following commands and press Enter after each one:
DISM.exe /Online /Cleanup-Image /Restorehealthsfc /scannow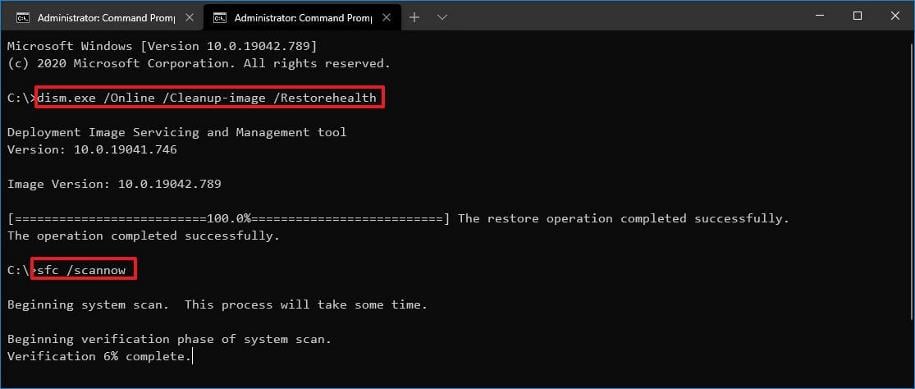
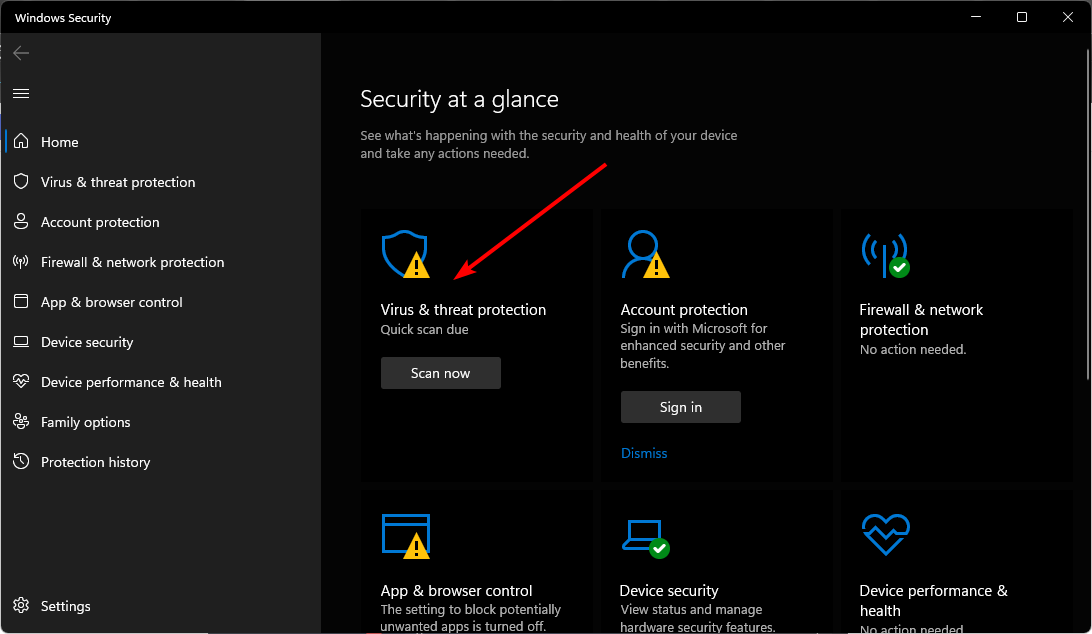
3. Run a virus scan
- Press the Windows key, search Windows Security, and click Open.

- Select Virus & threat protection.
- Next, press Quick scan under Current threats.
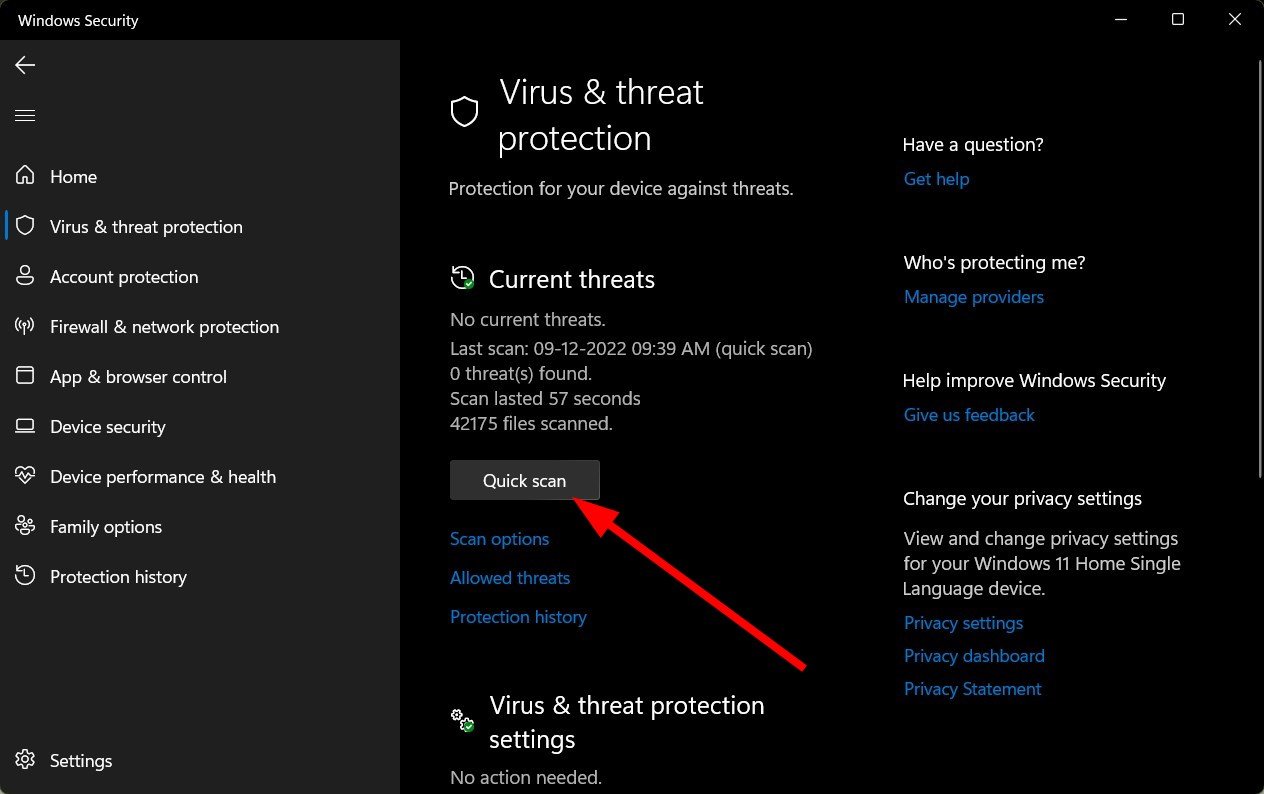
- If you don’t find any threats, proceed to perform a full scan by clicking on Scan options just below Quick scan.
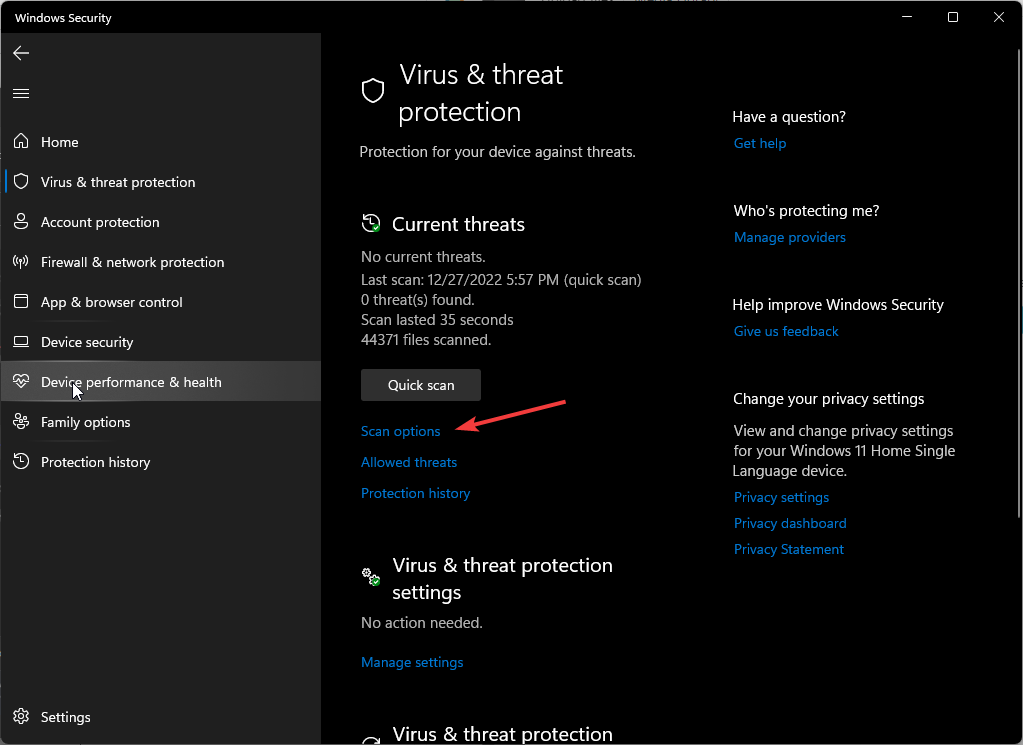
- Click on Full scan, then Scan now to perform a deep scan of your PC.
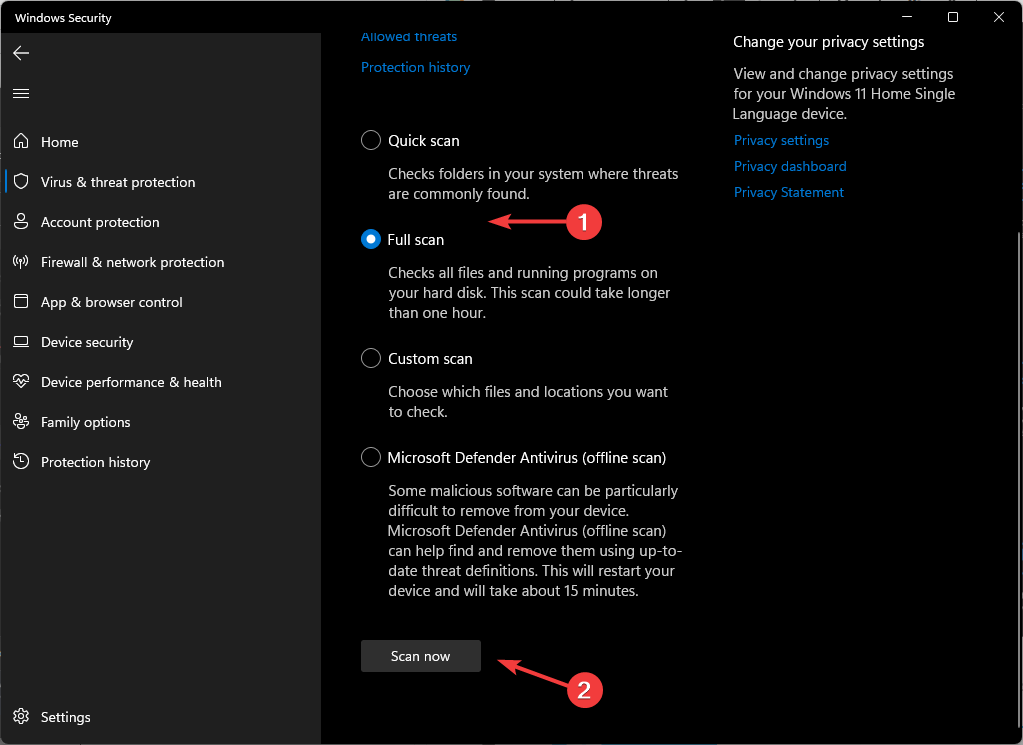
- Wait for the process to finish and restart your system.
4. Remove the task from Task Scheduler
- Hit the Windows key, type Task Scheduler in the search bar, and click Open.
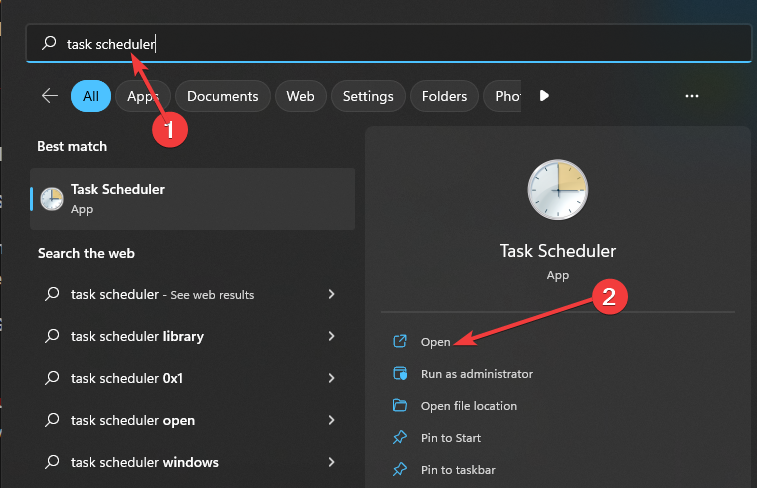
- Click on the Task Scheduler library menu to expand, then select Microsoft.

- Select Application Experience and right-click on StartupCheckLibrary, then click on Delete.
5. Uninstall recent Windows update
- Hit the Windows key and select Settings.

- Click on Windows Update and select Update history on the right pane.
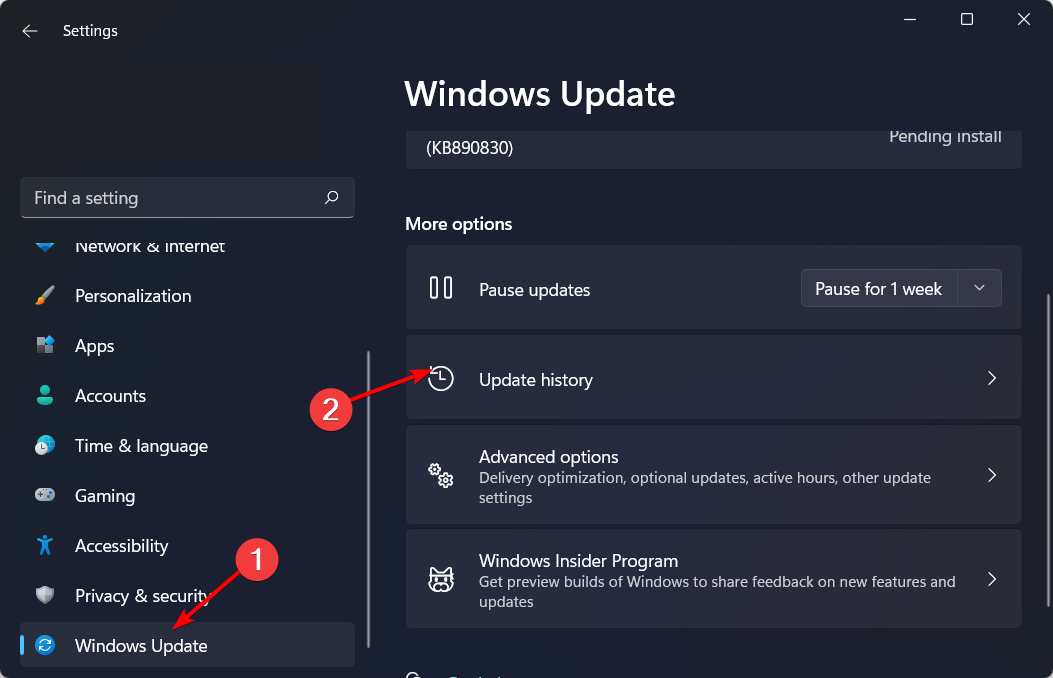
- Scroll down, and under Related settings, click on Uninstall updates.
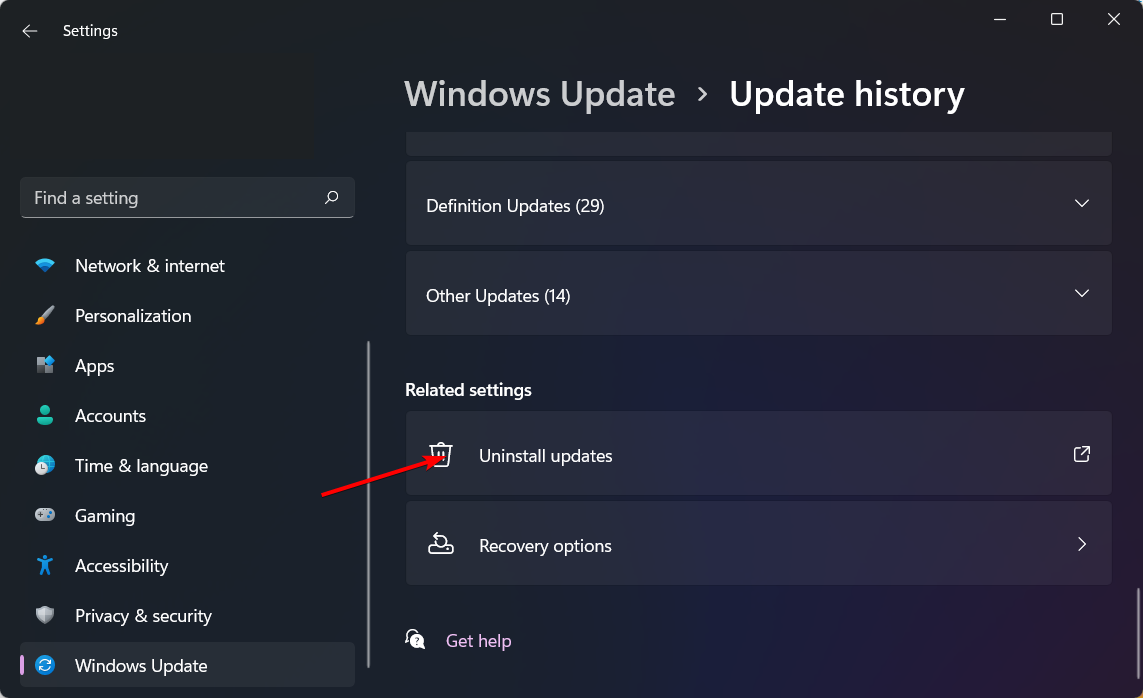
- This will take you to the most recent installed updates.
- Select the topmost update and click on Uninstall.
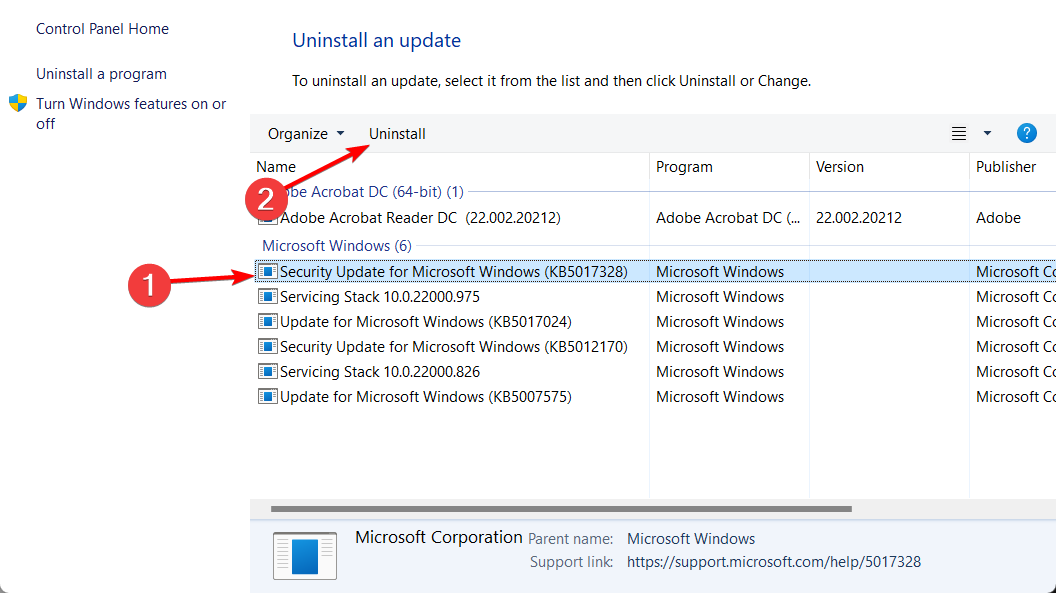
- Restart your PC and check if the problem persists.
If the Windows update was the problem, you can wait for the next update to be available in case Microsoft releases bug fixes.
For general DLL errors like missing DLL files after a Windows update, check out our comprehensive article on how to bypass these issues.
Let us know what solution worked for you if you encountered this error in the comment section below.
Read our disclosure page to find out how can you help Windows Report sustain the editorial team. Read more


Improve this guide


User forum
0 messages