How To Set Process Priority In Task Manager: Quick Guide
Learn to set a high priority for important processes
3 min. read
Updated on
Read our disclosure page to find out how can you help Windows Report sustain the editorial team. Read more
Key notes
- Not all processes on your PC are equal, and some might require more power than others.
- You can set a high priority for an app by tweaking its settings.

All processes on your PC share the CPU power equally, but did you know that you can give higher priority to specific applications?
That’s right, and in this guide, we’re going to show you how to set priority in Task Manager on a Windows PC. We also cover setting a high priority using other tools such as Command Prompt and PowerShell.
How can I set priority in Task Manager?
1. Set priority from the Details tab
- Press Ctrl + Shift + Esc to start Task Manager.
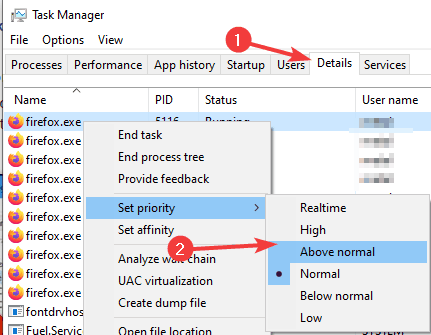
- Go to the Details tab, right-click the desired process, choose Set Priority and select any value that you want.
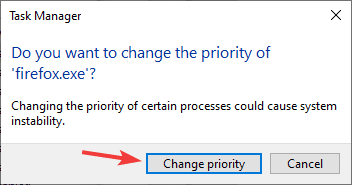
- When the confirmation dialog appears, select Change priority.
This is the easiest way to set priority in Task Manager, and the priority for that process will remain changed until you end the process or turn off your PC.
2. Change priority in Task Manager using Command Prompt
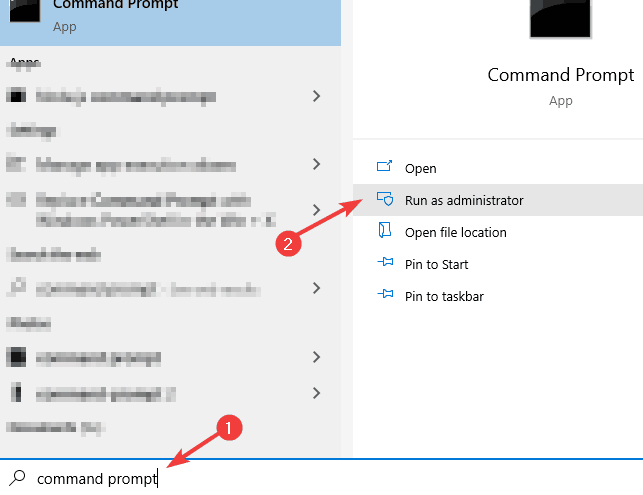
- Press Windows Key + S and enter command prompt. Select Run as administrator.
- When Command Prompt starts, run the following command:
wmic process where name="firefox.exe" CALL setpriority "Above normal"
Alternatively, you can set priority by using a numerical value like this:
wmic process where name="firefox.exe" CALL setpriority 32768
Keep in mind that in order for this command to work, the process needs to be running beforehand. Of course, be sure to change the process name and priority level as needed.
You can find the list of priority values in the table below.
| Realtime | High | Above normal | Normal | Below normal | Low |
|---|---|---|---|---|---|
| 256 | 128 | 32768 | 32 | 16384 | 64 |
3. Use PowerShell to set priority
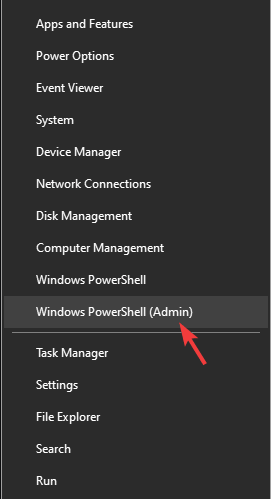
- Press Windows Key + X and select Windows PowerShell (Admin) from the list.
- When the PowerShell starts, run the following command:
Get-WmiObject Win32_process -filter 'name = "firefox.exe"' | foreach-object { $_.SetPriority(32768) }
Of course, be sure to replace the process name and the priority level as needed. You can find the numeric values from the priority list below.
| Realtime | High | Above normal | Normal | Below normal | Low |
|---|---|---|---|---|---|
| 256 | 128 | 32768 | 32 | 16384 | 64 |
4. Start applications with a specific priority with cmd
- Start Command Prompt.
- Now run the following command:
start "" /AboveNormal " C:\Program Files\Mozilla Firefox\firefox.exe"
This will start Firefox with the Above Normal priority. Of course, you can use any other priority levels to start any application you want, as long as you enter the correct path to it.
To set priority in Task Manager, you just need to go to the Details tab and make the changes from there. If you’re an advanced user, you can always use Command Prompt or PowerShell to change the priority.


User forum
2 messages