Fix: Could not Open Connection to the Host Telnet Error
Configure Firewall to allow Telnet connections to solve the error
Key notes
- Telnet could not open connection to the host usually occurs on port 22, 23, 25, 1433, 443, and 80.
- You can fix the error by creating a new rule to prevent Windows Firewall from blocking the Telnet inbound connection.

The error message Telnet could not open a connection to the host occurs when users attempt to use Telnet. When using the Telnet protocol, it indicates a problem establishing a network connection between the local machine and the target host. Hence, we’ll discuss how to fix the problem.
Also, you can check our article about the best network repair tools to fix issues in Windows 11.
Why is Telnet not connecting to the server?
- Network connectivity issues can sometimes block the Telnet traffic.
- An incorrect host or port will cause issues, so try to use port 23.
- If Windows Firewall is blocking a port you can experience issues.
- If a Telnet service is not running it can result in a connection error.
- DNS resolution failure can prevent you from connecting to a host.
What can I do if Telnet could not open connection to the host?
Before proceeding with any advanced troubleshooting steps, we recommend you try the following preliminary checks:
- Restart your computer and check if that fixes the temporary glitch.
- Perform a clean boot and ensure that nothing interferes with the connection.
- Verify network connectivity and make sure your connection is stable.
- Troubleshoot DNS and make sure that everything is working properly.
1. Configure Firewall to allow Telnet connections
- Left-click the Start button, type Windows Firewall in the search box, then select it from the results.
- Select Advanced Settings.

- Click on Inbound Rules from the left-hand pane, then select the New Rule option.

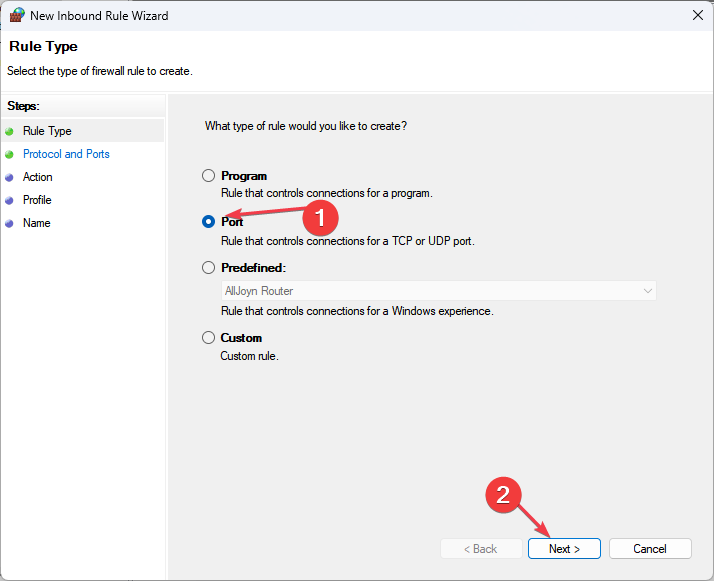
- Under the Rule Type, select Port, then click Next.
- Select TCP and Specific Local Ports. Enter 23 in the port number bar and click the Next button.

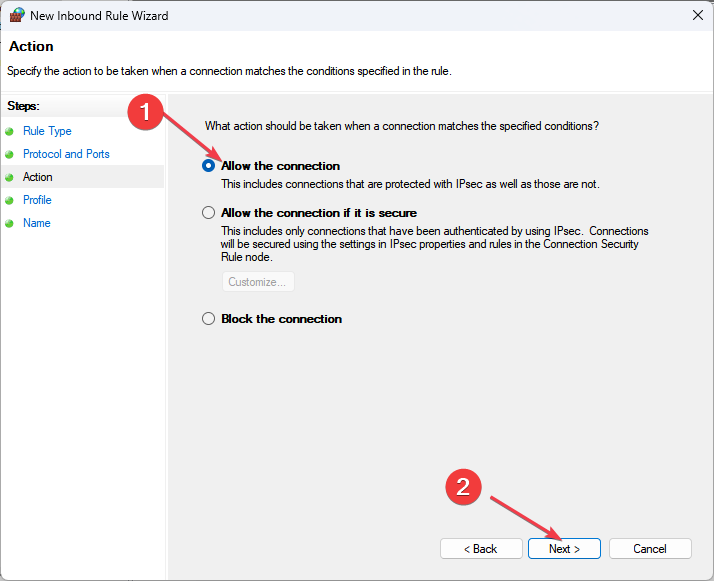
- Click the Allow Connection option and Next.
- Specify when the new rule can be applied. (Domain, Private, and Public)
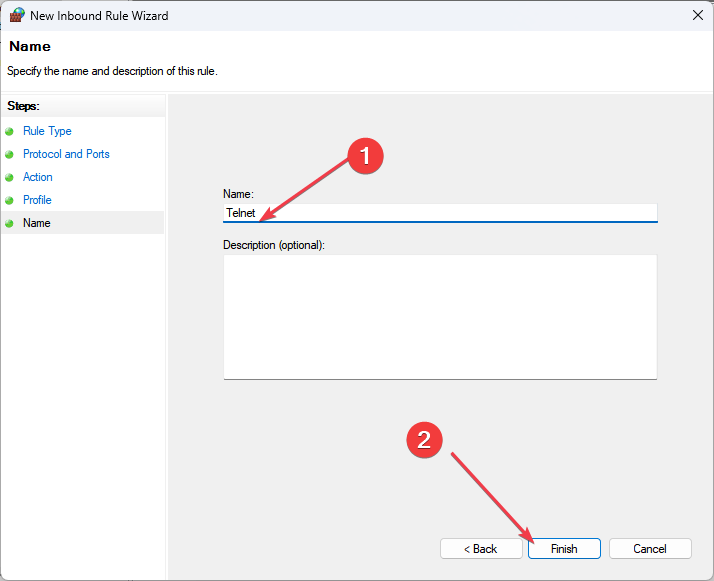
- Rename the Inbound Rule to Telnet, then click the Finish button.
- Restart your PC and test Telnet functionality again to see if the error persists.
Creating the new rule prevents Windows Firewall from blocking the Telnet inbound connection and resolves the access to the host error. Adding an inbound rule also fixes the 443 error code.
2. Enable the Telnet client feature
- Press the Windows + I key to open the Windows Settings app.
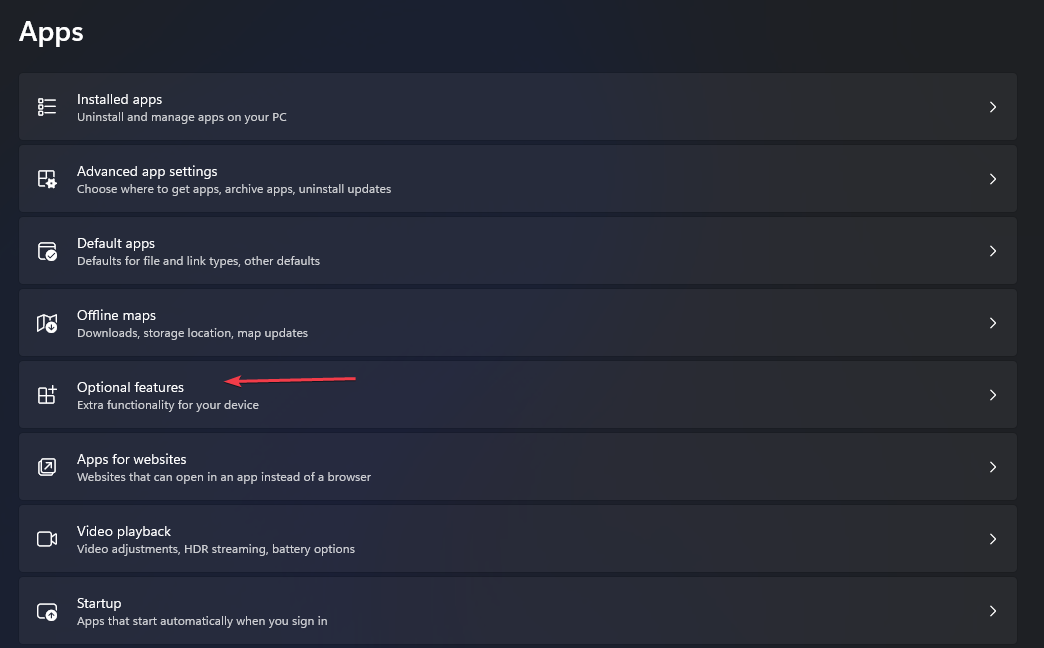
- Click on Apps and then choose Optional Features from the left sidebar.
- Click on View features button beside Add a feature and search for Telnet Client.
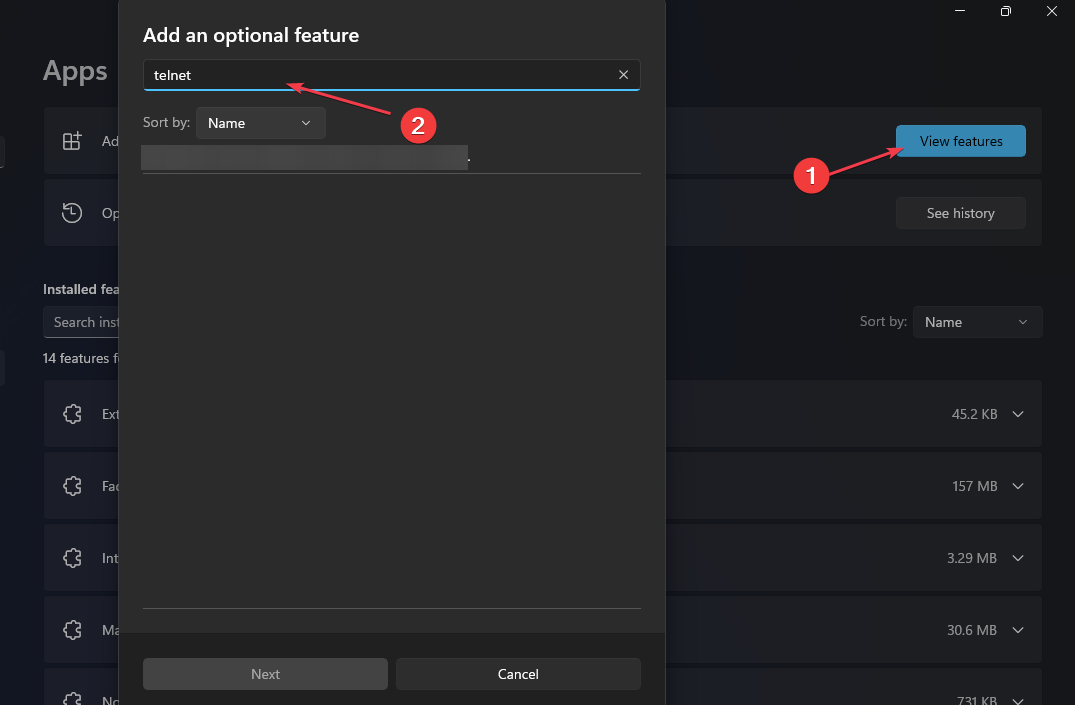
- Select Telnet Client from the list and click the Install button to enable it.
The Telnet Client feature might not be running or enabled on the host device because Windows 11 does not activate it by default.
In conclusion, you may be interested in our article about what to do if the can’t connect to this network error appears on Windows 11.
Should you have further questions or suggestions regarding this guide, kindly drop them in the comments section below.
Read our disclosure page to find out how can you help Windows Report sustain the editorial team. Read more


Improve this guide


User forum
0 messages