4 Ways to Turn On or Off Live Caption on Windows 11
Follow the various steps here to enable or disable Live Captions
3 min. read
Updated on
Read our disclosure page to find out how can you help Windows Report sustain the editorial team. Read more
Key notes
- Live Captions are used to provide a better understanding of the system audio.
- The Live Captions feature is exclusive to specific builds of Windows 11.
- Before exploring methods to turn on or off Live Captions on Windows 11, also note that they are currently available only in English (US).
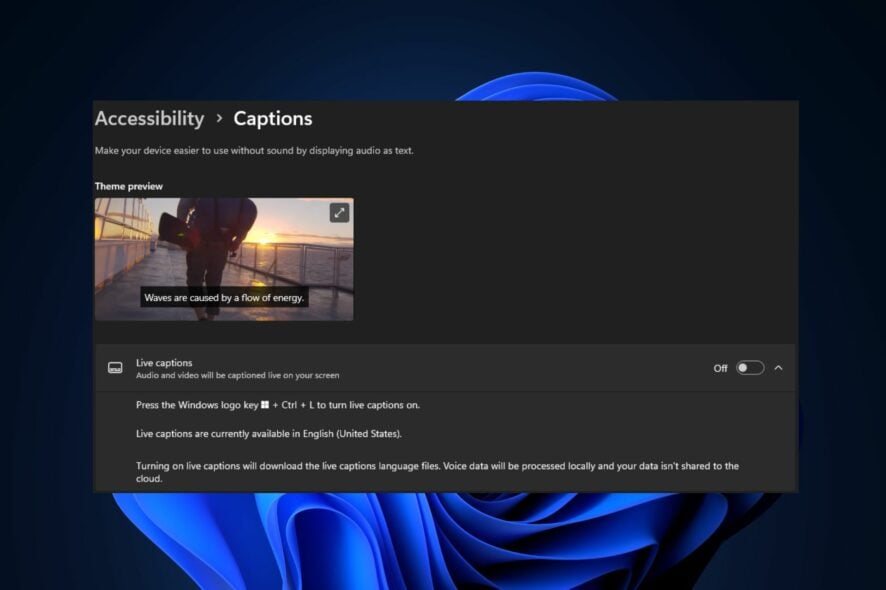
Live Captions is a new feature available in specific Windows 11 builds that converts the system’s audio to text-based transcriptions displayed on the screen.
This article provides some quick steps if you want to know how to enable or disable Live Caption on Windows 11.
What is Live Caption?
Live Caption is a text-based transcription of the audio produced from a video file. The feature is pretty new to Windows 11, but it’s been around in earlier versions of Windows using Microsoft Teams phones.
Live Captions help users better understand the audio by displaying a text-converted version of the audio on the screen.
How do I turn on or off Live Captions on Windows 11?
Before proceeding to explore methods on how to turn on or off Live Caption on Windows 11, you should ensure the following:
- Make sure you are running the latest Windows Update for Windows 11.
- Follow the prompts to download language captions files if you’re using them for the first time.
After confirming the above, you can proceed to the steps provided below to learn how to turn on or off Live Caption on Windows 11.
1. Via the Quick Settings
- Press the Windows key + A to open Quick Settings and click on the Accessibility option.
- Click on the Live Captions toggle button to turn it On or Off.
- Press the Windows key + A to close Quick Settings.
- Play the video and check if the Live Captions is active.
This is one of the fastest ways to get the Live Captions activated in Windows 11. If Quick Settings isn’t functioning on your PC, we have a detailed guide on how to fix Windows 11’s Quick Settings.
2. Use the Settings app
- Left-click the Start button and click on the Settings app.
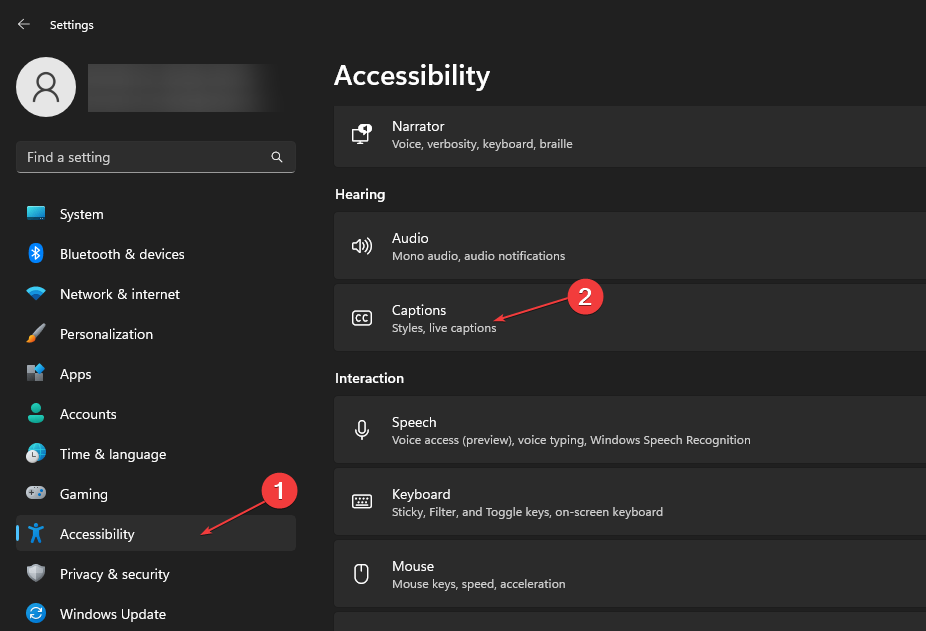
- On the left side of the Window, click on Accessibility and select Captions under the Hearing category on the right pane.
- Click on the toggle button beside the Live Captions to turn if on or off.
- Close the Settings app and check if it’s working.
Should you want to use other features, you can check our guide to know the new changes in the Windows 11 Accessibility settings.
3. Use the keyboard shortcut
Another viable way is to use keyboard shortcuts to activate or remove the Live Captions in Windows 11.
Press the Windows + Ctrl + L keys simultaneously to launch Live Captions. Also, you can disable Live Captions if it was enabled.
4. Use Task Manager
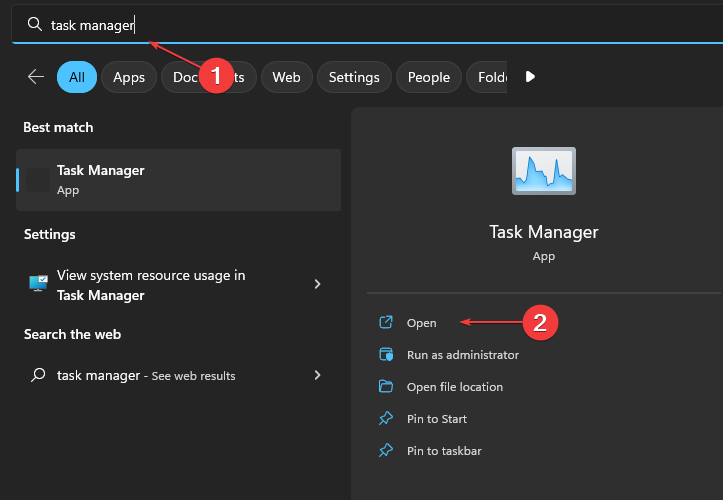
- Left-click the Start button, type task manager, and click Open.
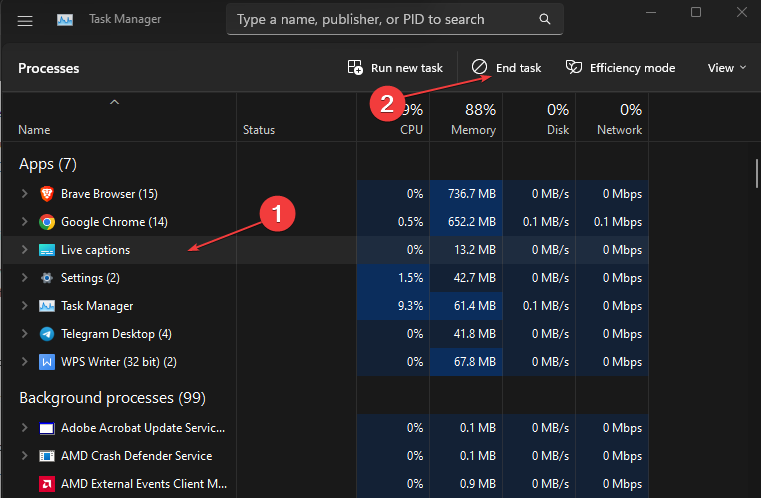
- Click on either the Processes or Details tab. Select Live Captions or Livecaptions.exe, and click on End task at the top of the Window.
This method only works when you wish to disable Live Captions. Here is a detailed guide on some of the best ways to open Task Manager in Windows 11.
How many languages are supported in Live Captions?
Since this is a new feature on Windows 11, only the English language(US) is actively supported. Also, you have to download the necessary files needed to use Live Captions first before it can work on your PC.
Live Captions remain one of the best features on Windows 11. If you run Windows 11, this is one feature you’d love to keep on as it provides a better understanding of the system audio.
Toggling this feature on or off requires little to no technical know-how; if you follow through with our guide, you should get Live Captions up and running in no time.
If you have any suggestions or questions on this guide, please leave them in the comments section below.



User forum
0 messages