How do You Update CPU Drivers on Windows 10 & 11?
Updating the CPU driver is a must and this is how you can do it
Key notes
- Keeping the driver for your CPU updated should be an absolute priority.
- Whenever you are prompted to download and install updates for it, do it.
- We are going to show you multiple ways to go about updating your CPU.
Keeping both our hardware and software up to date is essential for everything to go smoothly, and also to keep everything secure.
Don’t think that updates are just meaningless MB downloaded with no purpose whatsoever. In fact, updates contain important fixes, improvements, or security patches.
It’s even more important to have our software up to date when we are talking about the Windows OS, as the system can become vulnerable if not constantly updated.
And, speaking of updates, see how to easily update your drivers on your Windows 10 device, so you can be prepared when the time comes.
But wait, maybe you’ve already switched to Windows 11 and left the old operating system behind. In that case, see how to update drivers on Windows 11.
Just in case you also need this information, the article on how to check and update BIOS on Windows 11 is waiting for you to peruse through it.
We are about to show you a few methods that you can use in order to update your central processing unit (CPU) on your Windows 10 or Windows 11 PC.
it really doesn’t matter, as the steps are pretty much the same for both versions of the popular Microsoft-designed operating system.
Why should I constantly update my drivers?
Well, let’s just say that a hardware component for your PC would be pretty much useless without its software counterpart.
Thus, updating your device’s drivers can actually resolve problems, improve performance, and increase the stability of your computer.
Yes, we did say improve performance, which should be the sole interest you have when mentioning the PC’s CPU.
For better health and longer usage, we strongly recommend you install updates for the system’s software every time they become available.
Malicious third parties are always looking for a way inside our lives, so keeping everything updated makes it less likely that you will become a victim of cybercriminals.
Usually, a CPU is integrated with a graphics card (GPU), making these updates even more meaningful than first anticipated.
CPUs that come without a native GPU, don’t have drivers. Software support for that kind of CPU is included in its motherboard’s BIOS.
So, it goes without saying that, in order to upgrade the CPU driver, you will therefore need to update your BIOS.
How can I update my CPU drivers?
1. Use the Device Manager
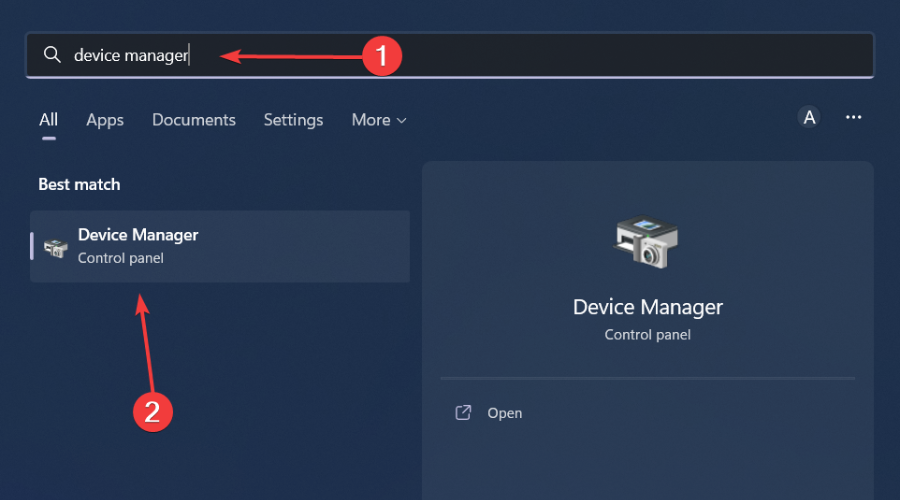
1. Press the Windows key on your keyboard to bring up the Windows search box.
2. Type device manager in the search box and click on the first result to open the app.
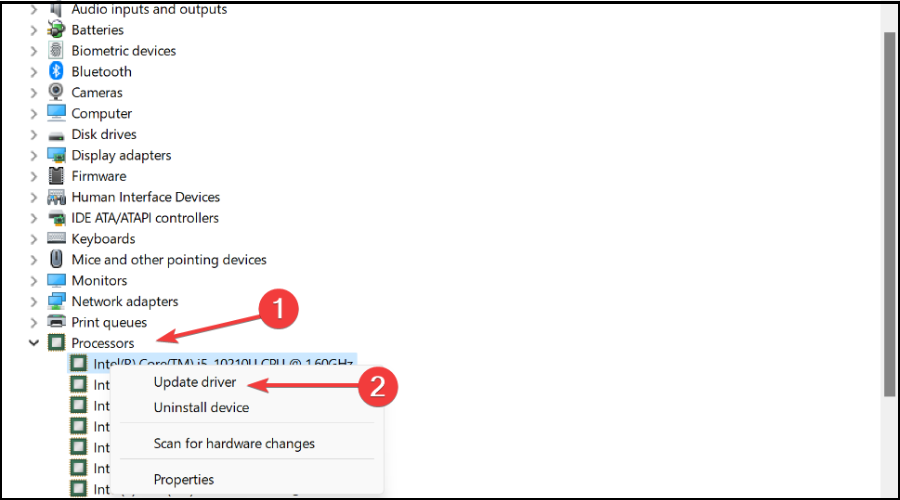
3. Scroll down to the Processors section.
4. Expand Processors, right-click the one you are using, and select Update driver.
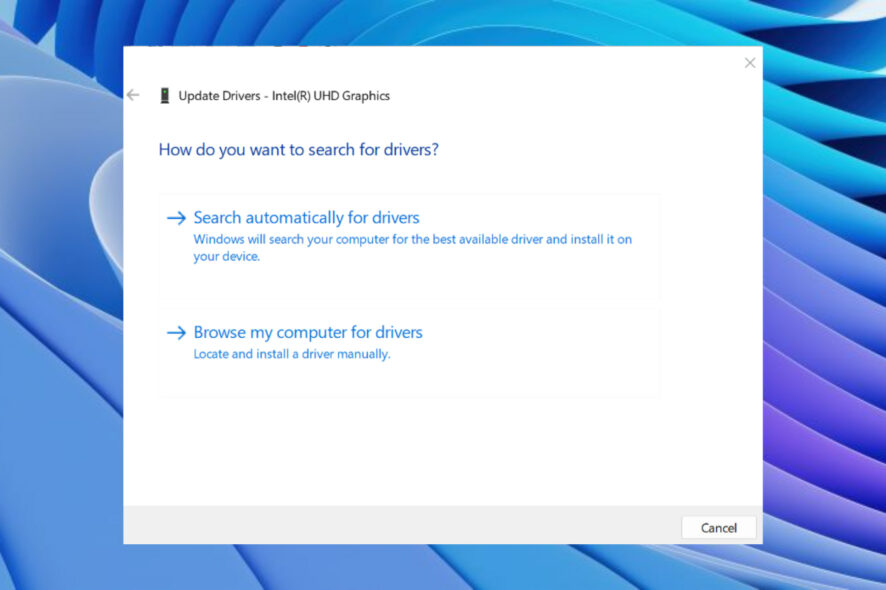
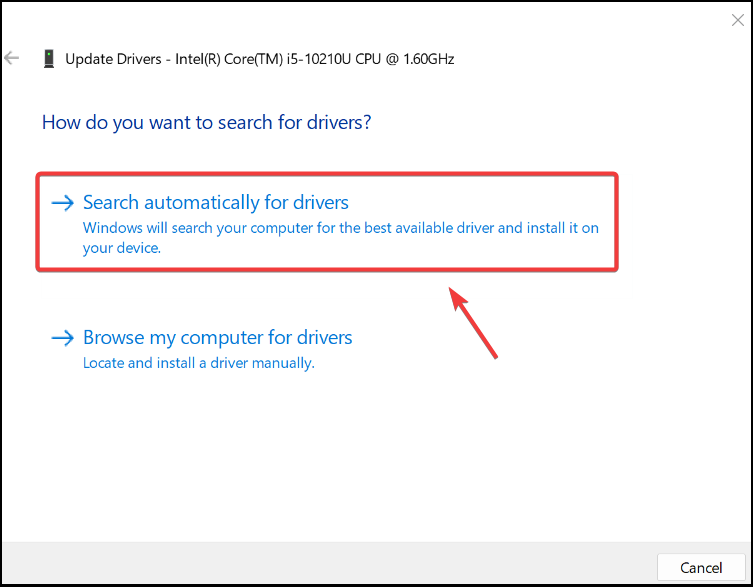
5. Choose Search automatically for drivers.
The first method you should try out when you’re looking to update your CPU drivers on a Windows 10/11 PC is to update them with Device Manager.
Device Manager is a built-in app on your device that allows you to install and update your devices’ drivers in a few clicks.
2. Use specialized software
It should go without saying that whatever choose to do on your PC can be done without crashes, lags, or freezes by keeping all drivers up to date and error-free.
Sometimes, manual checks are hard to perform, that’s why we recommend using an automated assistant that will scan for fresh driver versions daily.
So, if you are not in the mood to use any other of the solutions we are presenting to you in this guide, stop right here, download the specialized software and let it do the work for you.
Even though updating your CPU driver is an easy task, it’s understandable that you want to deal with it, so that’s why we recommend using an automated tool.
You can prevent these problems by using an automatic tool that will search and install the correct drivers on your computer with just a few clicks. That's why we recommend you use Outbyte Driver Updater. Here's how to do it:
- Download and install the Outbyte Driver Updater app.
- Launch the software.
- Wait for the app to detect all incompatible drivers.

- Afterward, it will show you a list of the drivers found to select the ones to Update or Ignore.
- Click on Update & Apply Selected to download and install the newest versions.
- Restart your PC to ensure the applied changes.

Outbyte Driver Updater
Use this software and solve all driver-related issues from your PC.3. Use the Windows Update tool
- Press Windows + I to access Settings.
- Select the Windows updates tab and click Install all.
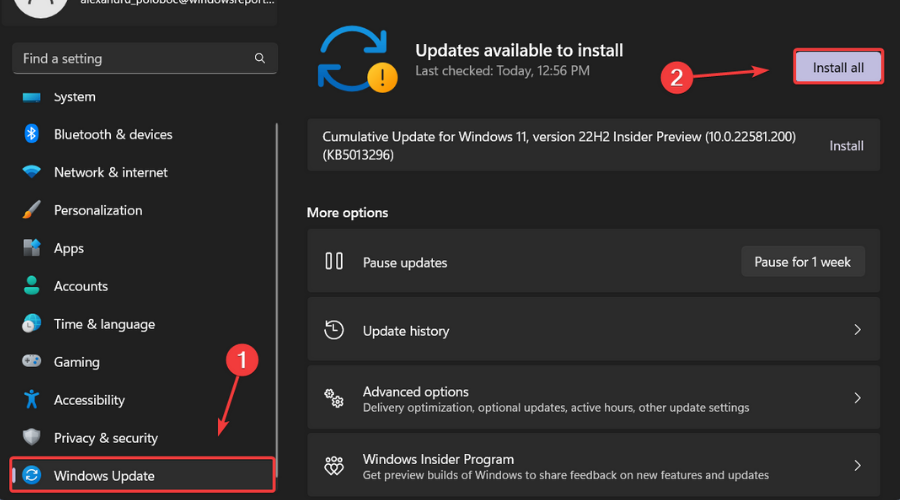
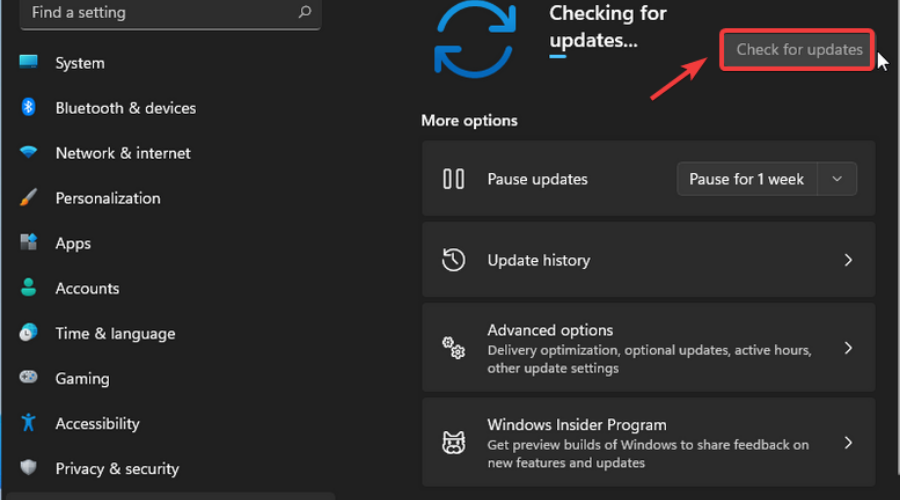
- If no updates are queued for installation, press the Check for updates button.
4. Download the driver from the manufacturer’s site
Some users don’t even rely on the Device Manager or the Windows Update tool to update the driver that their CPU uses.
In fact, those people choose to cut the middle man and go directly to the supplier, just like in the good old days.
What does that mean? It means that they go directly to the website of the CPU’s manufacturer, which can be Intel, AMD, or others, and download the diver directly from the source.
After downloading on your device, simply double-click the executable you downloaded and it will take you through the setup.
5. Re-install CPU software
- Search for Device Manager and open the app.
- Expand Processors, right-click on the one you are using, then select Uninstall driver.
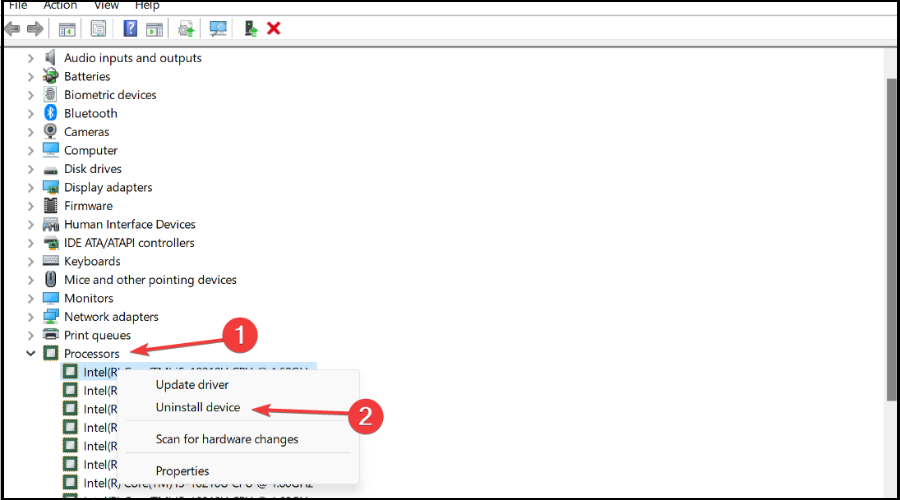
- Restart your PC.
Usually, after restarting your PC, Windows will try to install the latest CPU software including CPU driver software, so don’t worry.
If, however, the system doesn’t automatically do it, use the Device Manager and it will automatically find the one for you.
6. Manually install using CD/USB stick
Sometimes, when we purchase a new processor, it comes with a CD, or USB stick that contains the setup file and necessary drivers.
Simply put the CD in your PC, or insert the USB stick, and run the executable you find on it. Go through the setup and that’s all there is to it.
However, the CD/USB stick only contains the stater driver pack, so your system will need to download the latest drivers off the internet. Just use one of the methods above.
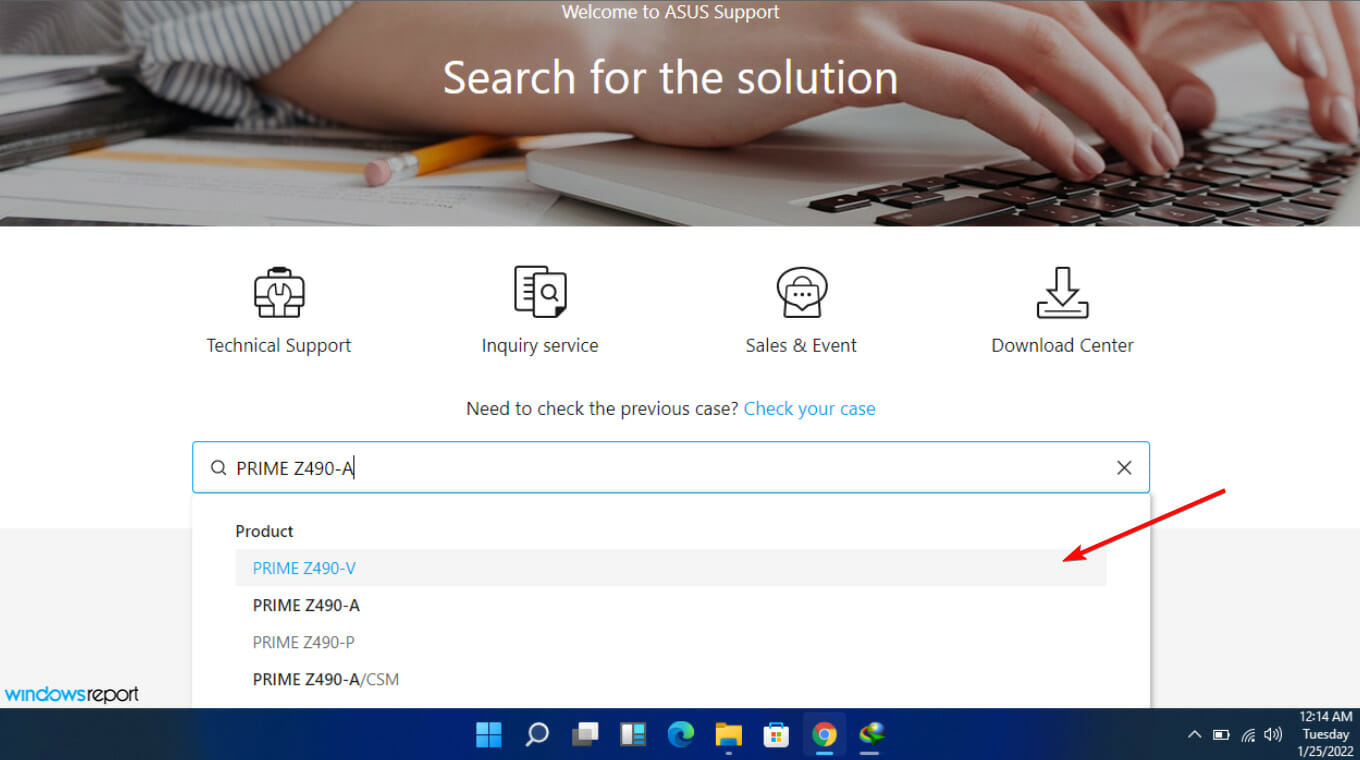
7. Update Motherboard BIOS
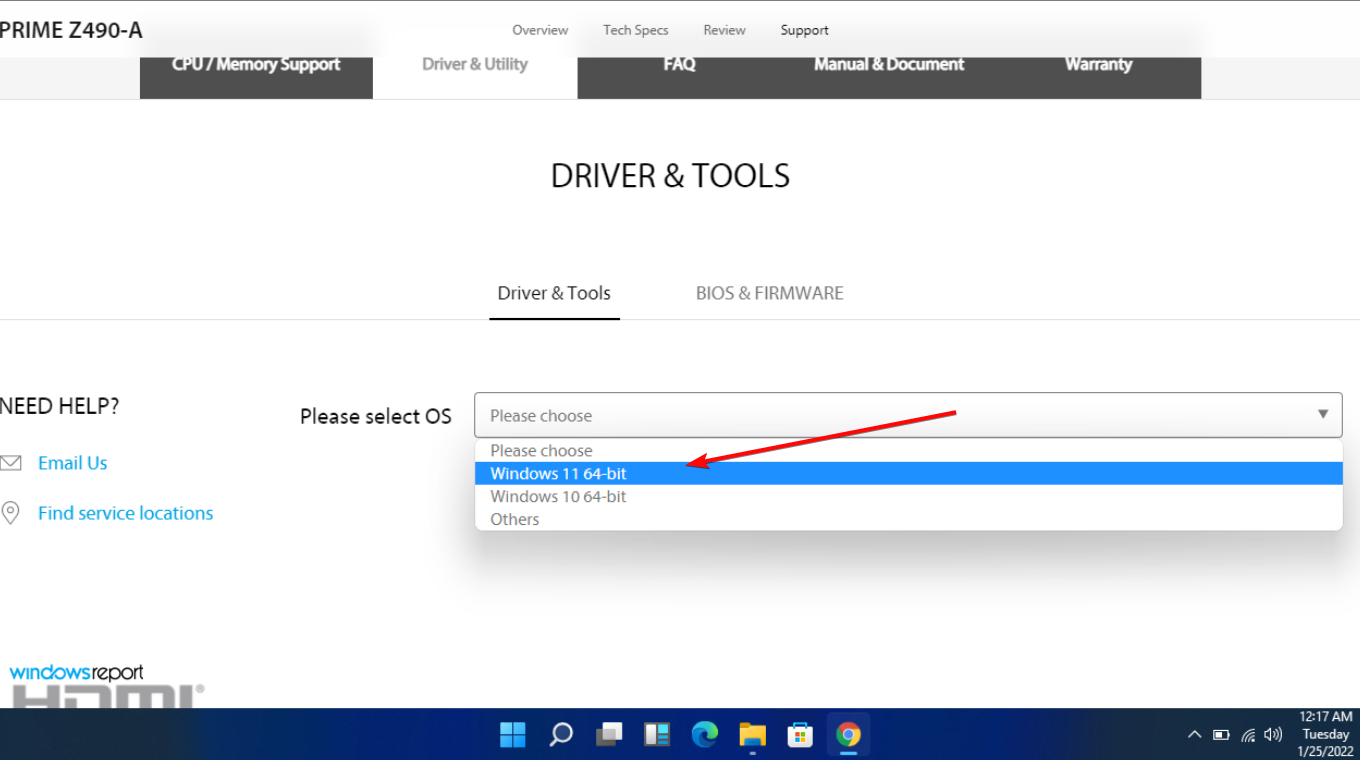
1. Visit the Asus Download Center, type in your motherboard’s model, and choose it when you see it in the drop-do list.
2. Select Driver & Utility and then Driver & Tools.

3. Choose your OS (we chose Windows 11 in this case).
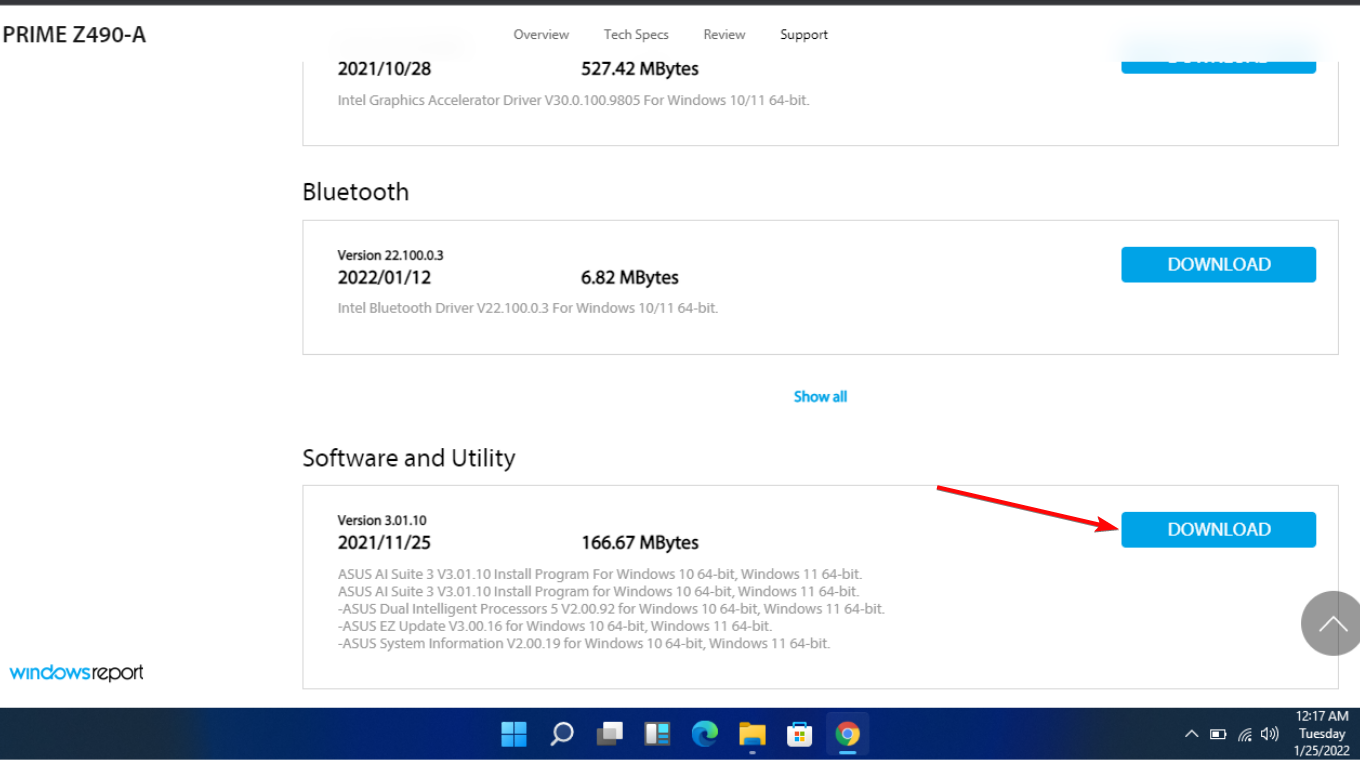
4. Under Software and Utility, look for ASUS AI Suite 3, and select Download.
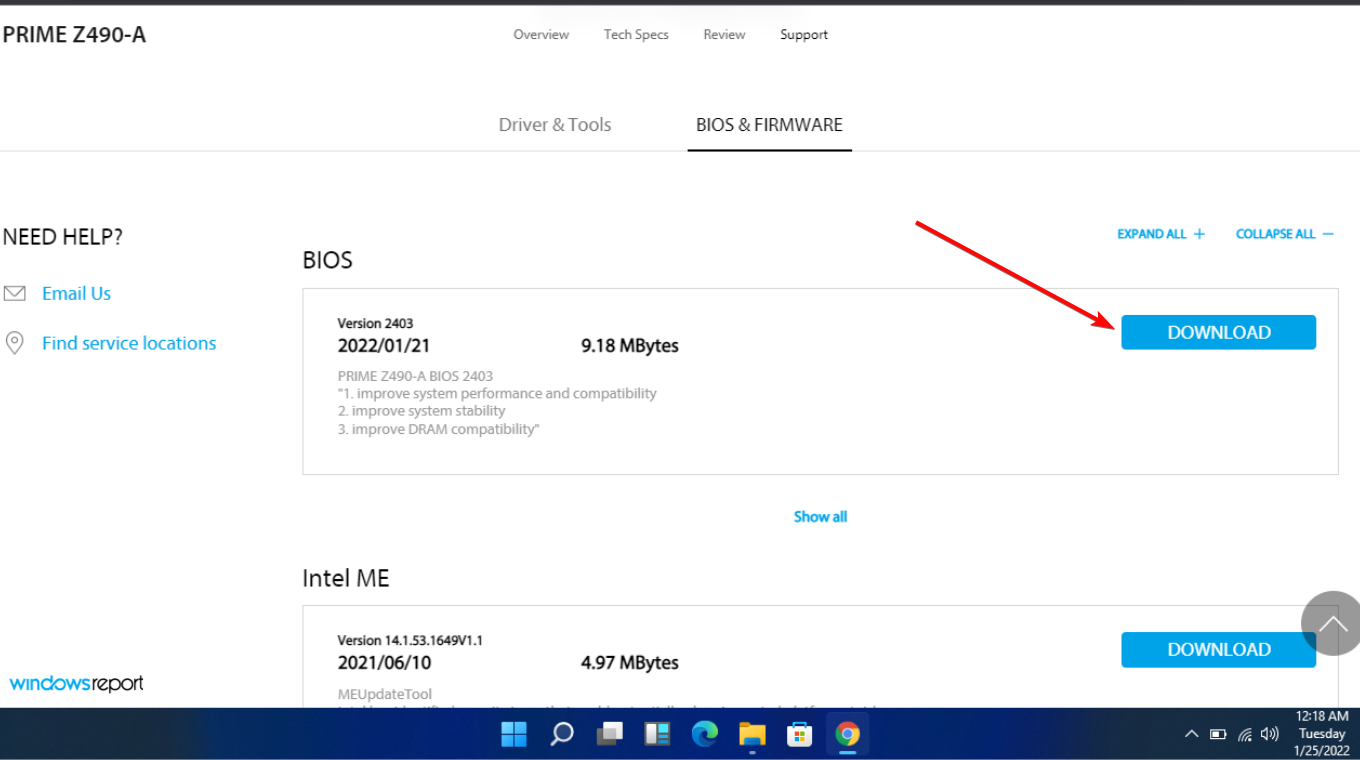
5. Scroll back to the top and click the BIOS & FIRMWARE tab.
6. Up next, scroll to the BIOS section and select Download.
7. Extract the ZIP file containing ASUS AI Suite 3, then open AsusSetup.exe and install the program. When finished, reboot your computer.
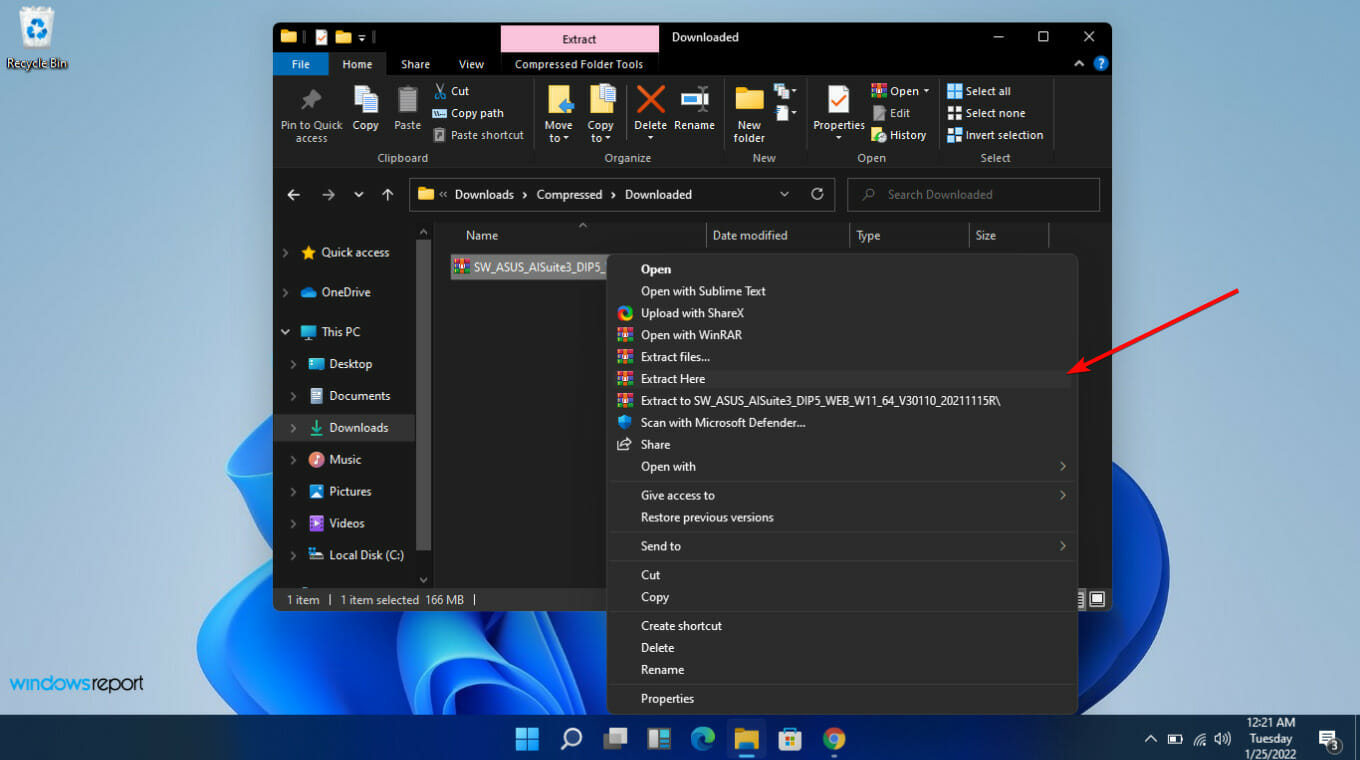
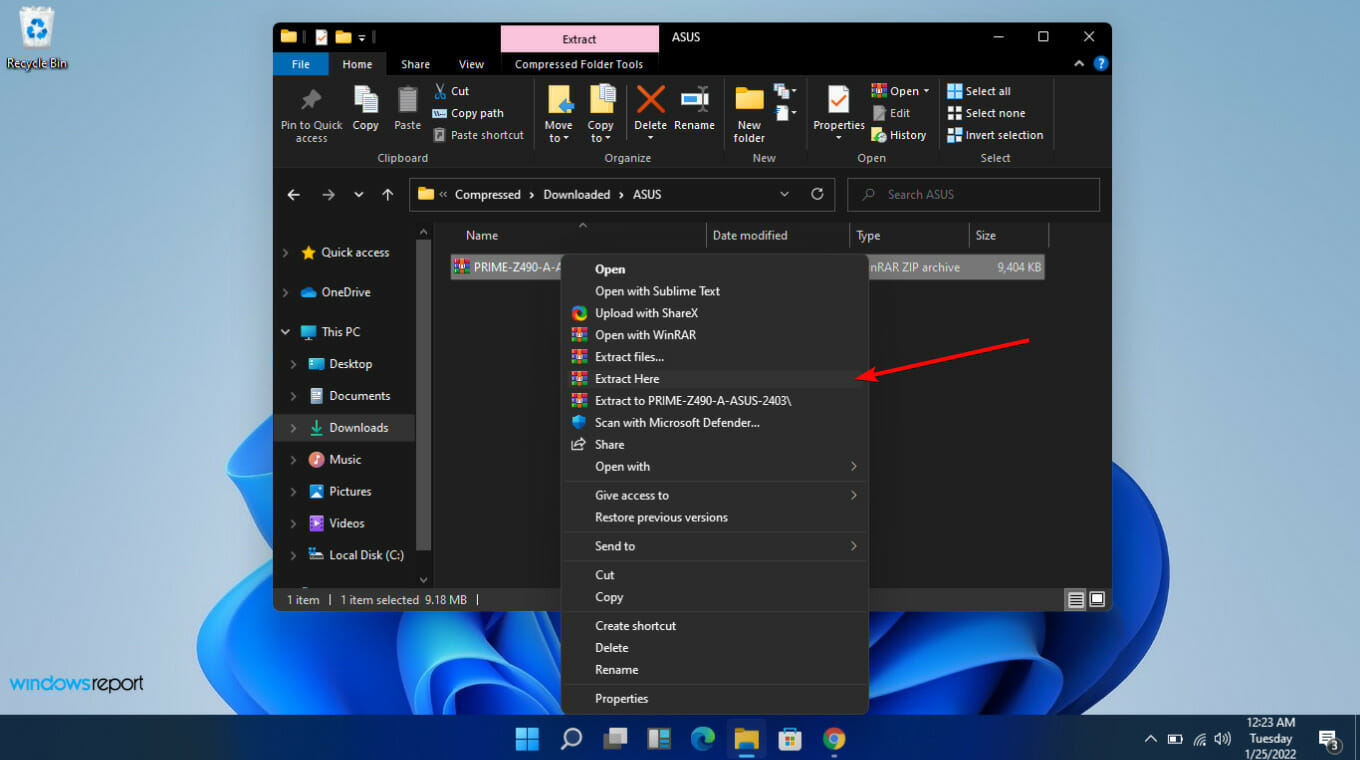
8. Extract the ZIP file that contains the BIOS folder.
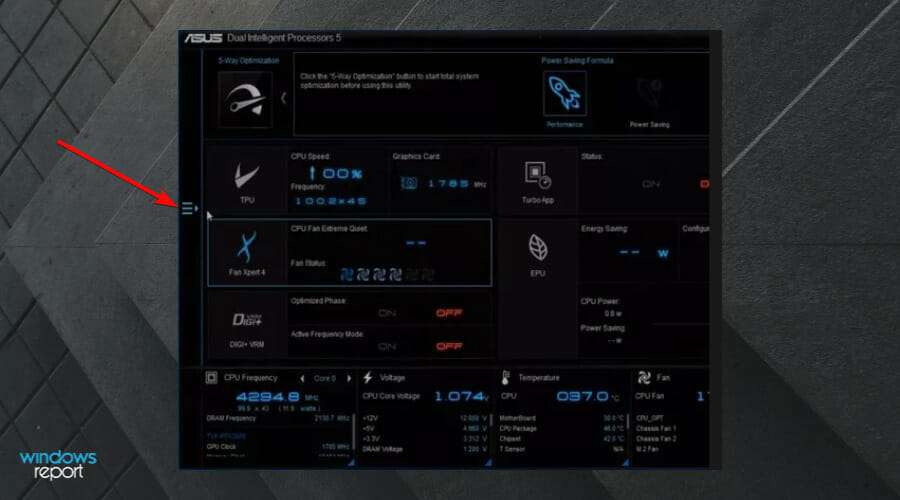
9. Open Asus AI Suite 3 and select the Menu icon (the three horizontal lines) on the left side.
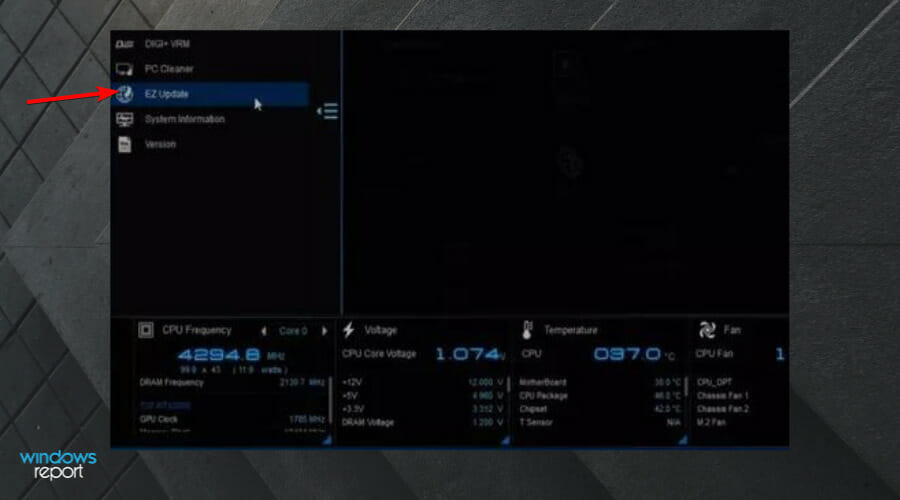
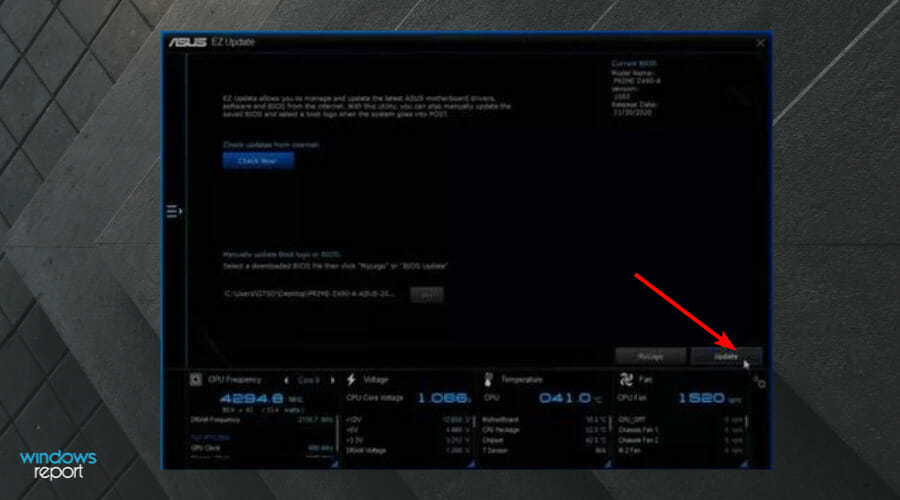
10. Select EZ update.
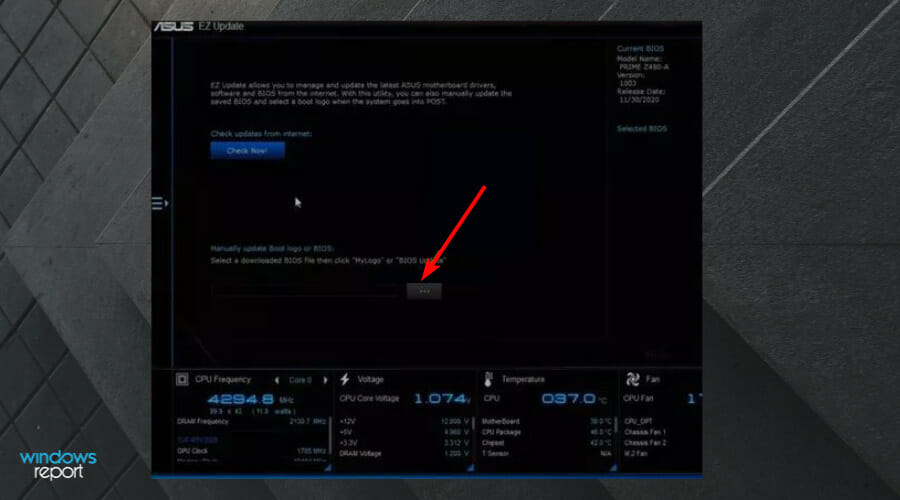
11. Under Manually update boot logo or BIOS, select the Ellipses (…), and choose the same BIOS file you had extracted earlier.
12. Choose Update in the lower-right corner.
13. Select Flash.
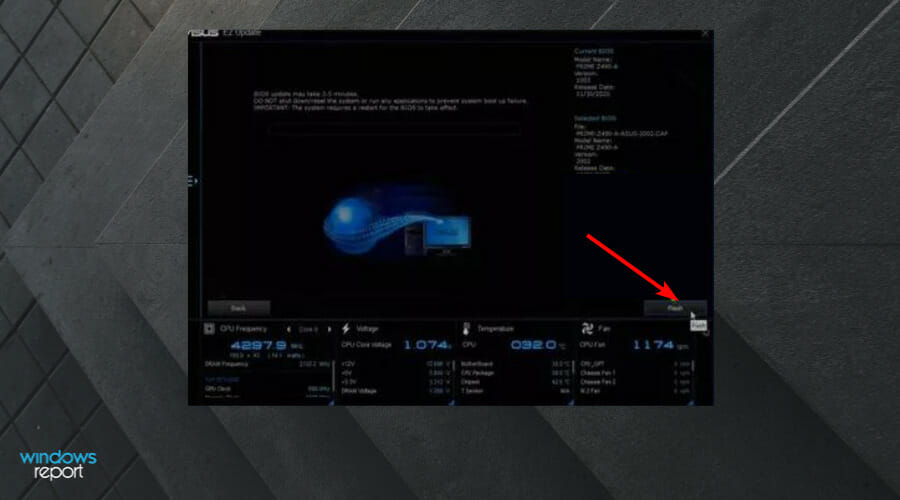
14. Choose OK. Reboot your computer once the process is done.
If you have a different laptop brand, don’t hesitate to check the dedicated article above on how to update your BIOS.
All the methods described in this article are valid for Windows 10 and Windows 11, so simply follow the same steps regardless of OS version.
When should I update my CPU drivers?
As a general rule, you should keep your PC and its components updated at all times. Regular driver updates also bring security measures and should ultimately help you avoid any problems.
Windows automatically checks your device for new software updates. This happens frequently, to ensure that you won’t miss out on any security updates.
Has this guide been helpful to you in your quest to update your CPU? Let us know in the dedicated comments section located below.
Read our disclosure page to find out how can you help Windows Report sustain the editorial team. Read more


Improve this guide


User forum
0 messages