How to Completely Uninstall Valorant From Your PC
First, close all the game-related processes from the Task Manager

Knowing how to uninstall Valorant completely can save you from a lot of frustration. If you try to remove it through normal settings and nothing happens, or Riot Vanguard keeps blocking the process, you’re not dealing with a simple uninstall. You’ll need to stop hidden processes, clear leftover files, and make sure nothing is running in the background. This guide walks you through every step to fully remove Valorant from your system without running into weird errors or files that just won’t go away.
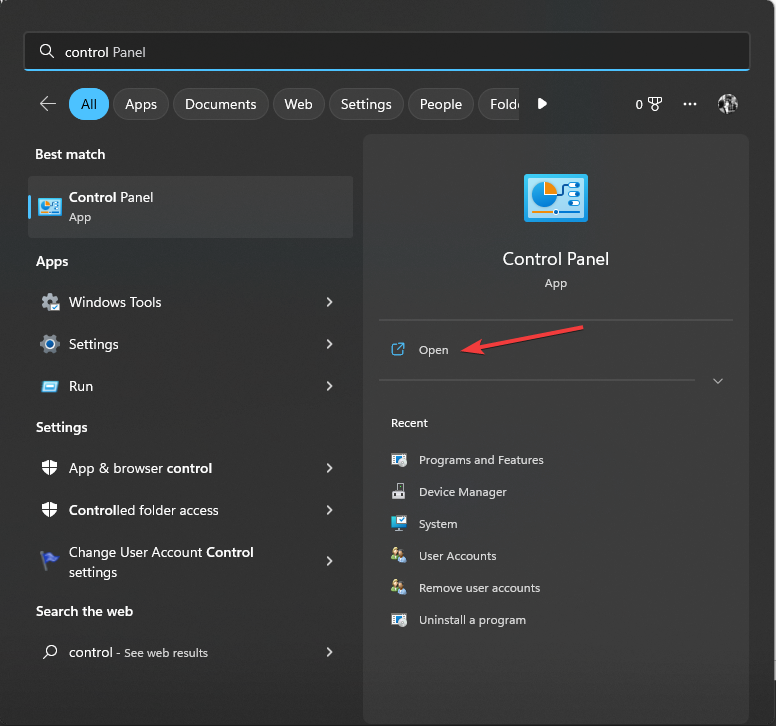
How do I force uninstall Valorant on Windows 11?
1. Using the Settings app
- Press Windows + I to open the Settings app.
- Go to Apps, then click Installed apps.

- Locate Riot Vanguard, click the three dots icon, then select Uninstall.

- Click Uninstall to confirm the action.

- Next, look for Valorant, and click three dots, then select Uninstall.
- Click Uninstall again to initiate the removal of the app.
This is the easiest uninstallation process and can be used to fix the most common errors you might face while playing the game; read this guide to learn about more solutions.
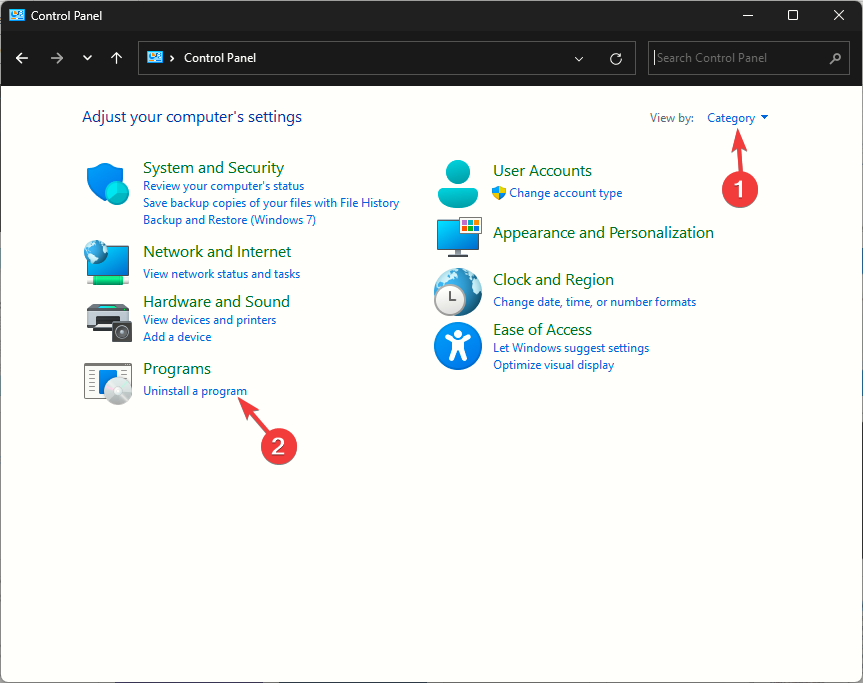
2. Using Control Panel
- Press the Windows key, type control panel in the search box, and click Open.
- Select Category for View by and click Uninstall a program under Programs.
- On the Programs and Features window, locate Riot Vanguard and click Uninstall.
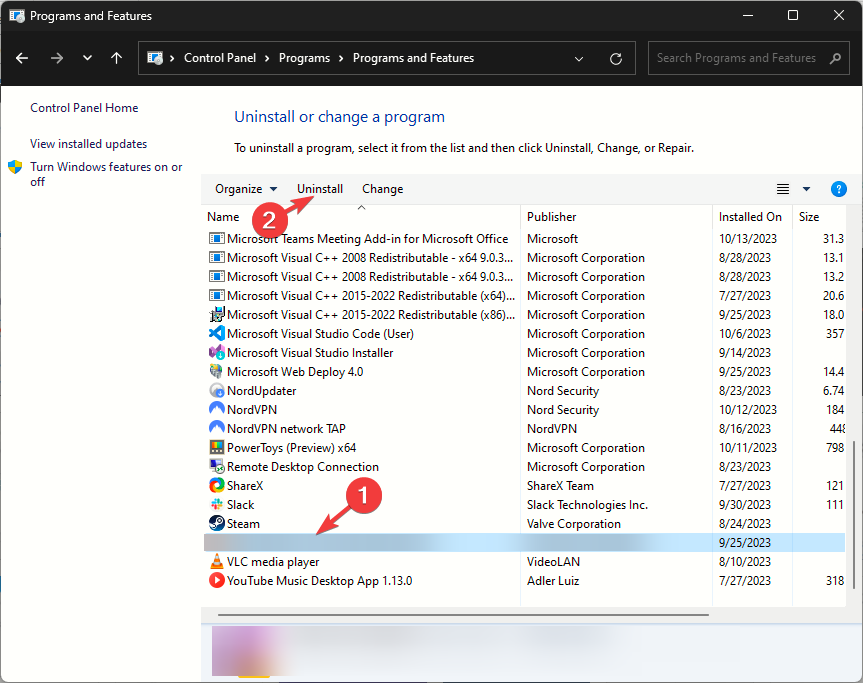
- Follow the onscreen instructions to complete the uninstallation process.
- Next, locate Valorant, click Uninstall and follow the prompts to remove the app.
- Restart your computer.
You can use this method to uninstall Valorant from your computer when the Valorant is not opening on your Windows 11 issue; read this guide to learn more.
3. Using the Command Prompt
- Press the Windows key, type cmd in the search bar, and click Run as administrator to open Command Prompt with elevated rights.

- Click Yes on the UAC prompt.
- Type the following command to uninstall Riot Vanguard and hit Enter:
sc delete vgc
- Copy & paste the following command to delete Valorant and press Enter:
sc delete vgk
- Close the Command Prompt window, and reboot your computer.
- Once your PC is up, log in and press Windows + E to open File Explorer.
- Navigate to this folder:
C:\Program Files\Riot Games - Locate and select the Riot Vanguard folder, then click the Delete button.

- Restart your computer to let the changes take effect.
To uninstall Valorant entirely from your computer, you must close all the processes associated with it and close Riot Vanguard, then follow any of the methods to remove it. This can also help you fix similar errors like a critical error that has occurred in Valorant; read this guide to learn more about it.
You must uninstall the Riot client app if you only had it because of Valorant; read this guide to learn the steps. Tell us how much disk space you recovered after uninstalling the app in the comments below.
Read our disclosure page to find out how can you help Windows Report sustain the editorial team. Read more


Improve this guide


User forum
1 messages