Vertical Red Lines on Screen: Causes & How to Fix
Faulty software or an outdated driver could be the cause
4 min. read
Updated on
Read our disclosure page to find out how can you help Windows Report sustain the editorial team Read more
Key notes
- The issue could have occurred due to outdated graphics drivers, misconfigured BIOS settings, or damaged HDMI or display port cables.
- This guide will cover all the possible fixes available to fix the issue in no time.
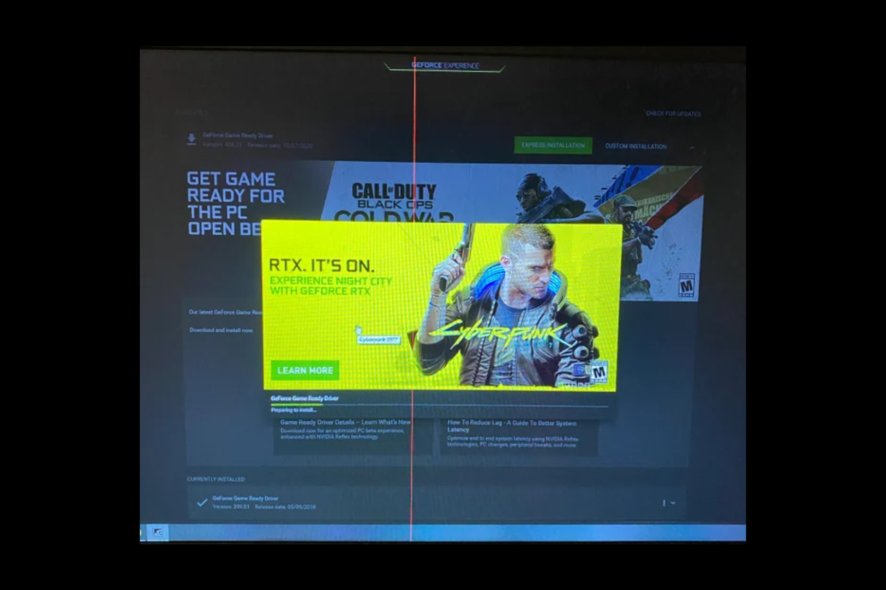
Vertical red lines on a computer screen could be frustrating and indicate underlying hardware or software issues.
In this guide, we will discuss all the available solutions to fix the problem right after talking about the causes. Let’s start!
What causes the vertical red lines on the screen?
Vertical red lines on your computer could appear due to various reasons; some of the common ones are:
- Overheating – Overheating issues on graphics cards can cause various problems, including this one. To avoid overheating, ensure your computer vents are clean and fans are working correctly.
- Hardware problems – If the graphics card, monitor, or cable is faulty, you might face this issue. Check for the faulty product’s warranty and get it repaired or replaced.
- Corrupted drivers – If the display drivers on your computer are old or outdated, you may see red lines on your computer. You need to update drivers to fix the issue.
- Electrical interference – If your computer is placed near another electronic device, there could be electrical interference. To fix it, move the monitor to a different location to see if it fixes the issue.
- Physical damage – If your computer monitor has suffered physical damage, red lines can appear on the screen.
What can I do to fix the vertical red lines on the screen?
Before engaging in advanced troubleshooting steps, you should consider performing the following checks:
- Remove the peripheral.
- Reconnect the video cable.
- Replace the ribbon cable.
- Restart your computer.
- Try using a different monitor.
1. Check the HDMI or display cables
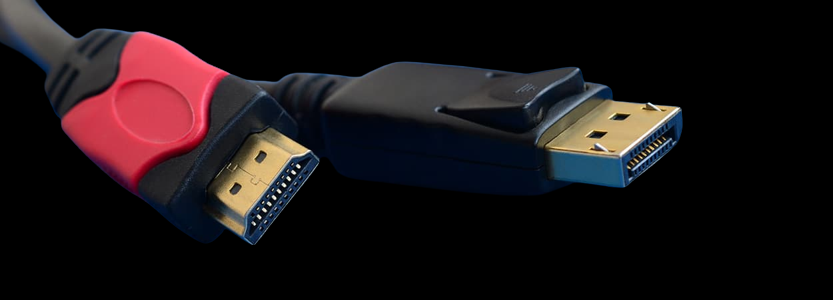
Check your HDMI or Display port for damage. If you think it is damaged, unplug the monitor cable and plug it into a different monitor or graphics card port.
Now check if you see the red vertical line on the screen. If the port has no signs of damage, try replacing the Display Port cable or power cable to fix the issue.
2. Update the graphics driver
- Press the Windows + R to open the Run window.
- Type devmgmt.msc and press Enter to open Device Manager.
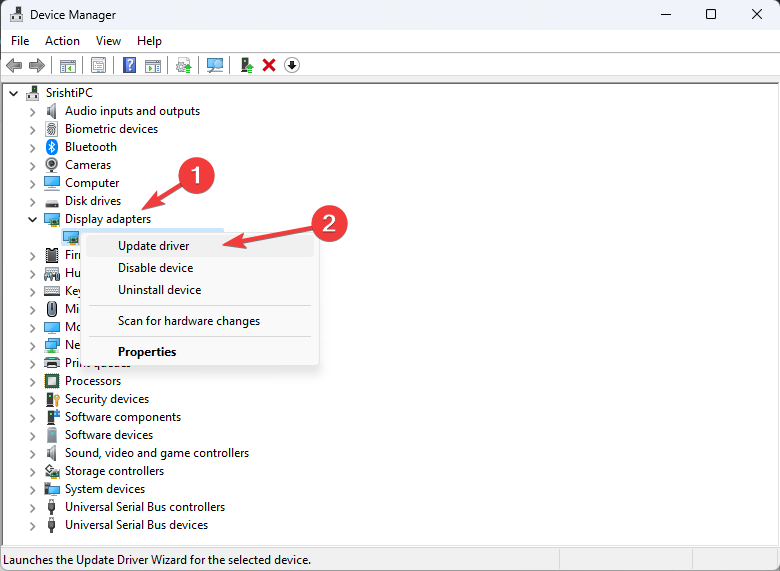
- Go to Display adapters and select the graphics driver.
- Now right-click the graphics driver and click Update driver.
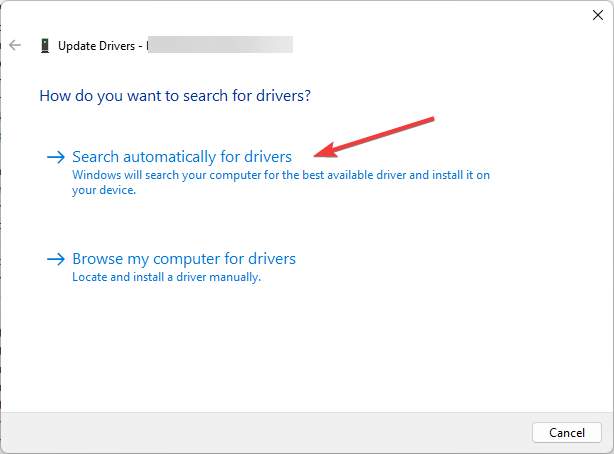
- On the next screen, Search automatically for drivers.
- Follow the onscreen instructions to complete the process.
- Once done, restart your computer.
In addition, you can follow up and choose another method for updating any PC drivers fully automatically and without any risks of incompatibility or system errors.
- Download and install the Outbyte Driver Updater app.
- Launch the software and wait for the app to detect all incompatible drivers.
- Now, it will show you a list of all faulty drivers to select the ones to Update or Ignore.
- Click on Update & Apply Selected to download and install the newest versions.
- Restart your PC to ensure the applied changes.

OutByte
Keep your GPU in a flawless state without worrying about possible driver issues.3. Adjust the screen resolution
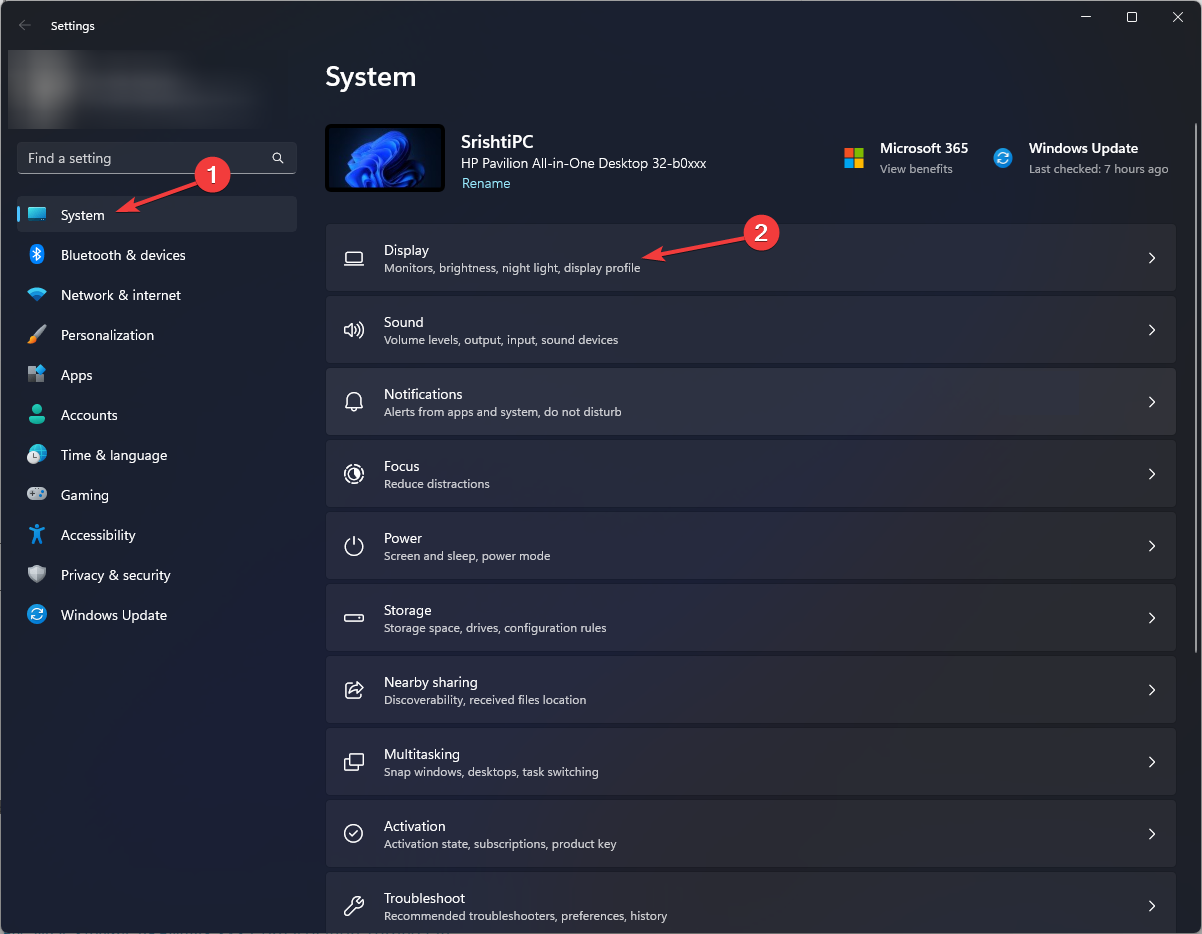
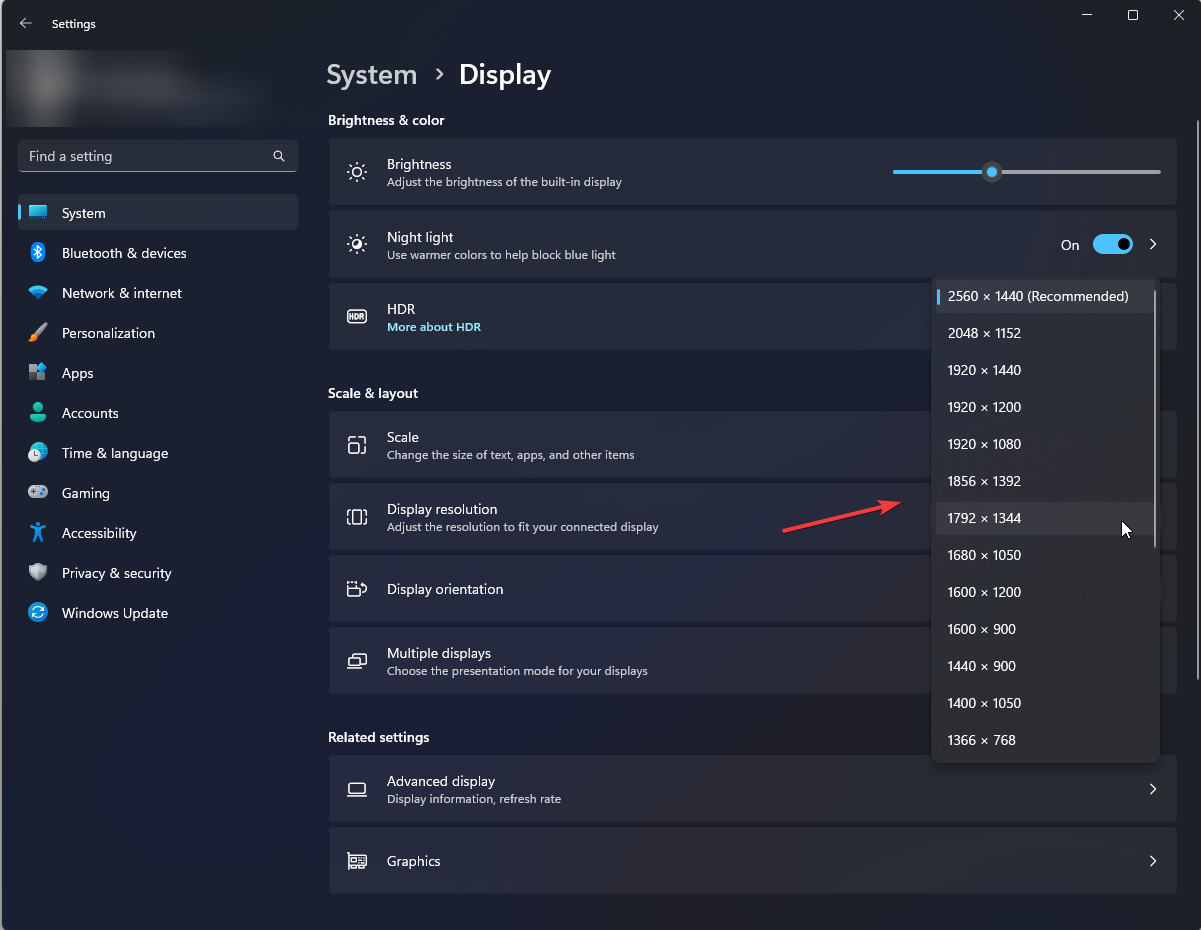
- Press Windows + I to open Settings.
- Go to System and click Display.
- Under Scale & Layout, go to Display resolution and choose the solution recommended for your display.
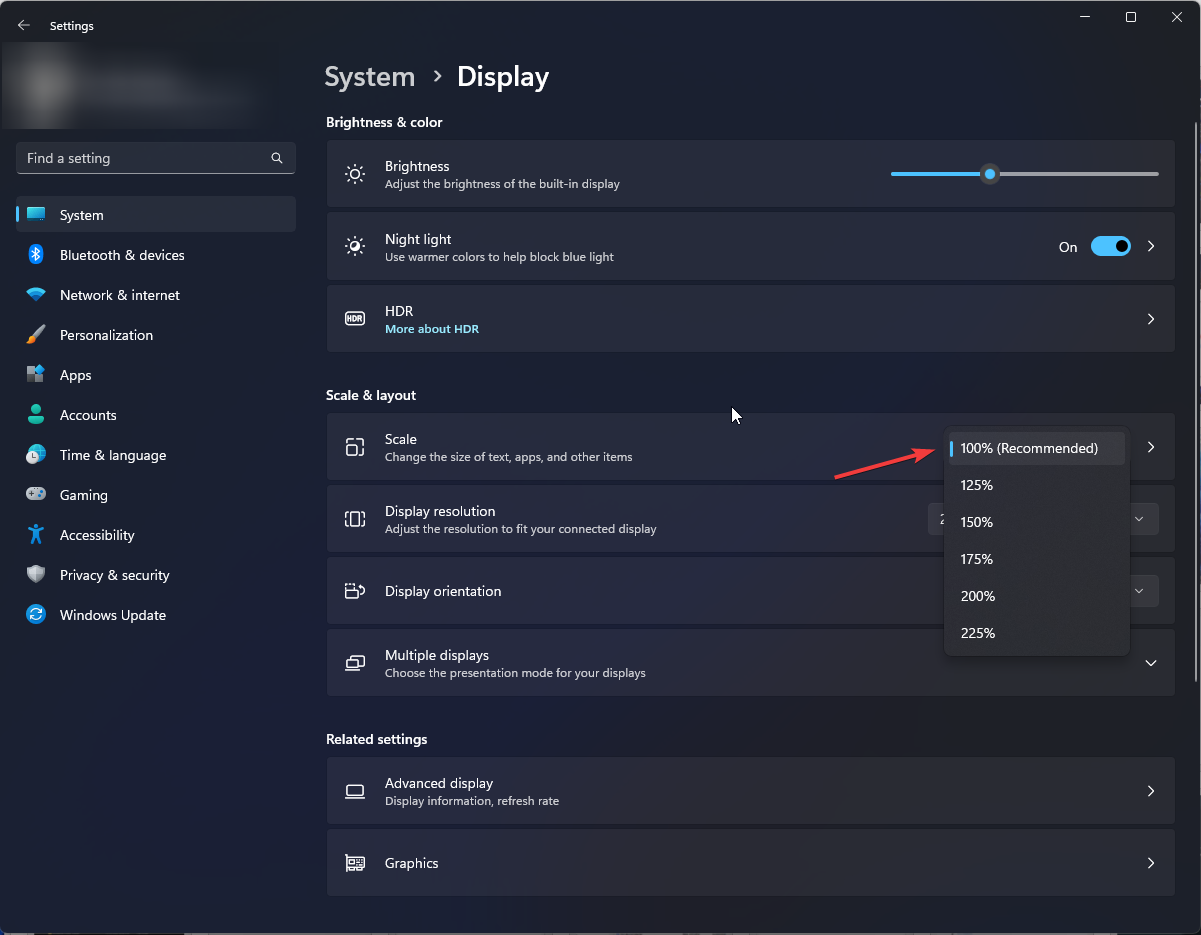
- Go to Scale, and choose the recommended settings from the drop-down.
- Restart your computer to save the changes.
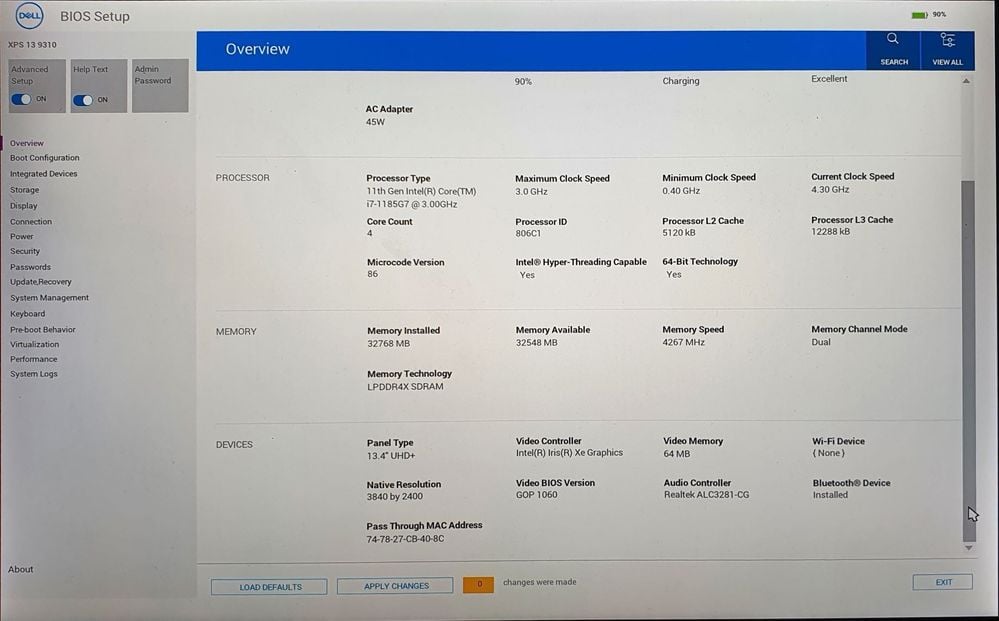
4. Reset the BIOS
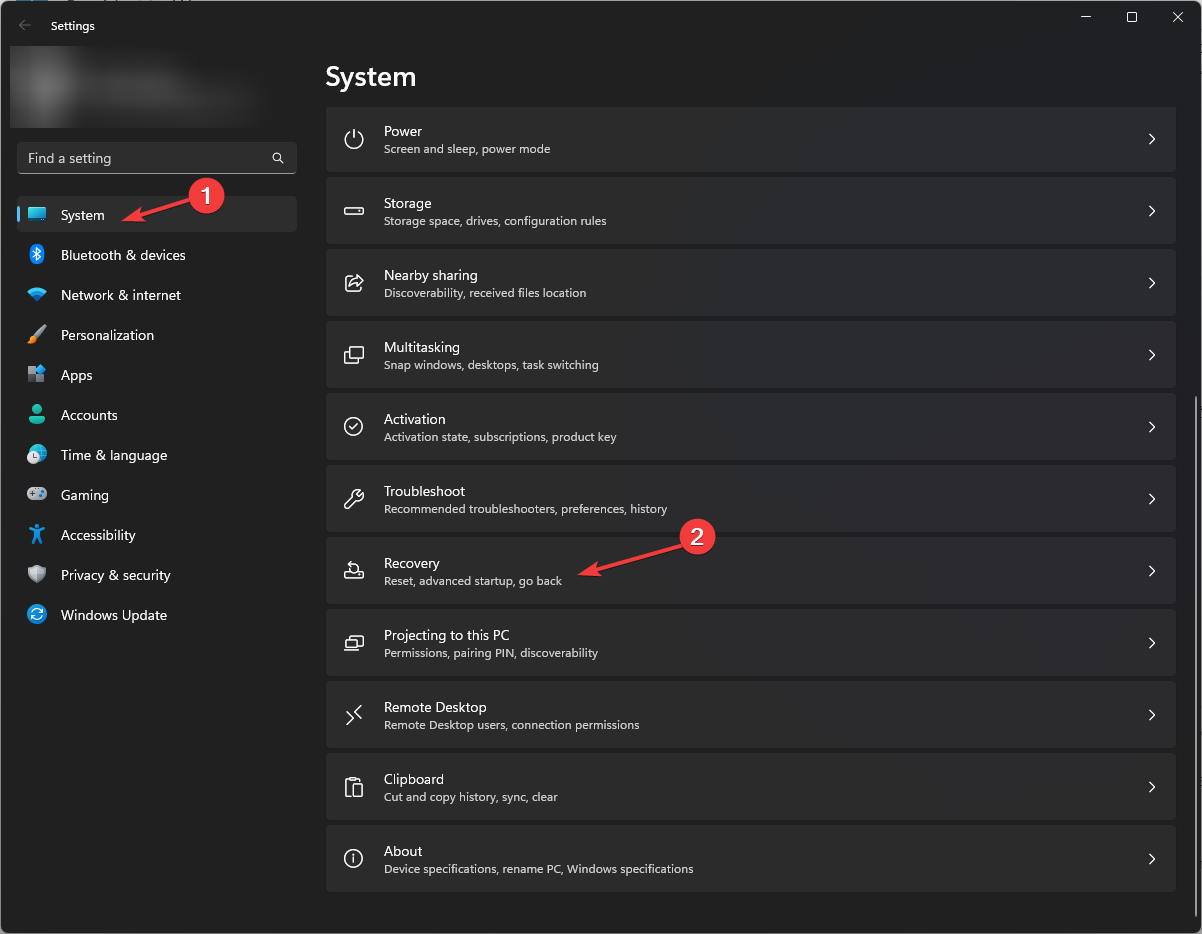
- Press Windows + I to open Settings.
- Go to System, then click Recovery.
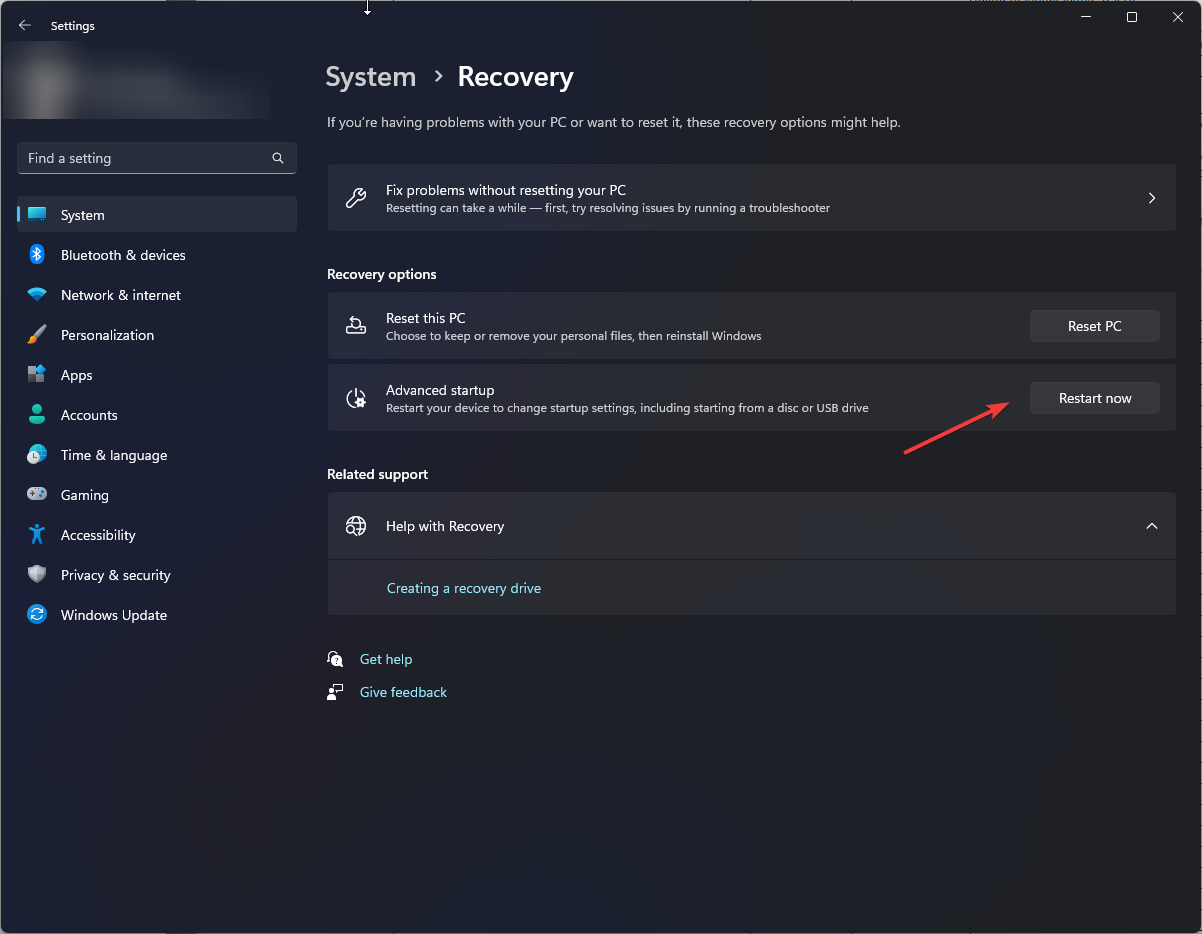
- Next to Advanced startup, locate and click Restart now.
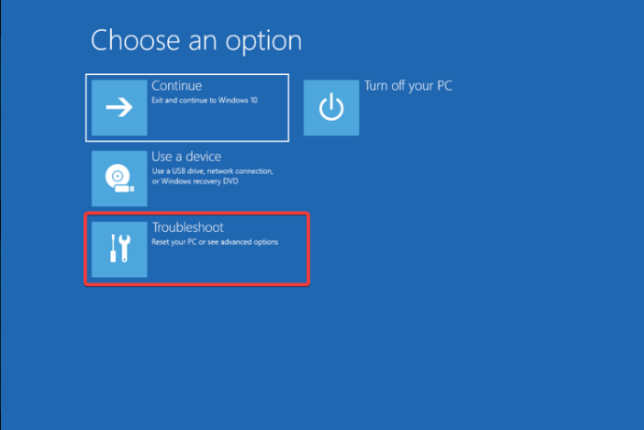
- On the Choose an option screen, click Troubleshoot.
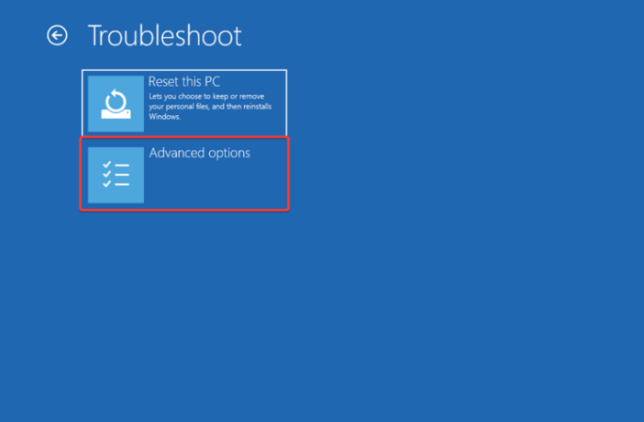
- On the Troubleshoot page, select Advanced options.
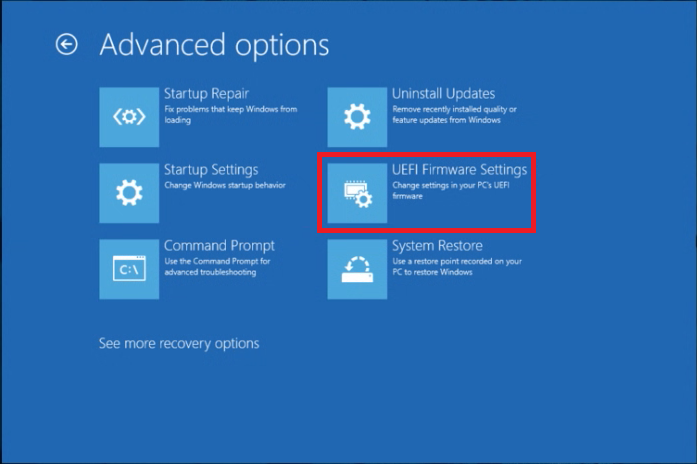
- Next, click UEFI Firmware Settings.
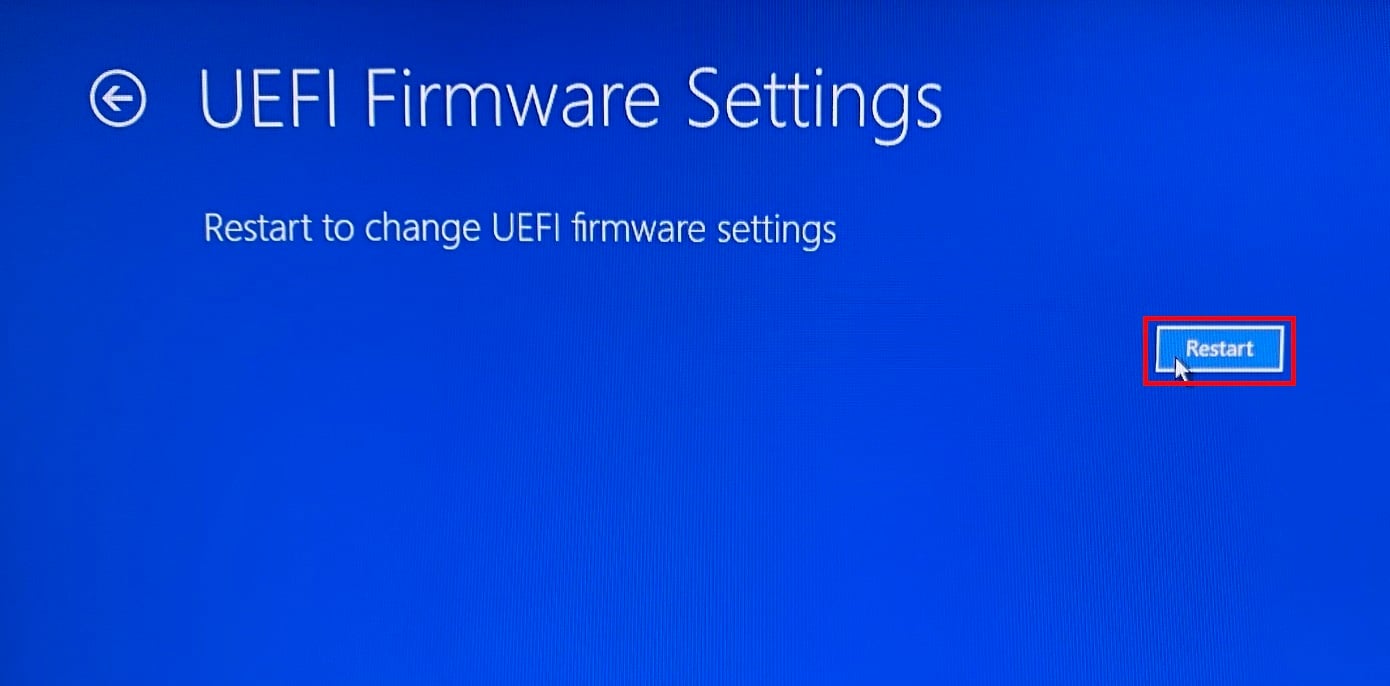
- Click Restart.
- On the next screen, choose the suitable option to enter BIOS.
- Locate Reset to default or Load to default and click it.
- Click Save & Exit to save the changes. Once the process is complete, your computer will restart normally.
5. Reinstall the driver
- Press the Windows + R to open the Run console.
- Type devmgmt.msc and press Enter to open Device Manager.
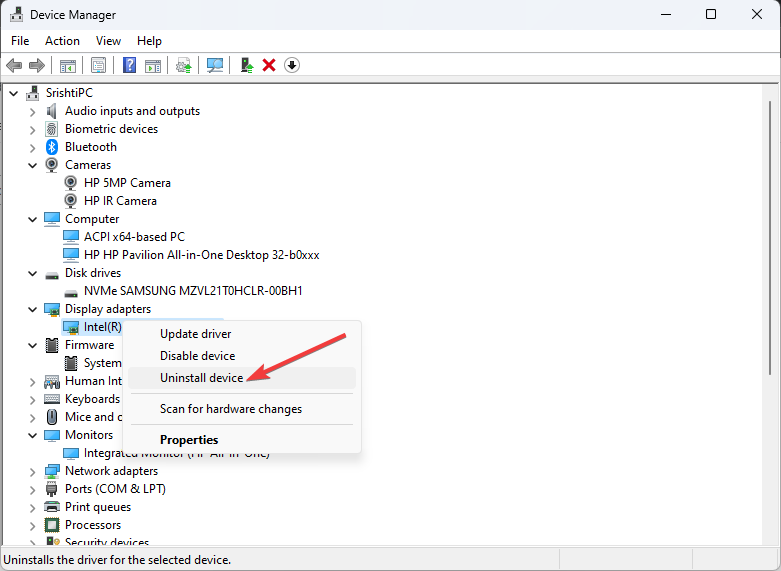
- Go to Display adapters and double-click to expand it.
- Now right-click the graphics driver and click Uninstall driver.
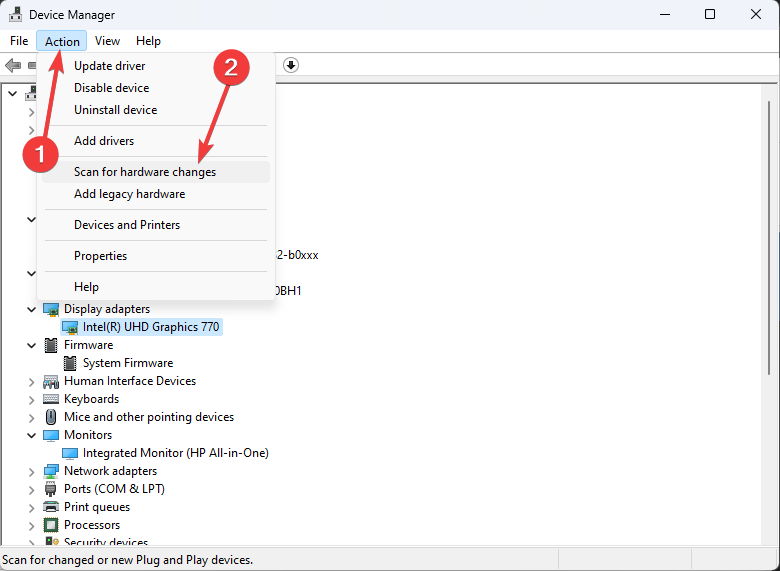
- Go to Action and click Scan for hardware changes. This will install the driver again.
- Restart the computer and check if the issue persists.
So, these are the methods you must follow to fix the vertical red lines on the screen issue. If nothing has worked for you, check for hardware damage or get the device serviced by a professional.
Please let us know in the comments section below if you have any questions or concerns.

