Fix: VT-X is Disabled in The BIOS for All CPU Modes
Enable virtualization technology from BIOS to resolve this
Key notes
- To run a Virtual machine without issues, you must allocate recommended RAM size.
- Errors like these might occur when the RAM size is too much or too low.
- This guide will discuss all the reasons and fixes to resolve the problem.

Trying to launch your Virtual Machine but stopped by VT-x is disabled in the BIOS for all CPU modes (verr_vmx_msr_all_vmx_disabled) warning on Windows 10? Don’t worry; we have got you covered.
This guide will discuss why the warning message appears and how we can fix it. Let’s start!
Why is VT-X disabled in the BIOS for all CPU modes on Windows 10?
Reasons for this warning message coming up can be many. Some of the popular ones are:
- Virtualization disabled – For a virtual machine to work, Virtualization Technology must be enabled from BIOS. If it is disabled, the virtual machine won’t launch.
- Your PC is not compatible with VT-X / AMD-V – If your computer is old, it might not be able to support virtualization, and you won’t find VT-X / AMD-V.
- Physical address extension – If PAE & NX are disabled, it could cause the issue. However, configuring the virtual machine to run with Physical Address Extension & NX can resolve it.
- Third-party apps conflict – There could be chances that your antivirus conflicts with your virtual machine. To resolve this, you need to add the virtual machine as an exception or turn off real-time protection for a while.
- Allocated RAM size is too low – If you have not allotted enough RAM, this could cause a problem.
What can I do if VT-X is disabled in the BIOS for all CPU modes on Windows 10?
Before performing the detailed troubleshooting steps, make sure you check these:
- Check your system information to ensure it is x64-based.
- Double-check if you have Microsoft C++ 2019 Redistributable package installed.
If the issue persists, follow the methods mentioned below:
1. Check If your PC supports VT-X / AMD-V
- Press Ctrl + Shift + Esc to fire up Task Manager.
- Go to the Performance tab, and click CPU.

- Under the graph, if you see Virtualization: Enabled, then virtualization works on your computer.
2. Enable Virtualization in BIOS
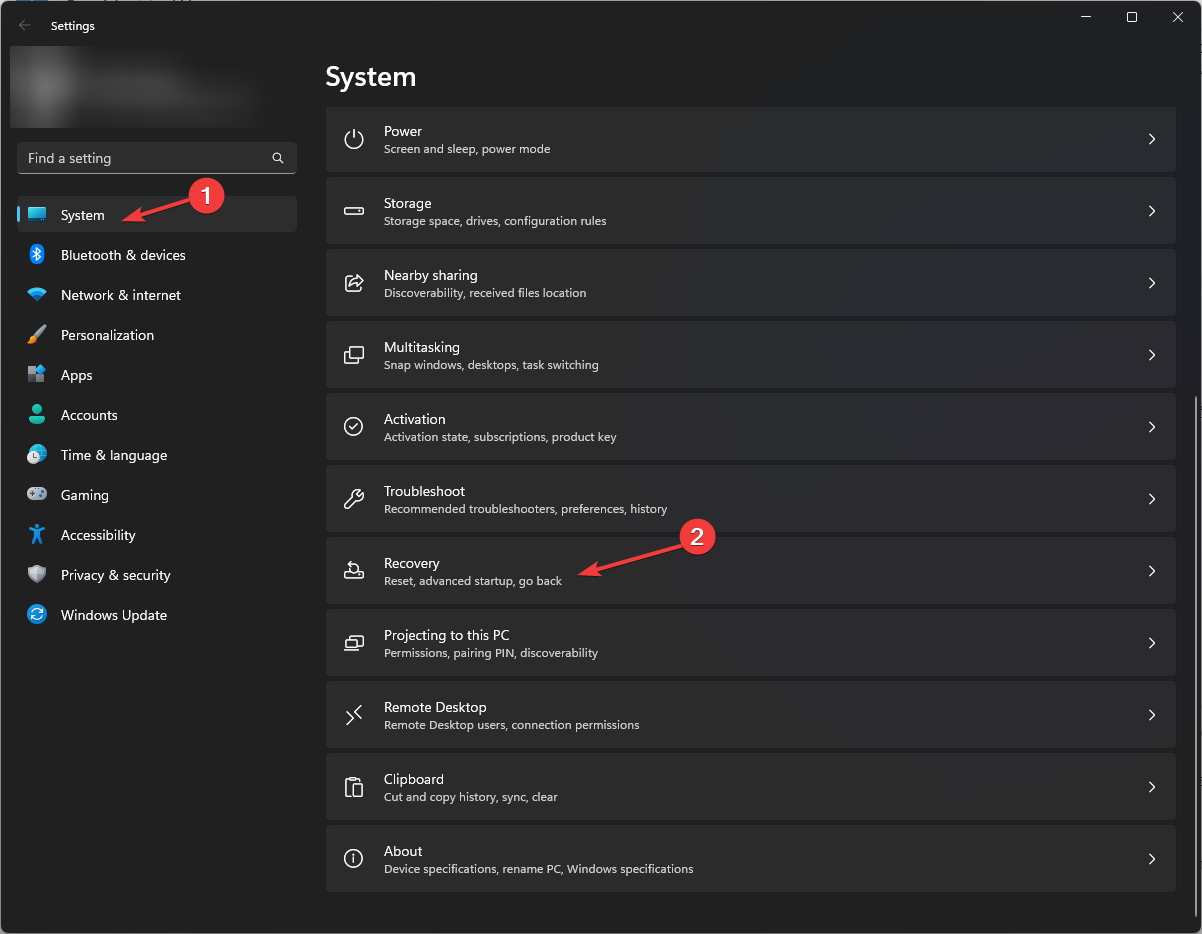
- Press Windows + I to get Settings.
- Navigate to System, then Recovery.
- Go to Advanced Startup and click Restart Now.

- On Choose an option screen, select Troubleshoot.

- Now click Advanced Options.

- Click UEFI Firmware Settings and then select Restart.

- Now the screen will present options; choose the one to enter BIOS.
- Click Configuration, then Virtualization Technology, and select Enabled.

- Click on Exit and choose Save changes and Exit.
3. Enable Physical Address Extension in the Virtualbox
- Click on the virtual machine and click Settings.
- Go to System and click on the Processor tab.
- Put a checkmark on Enable PAE/NX.

- Click OK.
4. Increase RAM size
- Launch VirtualBox, and then locate the virtual machine in question.
- Go to Settings, then click System.
- Click the Motherboard tab, and move the slider to increase RAM for your virtual machine.

- Now, click OK.
- Restart your machine now.
5. Disable Real-time protection temporarily
- Press Windows + I to get Settings.
- Click Update & Security.

- Select Windows Security and click Virus & threat protection.

- Now, click Manage settings.

- Toggle off the switch under Real-time protection.

So, these are some ways to fix VT-x is disabled in the BIOS for all CPU modes. Try them and let us know which worked for you in the comments below.
Read our disclosure page to find out how can you help Windows Report sustain the editorial team. Read more


Improve this guide


User forum
0 messages