Solved: This Network May Have a Captive Portal Warning
Unlock your Wi-Fi faster with these tricks
Key notes
- If you get an authentication page when you connect to a public Wi-Fi, try disabling your antivirus or VPN.
- Sometimes, you can also wait it out as it may just be a temporary downtime.
- Stay put as we uncover more ways to bypass this block.

If you’ve ever tried to access a public Wi-Fi hotspot and met with the This network may have a captive portal warning, this article will be of interest to you.
For the most part, it’s probably a minor bug that can be fixed by restarting your devices; if not, our troubleshooting steps can help eliminate this block.
What does it mean when a network may have a captive portal?
A captive portal is typically associated with public Internet or a sponsored service made available to guest users after they have passed through an authentication step.
This can be a login screen, a check-in page, a paywall, website logins, etc. Each of these has different security risks and is recommended for specific situations.
How do I fix the captive portal error on Windows 11?
Start off with the following simple workarounds before the main solutions:
- Ensure you are connected to a stable Wi-Fi network and check if it’s working properly.
- Make sure that all drivers are installed correctly and up-to-date.
- Close down all active browser tabs or try with another browser.
- Verify that your antivirus software isn’t blocking any connections required to access your wireless network.
1. Disable your antivirus temporarily
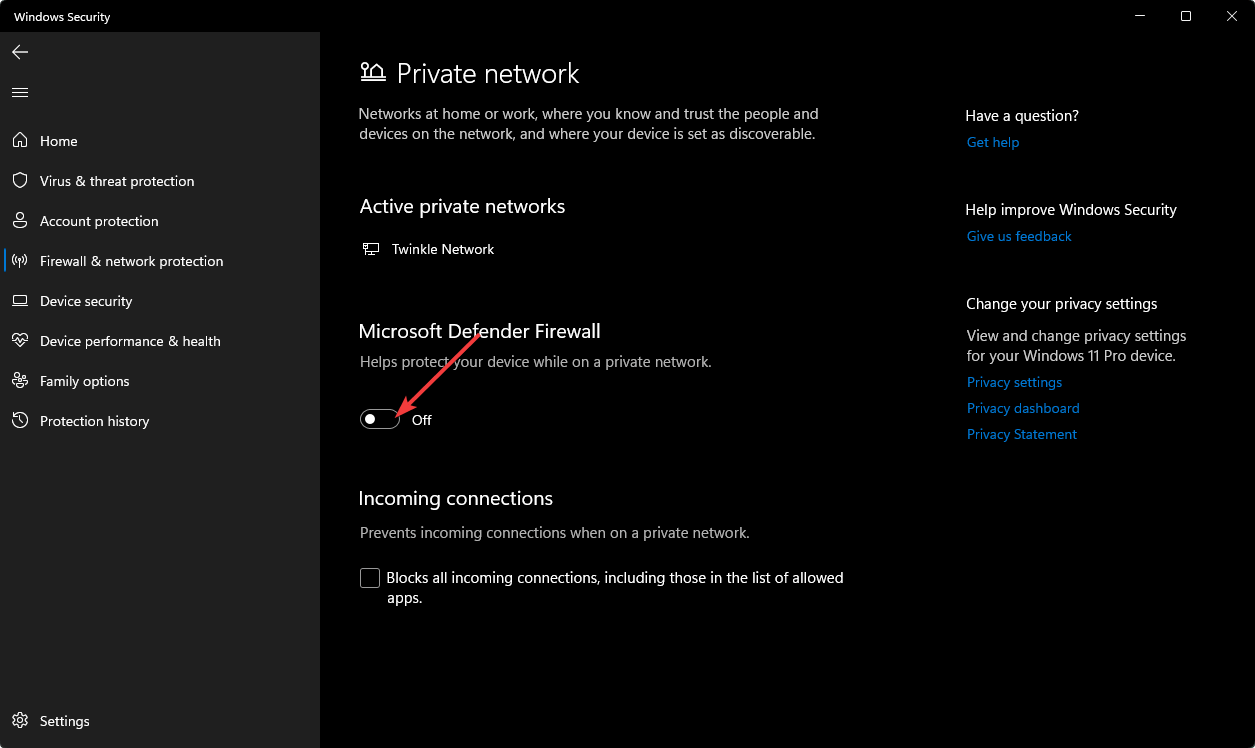
- Hit the Start menu icon, type Windows Security in the search bar and click Open.

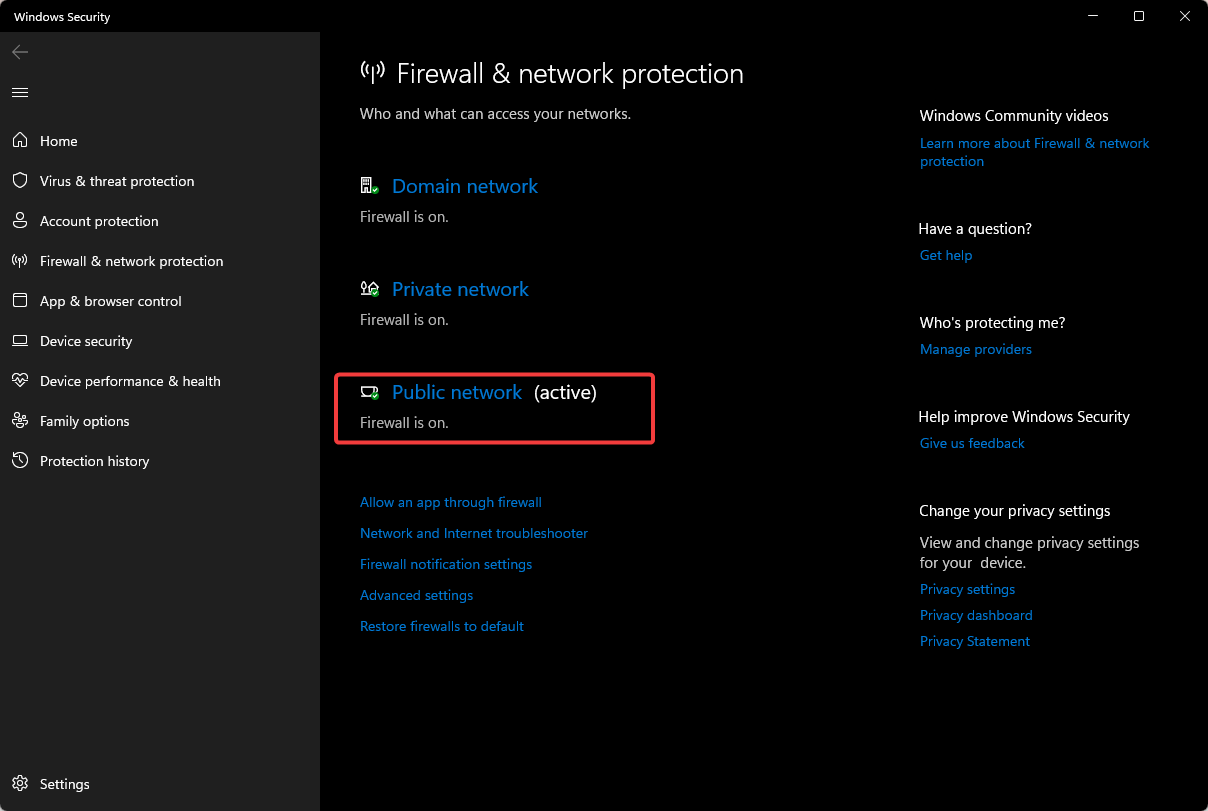
- Click on Firewall & network protection, then select Public network.
- Locate Microsoft Defender Firewall and toggle the off button.
2. Change the DNS settings
- Hit the Windows key, type Control Panel in the search bar, and click Open.
- Select Network and Internet>Network and Sharing Center.

- Click on Change adapter settings.

- Right-click on your Wi-Fi connection and click on Properties from the list of options.

- In the Properties window, select Internet Protocol Version 4 (TCP/IPv4) or Internet Protocol Version 6 (TCP/IPv6) option, depending on your network card configuration and hit OK.

3. Disable problematic browser extensions
- Launch your browser in this case Google Chrome, and click on Menu.
- Go to More Tools > Extensions.

- Here, you need to disable the most recently installed extension first. Disable the extension and restart Chrome.

- If the issue persists and you don’t have any recently installed extensions, start disabling all the extensions one by one.
- Start with VPN, security, online service, or adblockers extensions then restart the browser.
4. Disable your VPN
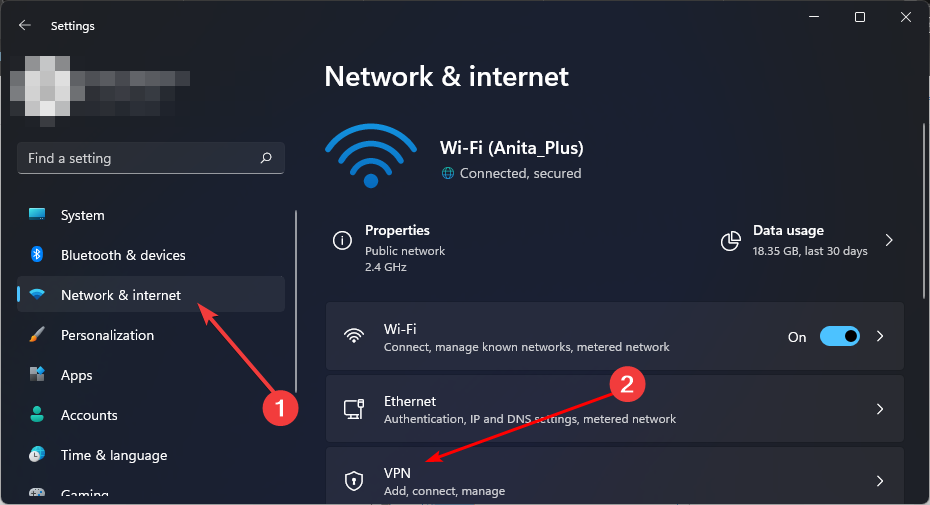
- Press the Windows key and select Settings.

- Next, select Network & internet and click on VPN in the right-side menu.
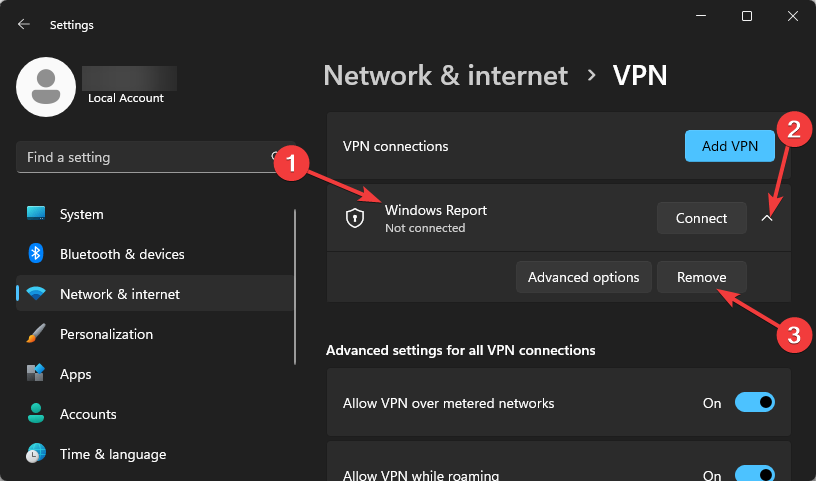
- Select the VPN connection you want to disable, click on the drop-down and select Remove.
Users who like to mask their identity in public places by hiding IP addresses may find out they can’t access the Internet in such places. If you must use it, we suggest you disguise your VPN.
5. Disable Proxy
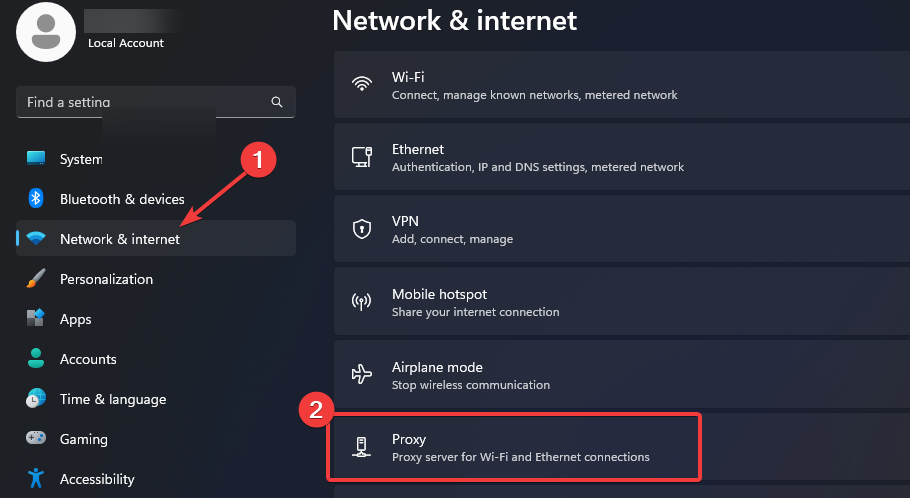
- Press the Start Menu icon and select Settings.
- Click on Network & Internet on the left pane, then scroll down and click Proxy on the right pane.
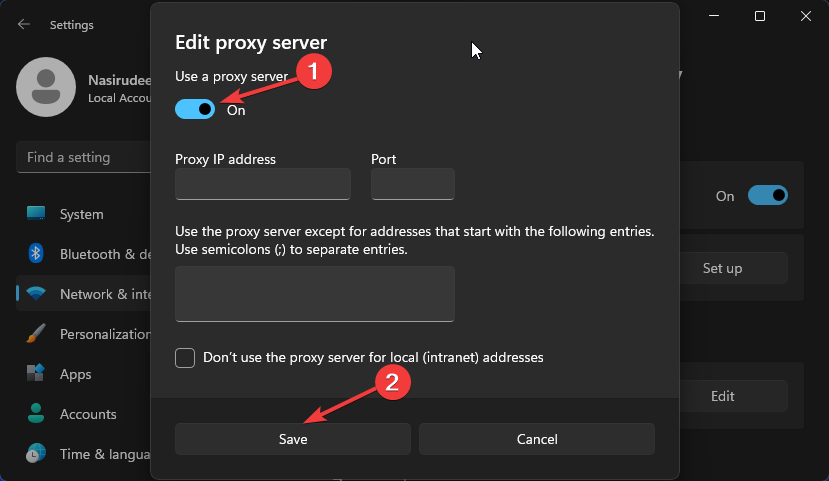
- Select Edit next to Use a proxy server option in the Manual proxy setup section, toggle off Use a proxy server and click on Save.
How do I set up a Captive Portal Authorization system?
- Choose an appropriate Captive Portal solution – A captive portal solution should be compatible with your hardware, secure enough to prevent unauthorized access, and easy to use.
- Set up custom DNS servers or use standard DNS servers – Servers allow you to control how traffic is redirected. Custom DNS servers redirect web traffic to their own web portals, while standard DNS servers provided by your ISP will allow users to access all websites without restrictions.
- Specify public access restrictions and acceptable use policies – You can enforce restrictions by specifying what websites are allowed to connect to the network, determining the time limit for each session, and blocking certain types of traffic.
- Configure mobile phone usage and video calling options – You can configure your router to limit access to devices or limit phone usage by disabling video calling. This will prevent bandwidth from running out.
- Create an email address for authentication purposes – This will allow you to receive a confirmation email from the system upon successful login.
- Define IP addresses allowed – You can create a blacklist and whitelist where you will deny or allow access to certain IP addresses or subnets.
- Adjust the portal behavior settings to sort out interaction desired with users – This is a setting to interact with users. It will gauge the behavior during login, and after a timeout period with no recorded activity, users will be logged out or encounter an error.
Ultimately, if you’re still unable to access the Wi-Fi connection because of the captive portal warning message, there isn’t much you can do if you’re not in control of the router.
If you’ve been successful, we’d recommend you take the necessary steps to safeguard your device when accessing public networks. You should also consider getting a random MAC address in situations where you have to reveal your IP address.
Did you find a way to get past the captive portal warning? If you have tried any of these methods and were able to get through the captive portal warning, please let us know in the comments below.
Read our disclosure page to find out how can you help Windows Report sustain the editorial team. Read more


Improve this guide


User forum
0 messages