FIX: Webcam not working on Windows 10/11 [Logitech, Dell]
8 min. read
Updated on
Read our disclosure page to find out how can you help Windows Report sustain the editorial team. Read more
Key notes
- Webcam issues are nothing out of the ordinary in Windows 10, even if it’s considered stable.
- To solve this problem, you may disable all USB hubs. Even more, BullGuard is a worthy alternative to other rivals that cause these webcam inconveniences.
- If you’re looking for similar quick solutions, check out this Webcam Troubleshooting section.
- We also encourage you to bookmark this Laptop & Computer Issues Hub for error-free future experiences.
It is very likely that your webcam won’t work after the upgrade to Windows 10. Luckily, this issue is minor and it could be solved in a few simple steps, buy installing the right driver.
Windows 10 is already a good and stable operating system. We can only expect it to behave like a fully-finished operating system.
Even so, Windows 10 still lacks a lot of drivers and features that are necessary for everyday use of the computer.
Many users enjoy their webcam frequently, but sometimes certain issues with the webcam can appear.
Speaking of webcam problems, users reported the following issues:
- We can’t find your camera Windows 10 – This is a relatively common problem with Windows 10. If Windows can’t find your camera, try reconnecting it or reinstalling its drivers.
- Webcam not in Device Manager – If your webcam isn’t listed in Device Manager, it’s possible that it’s disabled. Many laptops support a keyboard shortcut that allows you to disable your webcam, so be sure to look for it.
- Integrated webcam not working – This is another problem that many users have with their webcam. If the webcam isn’t working, be sure to update your drivers to the latest version and check if that helps.
- Webcam upside down – Several users reported that their webcam is upside down. This is a minor problem, and we covered a similar issue in our Skype camera is upside down article, so be sure to check it out.
- Webcam used by another application – Sometimes you might get this message on your PC. If you’re having this problem, be sure to disable all startup applications and check if that helps.
- Webcam not working, detected, recognized, turning on, showing up – There are various webcam problems that can occur, but you should be able to solve most of them by using one of our solutions.
What can I do if the webcam is not working on Windows 10?
1. Make sure that apps are allowed to use your webcam
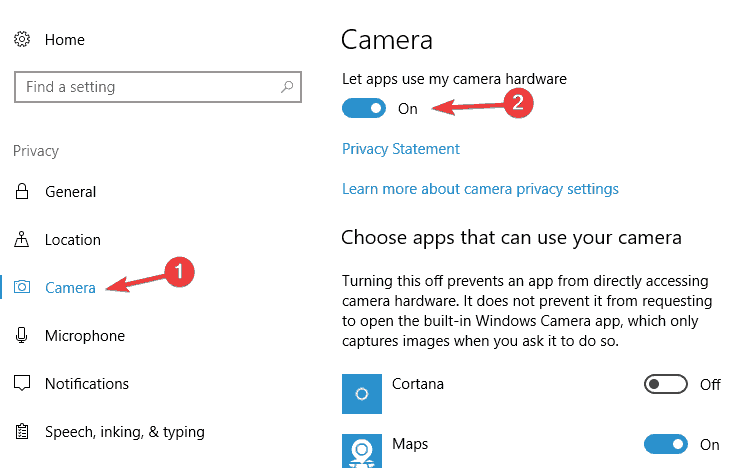
- Open the Settings app. You can do that quickly by pressing Windows Key + I shortcut.
- When the Settings app opens, go to the Privacy section.
- In the left pane, choose Camera. Now make sure that Let apps use my camera hardware option is checked. If the problem appears only with a specific app, check the Choose apps that can use your camera list and make sure that the camera is enabled for that app.
Webcam problems can occur if applications aren’t allowed to use your webcam. Windows 10 added a privacy feature that allows you to choose which applications can access your webcam.
To fix this problem, you need to check your privacy settings by doing as described above. After that, your apps should be able to access your webcam without any problems.
2. Update your drivers
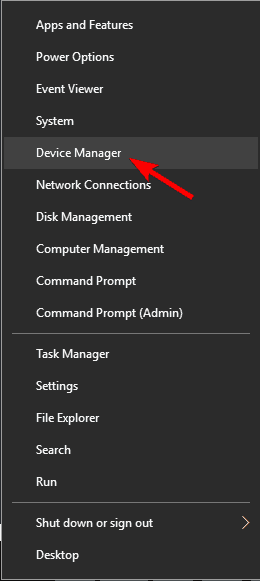
- Press Windows Key + X to open Win + X menu. Now choose Device Manager from the list.
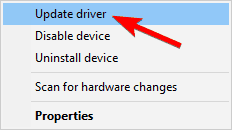
- When Device Manager opens, locate your webcam on the list and choose Update driver.
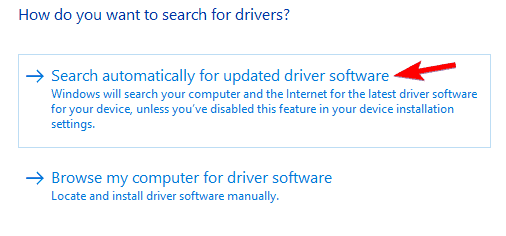
- Now choose Search automatically for updated driver software.
Sometimes webcam problems can be caused by outdated or missing drivers. If you’re having this problem, we advise you to try updating your drivers.
You can do that in several different ways. The easiest method is to use the automatic update. Windows will now automatically search and download the suitable driver for your PC.
In some cases, you might have to install the driver manually.
Windows 10 comes with a set of default drivers and you can install them by doing the following:
- Repeat Step 1 and 2 from above.
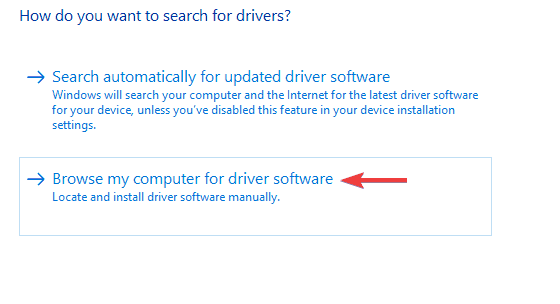
- Now choose Browse my computer for driver software.
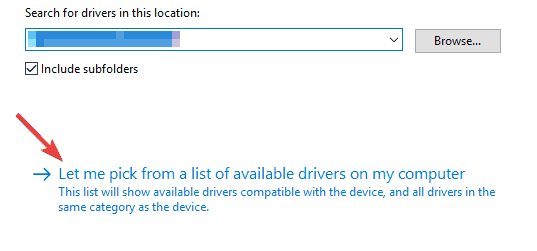
- Select Let me pick from a list of available drivers on my computer.
- Select the brand of your webcam and model and follow the instructions on the screen to install the driver.
If that doesn’t work, you might want to try rolling back to the older driver. This is rather simple and you can do it by following these steps:
- Open Device Manager, locate your webcam and double click it.
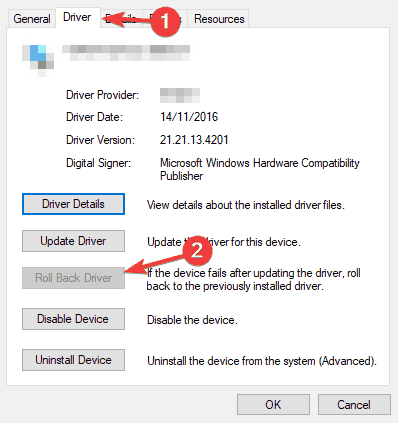
- When the Properties window opens, navigate to the Driver tab. Now choose the Roll Back Driver option.
If this option isn’t available, you won’t be able to roll back to the older driver.
Although these methods are simple to use, the best way to update your webcam driver is to download the driver for it manually. Simply visit the manufacturer’s website and download the latest driver for your model.
Update drivers automatically (third-party tool suggested)
Downloading drivers manually can put your system at an unnecessary risk: getting the wrong driver installed. This may lead to serious malfunctions.
The safer and easier way to update drivers on a Windows computer is by using an automatic tool that identifies each device on your computer and matches it with the latest driver versions from an extensive online database.
- Download and install the Outbyte Driver Updater app.
- Launch the software and wait for the app to detect all incompatible drivers.
- Now, it will show you a list of all outdated drivers to select the ones to Update or Ignore.
- Click on Update & Apply Selected to download and install the latest versions.
- Restart your PC to ensure the applied changes.

Outbyte Driver Updater
Maintain your device healthy by letting OutByte Driver Updater find the latest driver options.3. Check if your webcam is enabled
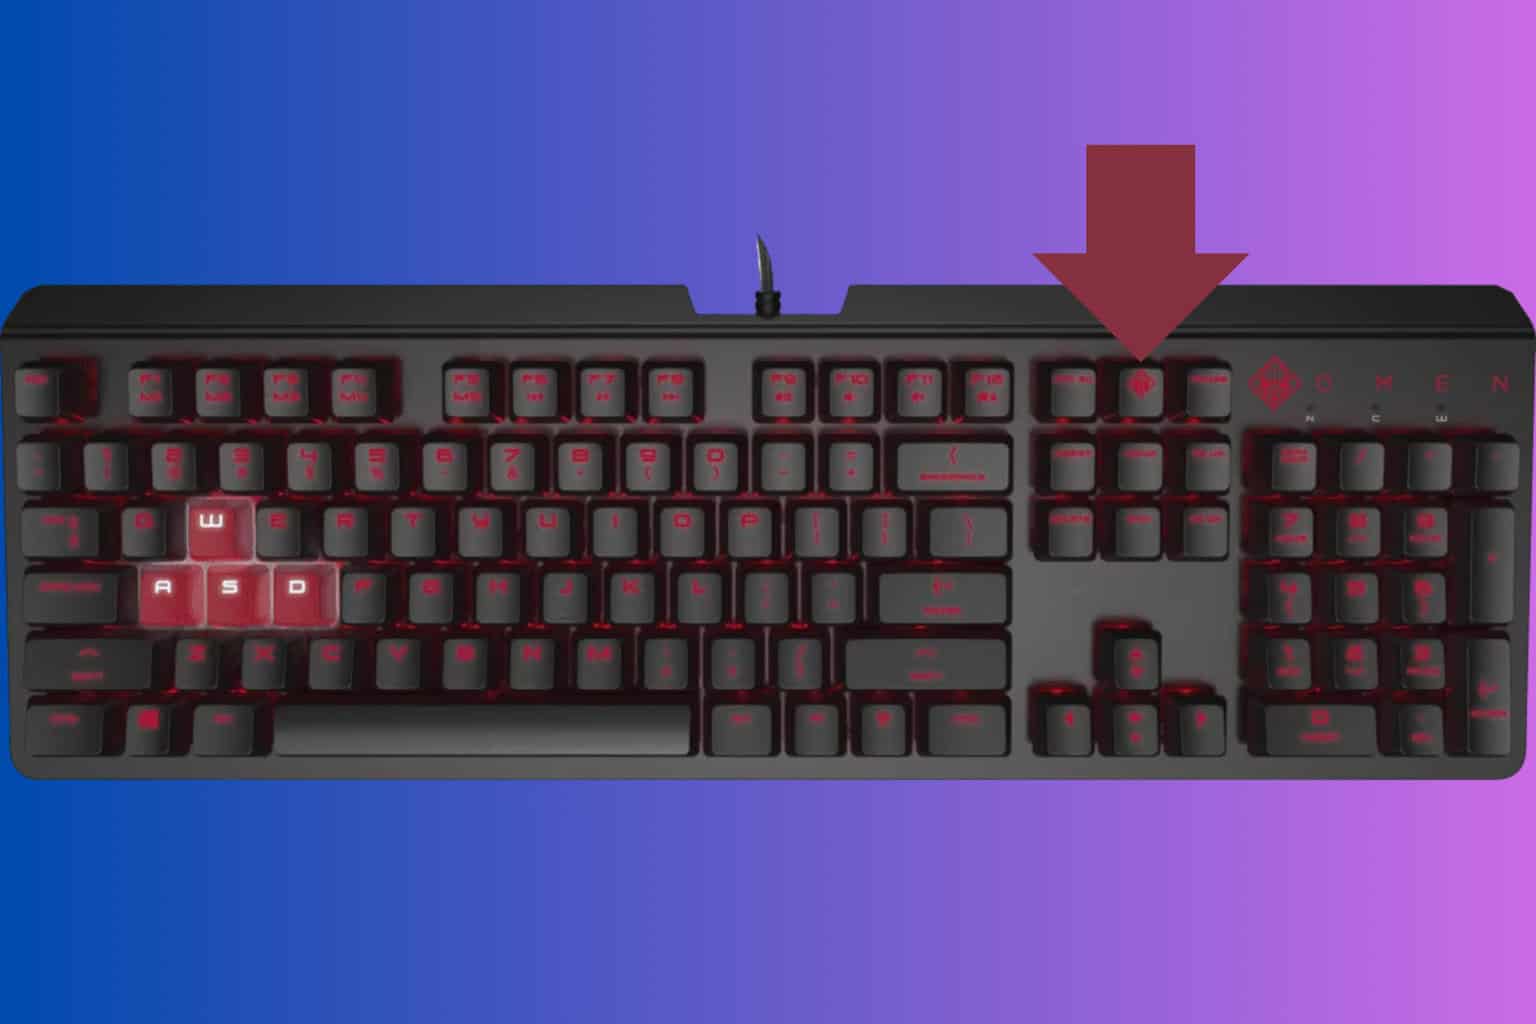
Many laptops allow you to enable or disable your webcam by using a keyboard shortcut. To check if your laptop supports this feature, look for a key that has a webcam picture on it.
To disable or enable your webcam, simply press the Fn key and that key together. On some laptops that keyboard shortcut is Fn + F6, but it might be different on your laptop.
To see if your laptop supports this feature and how to properly enable or disable your webcam, be sure to check your laptop’s instruction manual.
4. Check your antivirus settings
If you’re having webcam problems, the issue might be caused by your antivirus software. These tools tend to block your webcam in order to prevent hackers from spying on you.
Webcam blocking is a useful feature. However, it can cause issues with your webcam. To fix that, you should check your antivirus configuration and disable the webcam protection feature.
If that doesn’t help or if you can’t find this setting, you can try disabling your antivirus completely. Sometimes, in order to fix this problem, you need to remove your antivirus software completely.
Since it’s not safe to use a PC without an antivirus, consider switching to a different antivirus solution that its impact on system performance is hard to notice.
5. Disable all USB hubs
- Open Device Manager and expand Universal Serial Bus controllers section.
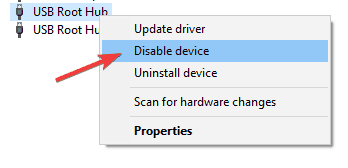
- Now locate USB Root Hub, right-click it and choose Disable from the menu.
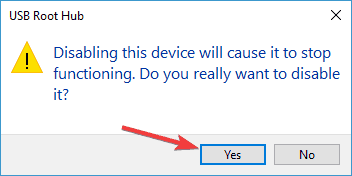
- A confirmation dialog will now appear. Click Yes to disable the device.
- Repeat the last two steps for all available USB hubs. Keep in mind that by disabling USB hubs you’ll cause other USB devices, including your mouse and keyboard to temporarily stop working.
- After disabling all USB hubs, restart your PC.
- Once your PC restarts, go back to Device Manager and enable all USB hubs.
According to users, sometimes your USB hub device can cause webcam problems to appear. However, you can easily fix this problem by disabling all USB hubs.
This is rather simple and you can do it by following the above steps. After doing that, your webcam should start working again.
6. Install the default driver
- Open Device Manager.
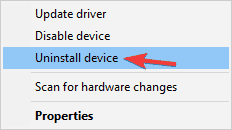
- Locate your webcam on the list, right-click it, and choose Uninstall device.
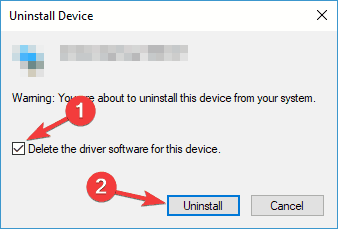
- When the confirmation dialog appears, check Delete the driver software for this device if available. Now click the Uninstall button.
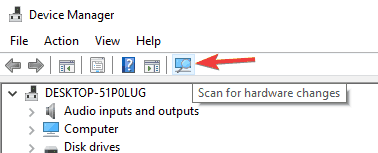
- After uninstalling the driver, click Scan for hardware changes icon.
- Windows will now install the default driver. If for some reason the default driver isn’t installed, restart your PC and check if that solves the issue.
Another way to fix this problem is to install the default driver. This is rather simple and you can do it by following the given steps.
After installing the default driver, the problem should be resolved and your webcam will start working again.
7. Rename SoftwareDistribution and catroot2 directories
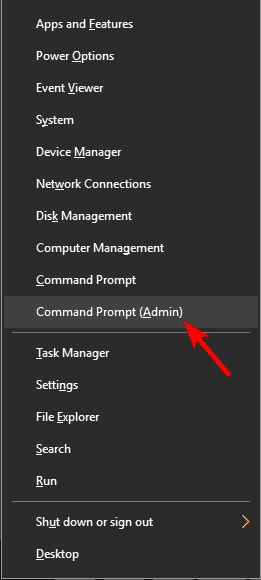
- Start Command Prompt as administrator. You can do that by pressing Windows Key + X and choosing Command Prompt (Admin) from the menu. If the Command Prompt isn’t available, you can also use PowerShell (Admin).
- When Command Prompt starts, enter the following commands:
- net stop wuauserv
- net stop cryptSvc
- net stop bits
- net stop msiserver
ren C:WindowsSoftwareDistribution SoftwareDistribution.oldren C:WindowsSystem32catroot2 catroot2.old- net start wuauserv
- net start cryptSvc
- net start bits
- net start msiserver
According to users, you can fix webcam problems simply by renaming SoftwareDistribtion and catroot2 directories. This is relatively simple and you can do it by running several commands.
After doing so, check if your webcam is working again.
If you’re still facing the webcam problem, besides checking for updates and installing necessary drivers, reach for the comments section.
We will do our best to help you further in order to solve your problem.





User forum
21 messages