Fix: WiFi certificate error on Windows 10 [Can't Connect]
4 min. read
Updated on
Read our disclosure page to find out how can you help Windows Report sustain the editorial team. Read more
Key notes
- Many users reported encountering Wi-Fi certificate errors that hinder their Internet activity.
- That is why we've written the guide below, to show you how you can bypass such issues.
- Want to enhance your home network? Check out our Network page for more info!
- We have plenty of similar articles like the one below on our dedicated Fix section.

There’s a variety of Wi-Fi errors in Windows 10 platform and some of them are quite hard to deal with. One problem, albeit not as common as others, concerns the Wi-Fi Certification and it prevents users from connecting to a network or access a certain website.
We enlisted some solutions below so make sure to give them a try.
How do I fix Wi-Fi Certificate error in Windows 10?
- Check Time & Time Zone
- Update your network drivers
- Set the Windows Time service startup to Automatic
- Restore Advanced Network Settings to defaults
- Enable Hyper-V Hypervisor
1. Check Time & Time Zone
- Right-click on Start and open Settings.
- Choose Time & Language.
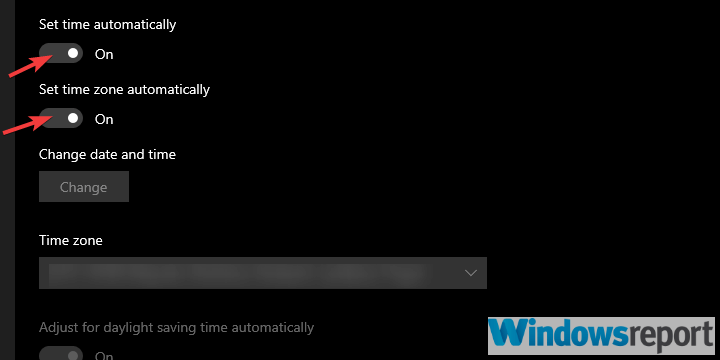
- Disable and re-enable the time and time zone automatic settings.
- Restart your PC.
- If the problem persists, set the time and time zone manually.
Let’s start by making sure that the time and date are properly set. This seemed to be a problem for some users, due to the discrepancy between the system and the regional time.
Resetting the Automatic time and date settings should resolve the problem, but you might also go for the manual approach if it fails.
2. Update your network drivers
Certificate errors with both WiFi and ethernet connections can also be caused by outdated network drivers.
You can look up and download the latest drivers for your hardware online, but be careful because faulty drivers may cause even more problems.
You can also update your drivers from Windows settings. Just open the Device Manager panel from the taskbar, find your network drivers, right-click on them and select update.
Alternatively, use a third-party driver updater like Outbyte Driver Updater to easily get rid of the problem instantly.
The program is portable, meaning that you just need to download it and you can run it straight for the client. It will then proceed to scan your system for outdated, damaged, or missing drivers, and then automatically fix them.
Outbyte Driver Updater is packed with libraries containing all known drivers, and as long as you are connected to the Internet, you can thus gain access to all the latest versions of your required drivers.
3. Set the Windows Time service startup to Automatic
- In the Windows Search bar, type Services and open Services.
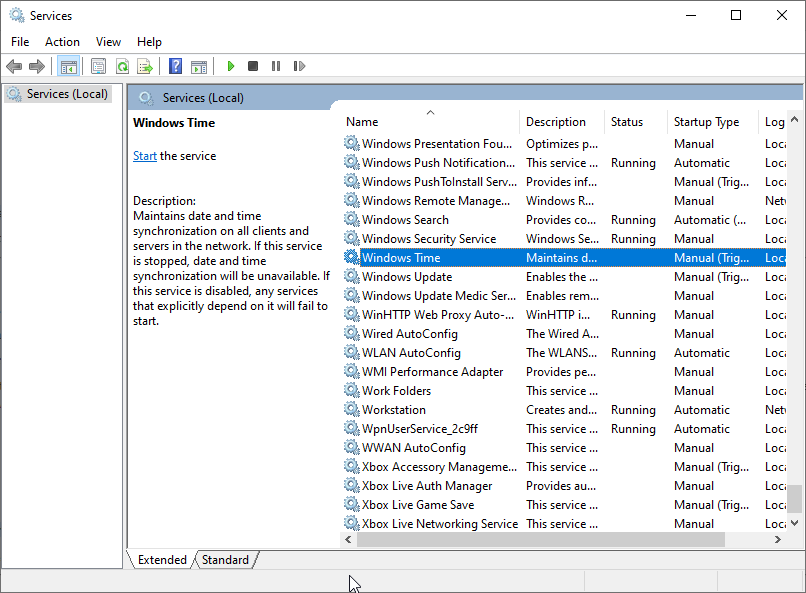
- Search for Windows Time service. Right-click on it and click Restart in the contextual menu.
- If the problem is persistent, right-click on the Windows Time service and open Properties.
- Change the Startup type from Manual to Automatic and confirm changes.
Windows Time Service regulates and maintains the date and time synchronization on a network. This service should start manually, when necessary.
However, it can get into a stall and thus invoke the error at hand. Restarting this service should be enough, but you can also go for the Automatic Startup type which will ensure the service is always on as soon as the system boots.
4. Restore Advanced Network Settings to defaults
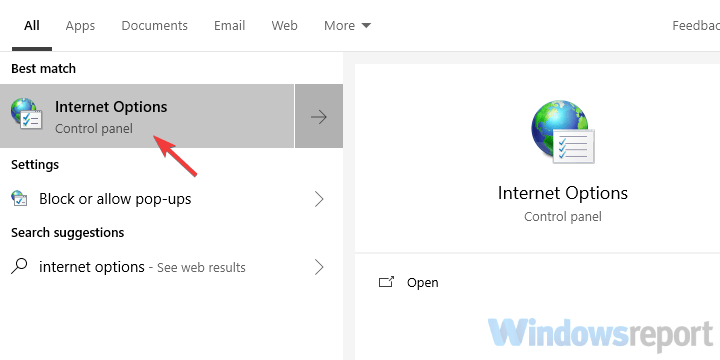
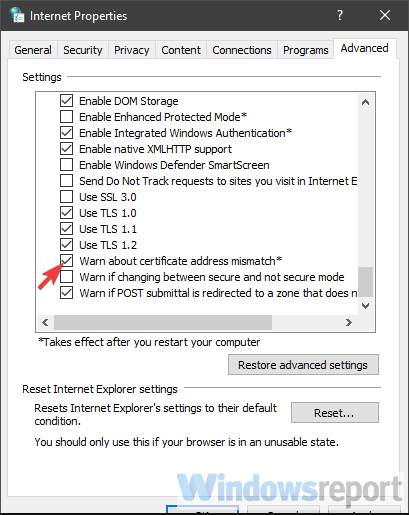
- In the Windows Search bar, type Internet Options and open Internet Options.
- Choose the Advanced tab.
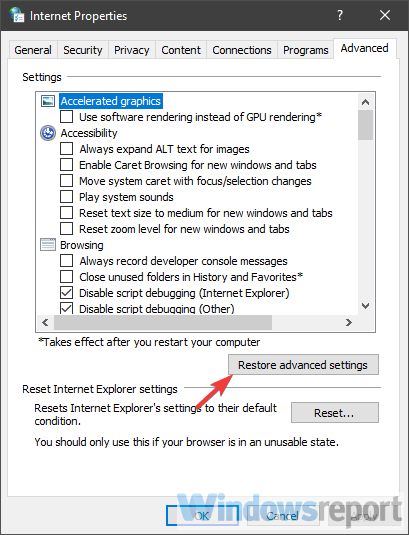
- Click on the Restore advanced settings.
- Scroll down through the Settings list until you find the ” Warn about certificate address mismatch” setting. Uncheck the box.
- Confirm changes and reset your PC.
It usually isn’t necessary to meddle with the Advanced Network Settings, at least not for home users. And that’s how they should stay in order to address this issue.
With one option being the only exception and that’s the Warn about certificate address mismatch which should be disabled.
5. Enable Hyper-V
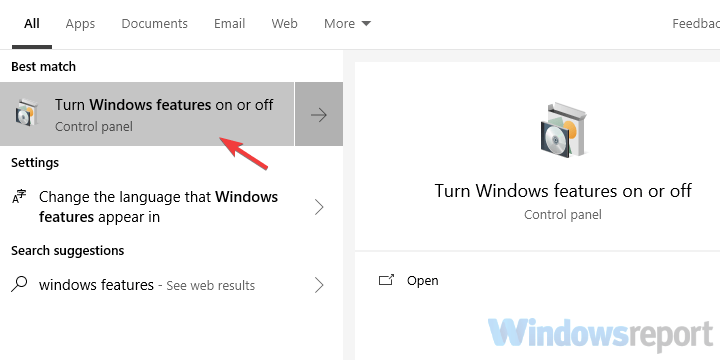
- In the Windows Search bar, Windows Features and open Turn Windows features on or off.
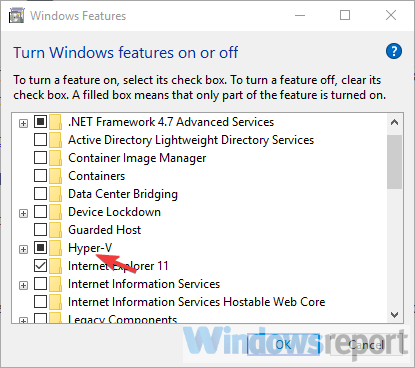
- Check the Hyper-V box to enable it.
- Confirm changes and restart your PC.
Finally, we suggest enabling the Hyper-V system feature. This, of course, applies only to users who have issues with servers. These issues started after the update to Windows 10 1803 so you can also roll back the update as your last resort.
That should do it. In case you have any questions or suggestions concerning Wi-Fi Certificate errors, we encourage you to post them in the comments section.



User forum
0 messages