Fix: Windows 10 build doesn't update or hangs
4 min. read
Updated on
Read our disclosure page to find out how can you help Windows Report sustain the editorial team Read more
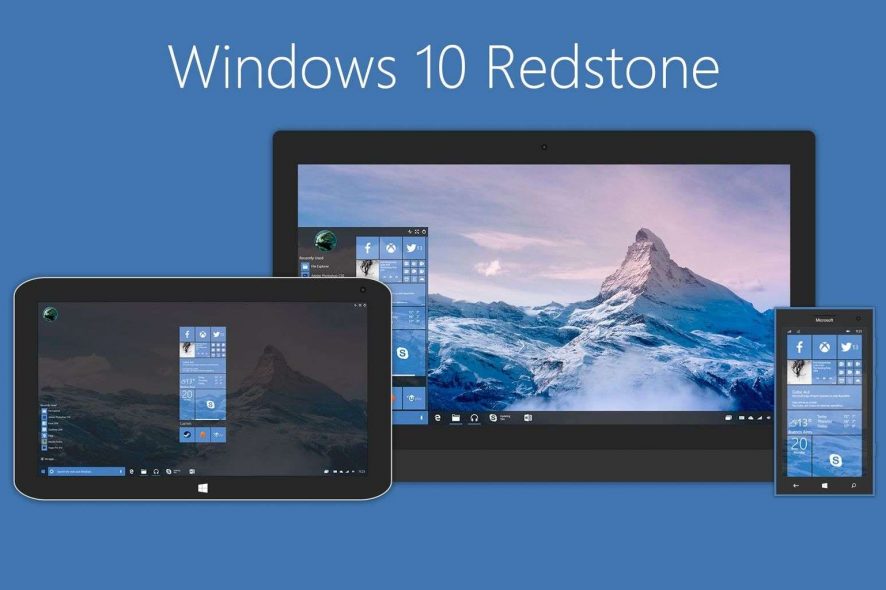
Microsoft has already started rolling out new builds to Fast Ring Insiders, marking the debut of the Restone 2 build program. Many Insiders have already reported they can’t install the first Redstone 2 build on their computers, and we expect this issue to be present on the upcoming builds as well.
Actually, it’s not far-fetched to say that every time Microsoft launches a new build, the first problems to plague Insiders are the annoying installation bugs.
Here’s how users describe build install bugs
“My problem, the update downloads, then I restart the computer to install the updates. At 23% it freezes. The little circle thing stops turning. I left it on for 48 hours to see if it would do anything, but it did not – it stayed stuck at 23%.”
Fix: Windows 10 build doesn’t update/ hangs
In case the latest Windows 10 build doesn’t update or simply hangs, follow the steps described below to fix these issues.
Solution 1 – Make sure you’ve logged in with your Microsoft Account and you’re on the Fast Ring
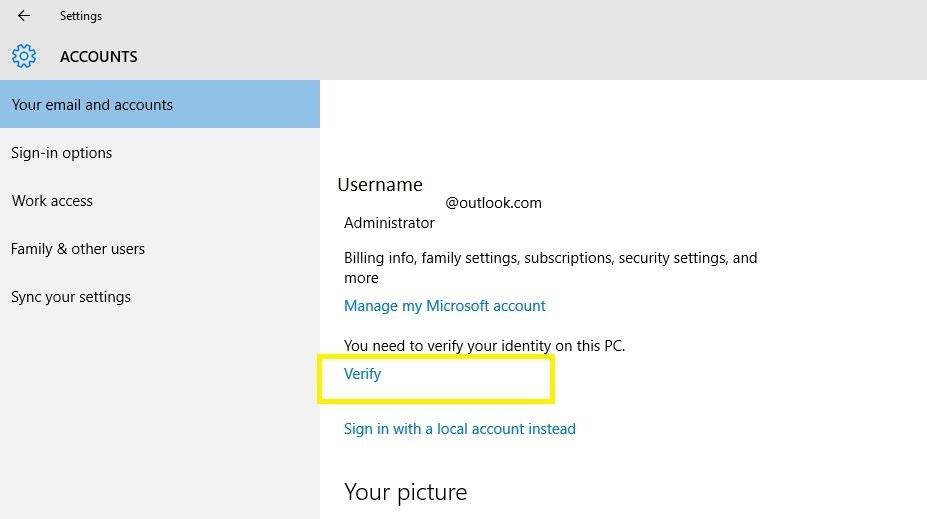
You need to log in using your Microsoft Account to be able to download and install updates. Also, go to Settings > Accounts > click on the Verify button to make sure your account is verified on your computer.
Thirdly, make sure you’re on the Fast Ring, the first ring to which Microsoft deploys its updates. If you’re not already on the Fast Ring, and you switched to it today, bear in mind that it can take almost 24 hours for Microsoft to take into account the change. Therefore, you’ll need to wait a bit longer to be able to detect and download the latest builds.
Solution 2 – Delete the $WINDOWS.~BT folder
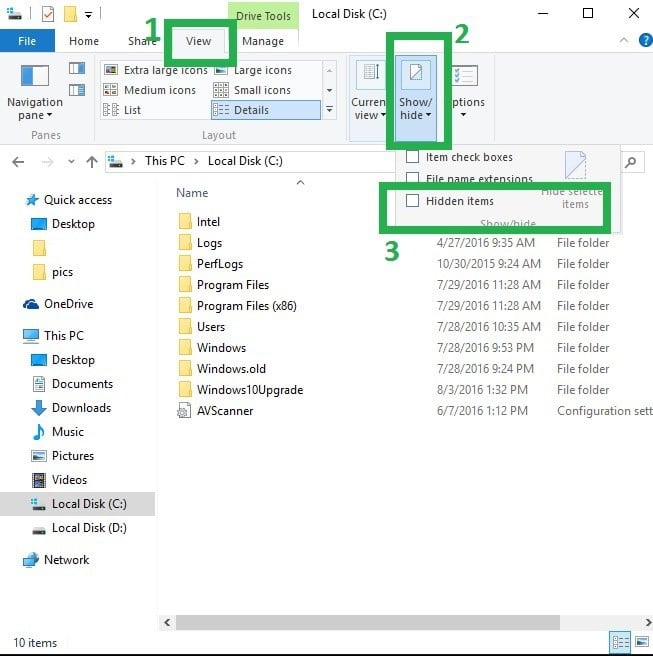
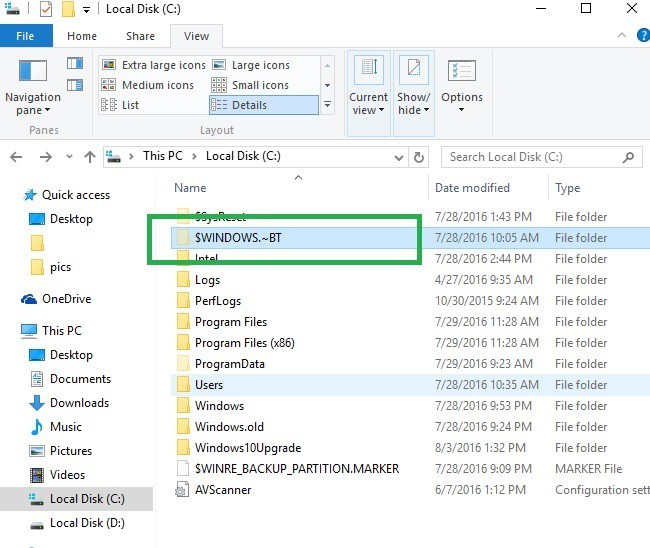
After each unsuccessful build install attempt, delete the $WINDOWS.~BT folder, reboot your computer and try again to download the build. To locate the default Windows Update folder, follow this guide:
- Go to This PC
- Click on the View Menu > select Show/ Hide
- Check the Hidden items checkbox
4. Once the option is activated, all the hidden files will appear on the list with a slightly transparent font.
5. Delete the $WINDOWS.~BT folder.
Solution 3 – Switch from Fast Ring to Slow Ring and then return to Fast Ring
As simplistic as this action may appears, it really works for some users, as they confirm: “Not sure if it was a coincidence or not, but after I went into advanced options and changed from FAST to SLOW, and then back again to FAST, and then after a restart, [build] started downloading.”
- Go to Windows Update from the Settings page
- Go to Advanced options and change the Update Fast Ring option to Slow Ring
- Close the window and open the Windows Update Center again
- Go to Advanced options and change back to Fast Ring. Next time you open the Windows Update Center, the update procedure will start immediately.
Solution 4 – Run the Windows Update Troubleshooter
Download the Windows Update Troubleshooter, run the tool and then try to install the build again.
Solution 5 – run the SFC /Scannow command
Press Windows Key + X and select Command Prompt (Admin). Once the Command Prompt window opens, enter sfc /scannow and press Enter to run it. Wait until the command is completed, and then try to download and install the build.
Solution 6 – Delete the content of the SoftwareDistribution folder
- Go to C:WindowsSoftwareDistributionDownload folder and delete everything in that folder.
- Launch Command Prompt Admin > run the command wuauclt.exe /updatenow
- Wait for the command execution to complete > try again to download and install the build.
Solution 7 – Restart the BITS, Cryptographic, MSI Installer and the Windows Update Services.
- Launch Command Prompt (Admin)
- Type the following commands to stop the BITS, Cryptographic, MSI Installer and the Windows Update Services. Press ENTER after each command.
net stop wuauserv
net stop cryptSvc
net stop bits
net stop msiserver
3. Type the following commands to rename the SoftwareDistribution and Catroot2 folder. Hit Enter after you type each command.
ren C:WindowsSoftwareDistribution SoftwareDistribution.old
ren C:WindowsSystem32catroot2 Catroot2.old
4.Type the following commands to restart the BITS, Cryptographic, MSI Installer and the Windows Update Services. As always, hit ENTER after you type each command.
net start wuauserv
net start cryptSvc
net start bits
net start msiserver
5. Type Exit > restart your computer > try again to install the build.
We hope one of these solutions help you to fix these build install issues, so that you can test out the latest features in Windows 10.
RELATED STORIES YOU NEED TO CHECK OUT:

