How to create VPN shortcut in Windows 10
Key notes
- You’ve decided to keep your online data safe and disguise your location with a great VPN.
- Creating a VPN shortcut in Windows 10 is your next move, so refer to the steps below.
- Everything you need to know about your computer’s OS can be found in the Windows 10 Hub.
- Use our VPN Troubleshooting Hub too and make sure no pesky issue prevents you from enjoying unlimited privacy and security.


World-class 24/7 support with 82% for a 2 years plan and 2 months free
70% of our readers choose Private Internet Access
70% of our readers choose ExpressVPN
Amazing connection speed with 61% off and 4 months free for the 2-years plan.
Best security protocols with 83% off and 2 months free for a 2-year plan.
You can quickly connect to VPNs in Windows 7 and 8.1 by clicking the Network system tray icon. However, that’s not so much the case in Windows 10.
Clicking the Network icon opens the Settings app, from which you then have to select your VPN connection and press the Connect button.
Wouldn’t it be great to have a more direct VPN quick connect shortcut on the Windows 10 desktop? This is how you can add a VPN connection shortcut to the Windows 10 desktop.
How can I set VPN Quick Connect shortcuts in Windows 10?
- Add a VPN Shortcut to Desktop via the Control Panel
- Add a new VPN Shortcut to the Desktop via the Create Shortcut Window
- Add a VPN Batch File Shortcut to the Desktop
- Add VPNMyWay to Windows 10
1. Add a VPN Shortcut to Desktop via the Control Panel
- Firstly, you can add a VPN shortcut to the desktop from Network Connections in the Control Panel. To open the Control Panel, press the Win key + R keyboard shortcut and enter Control Panel in Run.
- Click Network and Sharing Center to open the options below.
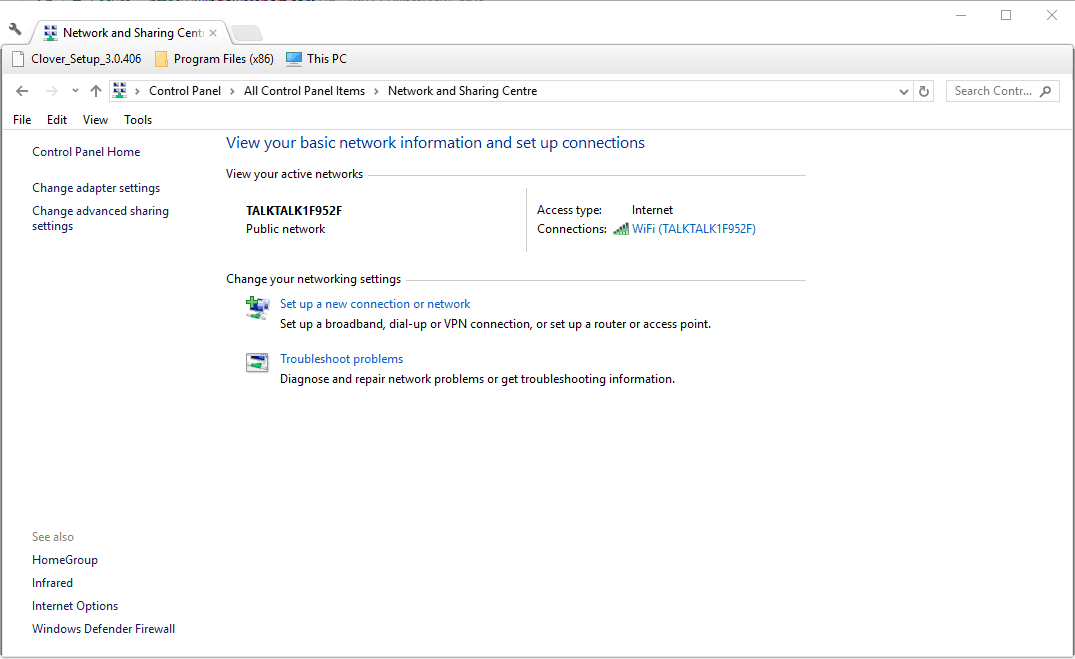
- Click Change adapter settings to open Network Connections.
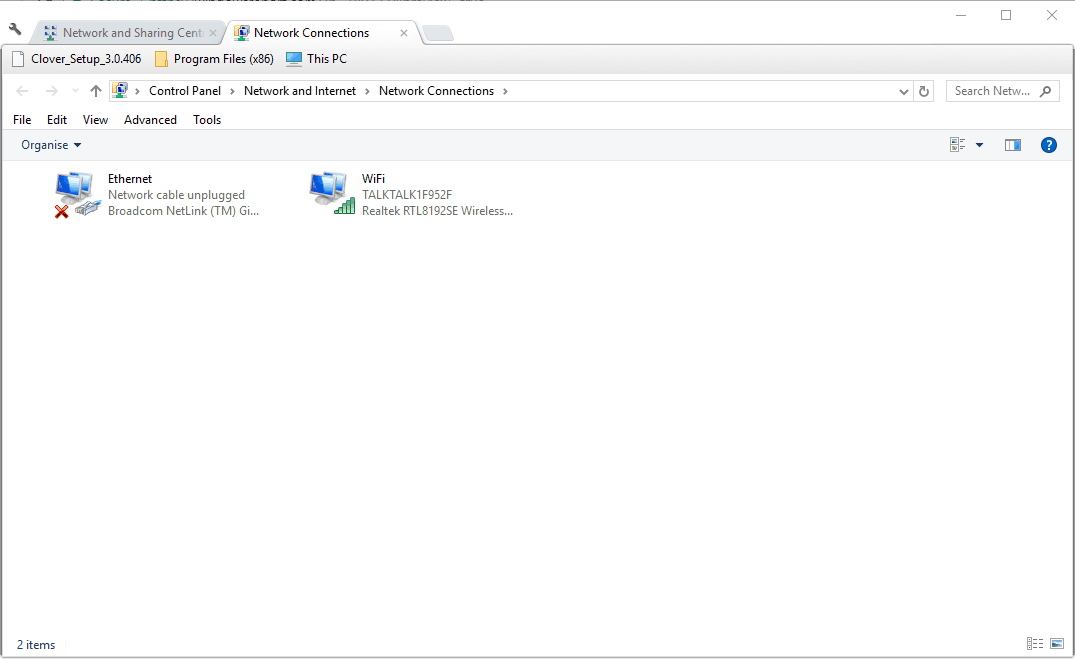
- Right-click the VPN connection listed there and select Create shortcut.
- A Shortcut dialog box window will then open requesting to add a shortcut to the desktop. Press the Yes button to confirm and add the VPN shortcut to your desktop.
2. Add a new VPN Shortcut to the Desktop via the Create Shortcut Window
- Alternatively, you can add a VPN shortcut to the desktop by selecting the Shortcut option on the desktop’s context menu. Right-click the desktop and select New > Shortcut to open the window directly below.

- Then enter rasphone -d VPN connection name in the location text box. Replace VPN connection name with your actual VPN connection name.
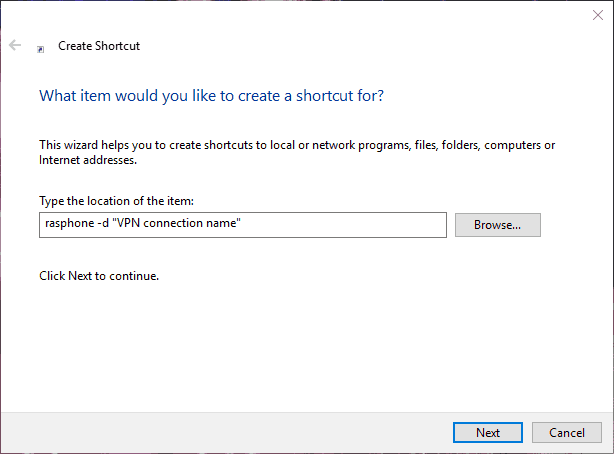
- Press the Next button, and then enter a title for the shortcut.
- Press the Finish button to close the Create Shortcut window.
- You can also add the shortcut for the VPN to the Start menu by right-clicking it and selecting Pin to Start.
3. Add a VPN Batch File Shortcut to the Desktop
- You can also set up a batch file that connects to your VPN and add that to the Windows desktop as a VPN shortcut. To set up a batch file, first press the Cortana button on the taskbar.
- Enter the keyword Notepad in the search box.
- Select to open Notepad.
- Now copy the text below with the Ctrl + C hotkey:
@ echo off Ipconfig|find/I "myvpn" && rasdial myvpn /disconnect || rasdial myvpn - Paste the text to Notepad by pressing the Ctrl + V hotkey.
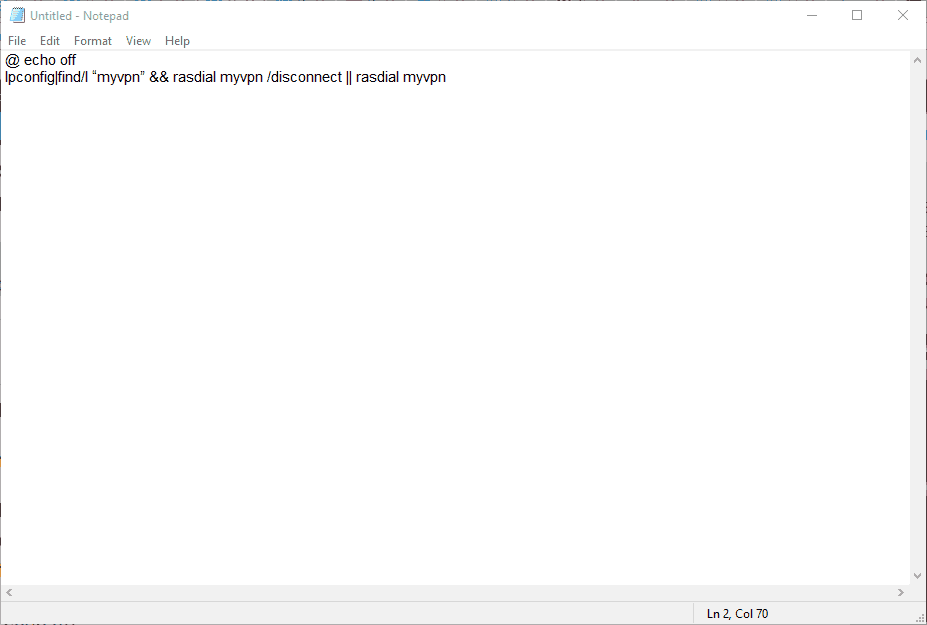
- Delete myvpn from the batch file and replace it with the required VPN connection name. For example, if your VPN was ExpressVPN the batch file would be:
@ echo off Ipconfig|find/I "ExpressVPN" && rasdial ExpressVPN /disconnect || rasdial ExpressVPN - Click File > Save As to open the window shown directly below.

- Select All Files from the Save as type drop-down menu.
- Enter a file title for the batch file. It doesn’t matter what the file title is, but it must end with .bat.
- Click Desktop on the left of the Save As window to save the batch shortcut to the desktop.
- Press the Save button.
- Then you can click the batch shortcut to connect to VPN.
4. Add VPNMyWay to Windows 10
- Click the WPNMyWay1.6.zip on this page, press the Download button, and select Direct download to save the program’s ZIP.
- Open the program’s ZIP folder in File Explorer, and press the Extract all button.
- Press the Browse button to select a folder path to extract the ZIP to, and then click the Select Folder button.
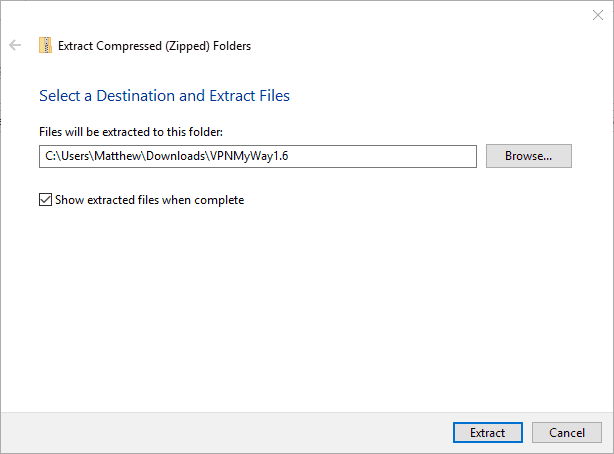
- Press the Extract button to extract the ZIP to the selected path.
- Open the program’s setup window from the extracted folder to add VPNMyWay to Windows.
- You might also need to configure notification area settings. Enter Select which icons appear on the taskbar in Cortana’s search box to open the window directly below.
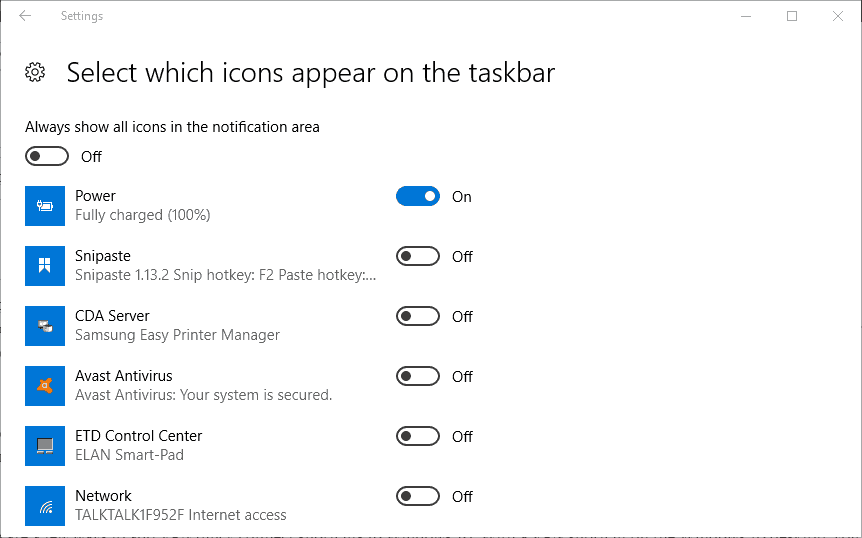
- Switch the VPNMyWay notification icon on if it’s off.
- Then you can click the VPNMyWay system tray icon in the snapshot below to connect to your VPN.
VPNMyWay is a small freeware program that adds a VPN connection shortcut to Windows 10.
It adds a connection icon to the system tray (or notification area) that you can click to connect or disconnect from your VPN. This is how you can add VPNMyWay to Windows 10.
So there are a few ways to add VPN quick connect shortcuts to Windows 10. With a VPN shortcut on the Windows 10 desktop, you can now connect to your VPN in just one or two clicks.
With so many options to choose from, it becomes hard to grasp the thought that they aren’t as secure as they claim to be.
[wl_navigator]
Read our disclosure page to find out how can you help Windows Report sustain the editorial team. Read more


Improve this guide


User forum
0 messages