Can't Set up Pin on Windows 10: Why & How to Fix
Your third-party antivirus might be the cause of this issue
7 min. read
Updated on
Read our disclosure page to find out how can you help Windows Report sustain the editorial team. Read more
Key notes
- When you can't change your login PIN for Windows 10, your OS might be corrupted.
- You can fix this by disabling your third-party antivirus temporarily.
- Another excellent solution is to repair corrupt system files by running a few commands.

PIN sign-in is a convenient way to log in to your computer through a four-digit code that is easy to remember and use as the primary sign-in option on your Windows computer.
However, there are times when Windows 10 won’t let you add a PIN, or it is just not working anymore, as this user reports:
For the past few days, the login with PIN on Windows 10 Pro is not available anymore on my laptop. On the sign-in options screen I can only add a PIN but not remove or change it. When try to add a PIN after Password confirmation it asks to confirm my identity with a PIN and then nothing happens anymore. […] If I instead enter a PIN select forget PIN it only open the dialog to go to sign-in option screen to reset my PIN.
Similar situations include:
- The inability to add or update your PIN
- Adding a PIN but not being offered the sign in option on the login screen
- PIN sign in option is offered, but the system rejects your PIN
- PIN sign in is stuck, and you need to reboot or use a different login option
- The PIN was added, but after an update, it was broken
If one of these issues applies to your case, you can try the solutions listed below to resolve it.
What can I do if Windows won’t let me add a PIN?
1. Set up PIN log in
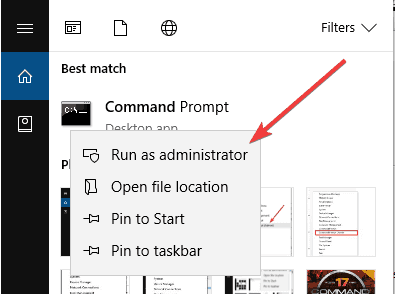
- Go to the search box and type CMD, then press Enter.
- Pick Command Prompt, right-click it, and select Run as administrator.
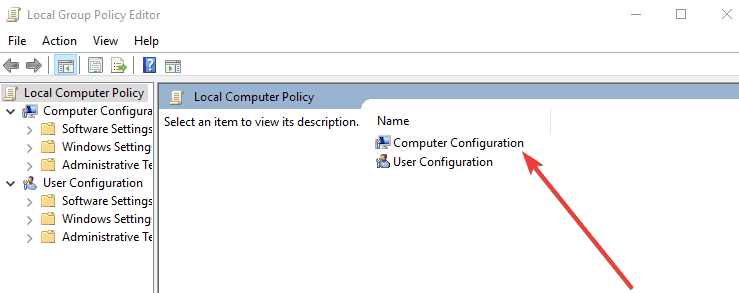
- In the Command Prompt (Admin) black screen, type gpedit.msc and press Enter.
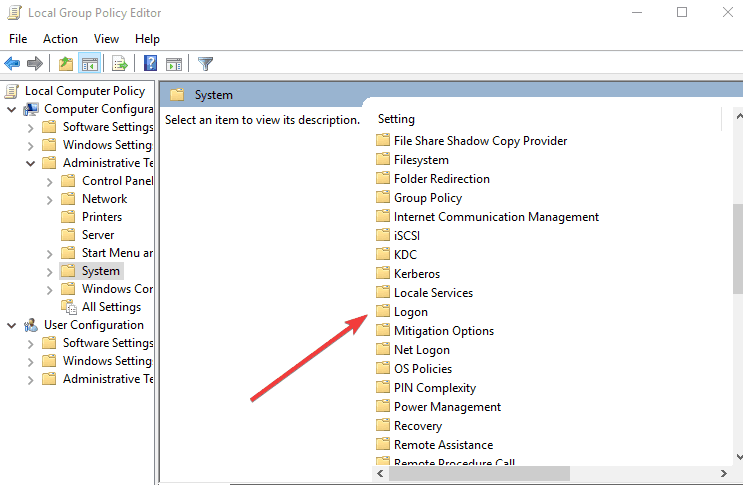
- Double-click on Computer configuration.
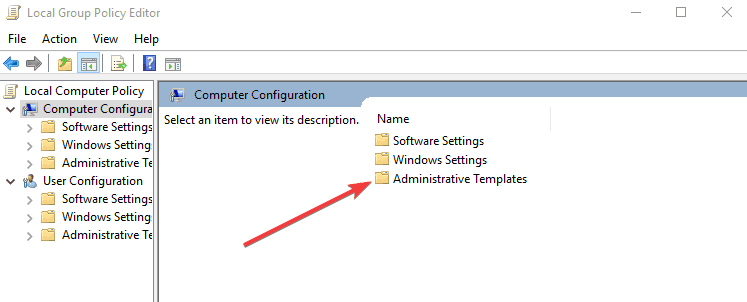
- Click Administrative Templates.
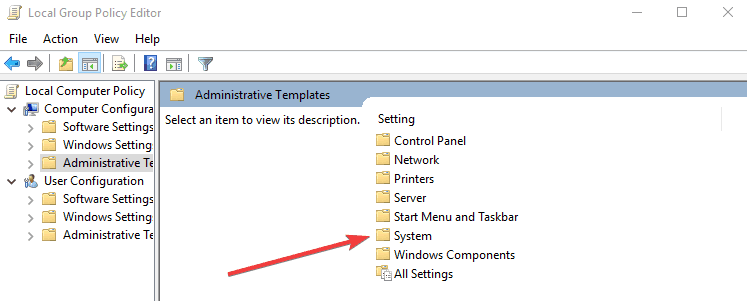
- Double click System.
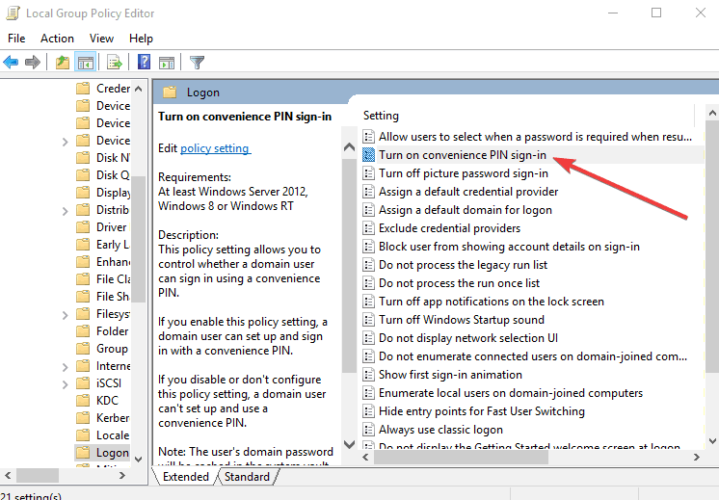
- Double-click Logon.
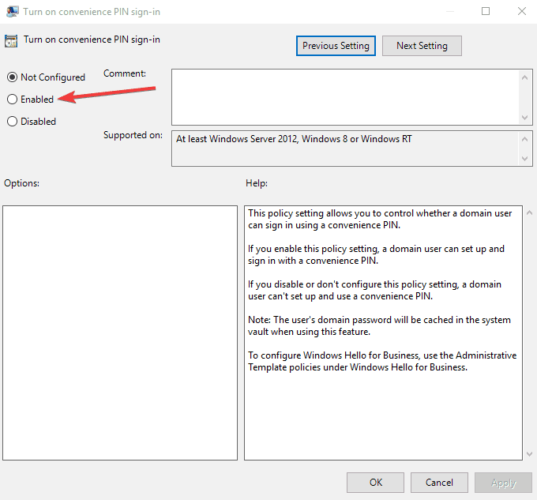
- Double-click Turn on convenience PIN sign in.
- Select Enable.
2. Alter Permissions
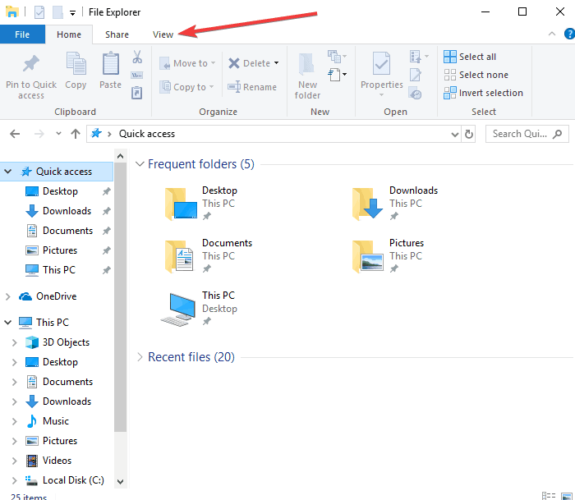
- Click Start and select File Explorer.
- Click View.
- Click Show/Hide and check Hidden Items.
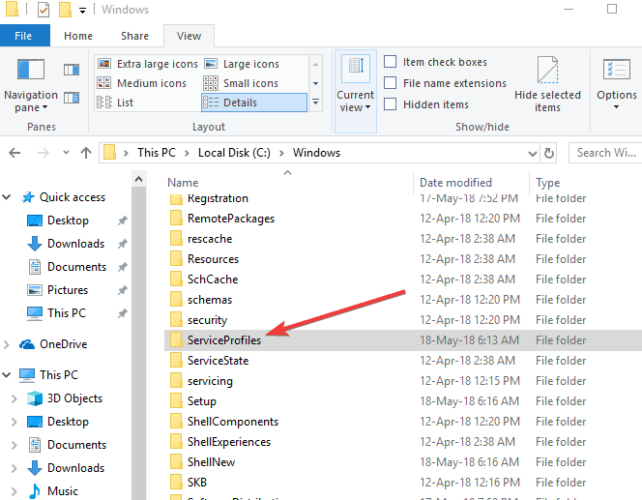
- Go to the following folder:
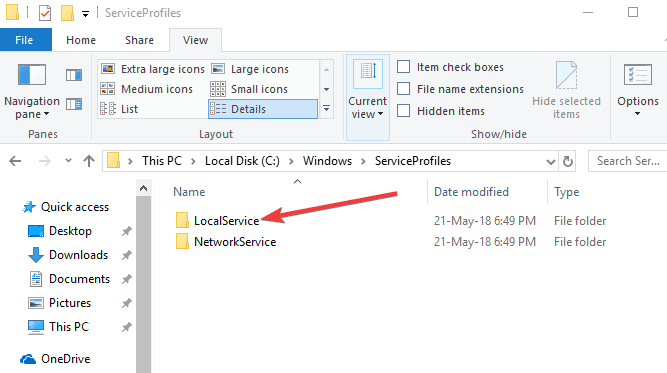
C:\Windows\ServiceProfiles - Double-click LocalService.
- Follow the path below:
AppData\Local\Microsoft - Right-click on the NGC folder.
- Select Properties.
- Go to the Security tab.
- Click Advanced.
- Click the Change link against Owner under Advanced Security Settings for NGC window.
- Take ownership of the NGC folder.
- Check Replace owner on sub-containers and objects, and replace all child object permission entries with inheritable permission entries from this object.
- Click Change permissions.
- Click Add.
- In the permission entry for NGC, click Select a principal.
- Enter SYSTEM as the object name.
- Click Check Names and click OK.
- Check Full Control under Basic Permissions and click OK.
Check if you can add a PIN after following these steps.
3. Disable or change your security software
Sometimes Windows 10 won’t let you add a PIN when your security software (antivirus or firewall) is blocking the powershell.exe after a Windows update.
Allow the program/unblock it via your antivirus program setting, and see if you can go straight to your account settings and add a PIN.
Not every security software behaves restrictively, though. While most such programs are designed to have minimal impact, some are more successful than others.
One such software is the ever-reliable ESET NOD32 antivirus. ESET NOD32 is a top-notch tool that offers complete online and offline security without messing with your PC.
It employs uses the latest technology to dig out the most stubborn virus on your PC. What’s more, this software can detect even the most hidden virus before it can harm your PC.
If you are looking for a lightweight antivirus that takes a no-nonsense stand against viruses without affecting your activities, you should give ESET NOD32 a try.
4. Reset ACLs on NGC folder
- Go to the search box and type CMD, then press Enter.
- Pick Command Prompt, right-click it, and select Run as administrator.
- In the Command Prompt (Admin) black screen, type this command:
icacls C:\Windows\ServiceProfiles\LocalService\AppData\Local\Microsoft\Ngc /T /Q /C /RESET - Press Enter.
- Close Command Prompt.
- You might need to add a new PIN now, which should work as expected.
5. Use a local account
- On the login screen, click on the Sign-in options.
- Try to login to Windows with your Microsoft account or local account Password.
- Click on the Windows icon in the bottom-right corner.
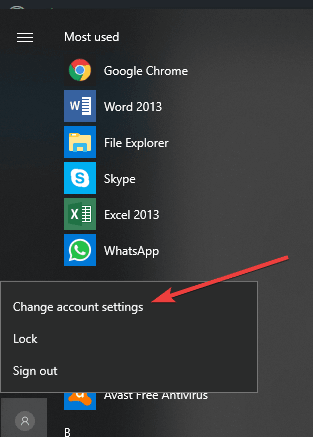
- At the top of the Start Menu, click on your account
- Select Change account settings
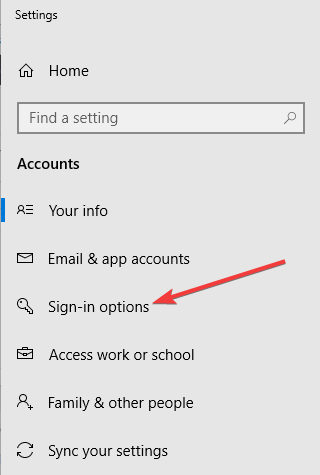
- On the left-side panel of Accounts settings, select Sign-in options
- Under the PIN option, click on Remove.
- Click Remove when you get Are you sure you want to remove your PIN prompt.
- A Log-in Box will open for you to re-enter your password. Enter your password, then click OK.
- You will be returned to the Sign-in options page, where you can add a PIN code again.
- Enter your new PIN and confirm it.
- Click OK to reset your new PIN.
- Restart your PC and sign in with your new PIN to confirm.
6. Login using another user account
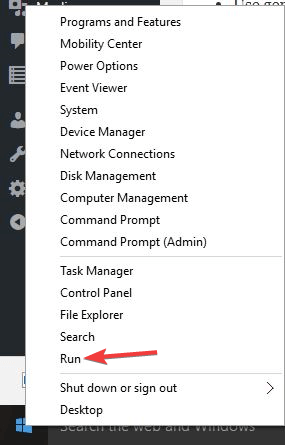
- Right-click on Start.
- Select Run.
- Type control userpasswords2 and press Enter.
- Select your account.
- Click Reset Password.
- Enter a new password, then click OK. Try logging into the account.
For computers connected to a Domain, contact your Network Administrator. There might be an issue with Kerberos authentication, or the version of Windows Server is not compatible.
Restart your computer a few times to see if you can log in. There might be a small delay also, so wait a few seconds, then try again. Use the preview button to make sure you entered the right characters.
7. Clear TPM
- In the search box, type tpm.msc, and press Enter.
- Click Clear TPM. (It will reboot you to a part of the system’s UEFI/BIOS).
- Press F1 to clear TPM.
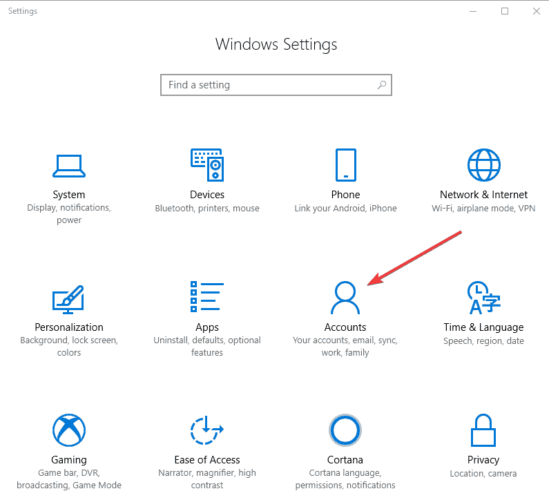
- Click Start and select Settings.
- Click Accounts.
- Go to the Add PIN function and select it to see if it works.
8. Run an SFC scan
- Go to Start and type CMD.
- Right-click Command Prompt and select Run as Administrator (elevated command prompt).
- Type the command below and hit Enter:
sfc /scannow - Wait for the process to finish.
The result should show one of these three things:
- Windows did not find any integrity violations (a good thing)
- Windows Resource Protection found corrupt files and repaired them (a good thing)
- Windows Resource Protection found corrupt files but could not fix some (or all) of them (not a good thing). If you get this message, run DISM as described below
9. Run the DISM tool
- Click Start.
- In the search field box, type CMD.
- Click Command Prompt in the search results list.
- Type the following commands and press Enter after each:
Dism /Online /Cleanup-Image /ScanHealthDism /Online /Cleanup-Image /CheckHealthDism /Online /Cleanup-Image /RestoreHealth
These commands will scan for missing components, check for missing or broken files and correct any causes of the Windows 10 desktop being slow to load issue respectively.
Note: The DISM tool usually takes 15 minutes to complete. However, sometimes it may take longer. Do not cancel when it is running. You may want to re-run SFC to check if the repair is successful.
The Deployment Image Servicing and Management (DISM) tool helps fix Windows corruption errors when Windows Updates and service packs fail to install due to corruption errors.
Before you leave, verify if you using an organization-based account and get rid of the Your organization requires you to change your PIN message.
Did any of these solutions help you add a PIN again? Let us know in the comments section below.


User forum
1 messages