How to Enable the Classic File Explorer Ribbon on Windows 11
The Ribbon gives access to handy features and commands
2 min. read
Updated on
Read our disclosure page to find out how can you help Windows Report sustain the editorial team. Read more
Key notes
- No matter how good-looking some of Windows 11’s new UI changes are, some just can’t get used to them.
- For many users, the Windows 10 style of design for many UI elements is still the best, and worth changing back to.
- If you dislike the File Explorer ribbon that Windows 11 has now, you can switch back to the way the previous OS displayed it.
- This article contains the exact steps you need to go through in order to perform this to the Classic File Explorer Ribbon Menu.

Every time Microsoft makes a design upgrade in Windows, there are people that prefer the old way because of different reasons.
One example is the new File Explorer in Windows 11 that substitutes the ribbon with a new command bar, unlike Windows 10.
Nowadays, it seems that every fresh UI design detail that Microsoft comes with for Windows 11 immediately gets rejected by the user community, under the pretext that they liked things better on Windows 10.
Can I get the classic File Explorer ribbon menu back in Windows 11?
Luckily, there still are some tips and tricks that some of the more tech-savvy users know how to use in order to revert some UI elements back to how they looked on the previous operating system like the File Explorer Ribbon on Windows 11.
Anything can be achieved, as long as you know where to look.
If you are one of the users that greatly appreciate the old style of doing things, as well as the old system layout, know that you can revert to the File Explorer ribbon from Windows 10, and here’s how you do it.
How do I restore the old File Explorer ribbon menu on Windows 11?
1. Manually edit the Registry
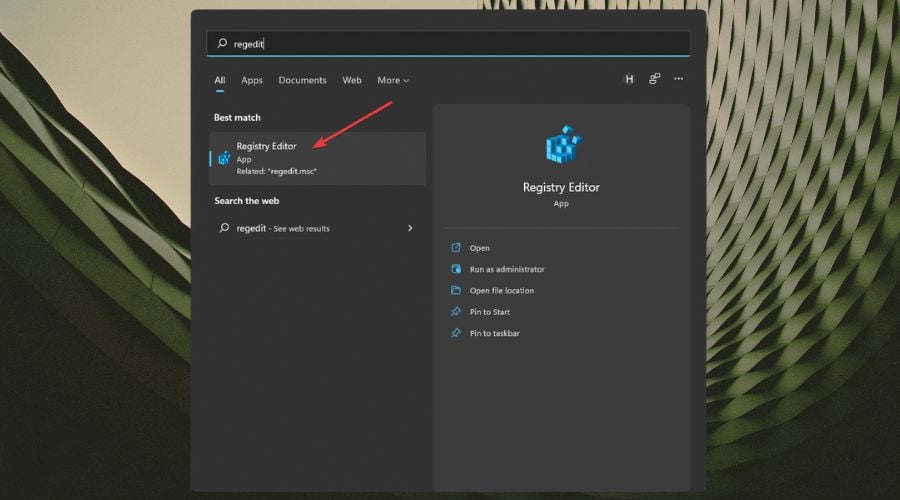
1. Click the search icon on your taskbar and type Registry Editor, then click the first result.
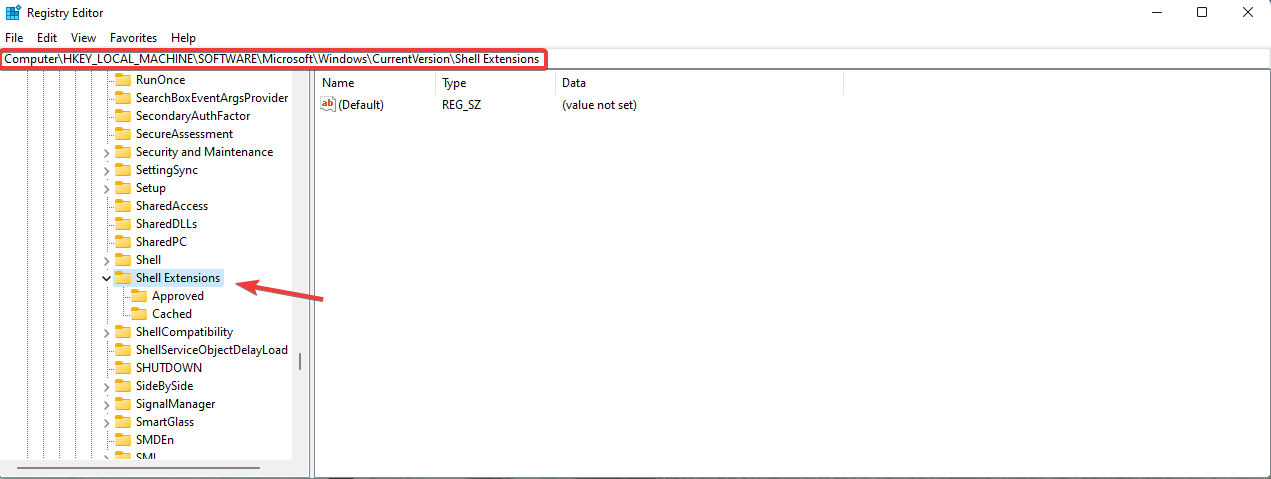
2. Navigate to the following registry key: Computer\HKEY_LOCAL_MACHINE\SOFTWARE\Microsoft\Windows\CurrentVersion\Shell Extensions
3. Right-click the Shell Extensions folder on the left side and select New > Key.
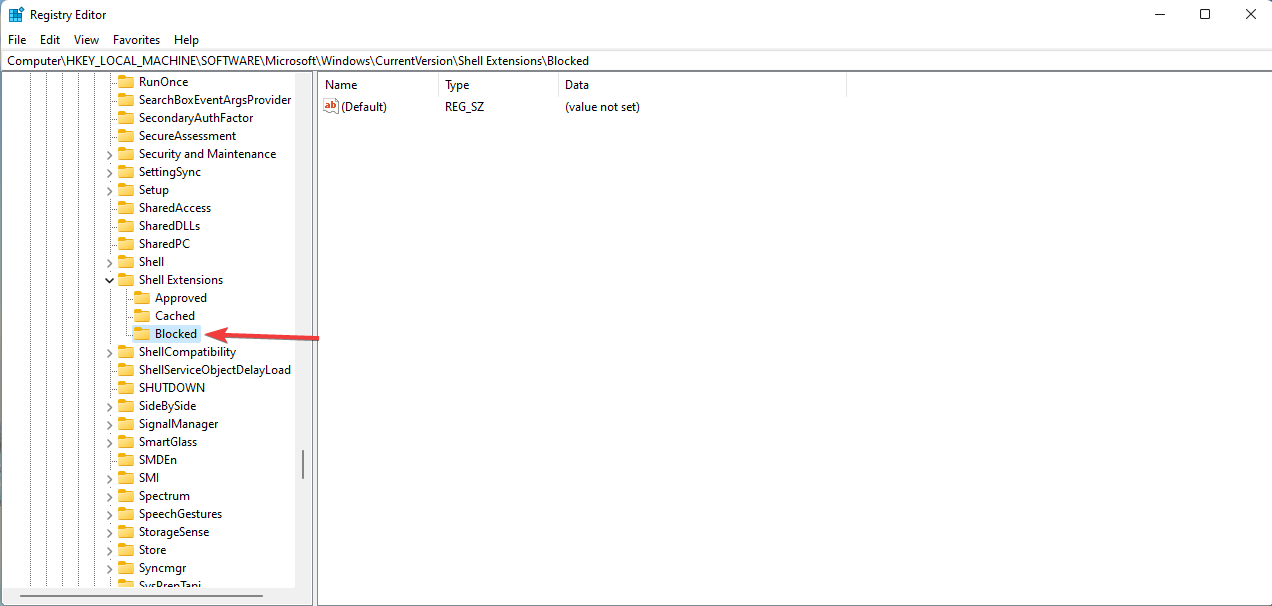
4. Name the new key Blocked.
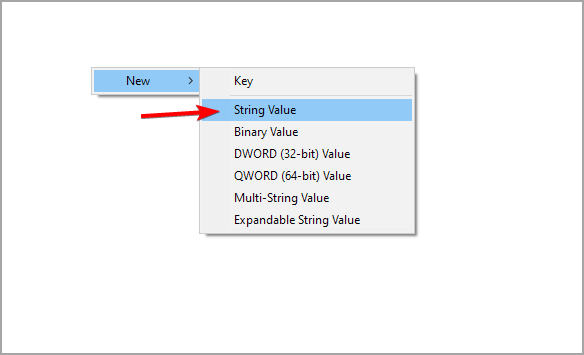
5. Open the Blocked registry key and create a new string value by right-clicking any free space in the main panel and selecting New > String Value.
6. Name the string value {e2bf9676-5f8f-435c-97eb-11607a5bedf7}.
7. Restart your PC to apply changes.
The process of getting the old File Explorer ribbon only requires a few moments of your time and it’s achievable without having a thorough knowledge of how computers actually work.
A simple Registry tweak will get you the desired result within a few clicks. However, you should know that performing Registry modifications is risky and should be done carefully, as to not cause any damage to your PC.
To return to default File Explorer in Windows 11, open Registry Editor and delete the Blocked key you created, close the editor, and then restart your PC.
2. Via Control Panel (only works on versions prior to build 71)
- Access the Control Panel app on your Windows 11 device.
- Select Appearance and Personalization.
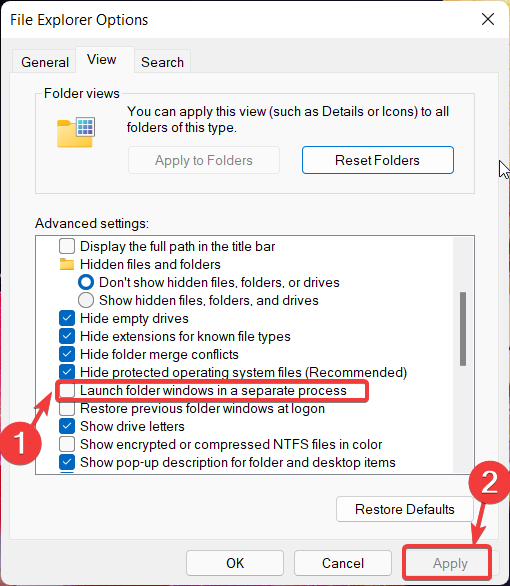
- Click on File Explorer Options.
- Check the tiny box next to the text that says Launch folder windows in a separate process, found under the View tab. Once you’ve done this, click on Apply and you are good to go.
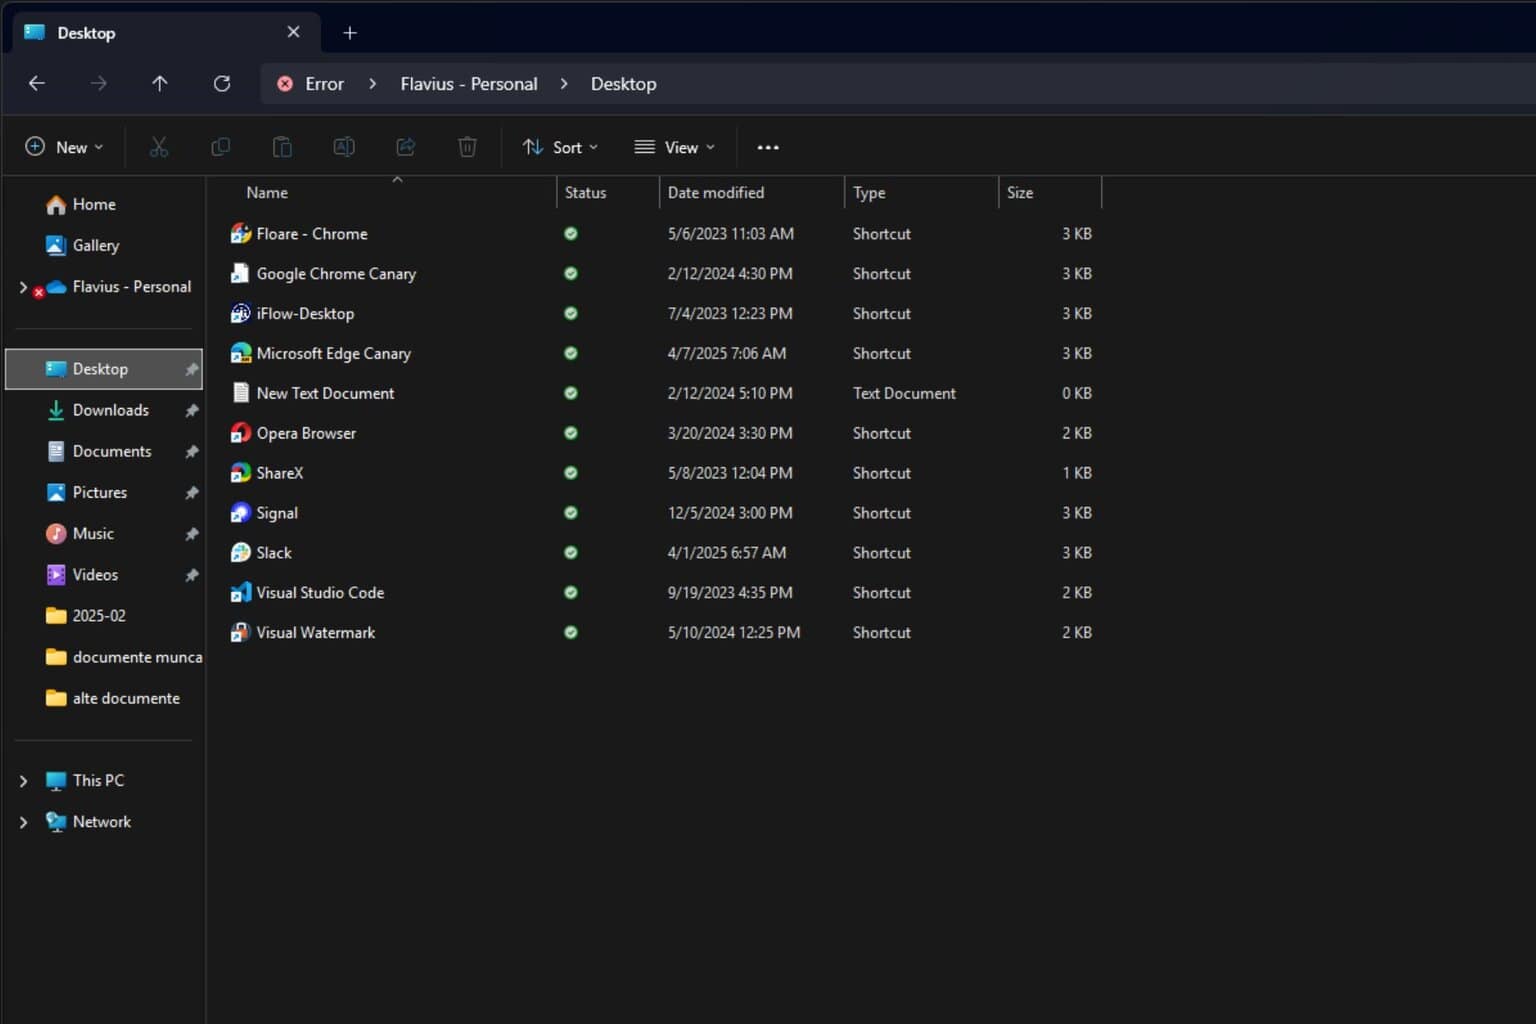
- If you followed these steps correctly, the end result should look something like this:
 NOTE
NOTE
If, however, at some point you get bored with this look and want to switch to the Windows 11 version, simply follow the same steps and untick the little box you ticked in order to make this happen.
Before you go, you might want to check our guide on how to customize File Explorer on Windows 11 for more useful tips.
Which one of the ribbons do you prefer for your File Explorer? The old Windows 10 one, or the new and improved Windows 11 version? Let us know in the comments section below.




User forum
4 messages