What is The Location of Windows 11 Firewall Logs?
First, ensure logging feature is enabled
![]() 5 min. read
5 min. read
![]() Updated on
Updated on
Share this article
Improve this guide
Read our disclosure page to find out how can you help Windows Report sustain the editorial team. Read more
Over the years, Windows Firewall has evolved to enhance security and protection against emerging threats and unauthorized access. It also generates logs and provides insights into its activities, and you can monitor & troubleshoot security-related issues with its help.
This guide is for you if you want to learn where Windows Firewall logs are located and interpret them to ensure better security management.
Where can I check Firewall logs on Windows 11?
1. Using the Windows File Explorer
- Press Windows + E to open the Windows File Explorer.
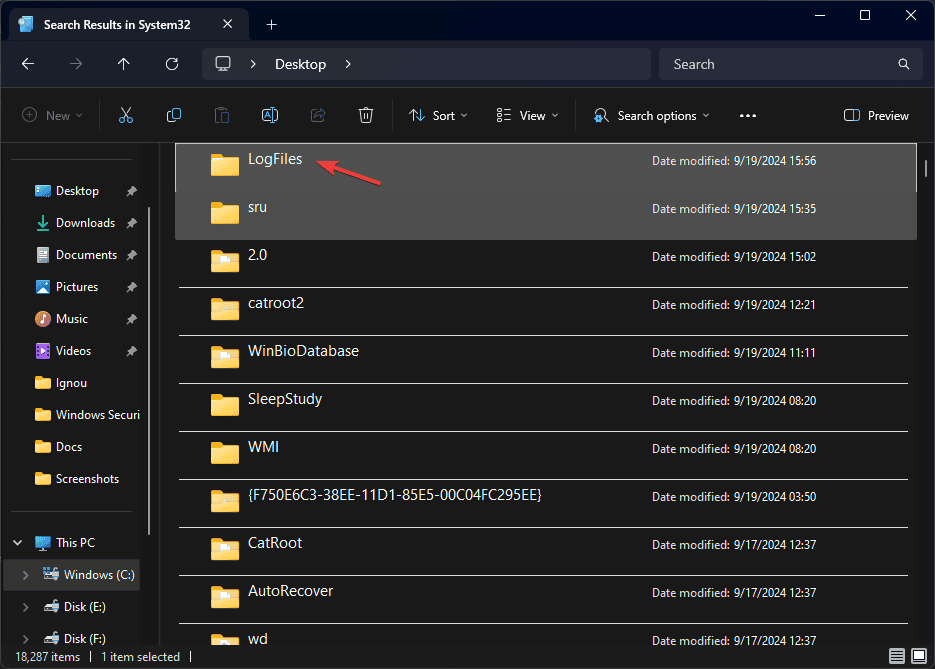
- Go to the system drive; in our case, it is C.
- Now, locate and click on the Windows folder.
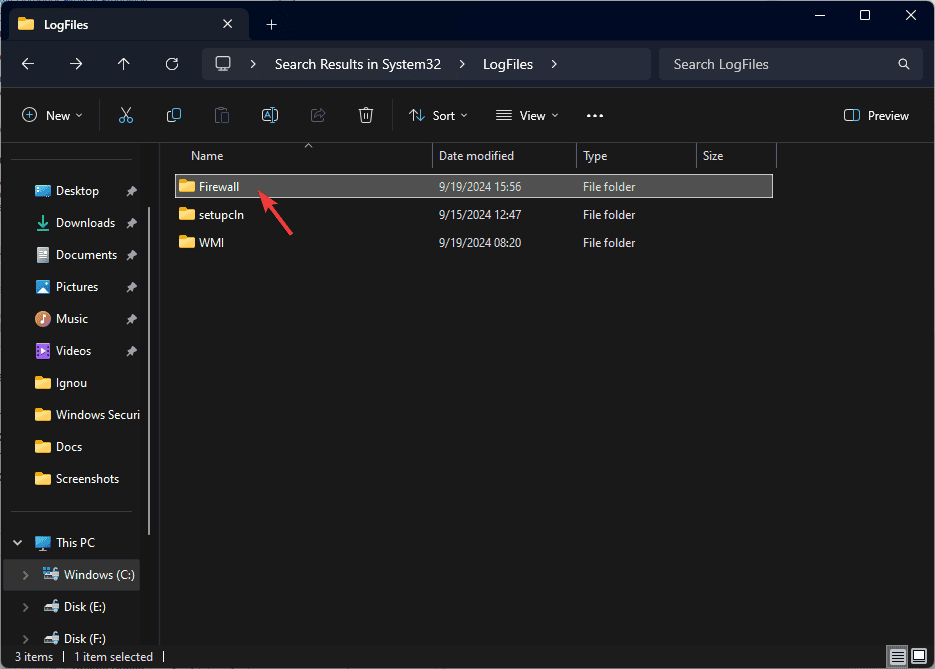
- In the Windows folder, go to System32 and click Log Files.

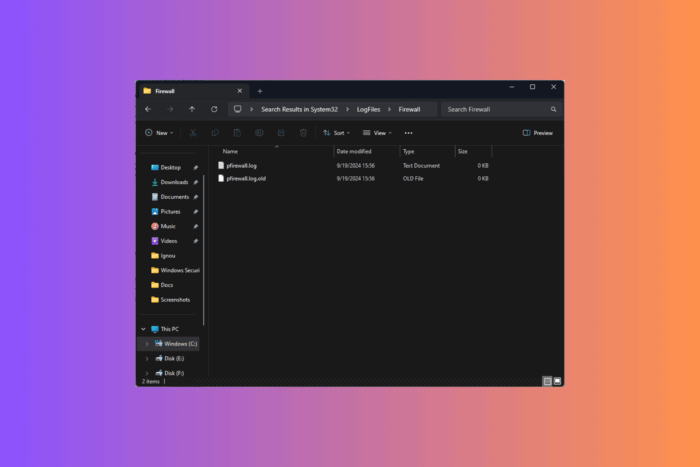
- Open the Firewall folder.
- Look for pfirewall.log.

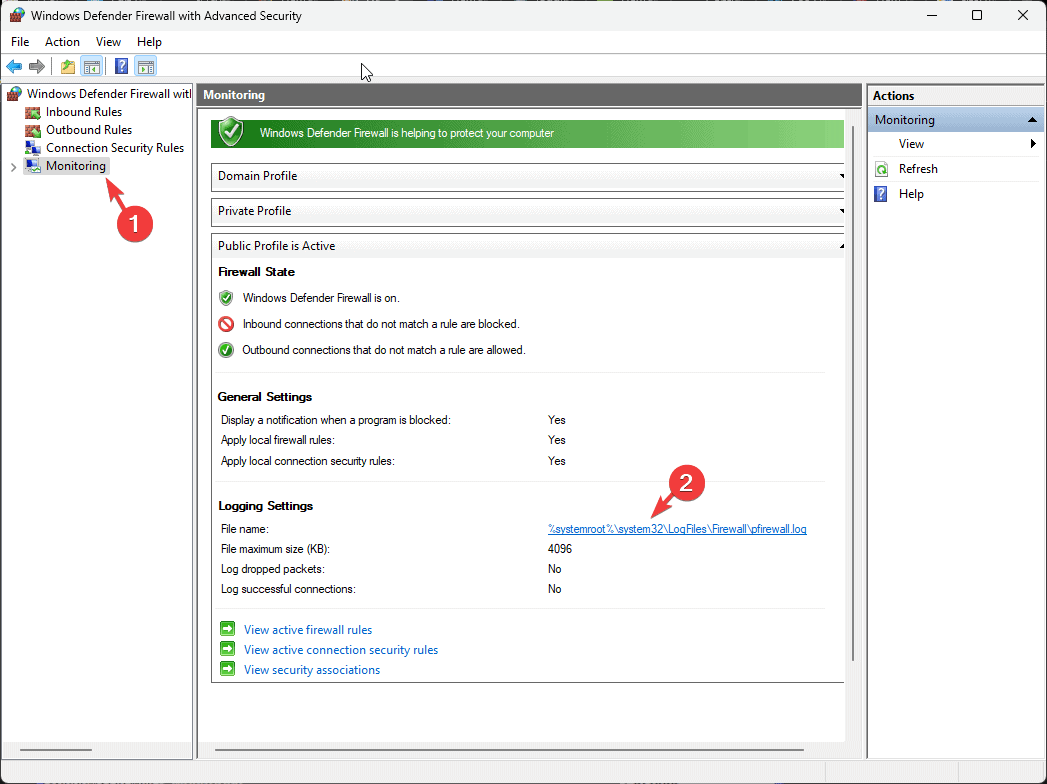
2. Using the Windows Firewall with Advanced Security
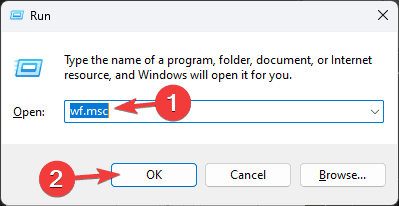
- Press Windows + R to open the Run window.

- Type wf.msc and click OK to open the Windows Defender Firewall with the Advanced Security window.
- Click Monitoring, and on the right pane, locate Logging Settings.

- You will see a path with a hyperlink; click it to open the log file location.
How can I interpret the Windows Firewall log?
The Firewall log contains static and descriptive information about the log version and the fields available. Here are some things you can find in the header of the log:
- Version – Shows the version of the Windows Firewall security log
- Time – Displays the timestamp information in the log in local time
- Software – Shows the name of the software creating the log
- Fields – Displays a list of fields available for security log entries.
Whereas in the body of the log file, you will see
- Date – In YYYY-MM-DD format
- Time – In HH:MM:SS format (24 hours format)
- Action – Information related to the various actions Firewall performs, including logging connection attempts
- Protocol – Protocol like TCP, UDP, or ICMP
- SRC-IP – Source IP address
- dst-ip – Destination IP address
- src-port – Source port number
- dst-port – Display port number
- Size – Packet size in bytes.
- tcpflags – Information about TCP flags in TCP headers.
- tcpsyn – Shows the TCP sequence number
- tcppack – Displays the TCP acknowledgment number
- tcpwin – TCP window size
- icmptype – Information about the ICMP messages.
- info – Shows an entry that depends on the type of action happened
- Path (SEND, RECEIVE, FORWARD, or UNKNOWN)- Shows the direction of communication
What if I can’t access the Firewall logs in the default location?
First, reboot your computer and install the latest Windows update to resolve the log generation issues. Also, make sure you have logged in using an administrator account.
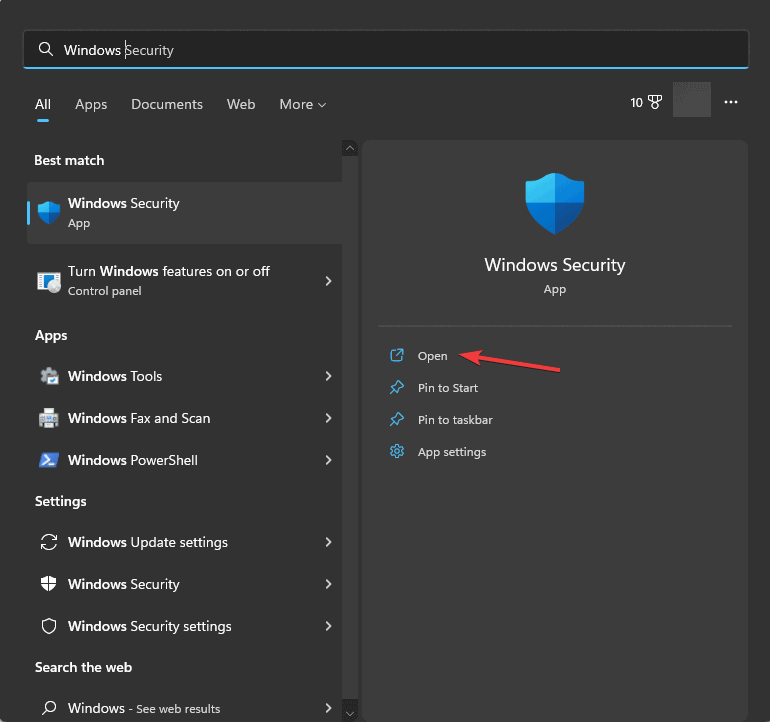
1. Check the Firewall settings
- Press the Windows key, type windows security in the search box, and click Open.

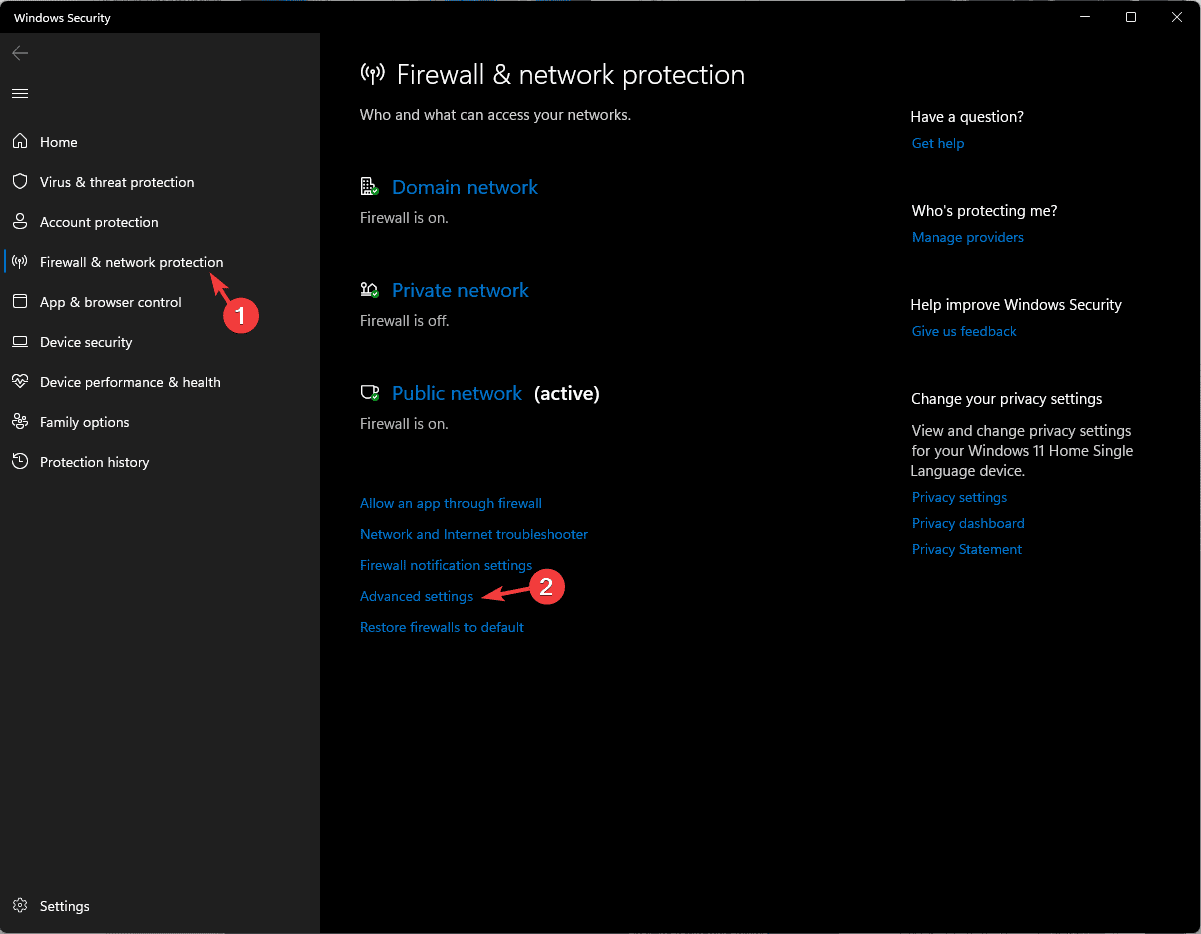
- Go to Firewall & network protection and click the Advanced settings option to access the Windows Defender Firewall with the Advanced Security window.

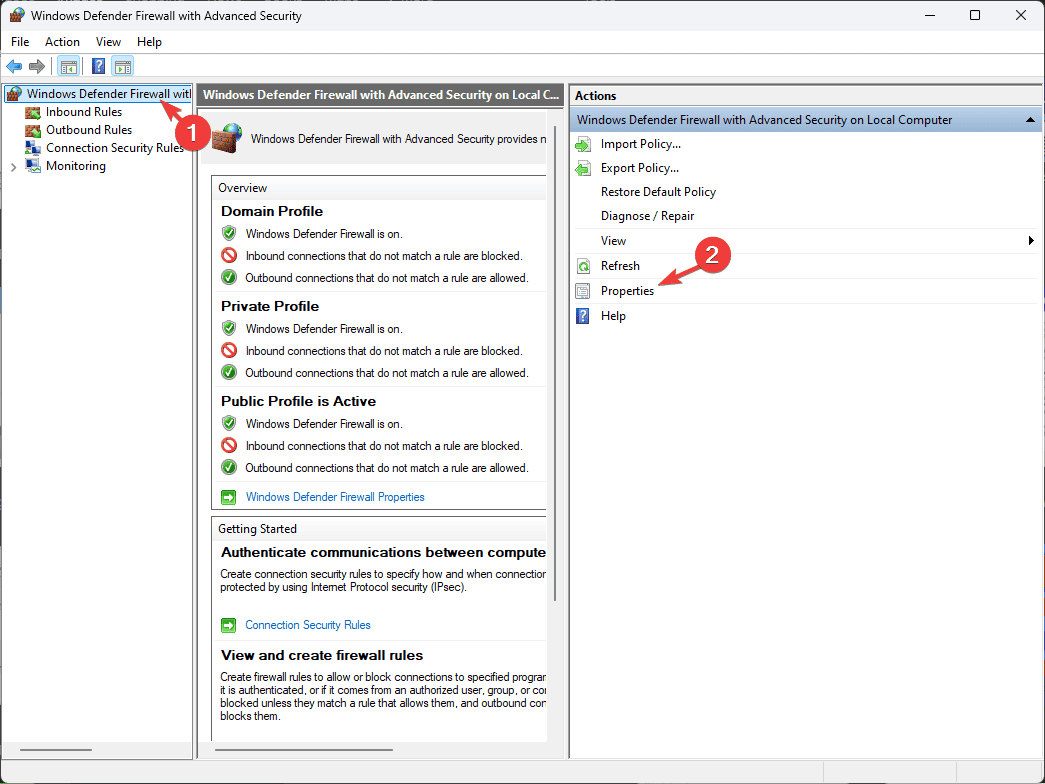
- Select Windows Defender Firewall with Advanced Security on Local Computer, and click Properties from the right pane.

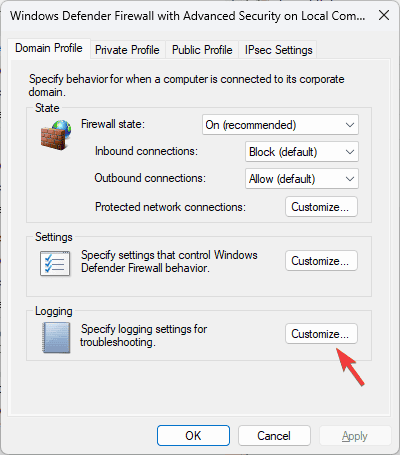
- Go to the Domain Profile tab or any other active profile (Public or Private), locate Logging, and click Customize.

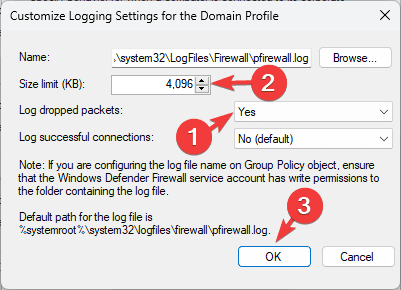
- Locate Log dropped packets and ensure Yes is selected from the drop-down menu.

- Look for the Size limit option and increase the log file size.
- Click OK, then OK to save the changes.
2. Check file permissions
- Press Windows + E to open the File Explorer.
- Navigate to
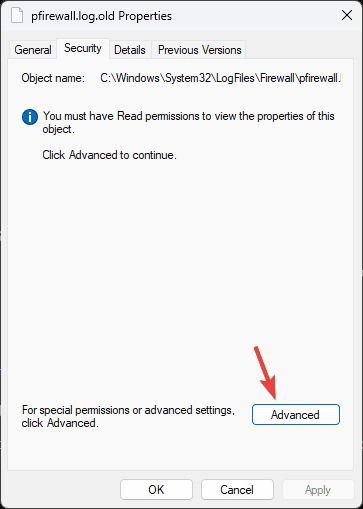
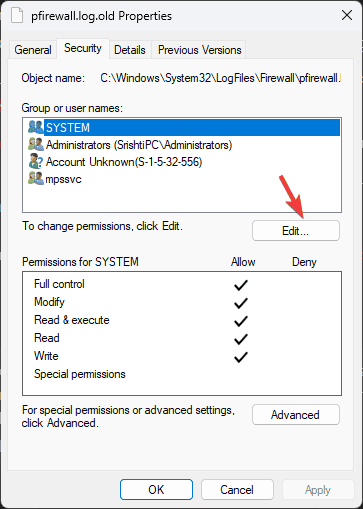
C:\Windows\System32\LogFiles\Firewall\pfirewall.log - Right-click the pfirewall.log and choose Properties from the context menu.
- In the Properties window, go to the Security tab, and you might not see anything but a warning You must have Read permissions to view the properties of this object, so click Advanced.

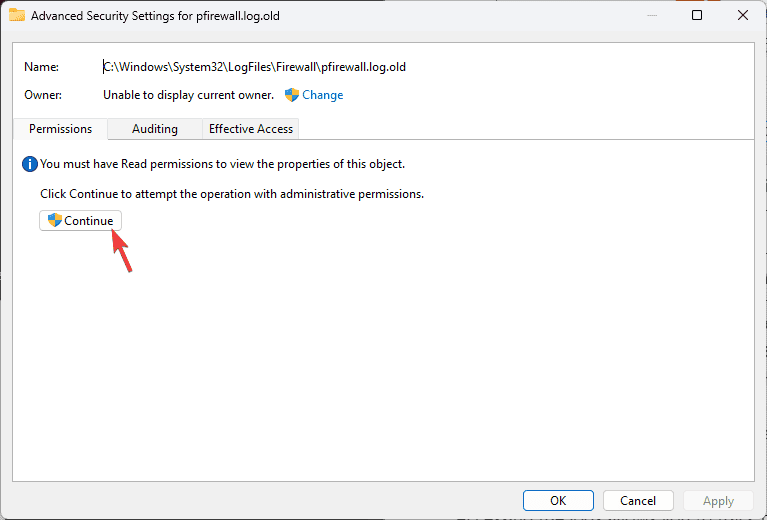
- On the following window, click Continue.

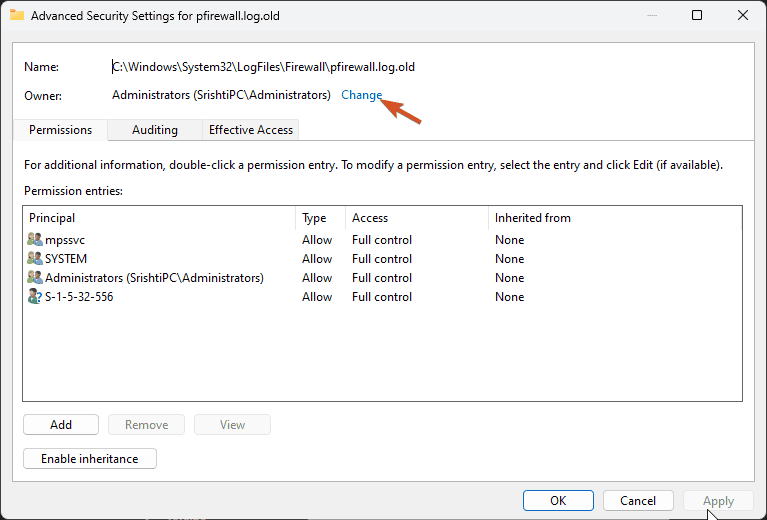
- On the Advanced Security Settings window, locate Owner and click Change.
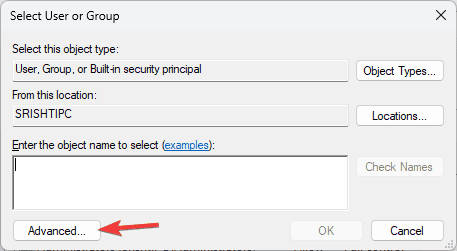
- On the Select User or Group window, type the user name of your account or click Advanced.

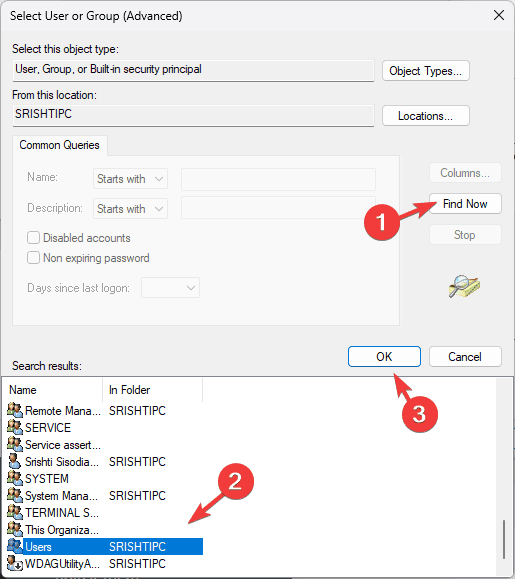
- Click the Find Now button, select the user from the list, and click OK.

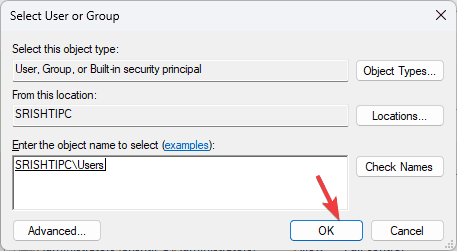
- Click OK on the Select User or Group window.
- Click Apply and then OK to save the changes. Click OK again.
- However, if you see this page instead, skip steps 5-10, select your username from Group or user names, and click Edit.

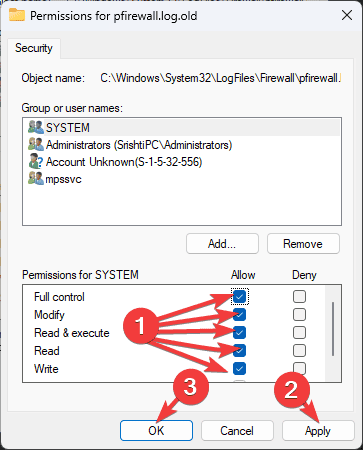
- In the following dialog box, locate the Permissions field and place a checkmark next to the Read and Write options. You can also select all of them. Click Apply and OK to save the changes.

- Click Apply and OK again.


Accessing the logs allows you to track network traffic, identify blocked connections, and ensure that your device’s firewall settings are in place.
If you want to know more about the Firewall settings and best practices to follow to keep your computer secure; we have a separate guide for you.
How often do you check the logs of your Windows Firewall on Windows 11? Share your views with our readers in the comments section below.


User forum
0 messages