How to Remove Static Noise From Microphone on Windows 11
How an earlier update could resolve your microphone issues
Trying to record a podcast or attend online meetings, but there is a lot of static noise coming from your microphone on Windows 11?
You’re in luck because this is a first-hand experience from our WindowsReport experts, so stay tuned to see how you can achieve better sound quality.
How do I fix static noise on my microphone in Windows 11?
Begin with the following preliminary checks before any advanced troubleshooting:
- Test your microphone and ensure it’s in good working condition.
- Try plugging it into a different port on your computer to ensure they’re not damaged.
- Ensure your PC has been updated with all available software updates, then restart it.
1. Run the audio troubleshooter
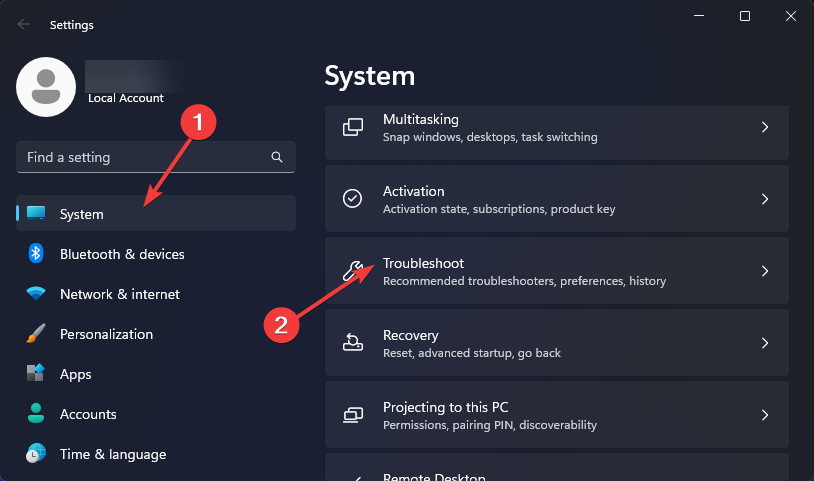
- Hit the Windows key and click on Settings.

- Click on System then select Troubleshoot.
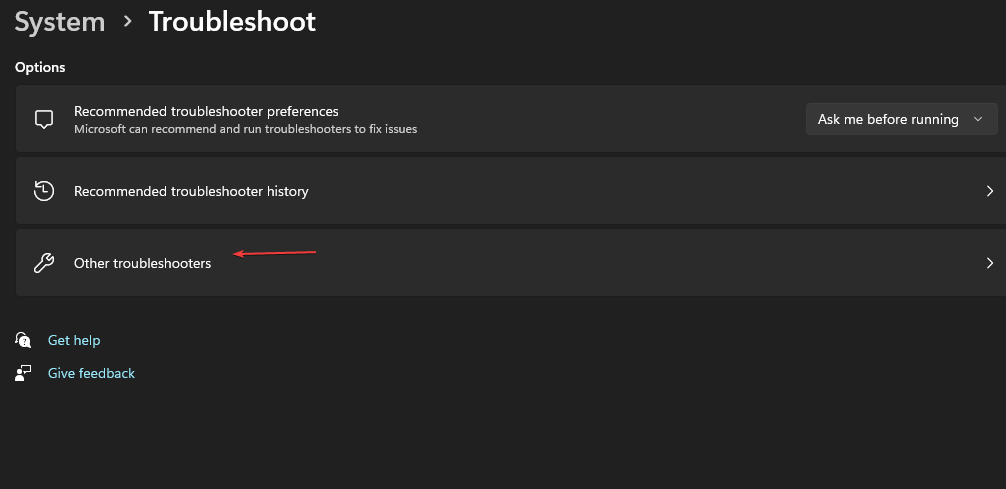
- Select Other troubleshooters.
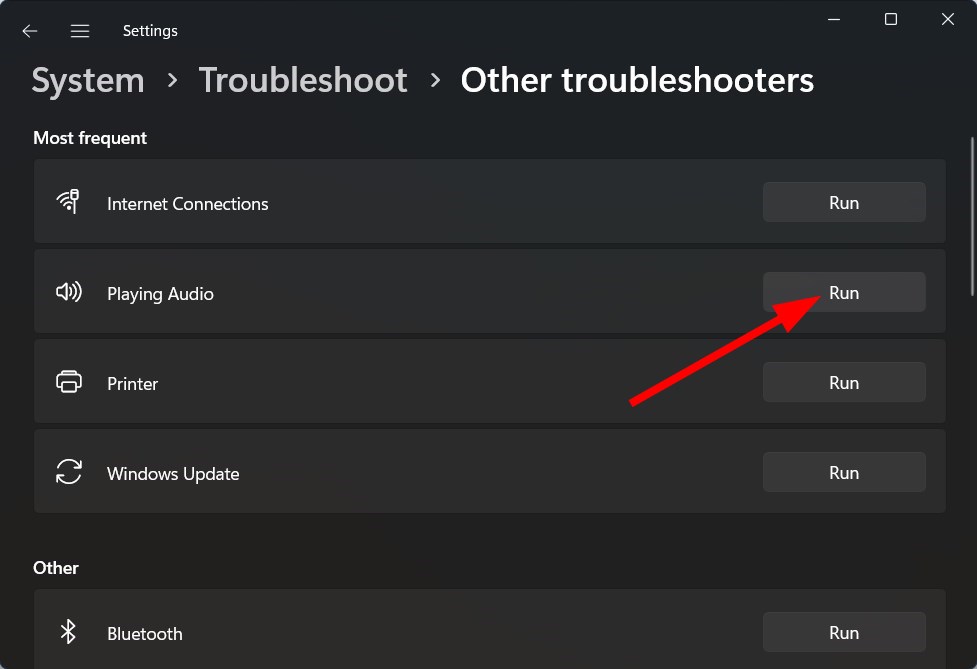
- Hit the Run button next to Playing Audio.
2. Disable audio enhancements
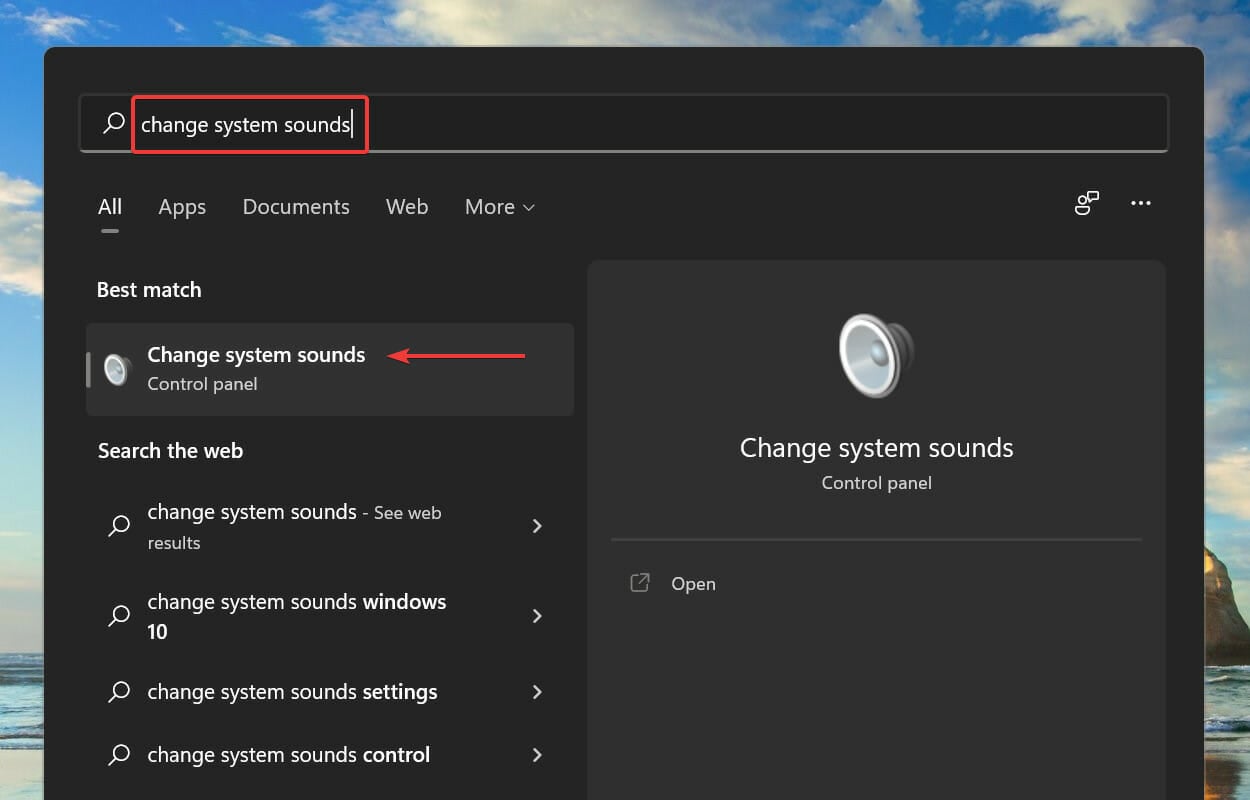
- Press Windows + S to launch the Search menu. Enter Change system sounds in the text field at the top, and click on the relevant search result that appears.

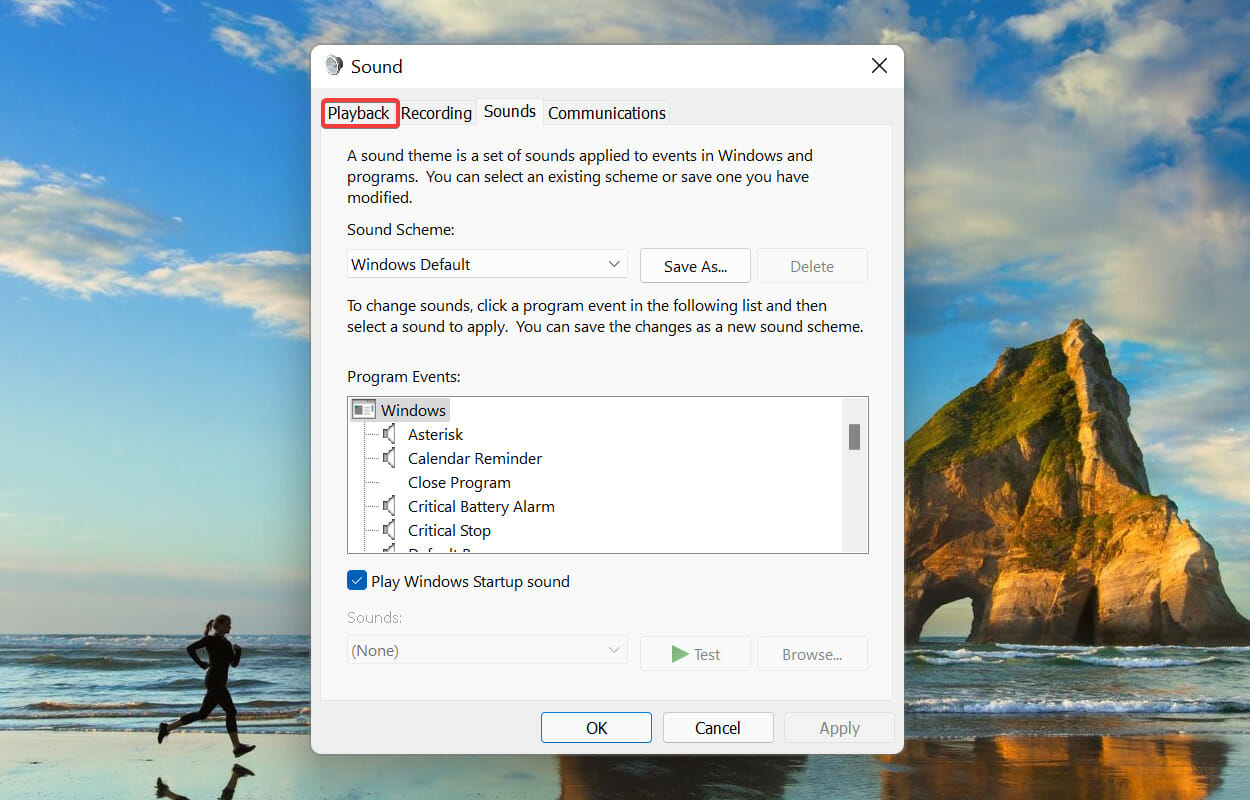
- Navigate to the Playback tab in the Sound window.

- Right-click on the device currently in use, and select Properties from the context menu.
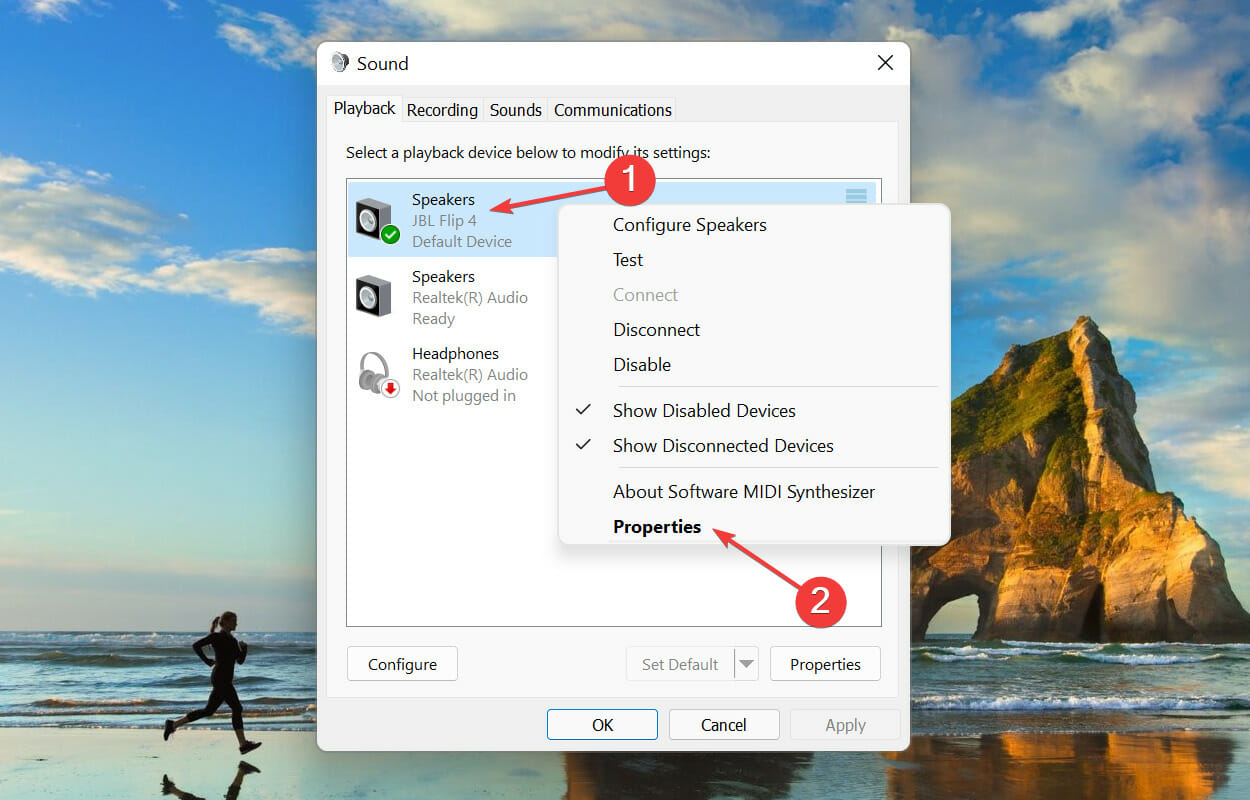
- Now, navigate to the Enhancement tab in the Speaker Properties window, tick the checkbox for Disable all enhancements, and click on OK at the bottom to save the changes.


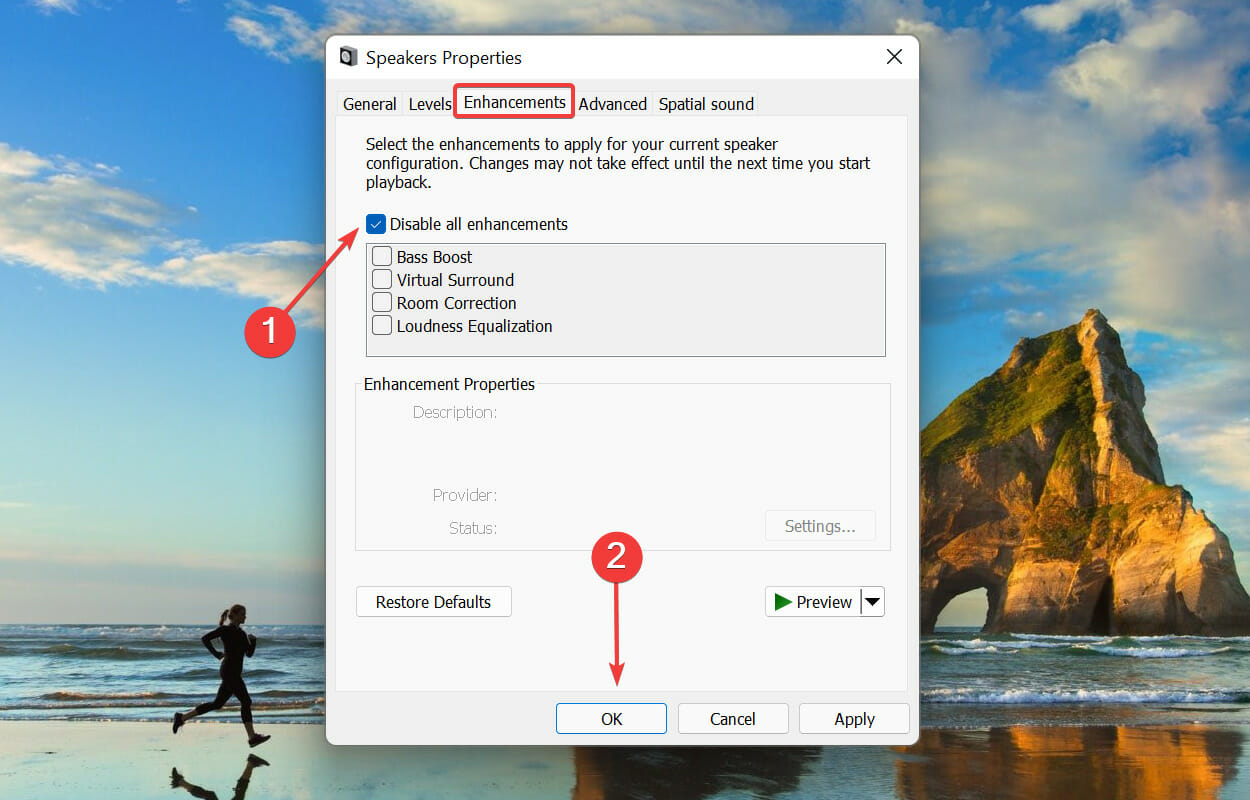
Removing these enhancements or resetting your microphone settings to default will not only resolve the Windows 11 microphone static noise but also help with issues like the volume too low on your microphone.
3. Reinstall audio drivers
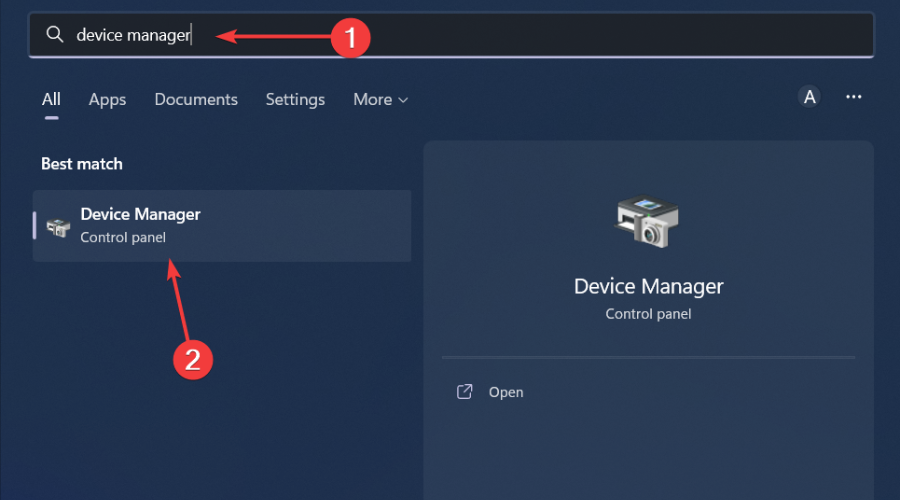
- Hit the Windows key, type Device Manager in the search bar, and click Open.
- Navigate to Sound, video, and game controllers to expand, right-click on your audio device, and select Uninstall device.
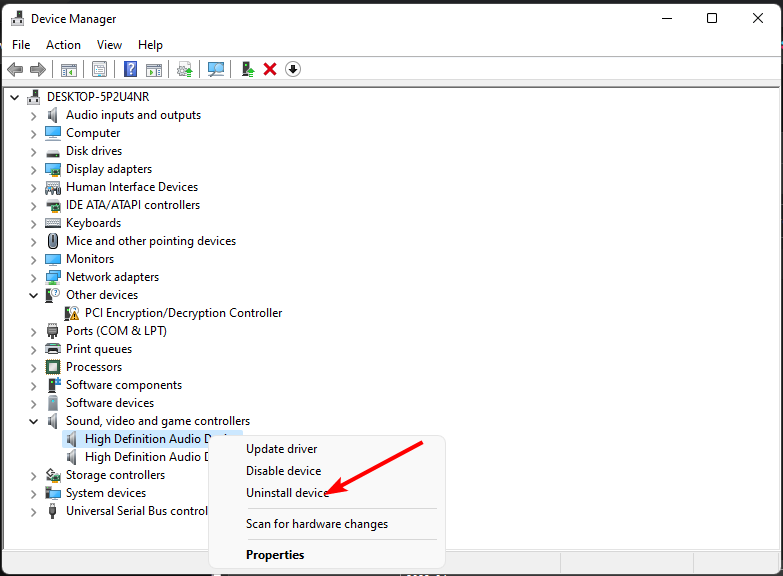
- Confirm on Uninstall.
- Restart your device, and the drivers will automatically reinstall themselves.
4. Update audio drivers
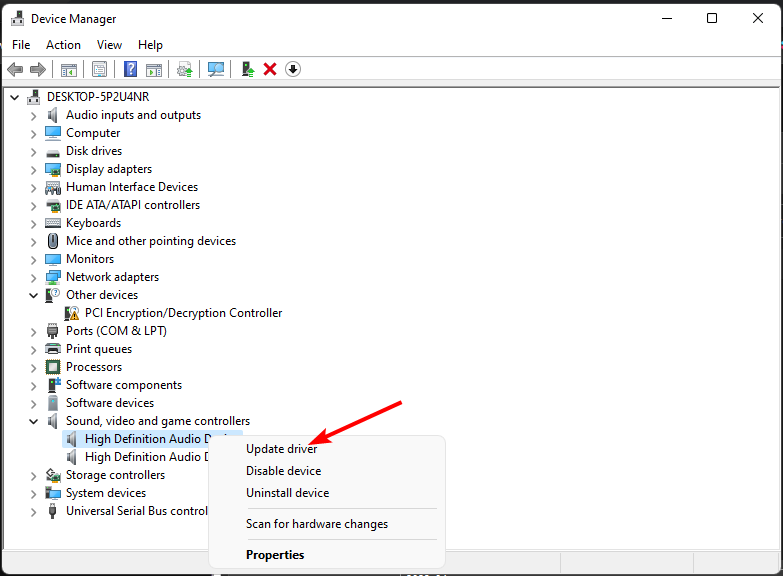
- Hit the Windows key, type Device Manager in the search bar, and click Open.
- Navigate to Sound, video, and game controllers to expand, right-click on your audio device, and select Update driver.
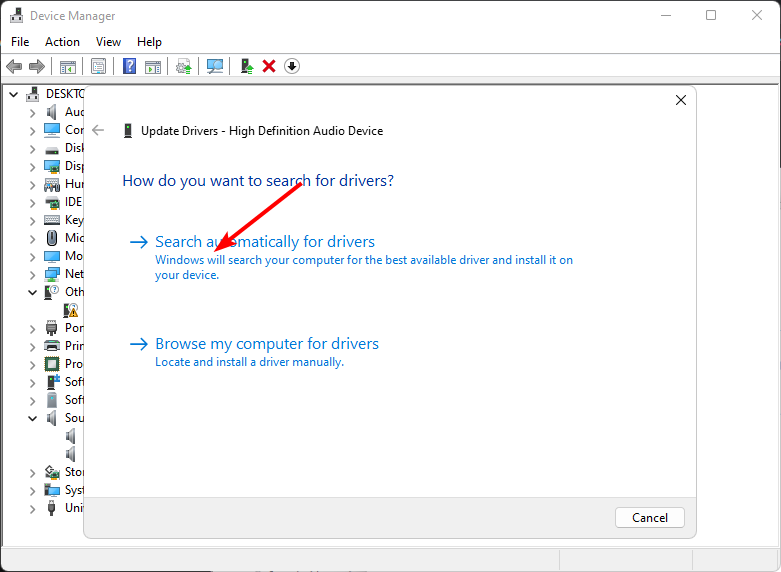
- Select Search automatically for drivers.
- Restart your PC and try reconnecting.
If this method doesn’t yield the expected results, consider downloading straight from the manufacturer’s website. Better yet, use a driver updater tool like Outbyte Driver Updater that automatically detects, scans, and replaces missing, damaged, or outdated drivers with the correct ones.
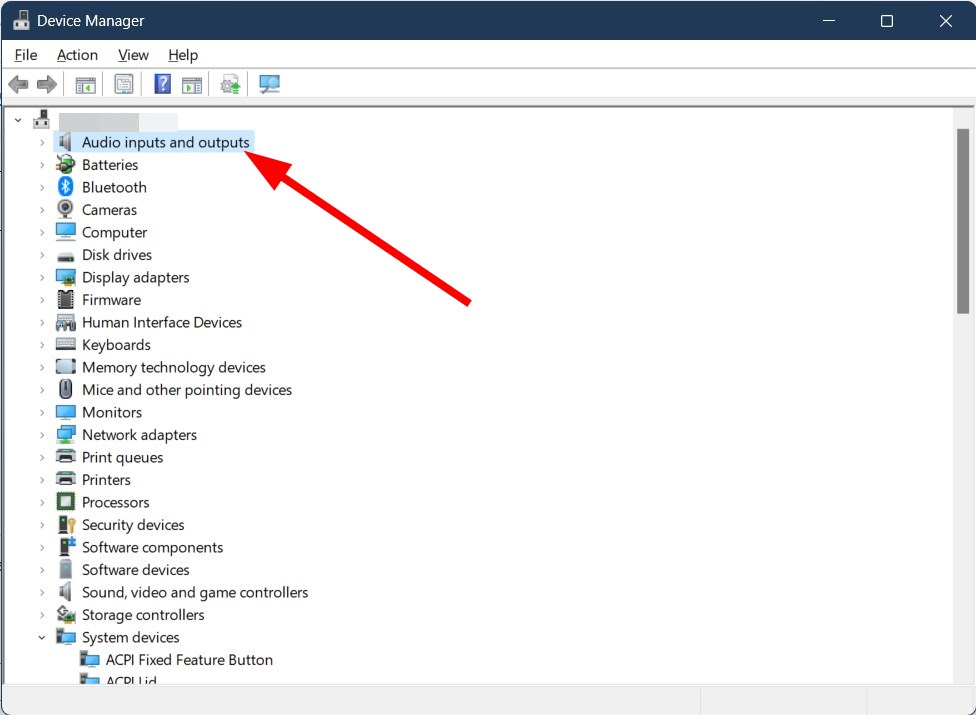
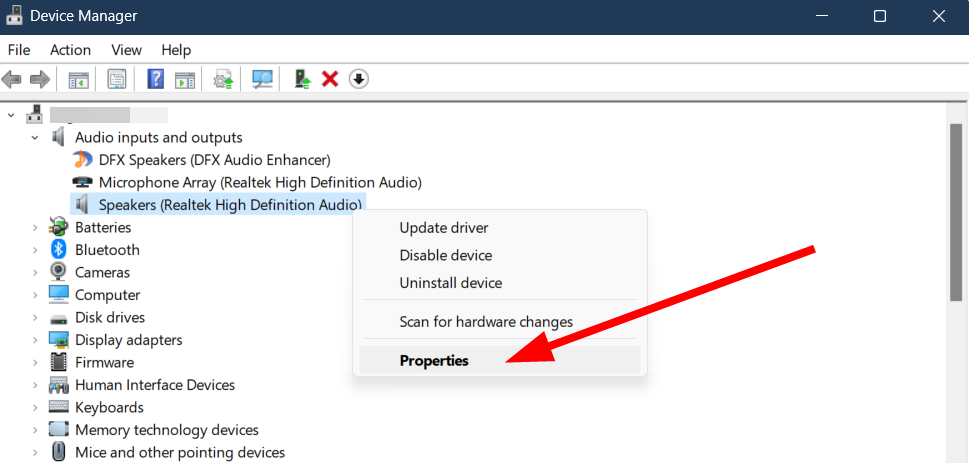
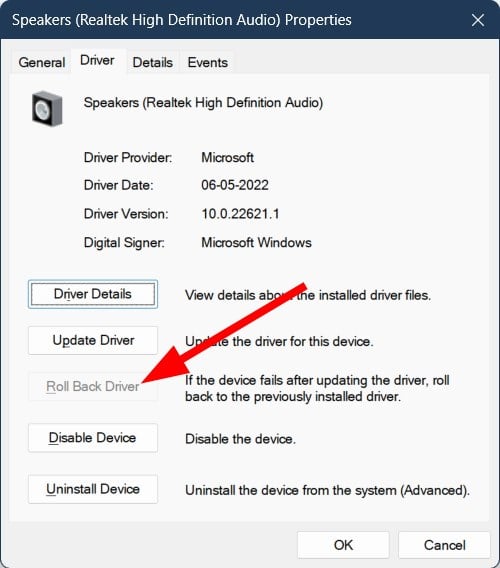
5. Rollback previous audio driver
- Hit the Windows key, type Device Manager, and click Open.
- Expand the Audio inputs and outputs section.
- Right-click on your audio driver and select Properties.
- Hit the Roll Back Driver button.
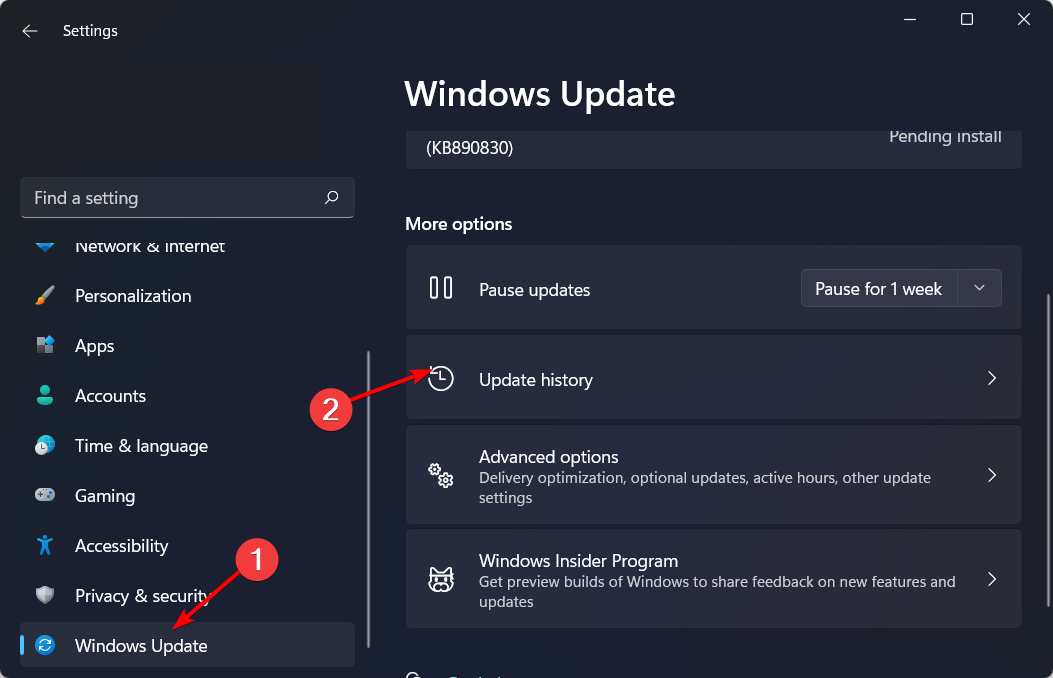
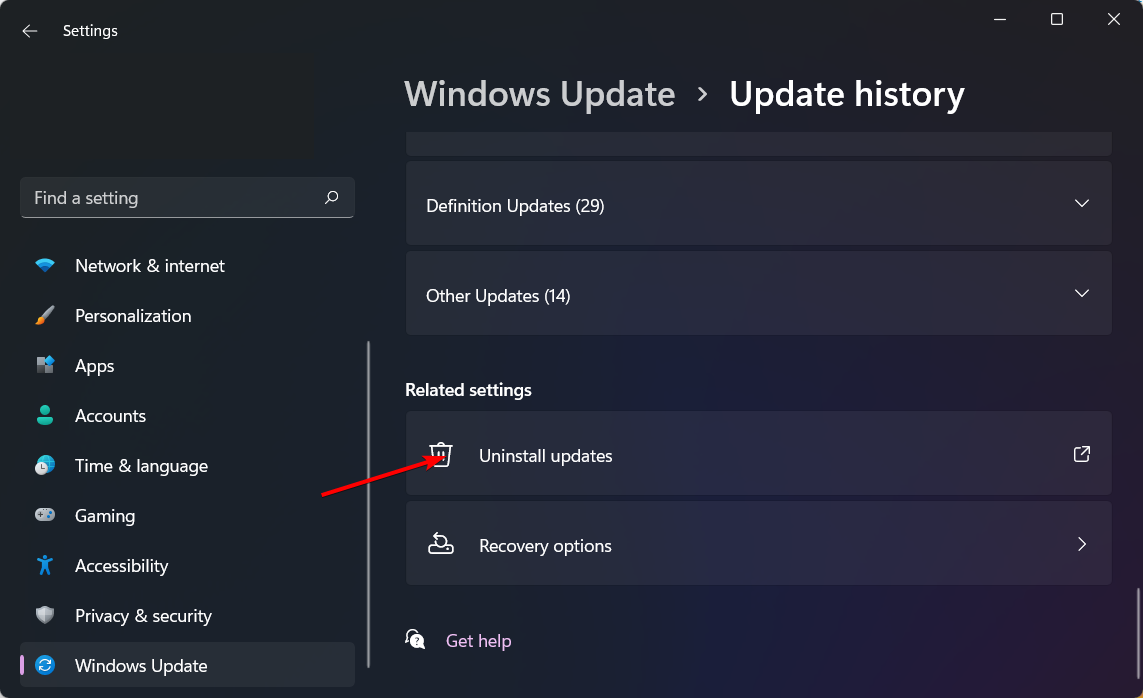
6. Uninstall recent Windows update
- Hit the Windows key and select Settings.
- Click on Windows Update and select Update history on the right pane.
- Scroll down, and under Related settings, click on Uninstall updates.
- This will take you to the most recent installed updates.
- Select the topmost update and click on Uninstall.
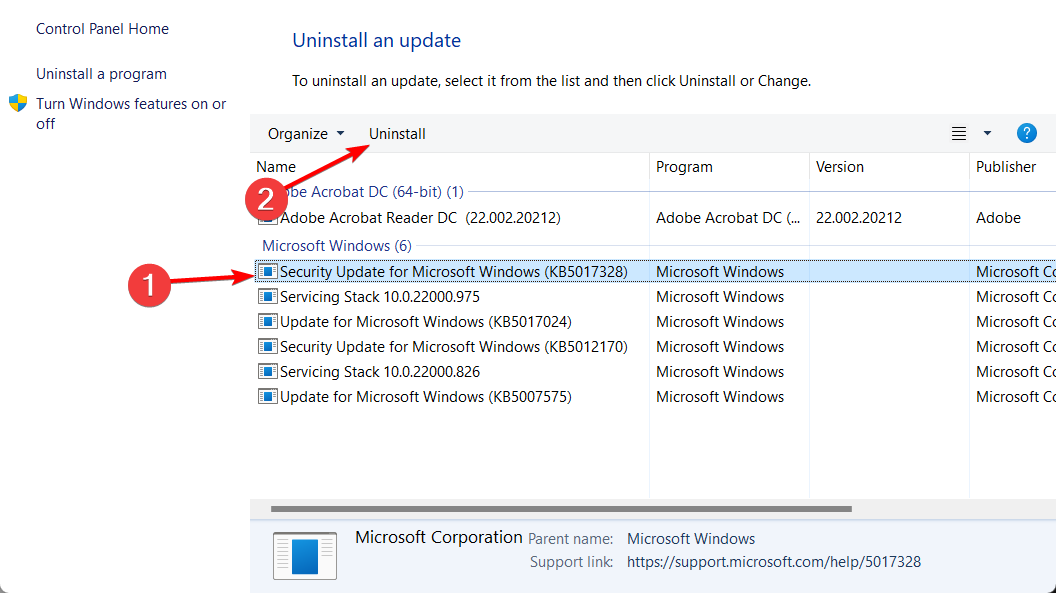
- Restart your PC and check if the problem persists.
A buggy update can cause your microphone to stop working, so removing it can restore its once-normal working condition.
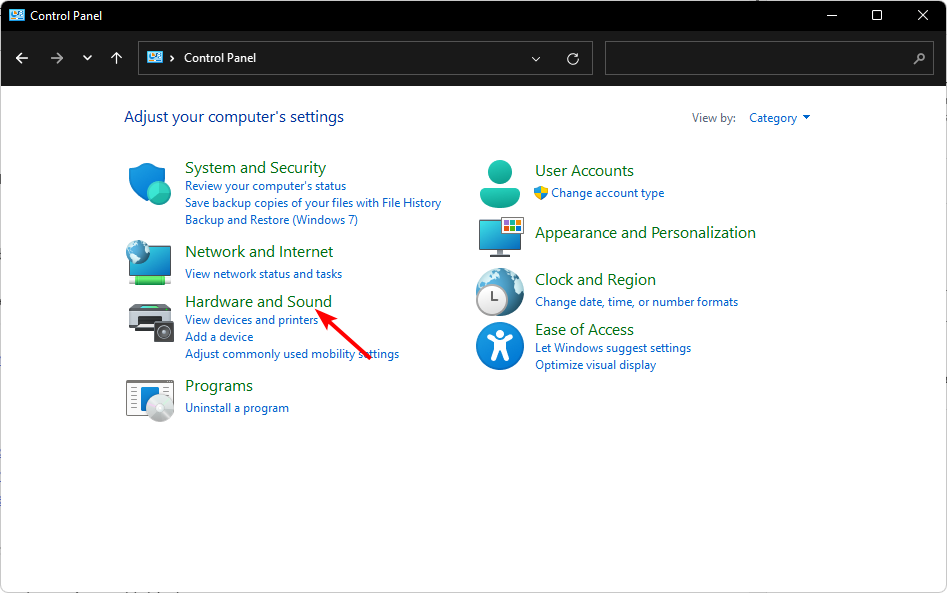
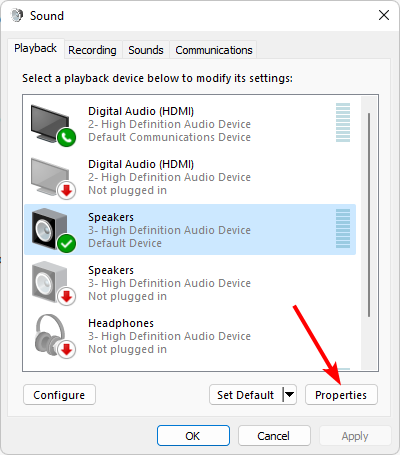
7. Disallow app controls
- Hit the Windows key, type Control Panel in the search bar, and click Open.

- Click on Hardware and Sound.
- Select Sound.
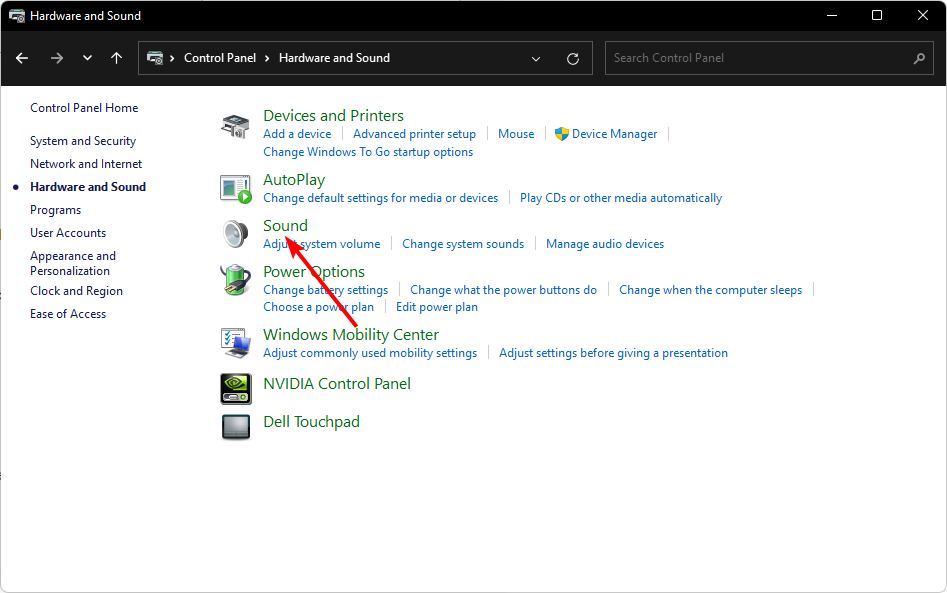
- Navigate to the Playback tab, right-click on your audio output device, and select Set as Default Communication Device.

- Click on Properties at the bottom.
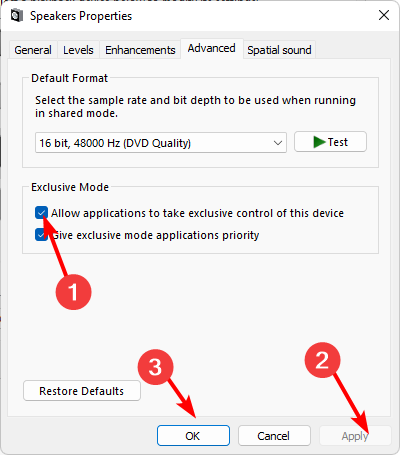
- Navigate to the Advanced tab and uncheck the Allow Application to take exclusive controls on this device box.
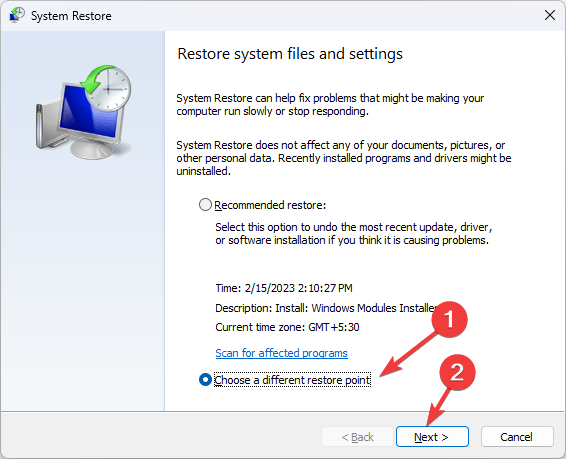
8. Perform a System Restore
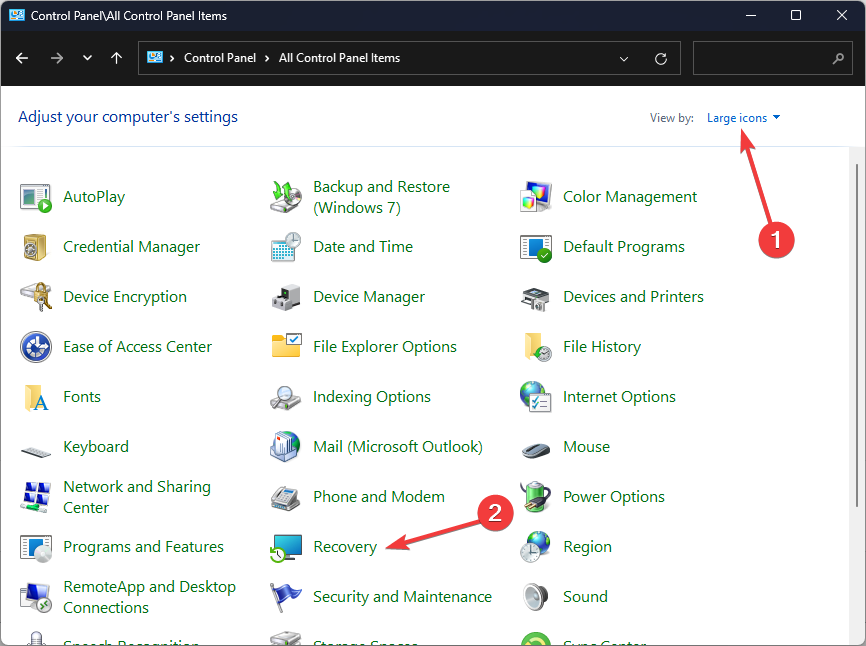
- Press the Windows key, type Control Panel, and click Open.
- Select Large icons as View by and click Recovery.
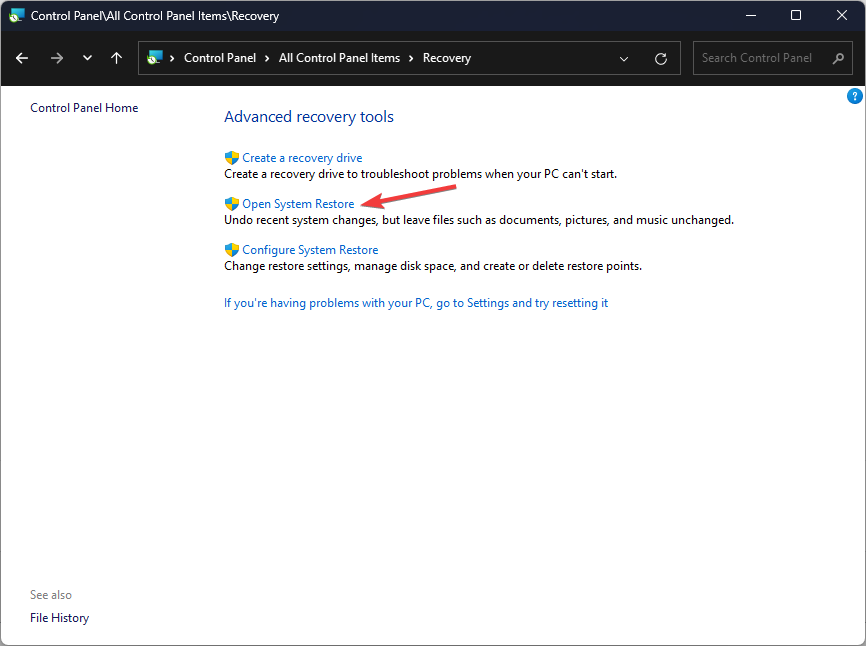
- Click Open System Restore.
- Select Choose a different restore point and click Next.
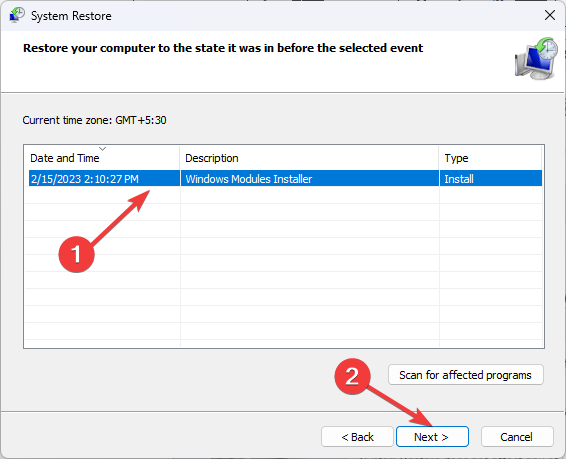
- Now select the restore point and click Next.
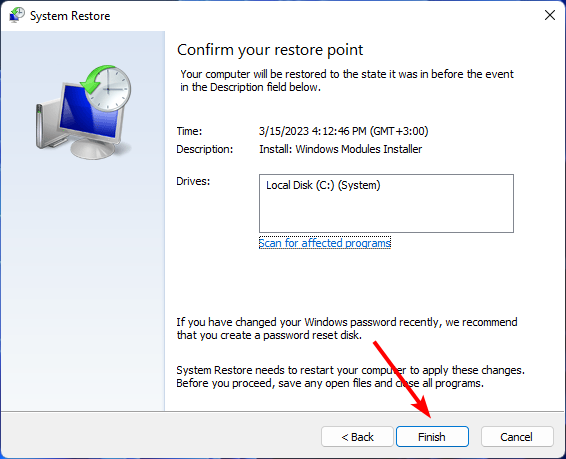
- Click Finish to restore the previous settings, and Windows will restart.Now click on Finish.
How do I calibrate my microphone on Windows 11?
You can easily calibrate your microphone via the Settings app in Windows 11. Simply navigate to System>Sound>Input>Test your microphone>Start test. You’ll have to speak into the microphone and listen, but be prepared to adjust it a few times until you’re satisfied with the new sound settings.
Luckily, you don’t have to do it manually because there exists sound calibration software that can do this in a few seconds. This allows your microphone to work more effectively by eliminating background noise and other interferences.
Most of the time, static noise will appear in audio recordings during transition periods or in between pauses. With other interference factors under your control, like weather or hardware, you can always move to a quieter room and upgrade to noise cancellation microphones.
Unfortunately, microphone problems are in plenty and can show up at any time. The good news is we address a huge chunk of them, so your sound is not interrupted.
That wraps up this article. If your solution isn’t covered in this article but was instrumental in fixing this problem, feel free to share it with us in the comment section below.
Read our disclosure page to find out how can you help Windows Report sustain the editorial team. Read more


Improve this guide

User forum
0 messages