Windows 11 Update Not Showing: How to Fix it in 7 Steps
This issue prevents the installation of the new OS
Key notes
- A lot of users have reported being the Windows 11 update not showing in Windows 10 on the Windows Update tool.
- If you using a PC that meets that minimum requirement, you should receive the update in a while since the roll-out is in a phased manner. However, there are ways to make the jump even sooner.
- Check for any issues with the Windows Update, namely, if they are paused, stuck, or the presence of conflicting programs.
- Also, learn how to install Windows 11 on unsupported PCs.

I’m sure many of us were excited about the release of Windows 11, but like me, you might have noticed that Windows 11 is not showing up in Windows Update. This can be due to a variety of reasons, such as compatibility issues and the phased rollout process.
If you’ve been eagerly waiting for the Windows 11 update to appear in your Windows Update section without success, you’re not alone. In this article, I’ll share multiple solutions to help you install Windows 11 on your PC.
Let’s navigate through the reasons behind the absence of the Windows 11 update and explore effective methods to ensure a successful upgrade. Together, we’ll overcome this hurdle and experience all that Windows 11 has to offer!
Why don’t I see the Windows 11 update?
A large number of computers wouldn’t be able to upgrade to Windows 11 owing to the strict system requirements. And Microsoft has its reasoning for that. Also, if you find Windows 11 23H2 not showing up, it could be a problem with compatibility or an issue at your end to blame.
Can my PC run Windows 11?
To check whether a computer can run Windows 11, Microsoft has released the PC Health Check app. Just download and install the app, run it, and you will find out whether or not your system is compatible.
If you get the message This PC meets Windows 11 requirements, your computer is compatible. Head over to the next section to find out ways to make the upgrade even if Windows 11 is not showing up in Windows Update.
For those of you who see This PC doesn’t currently meet the Windows 11 system requirements, you wouldn’t be receiving the upgrade via Windows Update. Head over to the end to find out how you can install Windows 11 on an unsupported PC.
What can I do if the Windows 11 update is not showing up?
1. Resume Windows Update
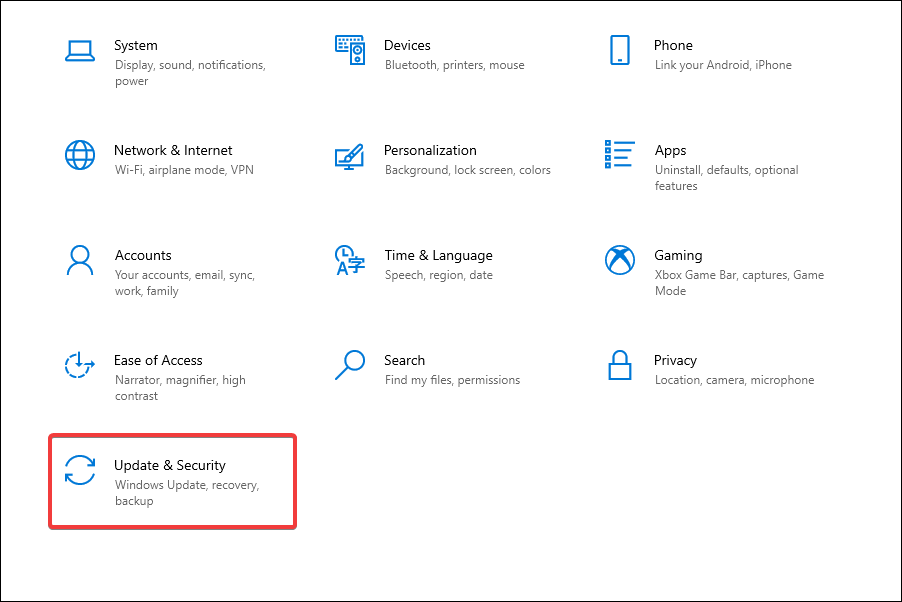
- Press Windows + I to launch the Settings app.
- Select Update & Security from the various options listed here.

- In the Windows Update tab that opens by default, check if there is a Resume Updates button on the right. If there’s one, click on it to start receiving updates.
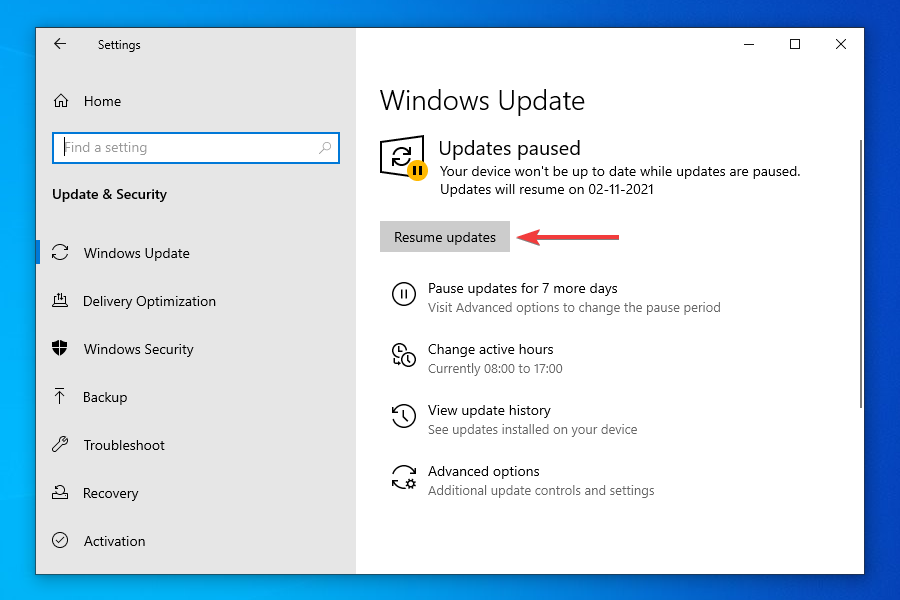
- Your system will now automatically start scanning for any available update including those for Windows 11.


If you have paused updates, you wouldn’t be receiving any, including the one for Windows 11. Even if you don’t remember doing it, there’s no harm in cross-checking before we proceed further.
After you enable updates, if an upgrade for Windows 11 is available, it would be shown in Windows Update, and subsequently, downloaded and installed on your computer.
2. Reboot the computer
- Navigate to the desktop and press Alt + F4 to launch the Shut Down Windows box.
- Click on the dropdown menu and select Restart from the list of options.

- Click on OK to restart the computer.

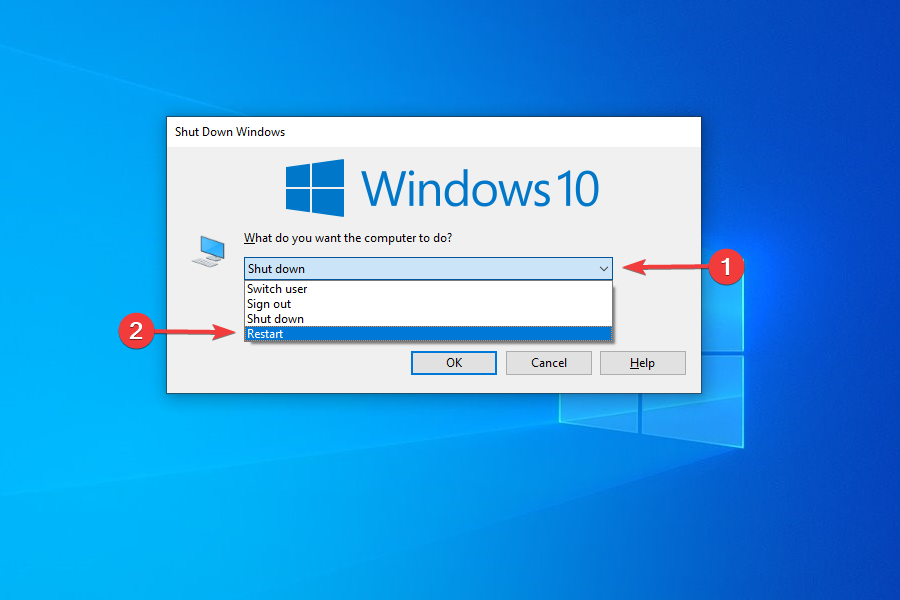

Before restarting, make sure to save any open files to avoid data loss. Rebooting the computer restarts the OS and fixes any trivial bugs that may be interfering with the Windows 11 update.
3. Run the Windows Update troubleshooter
- Press Windows + I to launch the Settings app.
- Select Update & Security from the list of options listed in the Settings.

- Select Troubleshoot from the tabs listed in the navigation pane and click Additional troubleshooters on the right.

- Click on Windows Update.

- Click Run troubleshooter to diagnose and fix issues preventing your PC from receiving the update for Windows 11.

- The troubleshooter will now start running. Follow the instructions and choose the appropriate response, if and when prompted, to complete the process.

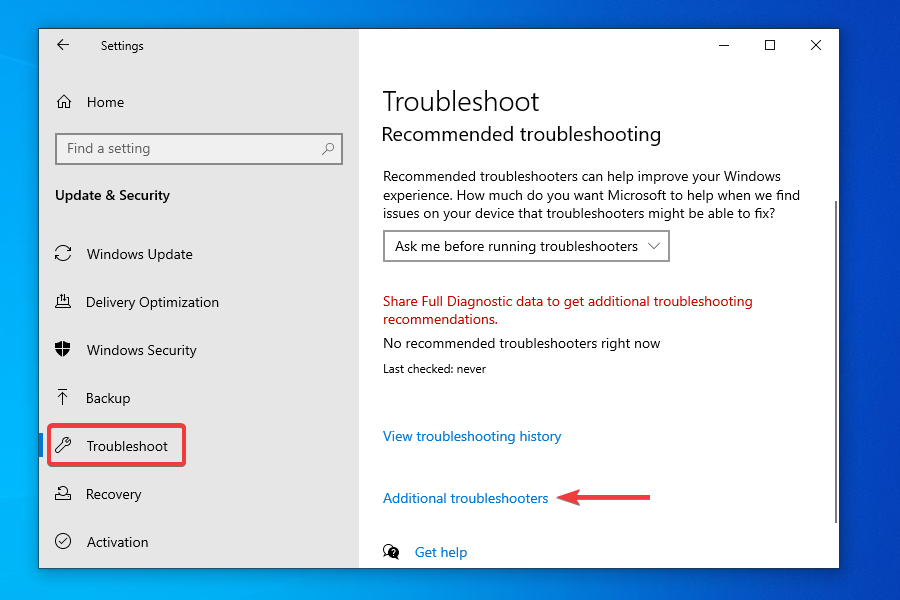

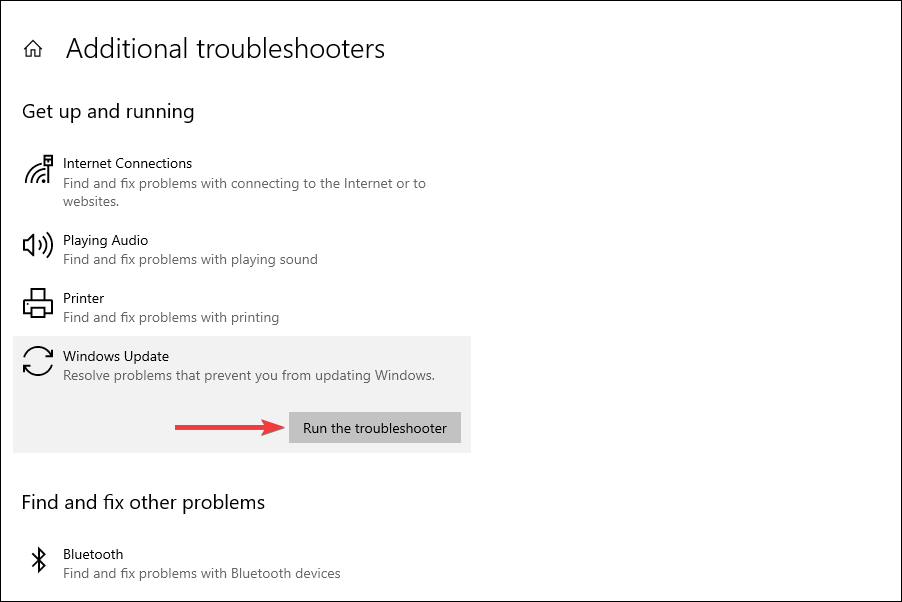
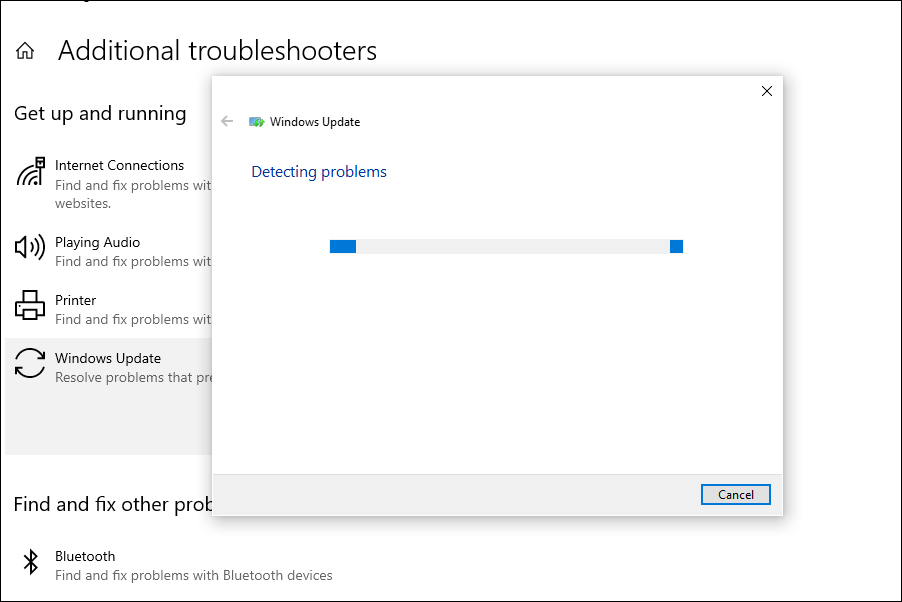
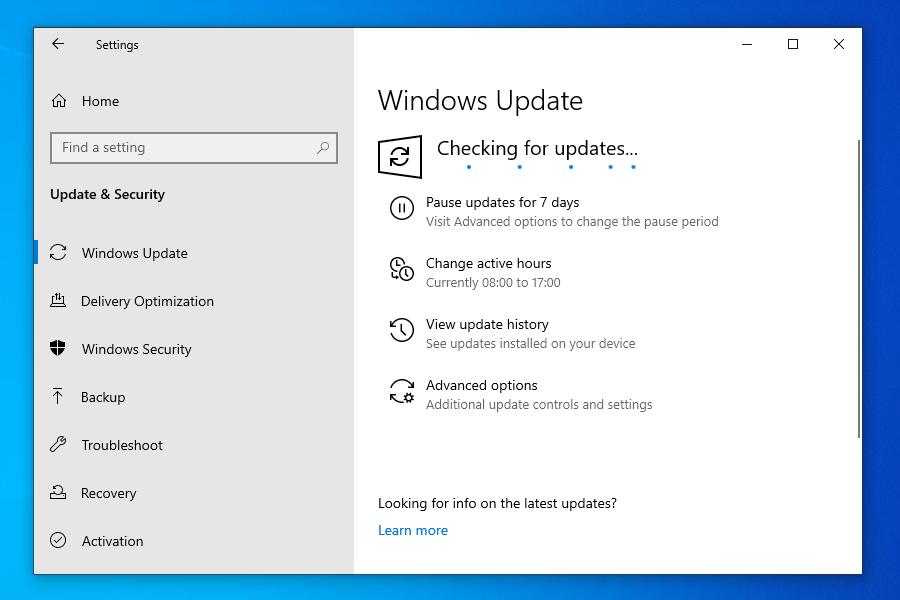
The built-in troubleshooters offered by Microsoft are excellent in identifying and fixing small bugs, misconfigured settings, and other issues. After the troubleshooter is done running, check if Windows 11 is now showing up in Windows Update.
4. Repair Windows Update components
Although you are required to repair or reset Windows Update components when encountering an error, it may also help you get the Windows 11 update in this case.
If they have become corrupt or have run into a bug leading to the Windows 11 not showing up in the Windows update issue, repairing or resetting them should come in handy.
If you are having issues with the Windows update, you can always fix the corrupted files with the help of specialized repair software.
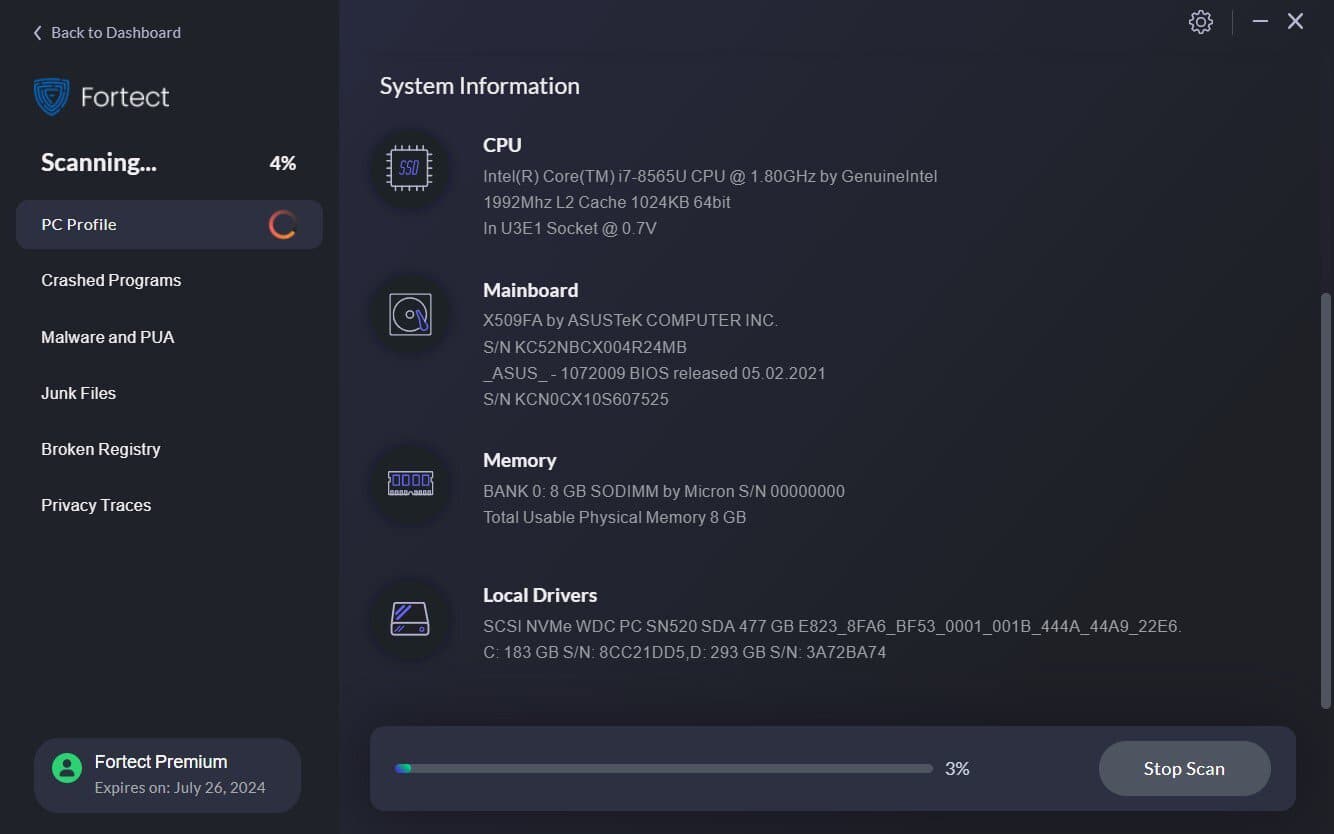
Fortect fixes these issues automatically by repairing corrupted system files. Once restored, your updates install normally, keeping your PC secure and up to date with the latest improvements.
This is how you can fix Windows Update errors with Fortect:
- Install and launch Fortect.
- Run a full system scan.
- Let Fortect replace faulty update files.
- Restart your PC and install updates.
Disclaimer: In order to perform some operations, this software must be updated to the premium plan.
5. Restart the Windows 11 update
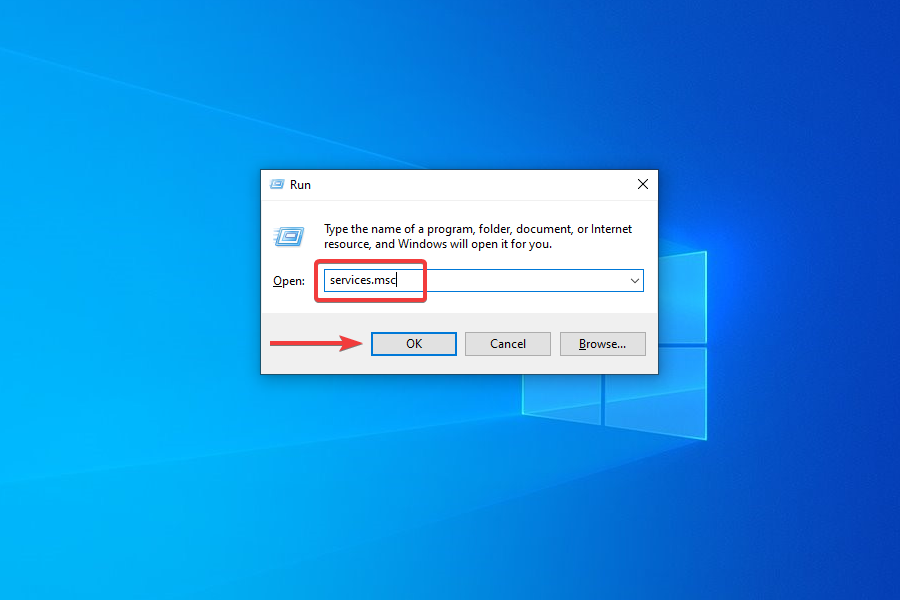
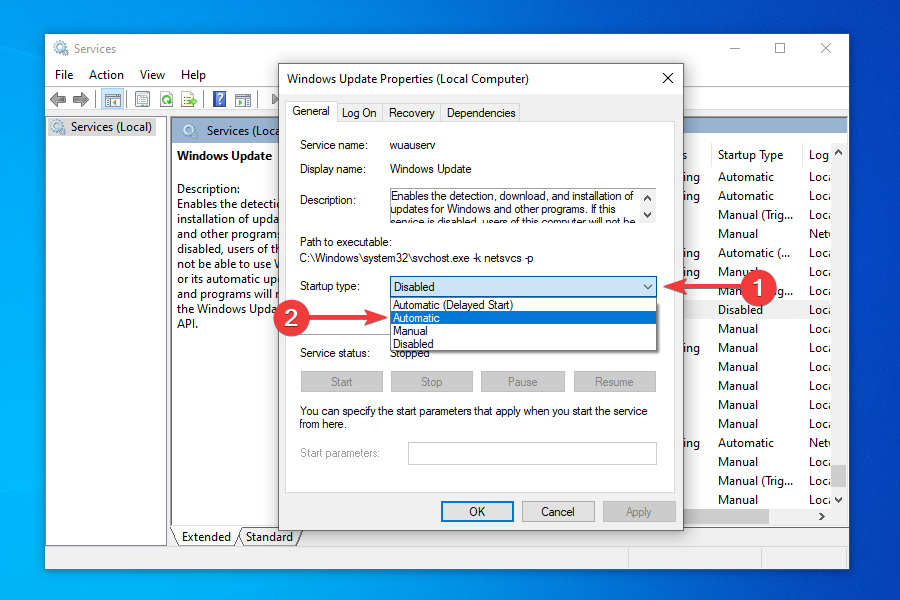
- Press Windows + R to launch the Run command.
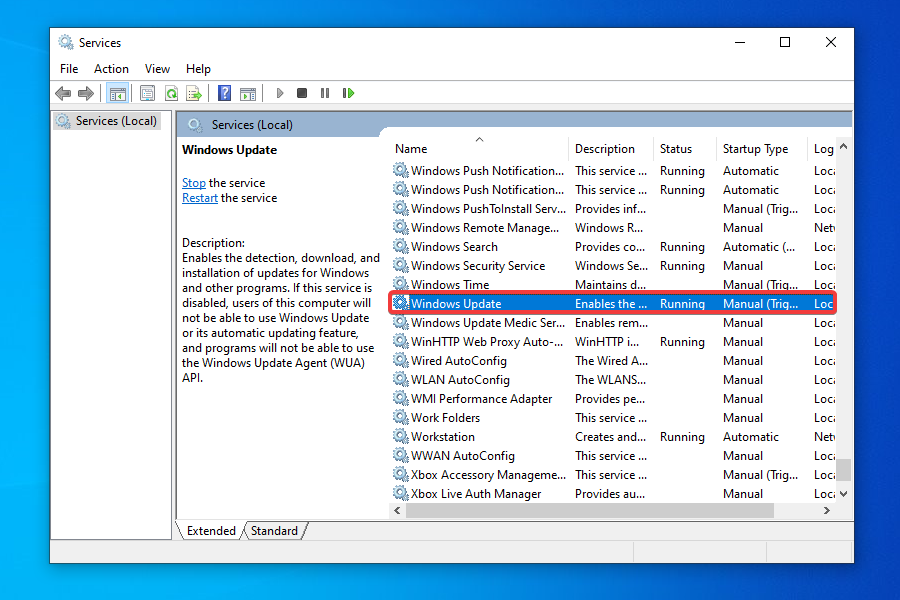
- Type services.msc in the text field, and either click on OK or press Enter to launch the Services app.

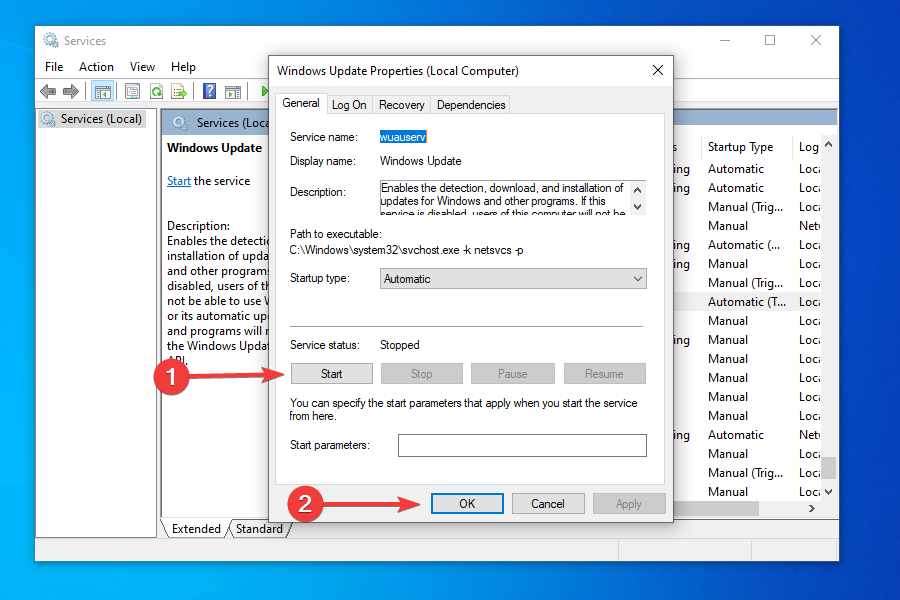
- Locate and double-click on the Windows Update service.
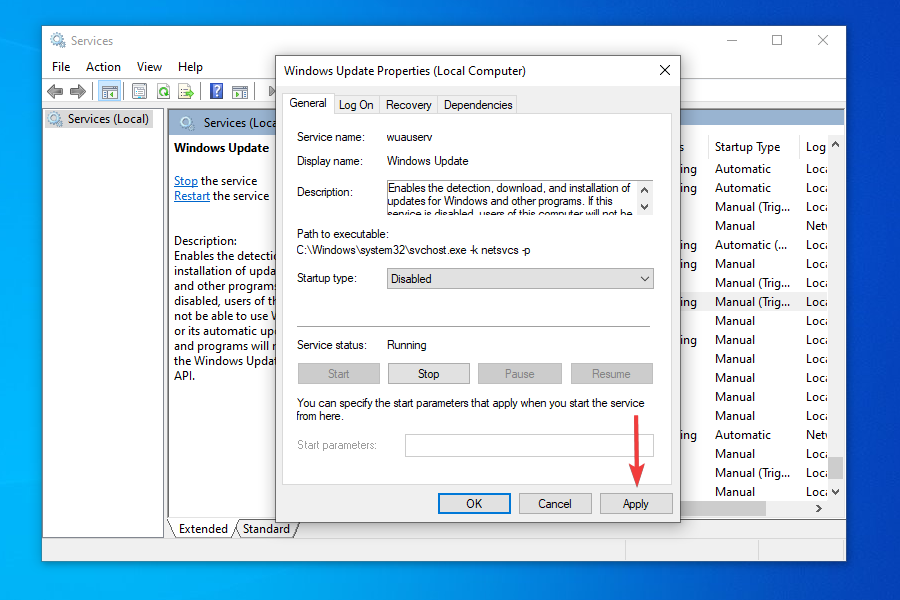
- Click on the Startup type dropdown menu and select Disabled from the list of options that appear.
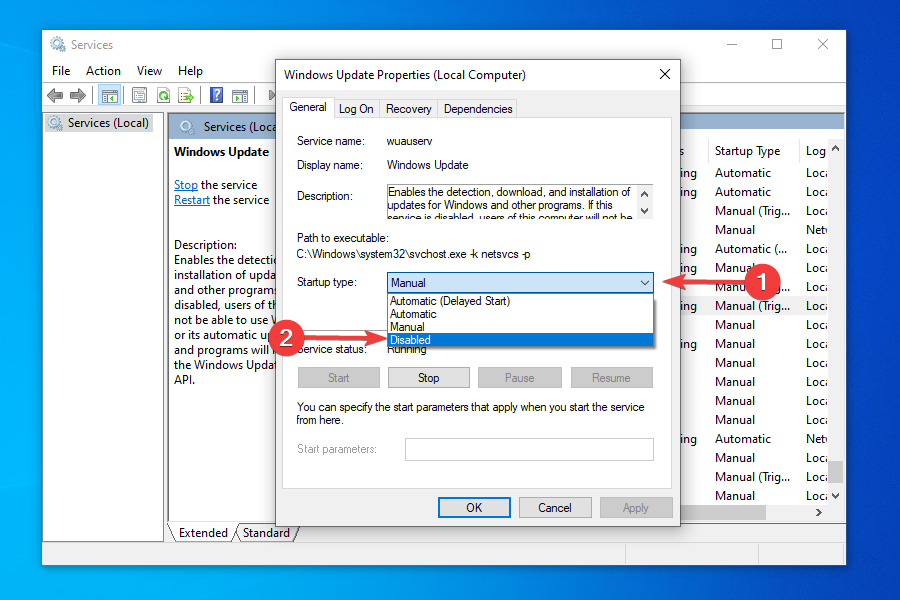
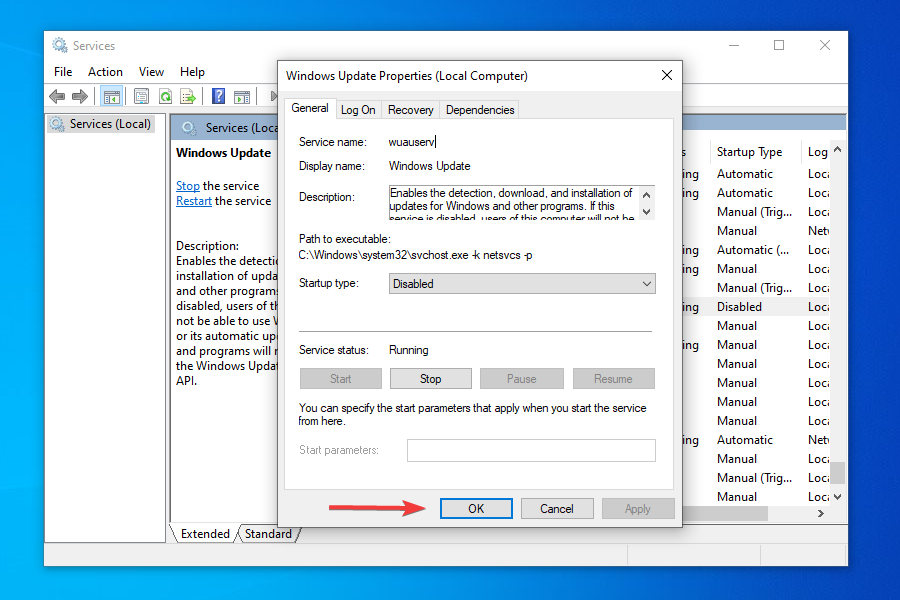
- Click on Apply to save the changes.
- Next, click OK to close the properties window.
- Close the Services app.
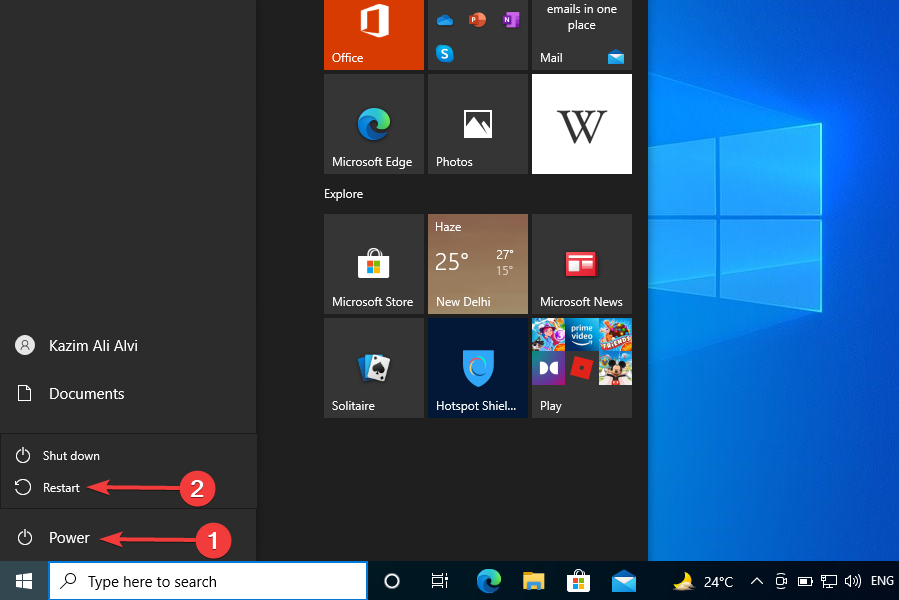
- Now, you need to reboot the computer. To do that, press the Windows key, click on the Power button, and select Restart from the menu that appears.

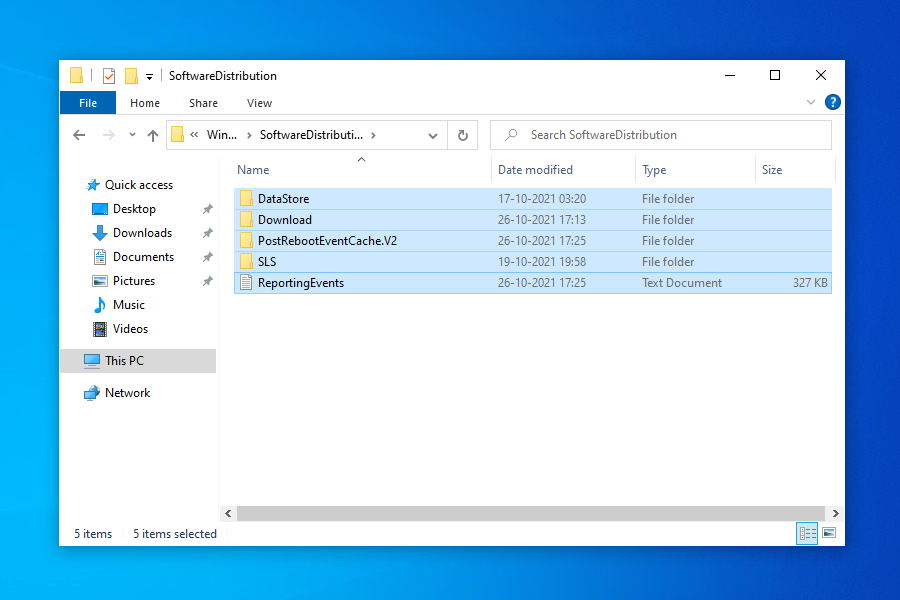
- Press Windows + E to launch the File Explorer, and navigate to the following path or paste it in the addressbar at the top and hit Enter.
C:\Windows\SoftwareDistribution - Press Ctrl + A to select all the files saved here, and hit the Del key to delete them.

- Choose the appropriate response in case a confirmation box pops up.
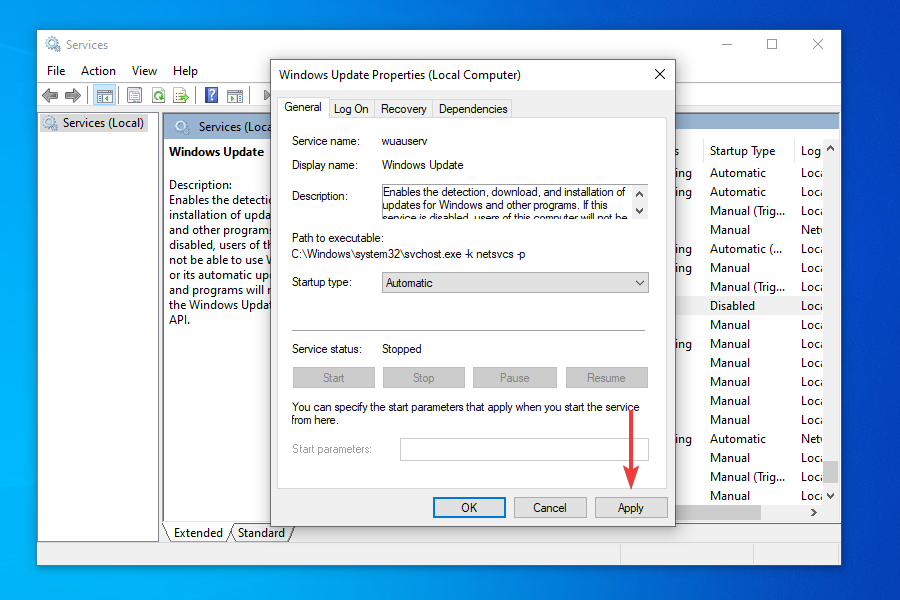
- Now, again launch the Services app as you did earlier, and double-click on the Windows Update service.
- Select Automatic from the Startup type dropdown menu this time.

- Click on Apply to save the changes.

- Click on Start under Service status to run the service, and then click on OK at the bottom.
- Go to the Windows Update section in Settings and check if you can now install Windows 11.


In some cases, the update for Windows 11 may seem stuck at 100% for hours without any progress. In such cases, following the steps mentioned here will get things up and running and allow you to upgrade.
6. Disable or uninstall conflicting apps
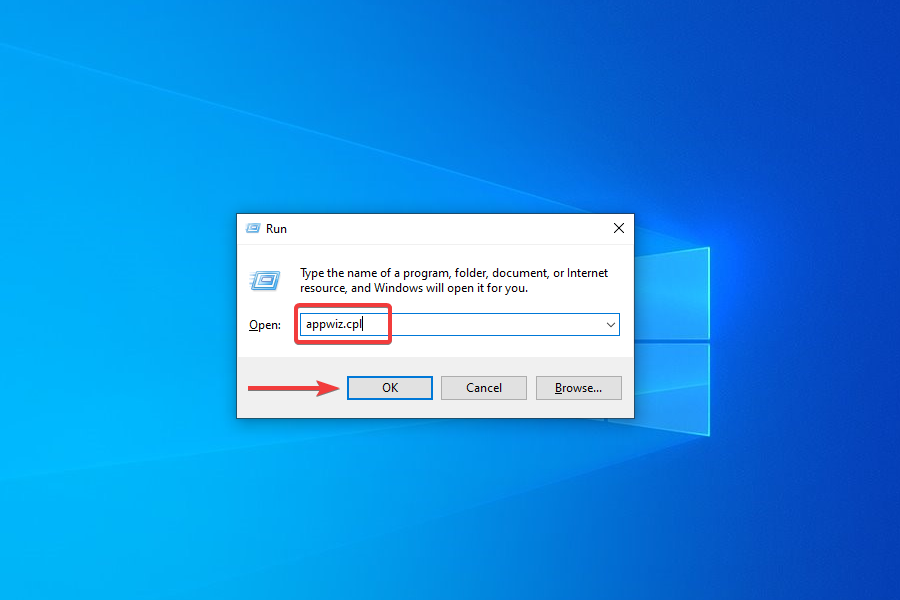
- Press Windows + R to launch the Run command.
- Enter appwiz.cpl in the text field and click on OK or hit Enter to launch the Programs and Features window.

- Locate and select the app you want to remove, and click on Uninstall at the top.

- Choose the appropriate response in case a confirmation box pops up.

To disable an app, you can go to its built-in Settings and turn on/off the required toggle or choose the appropriate response.
The method to disable each app is different and there should be an option for it somewhere in the app’s built-in Settings. Search the FAQ section on the official website for the program to find out the exact steps.
If disabling the app didn’t work or you couldn’t find the option for it, follow the steps above to uninstall the app.
Certain programs are known to block the Windows Updates, thus leading to the current issue.
You should look out for third-party firewalls and disable or uninstall them. Also, apps like Pi-hole or other similar ones, have been found to be the culprit, and uninstalling them fixed the problem.
Once you are done disabling or uninstalling the problematic apps, check if you are able to find and install Windows 11 from Windows Update.
7. Use the Installation Media
 NOTE
NOTE
- Plug in the flash drive to your sytem.
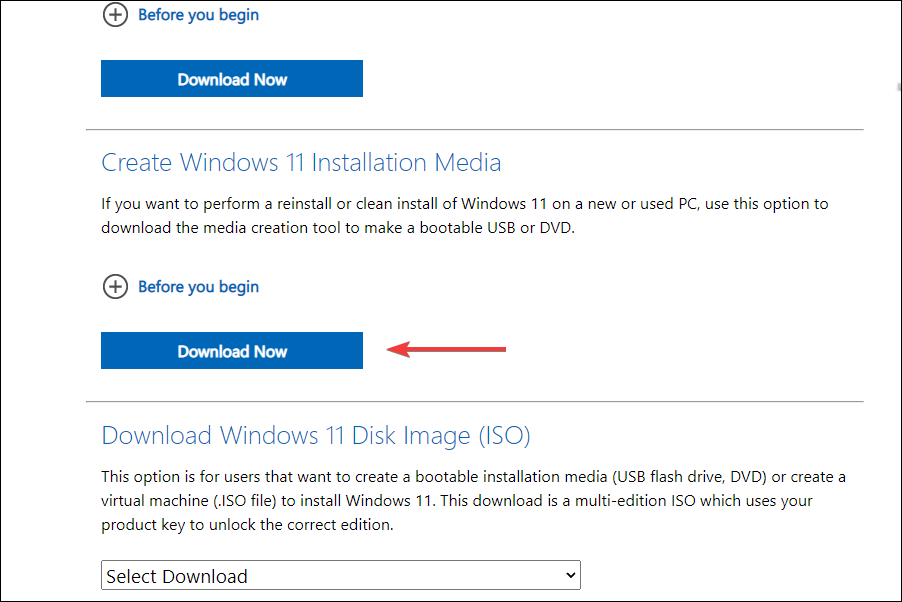
- Go to the download page for Windows 11 and click on Download Now under Create Windows 11 Installation Media.
- Navigate to the location where the downloaded file is saved and double-click on it.
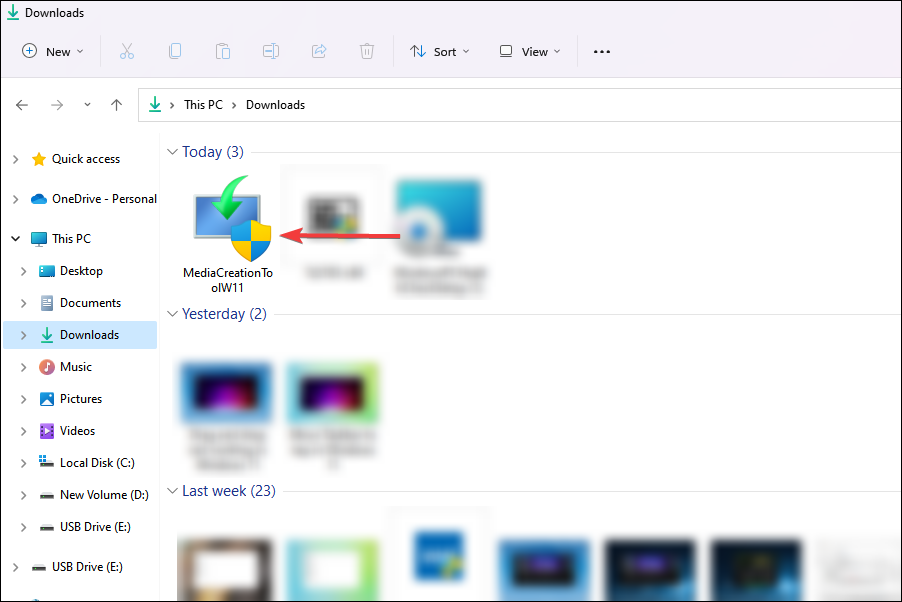
- Click Yes on the UAC prompt that appears.
- The setup will take a few moments to get things ready.
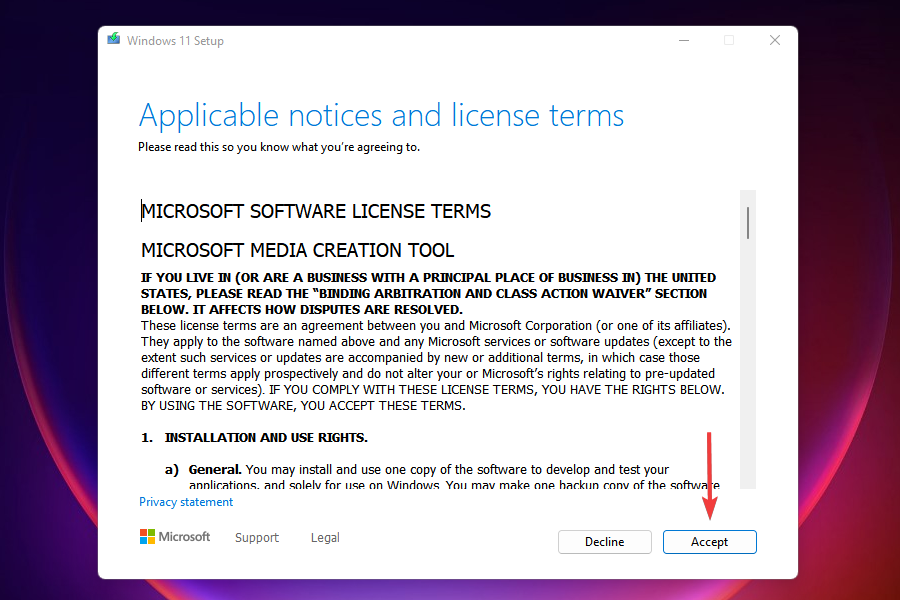
- Click on Accept to agree to the license terms.
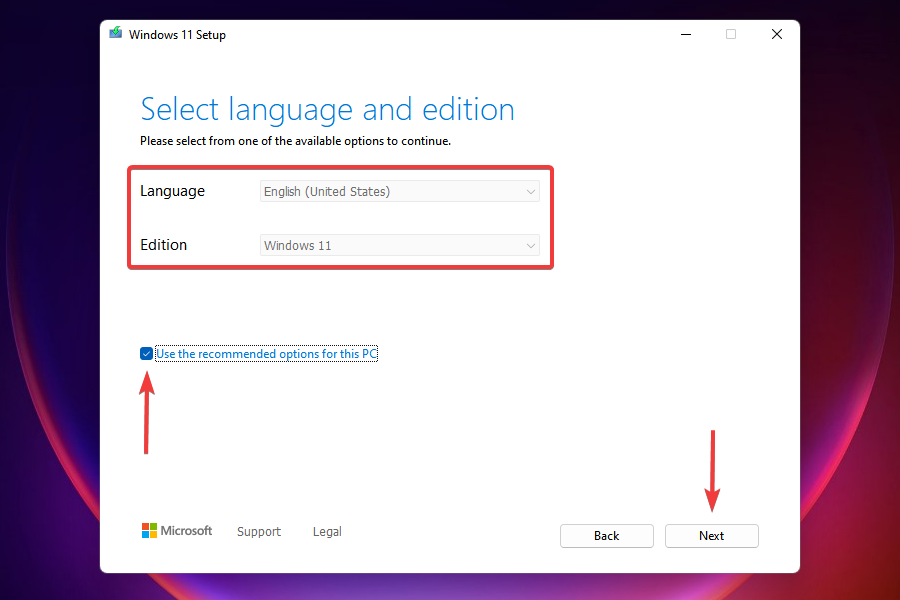
- Now, you will find the recommended language and edition already selected. In case you want to make any changes, untick the checkbox for Use the recommended options for this PC and choose the appropriate settings. Finally, click on Next.
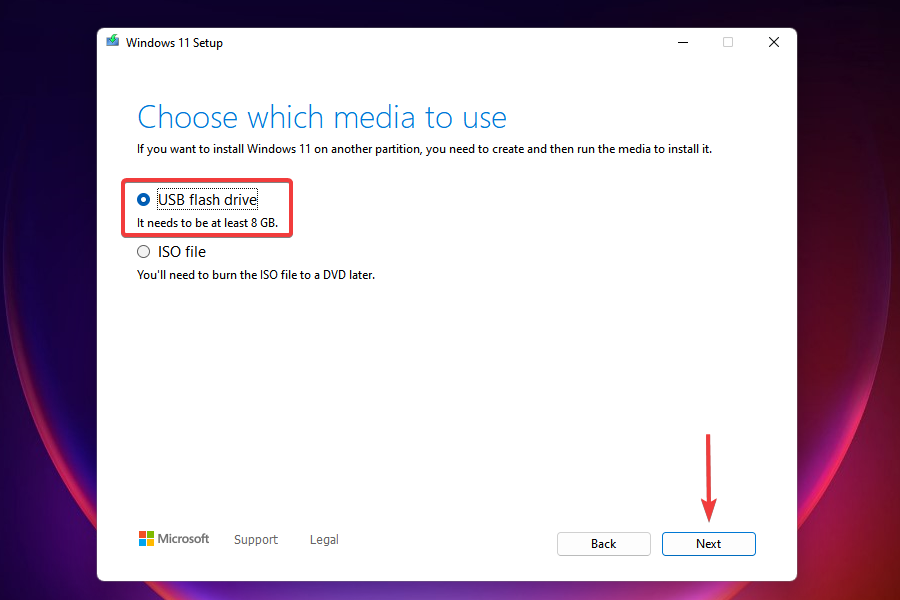
- Choose the USB flash drive option and click Next.

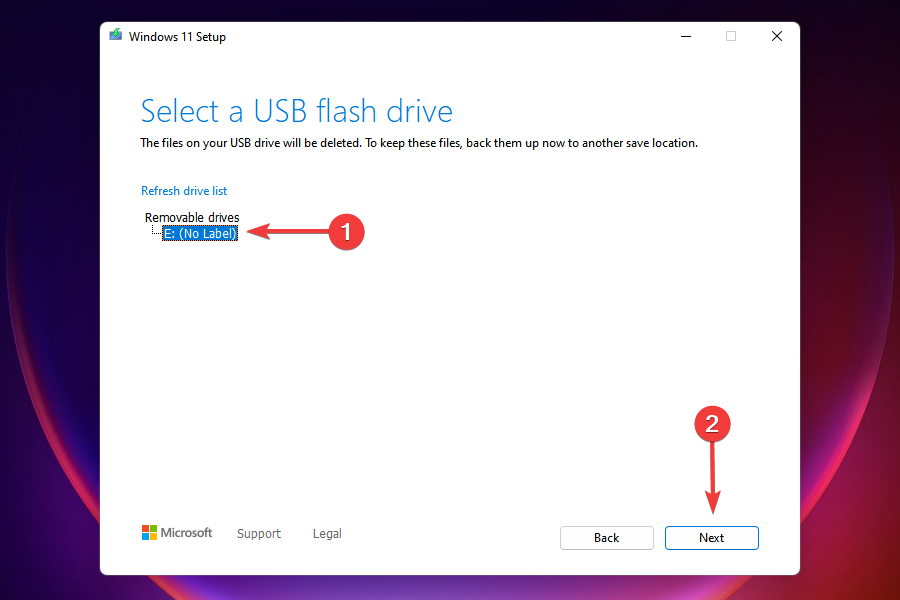
- Select the removable drive that you earlier plugged in from the list and click on Next.

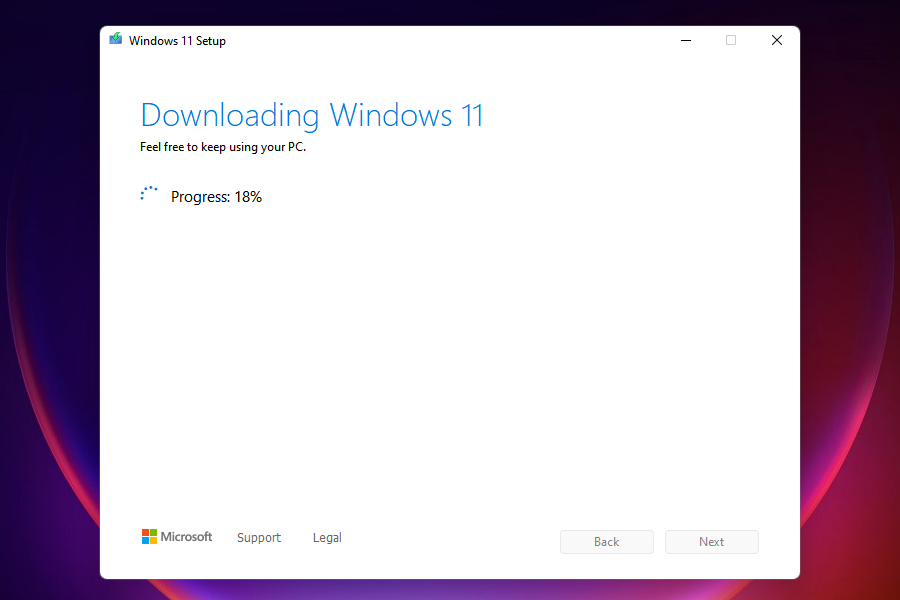
- Wait for the setup to create a bootable USB drive. You can monitor the progress in this window.
- After the bootable flash drive is created, click on Finish to close the setup.
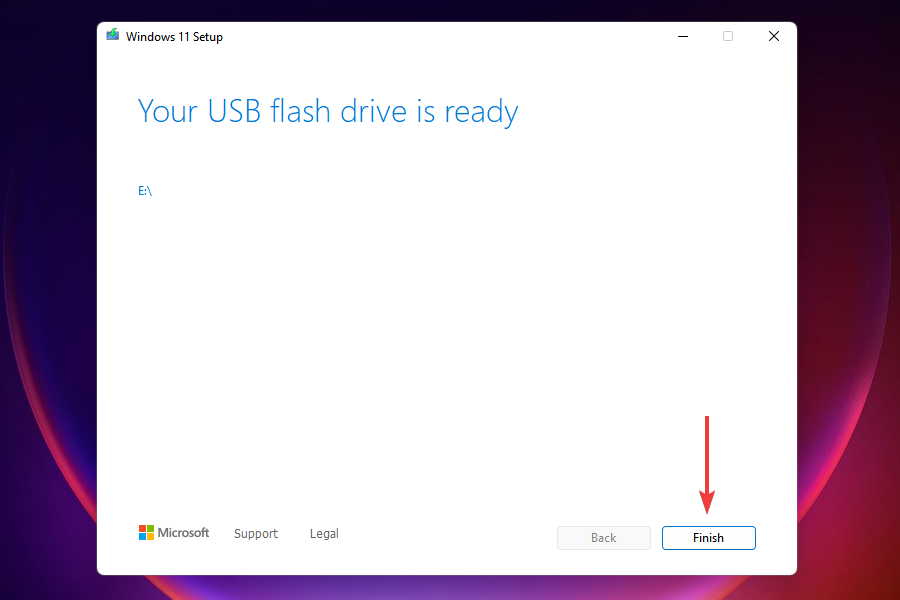


Once done, you can now easily install the OS from the bootable USB drive. Although the guide is for Windows 10, it would assist you when installing Windows 11 as well since the process remains the same.
After the flash drive is booted, follow the on-screen instructions to complete the installation process.
A major advantage of this method is that you will always have a bootable USB at your disposal, which would make things a lot easier in case you have to reinstall Windows 11.
We’ve written extensively about the issue of people being unable to complete the upgrade process to Windows 11 or not seeing the option at all. Here are some resources we’re suggesting for you to check out:
- How to fix Windows 11 Windows Update errors
- How to fix Windows 11 errors after update from Windows 10
- How to make Windows 11 update after restart
- How to fix Windows Update troubleshooter in Windows 11
- How to fix a stuck Windows 11 download
- How to solve Windows 11 installation woes
Can I use the Windows 11 Installation Assistant to upgrade?
Yes, the Windows 11 Installation Assistant is another tool at your disposal to upgrade to the latest iteration. However, you cannot use it if the PC doesn’t meet the minimum system requirements, since the Installation Assistant wouldn’t run.
You can download and use the Windows 11 Installation Assistant with the help of our guide. Simply, go to the How to use the Windows 11 Installation Assistant? heading and follow the steps listed there.
What do I do if my PC doesn’t meet the system requirements for Windows 11?
As promised earlier, we will now list out the ways you can install Windows 11 on an unsupported PC. However, Microsoft has stated that such PCs may have compatibility issues and might not receive updates, including those for security. You will thus be exposing the system to a major risk.
However if you have made up your mind, you can install Windows 11 after bypassing SecureBoot and TPM checks. This would require making some minor changes to the Registry.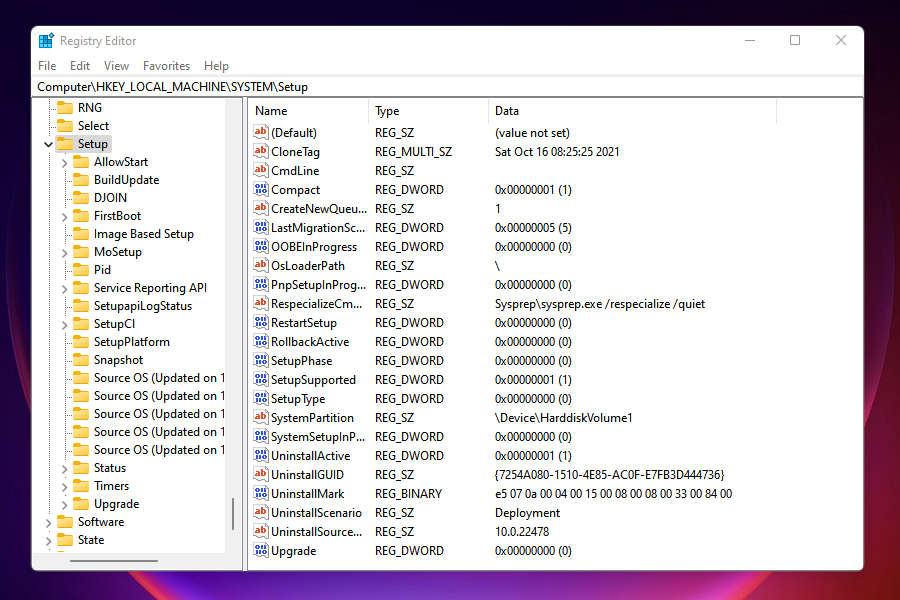
It’s also possible to install Windows 11 without TPM, another workaround users had been looking for due to the TPM 2.0 requirement.
If you are still unsure, learn how to install Windows 11 on a Virtual Machine, try it out, and then make the upgrade. Nevertheless, if you have already made the jump, it’s easy to roll back from Windows 11 to Windows 10.
By the time you reach the end of this article, you know many ways to install the latest iteration from Microsoft on both supported and unsupported PCS. Also, the Windows 11 not showing up in the Windows Update issue would be fixed.
Let us know which method worked for you and your experience thus far with Windows 11.
Read our disclosure page to find out how can you help Windows Report sustain the editorial team. Read more


Improve this guide


User forum
0 messages