Remote Audio Is Not Working in Windows 11: 5 Ways to Fix It
Thanks to our tested solutions, you'll solve the issue in no time
4 min. read
Updated on
Read our disclosure page to find out how can you help Windows Report sustain the editorial team. Read more
Key notes
- If you're Windows 11 remote audio not is working, first, check to see if the audio on your local PC is enabled.
- Also, this issue sometimes derivates from a permission problem.
- Group policy settings are where all the permission regarding the remote audio are stored, so check the settings to see if anything is disabled which can cause the issue.
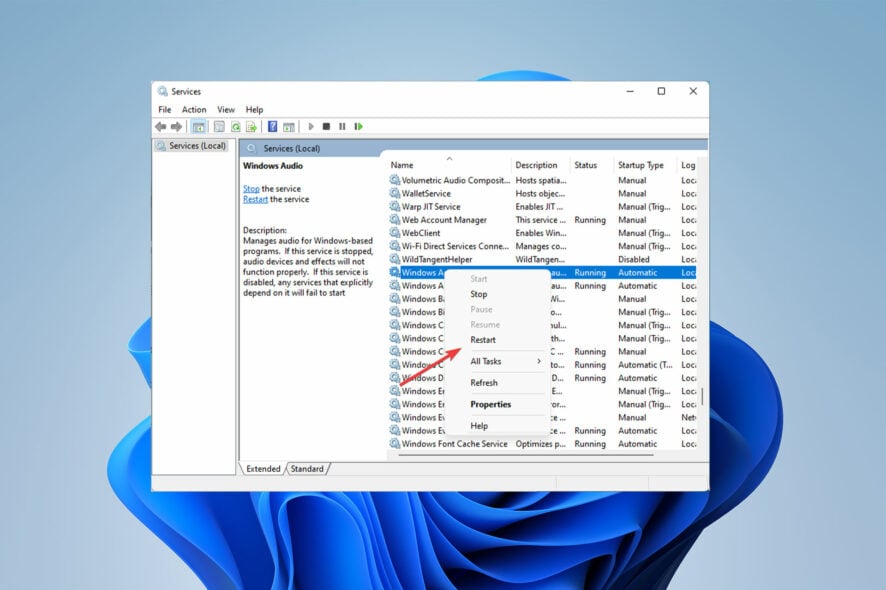
Remote Desktop is a cool feature and practical software that has recently gained popularity because of the pandemic. However, this capability could have certain flaws, like Windows 11’s remote audio not working.
The root cause of this problem might be anything from a simple audio problem to a driver update or compatibility problem. Whatever the root of the issue, there is a straightforward solution.
By reading the article, let’s examine the common causes and solutions for remote audio not working in Windows 10 and Windows 11.
Why is my audio not working on a remote desktop?
When you remotely access a computer, Windows Remote Desktop Connection often allows you to play sound from that computer on your local PC. There are three common reasons you might not be able to hear the sound from the remote PC.
- You haven’t enabled audio on your local PC
- The option for audio and video playback redirection is disabled
- You have disabled Allow audio recording redirection
How do I fix my audio if it’s not working on a remote desktop in Windows 11?
1. Enable Windows Audio Service
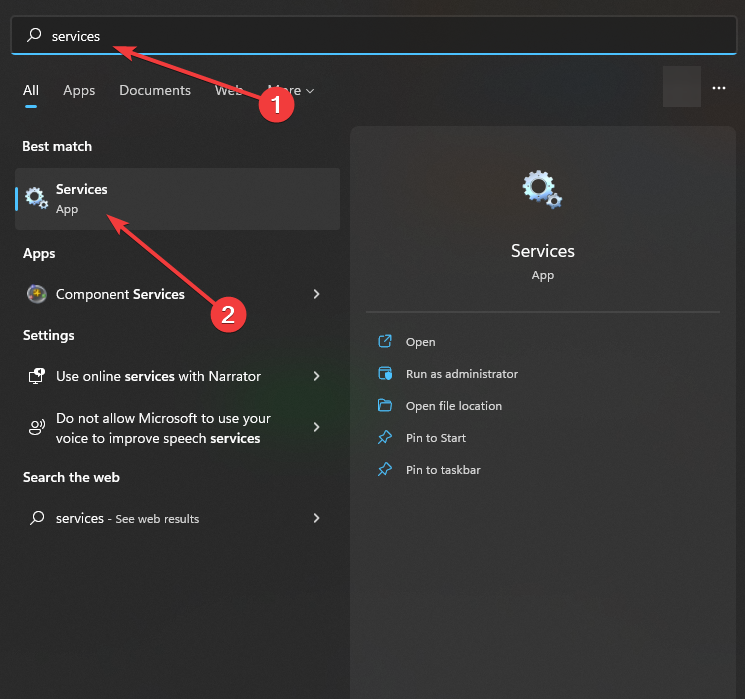
- Enter Services in the Start menu search box to access Services.
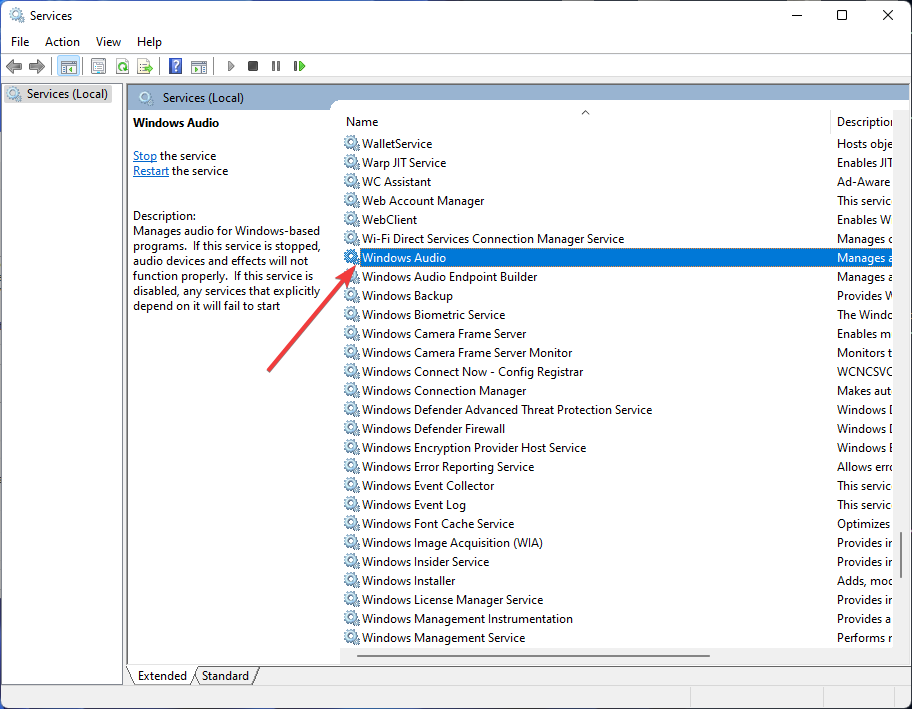
- Find Windows Audio. Double-click it.
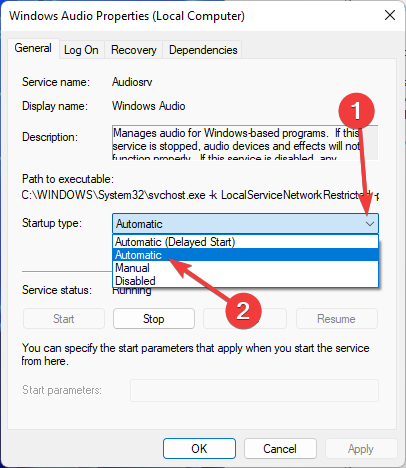
- In the Startup type menu, select Automatic.
If Windows Audio Service is disabled in this list, you will face Windows 11 remote audio not working after the update.
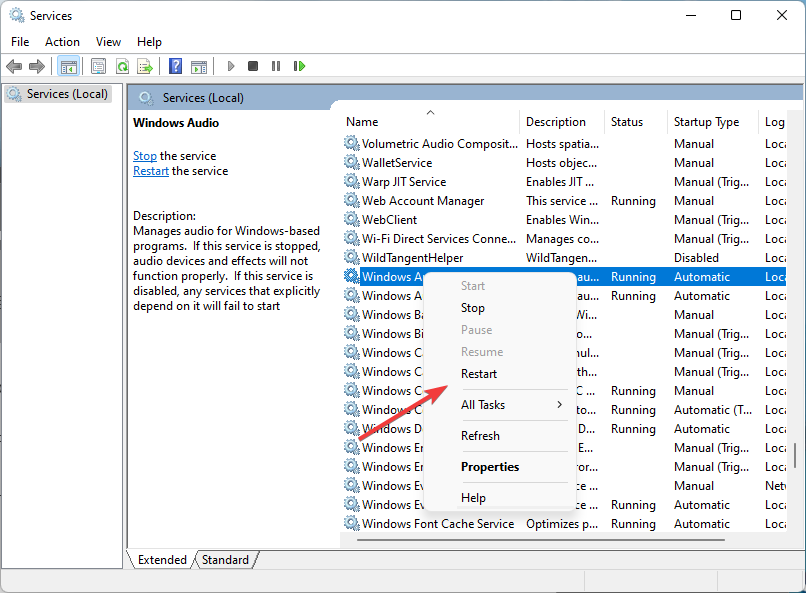
2. Restart the Windows Audio Service
3. Check the Group Policy setting on the host computer
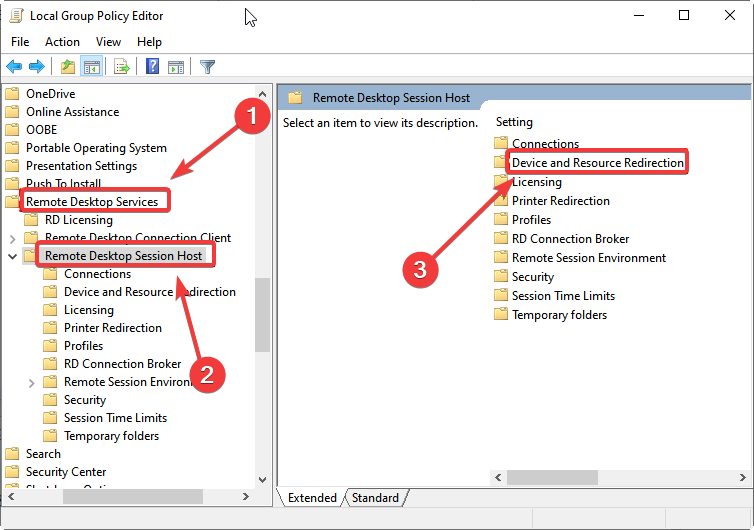
- To launch the Local Group Policy Editor window on the host remote computer, press Win + R to open the Run dialog box, type gpedit.msc, and then click OK.
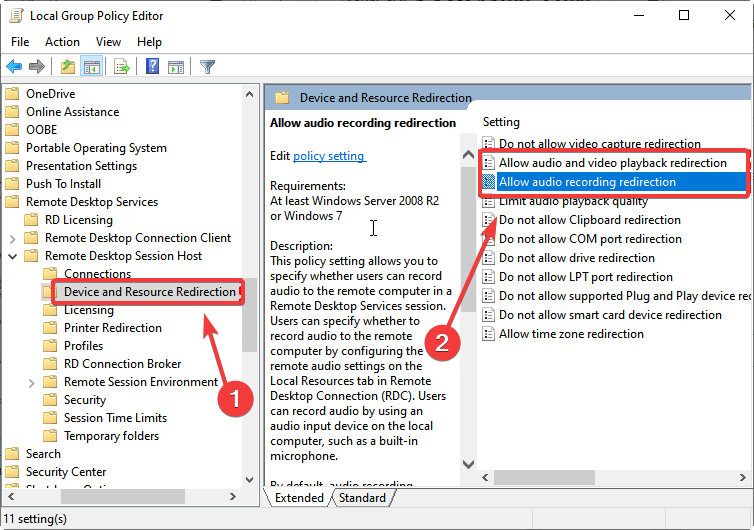
- Follow this path: Local Computer Policy, Computer Configuration, Administrative Templates, Windows Components, Remote Desktop Services, Remote Desktop Session Host, Device and Resource Redirection.
- Click on Device and Resource Redirection, then click on Allow audio and video playback redirection and Allow audio recording redirection, and make sure they are Enabled.
The Group Policy setting is complicated enough for new users to get lost in it, so follow the instructions mentioned above.
4. Check the Group Policy setting on the client’s computer
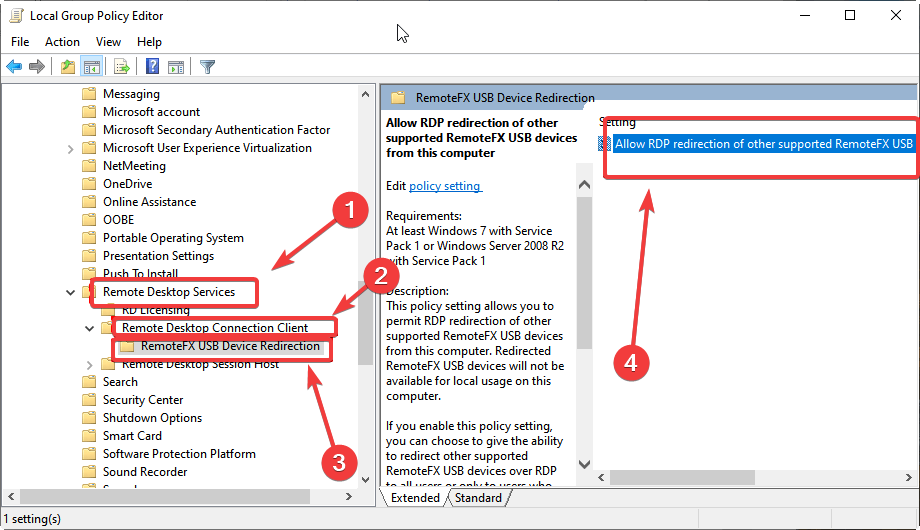
- On your local computer, open the Group Policy Editor window.
- Follow this path: Local Computer Policy, Computer Configuration, Administrative Templates, Windows Components, Remote Desktop Services, Remote Desktop Connection Client, RemoteFX USB Device Redirection, Allow RDP redirection of other supported RemoteFX USB devices from this computer.
- Select Allow RDP redirection of other supported RemoteFX USB devices from this computer, and make sure it is Enabled.
5. Restart your PC
As a last resort to fix the remote desktop microphone not working, restarting the PC might fix the issue if there are any active bugs in the system.
How do I enable audio devices in Windows 11?
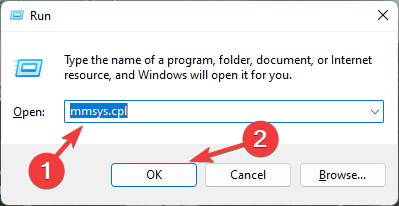
- Open Run by pressing Win + R.
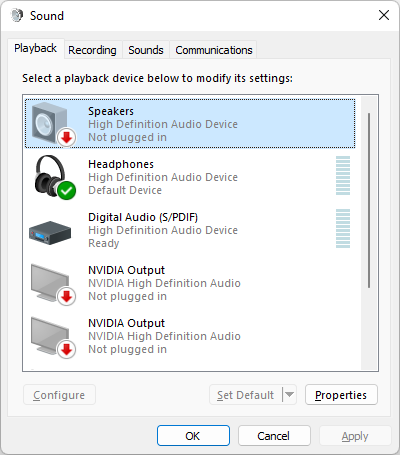
- Open the Sound control panel by entering control mmsys.cpl and click OK.
- Right-click on the disabled device and select Enable.
- To save the changes, click Apply and then OK.
By following the instruction above, you may be able to fix the issue without any professional help. The issue usually comes from permission problems; that’s why the group policy settings need to be checked to see if everything is in order or not.
Depending on what application you are using to access your computer remotely, Anyviewer or Anydesk, it would help if you checked the application settings before attempting any fixes.
We usually tend to ignore simple things like checking the settings and rush to the internet to find some technical fixes for the issue.
In the comment section below, let us know if you were able to fix Windows 11 remote audio not working issue.


User forum
0 messages