Windows 11 Screensaver Not Working: 7 Ways to Fix It
Restore your Power settings to default as a quick fix
Key notes
- Screensavers help keep your PC from looking bland when idle hence why they’re widely used.
- When your screensaver fails to work as it should, it could be a display issue which means you need to update your drivers.

If you’re running Windows 11, and your screensaver isn’t working properly, it might be because you have an older version of Windows installed or have recently upgraded to a newer version. Windows screensavers are a great way to add some personalization to your desktop.
They can be used as a cool backdrop for your computer or as a way to get rid of all the clutter on your screen. So, if you are searching for a solution to fix your Windows screensaver not working, then you are at the right place.
Why is my screensaver not working in Windows 11?
If you’re lost on why the screensaver is not working on your Windows 11, below are some possible causes:
- Virus infection – It’s possible that there’s a bug in Windows 11 that causes the screensaver to stop working after a few minutes of use.
- Corrupt user profile – You might have a corrupted user profile, especially if you didn’t create it correctly or tampered with some settings.
- New Windows updates – When a new version of Windows is released, there are usually some changes that can sometimes cause issues with your screensaver.
- Outdated/missing drivers – In some cases, if you’re using an older driver or have missing drivers, they may not be compatible with the latest version of Windows.
- Configurations – You may have incorrectly configured the screensaver settings.
How do I trigger the screensaver in Windows 11?
As usual, before you apply any of the slightly technical solutions listed below, we recommend you start with the following:
- Remove all connected peripherals such as mice, USB drives, or printers.
- Clean your mouse and mouse pad to ensure it doesn’t accidentally trigger the screen.
- Verify that you have enabled the screensaver settings.
- Ensure your PC’s sleep time is greater than the screensaver.
- Check if you have recently installed any new software and uninstall it, especially an app that is also a screen saver or program that might interfere with the screen saver.
- Try restarting your PC.
1. Update the display drivers
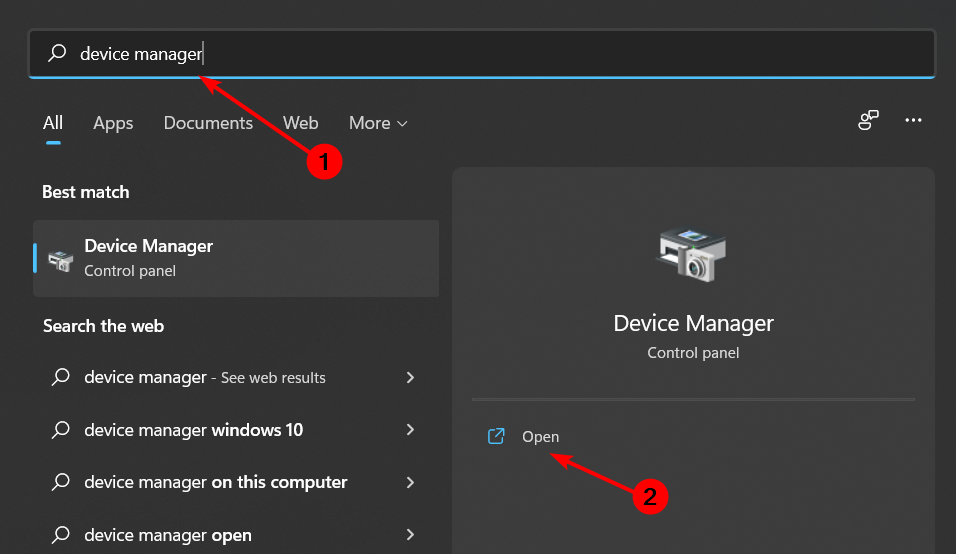
- Hit the Windows key, type Device Manager in the search bar, and click Open.
- Navigate to Display adapters and find your graphics card.
- Right-click on your graphics card and select Update driver.

- Select Search automatically for drivers.

If you have a Windows 11 screensaver that is not working and doesn’t want to go through the long method, you can try to update the display drivers using a third-party tool.
Outbyte Driver Updater scans your system for corrupted, missing, or outdated driver versions. Once it finds a faulty driver, it will download and install an updated version.

Outbyte Driver Updater
Quickly update your drivers with the newest versions and give Outbyte Driver Updater a try.2. Switch to a new user profile
If your screensaver is not working in Windows 11, it is possible that your current user account is corrupted. To get around this, the next time you log in, switch to a different user profile or copy your profile to a new one.
You can also create a new profile if you wish to do so. If this works, you will have confirmed that the previous profile is corrupted and needs to be repaired.
3. Run DISM and SFC scans
- Hit the Windows key, type cmd in the search bar, and click Run as administrator.

- Type the following commands and press Enter after each one:
DISM.exe /Online /Cleanup-Image /Restorehealthsfc /scannow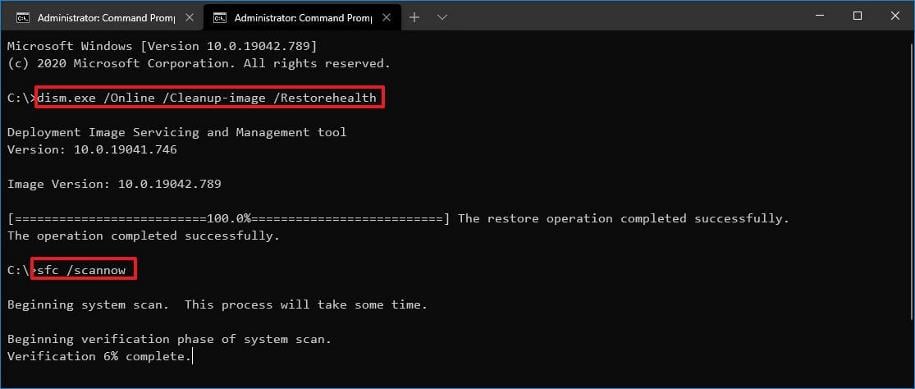
- Restart your PC.
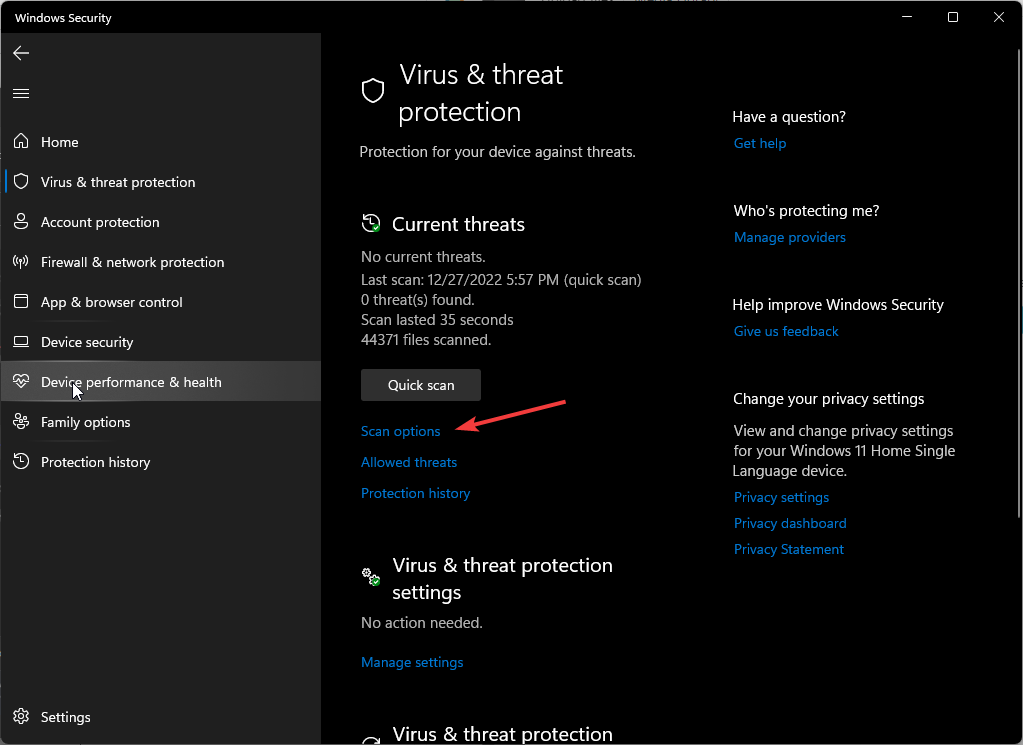
4. Scan for viruses
- Press the Windows key, search Windows Security, and click Open.

- Select Virus & threat protection.
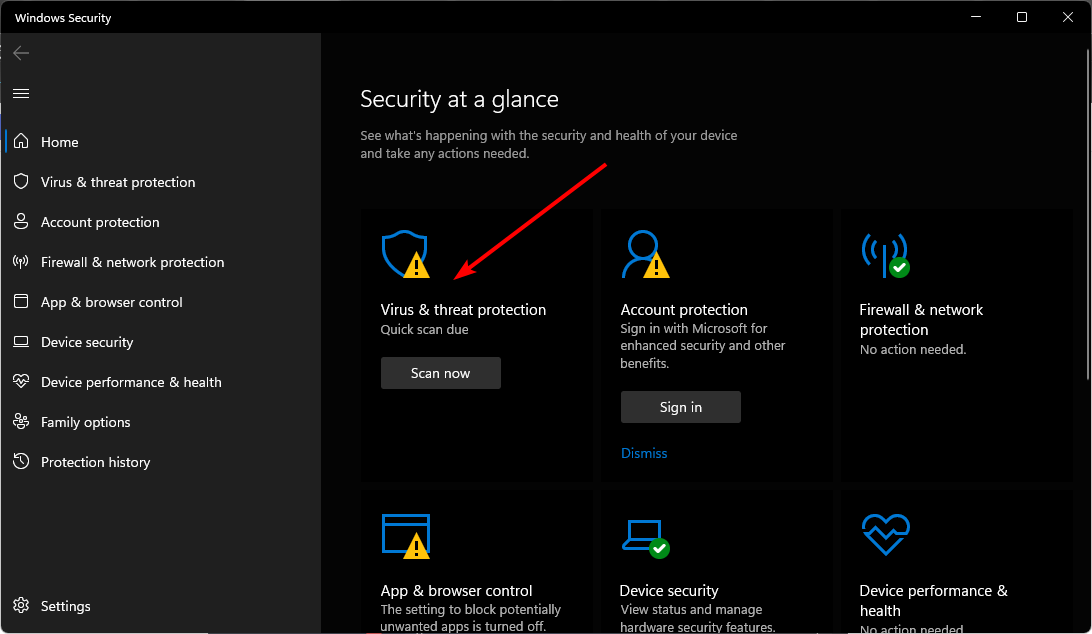
- Next, press Quick scan under Current threats.
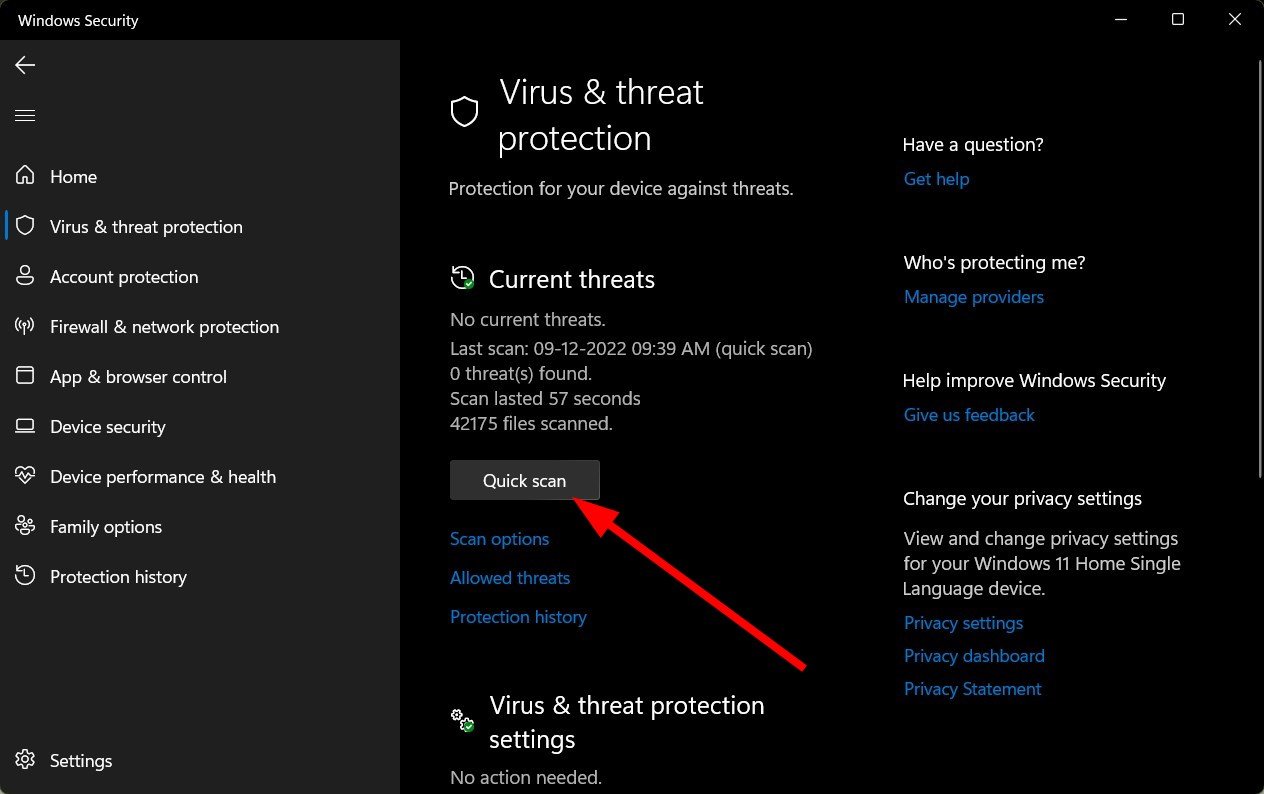
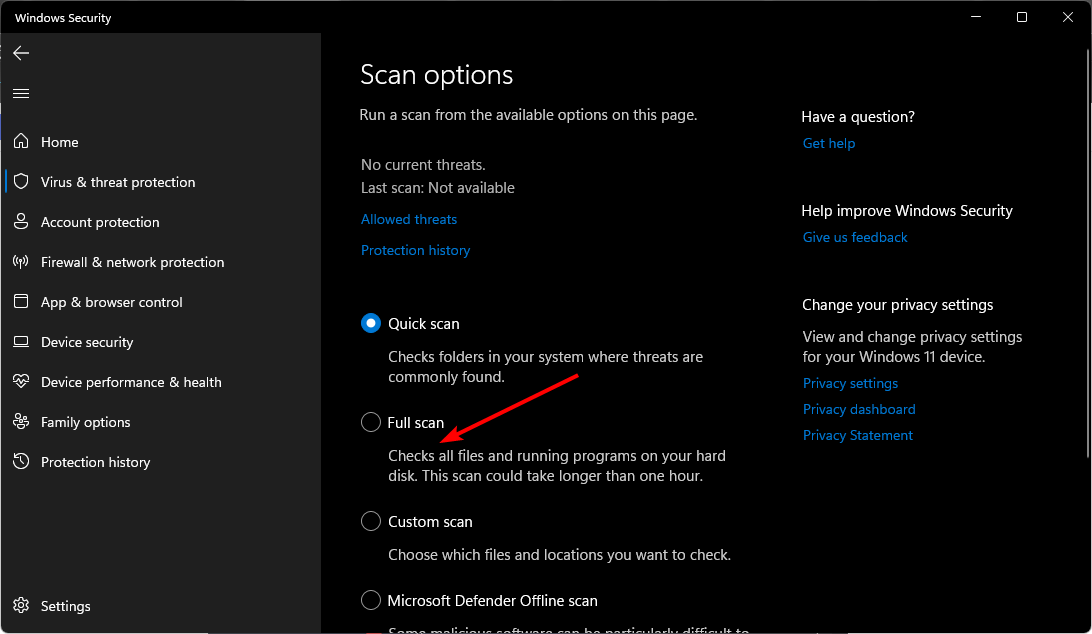
- If you don’t find any threats, perform a full scan by clicking on Scan options just below Quick scan.
- Click on Full scan to perform a deep scan of your PC.
- Wait for the process to finish and restart your system.
5. Check for Windows updates
- Hit the Windows key and click on Settings.

- Select Windows Update and click on Check for updates.
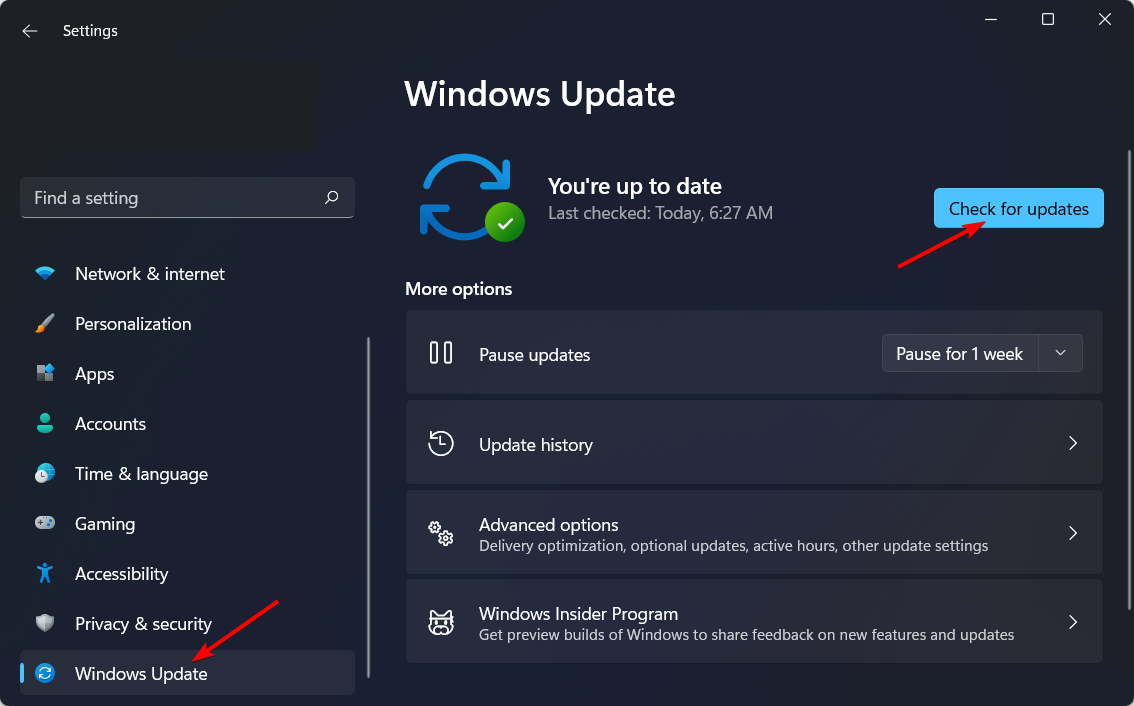
- Download and install if available.
6. Restore Power settings to default
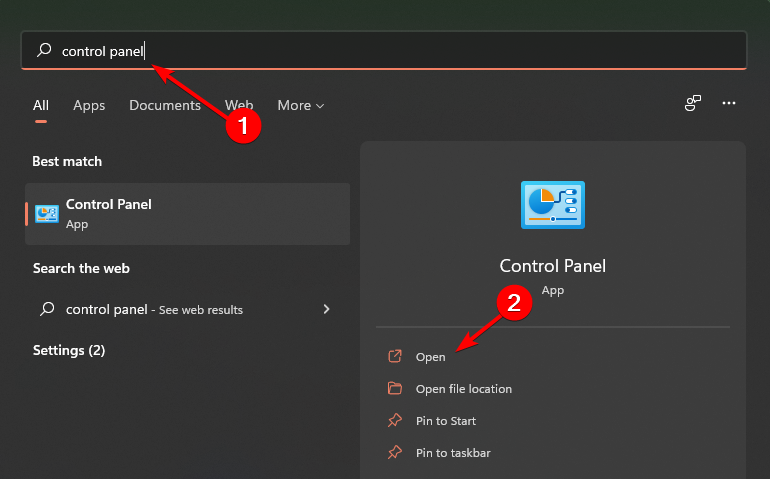
- Hit the Windows key, type Control Panel in the search bar, and click Open.
- Navigate to Power Options and click to Open.

- Select Change plan settings.
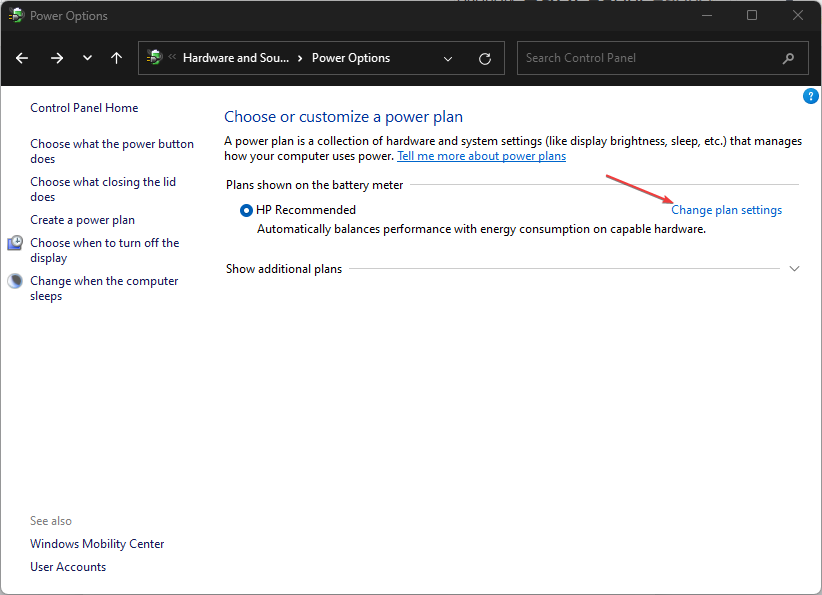
- Click on Change advanced power settings.

- In the Power Options dialog box that appears, select Restore plan defaults, then click Apply and OK to save changes.

- Restart your PC.
7. Perform a clean boot
- Hit the Windows + R keys to open the Run command.
- Type in msconfig and hit Enter.

- In the System Configuration window that opens, navigate to the Services tab and check Hide all Microsoft services option.

- Click on Disable all.

- Press OK, then restart your PC.
Now that you have fixed the issue of your screensaver not working, perhaps you’ll be interested in our collection of awesome screensavers for your Windows 11.
You can also personalize your display by following our guide on using Photos as a screen saver in Windows, which shows how to turn your favorite pictures into a slideshow.
Do let us know of any additional solution not mentioned here that may have worked for you in the comment section below.
Read our disclosure page to find out how can you help Windows Report sustain the editorial team. Read more


Improve this guide


User forum
0 messages