Check the Last Reboot on Windows Using a Simple Command
You can easily find you last reboot time on Windows using a command line

In this guide, we’ll show you exactly how to check the last reboot time in Windows, so you can stay on top of your system’s performance and activity.
You don’t need any extra softwarejust a quick command or two in Command Prompt or PowerShell will give you a clear answer.
How to see the last reboot time & computer uptime?
The systeminfo | find /i “Boot Time” command helps you check the last reboot time in Windows 11. Today, we’ll guide you through the exact steps in Command Prompt to make it work. If it fails, we’ve also included alternative methods.
1. Use Command Prompt
- Open Command Prompt as an administrator.
- In the command line, copy-paste the following command and press Enter:
systeminfo | find /i “Boot Time”
- You should see the last time your PC was rebooted.
If you’re having trouble opening CMD as admin or the command doesn’t work, you can use Task Manager.
2. Check the Task Manager’s uptime
- Open the Task Manager by simultaneously pressing CTRL + SHIFT + ESC.
- Then click the Performance tab.
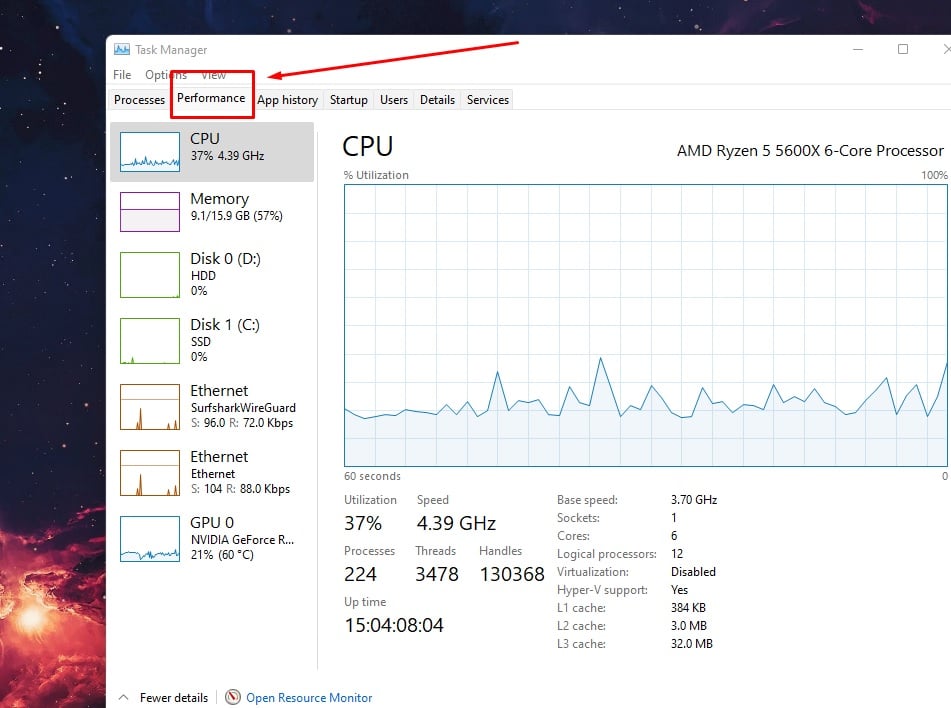
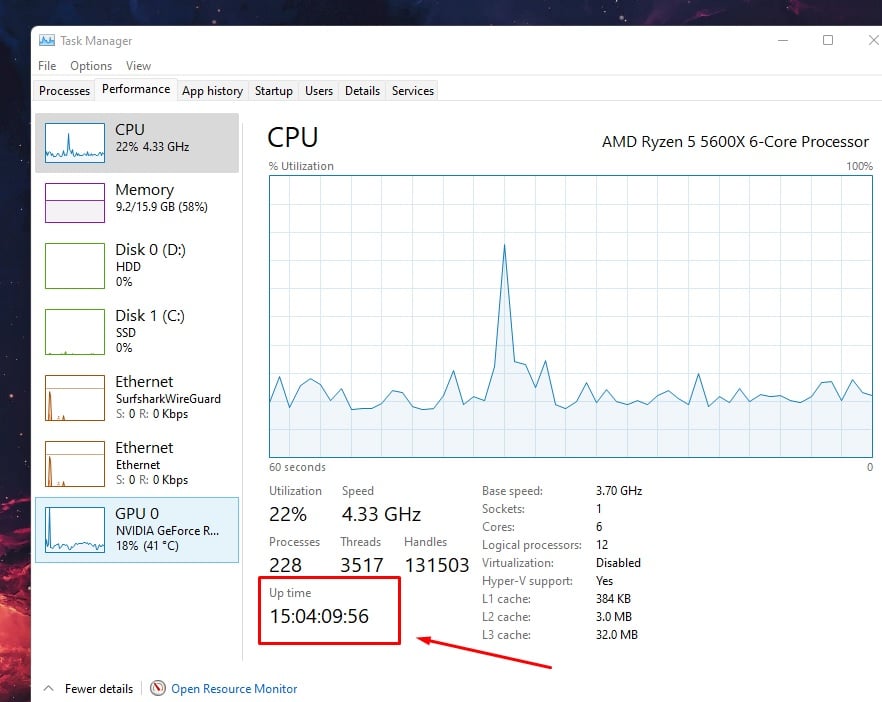
- In the lower part, you can find the Up time since your last reboot.
3. Use the System Event Log
- Open Event Viewer from the Start menu.
- In the far right pane, select Create Custom View.
- Under the Log drop-down menu, choose Windows Logs.
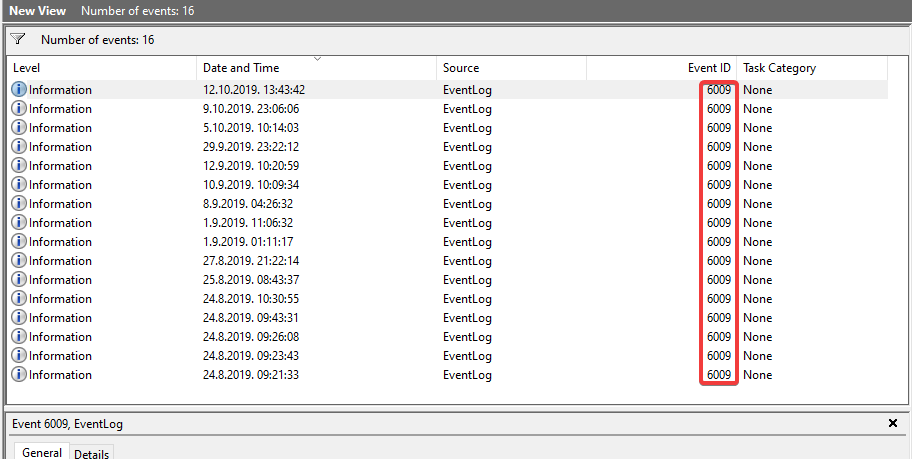
- Under the <All Event IDs> add just 6009.
- Create a custom view.
- Now you can see all the times your PC was rebooted since the system was installed, which is a great feature.
You can use the System Event Log to find out when the last reboot of Windows was. This procedure is quite simple, as the only important thing is to single out one Event.
4. Schedule reboot with Scheduled Tasks
- Open Scheduled Tasks from the Start menu.
- Select Add a New Scheduled Task and click Next.
- On the Program selection screen, navigate to C:WINDOWSSystem32shutdown.exe.
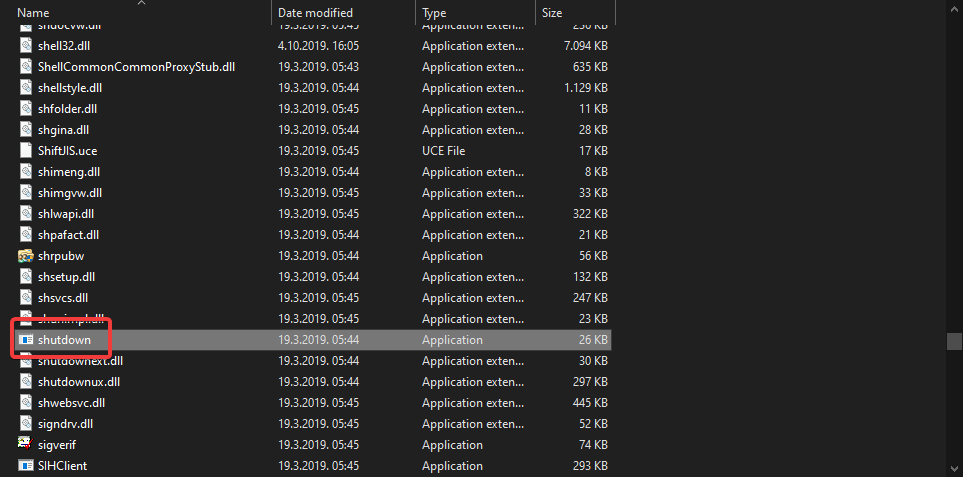
- Select shutdown.exe and name the task shutdown.
- Choose the shutdown frequency.
- Select the time and day when the scheduled reboot will occur.
- Enter your administrative credentials and confirm.
- Now, check the Open Advanced options when I click Finish box and click Finish.
- Finally, when a new window appears, copy-paste the following command and replace the default one:
C:WINDOWSsystem32shutdown.exe -r -f -t 01 - Select Apply, and you are good to go.
- Later, you can check when the last time the Windows reboot occurred with one of the first two steps.
If you are interested in automatizing the reboot sequence, you can create a scheduled task. If you are not familiar with it, here’s how to schedule a reboot on Windows Server via the Scheduled Tasks utility:
If you’re on Windows 11, we have a great guide on how to check Windows 11 uptime, so visit it for more information.
Checking last reboot in Windows 11 is easiest with Command Prompt, but if it doesn’t work, you can also find the last restart time using Task Manager or the System Event log.
Read our disclosure page to find out how can you help Windows Report sustain the editorial team. Read more


Improve this guide


User forum
1 messages