Windows Shell Common DLL has Stopped Working: 11 Ways to Fix It
Reinstalling your audio driver should fix this issue quickly
8 min. read
Updated on
Read our disclosure page to find out how can you help Windows Report sustain the editorial team Read more
Key notes
- If the Windows Shell Common DLL stopped working on your PC, it might be because of faulty drivers.
- The best way to fix this problem is to use specialized software to repair your damaged DLL files.
- Another way to fix this issue is to update or reinstall the problematic drivers.
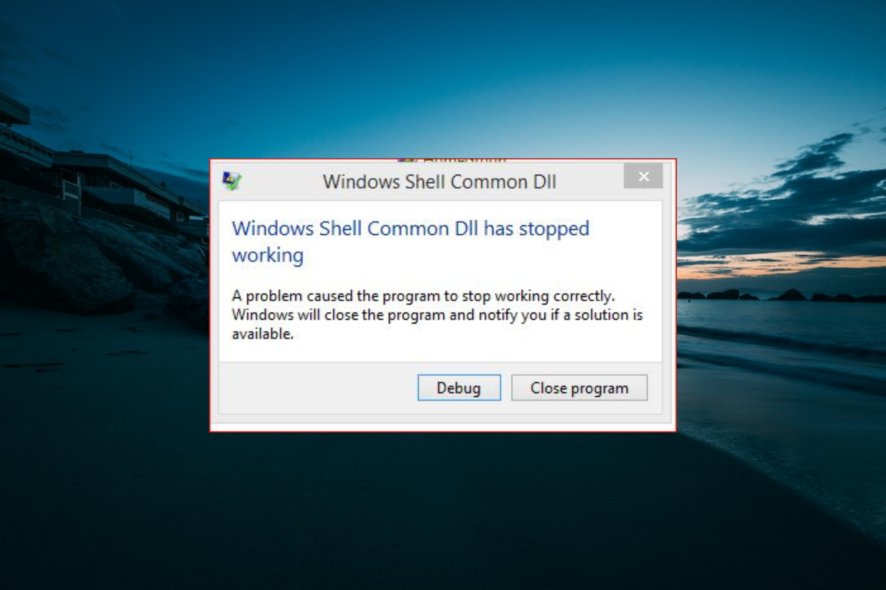
All sorts of errors can appear on your PC, but one of the most annoying ones is Windows Shell Common Dll has stopped working.
This error can prevent you from using standard Windows features and be problematic. So, in this article, keep reading to find additional solutions for this error.
Why does Windows Shell Common DLL has stopped working message appear?
Below are some of the factors that can cause the Windows Shell Common DLL error on your PC:
- Faulty drivers: If the Windows Shell Common DLL stopped working while using your recording devices or microphone, it might be because of faulty audio drivers. You need to reinstall or update your driver to solve the problem.
- Interference from third-party apps: Sometimes, this issue can be down to an app running a counter program to the software you are trying to open. This is especially true if you are getting the Windows Shell Common DLL has stopped working error on Outlook 2016 or 2013.
- Faulty system files: Sometimes, this issue might be because some of your files are broken or missing. Repairing and restoring these files should restore normalcy.
- Outdated PC: An outdated PC can cause several issues, including this DLL problem. Hence, you need to update your operating system.
How can I fix Windows Shell Common DLL has stopped working error?
Listed below are some of the preliminary troubleshooting steps to try before exploring the more sophisticated solutions:
- Disable audio enhancements
- Reinstall the problematic app
- Disable or remove the antivirus software
- Rename olmapi32.dll (path: C:/Program Files/Microsoft OfficerootOffice16)
- Delete Outlook plugin for Microsoft Dynamic CRM
- Remove Touch-Base UPDD
If these steps do not fix the issue, proceed to the solutions below:
1. Reinstall your audio drivers
- Press the Windows key + X and choose Device Manager.
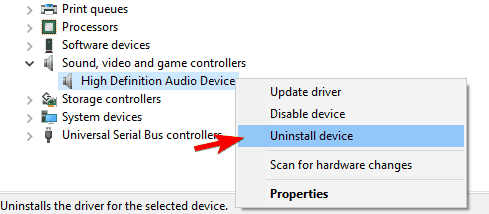
- Double-click the Sound, video and game controllers option to expand it and right-click the High Definition Audio Device.
- Now, choose Uninstall device.
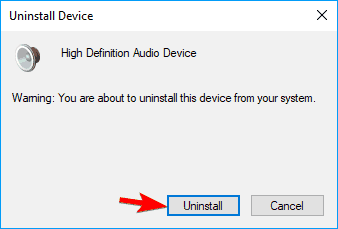
- Check the box for Remove driver software for this device if available and click the Uninstall button.
- Finally, restart your PC, and Windows will automatically reinstall the driver.
According to users, they managed to fix the Windows Shell Common Dll has stopped working error simply by reinstalling their audio drivers. However, your drivers can be buggy, and that can cause this error to appear.
To keep your drivers up to date at all times, we advise using specialized driver updater software such as Outbyte Driver Updater.
2. Uninstall Synaptics driver
- Launch Device Manager.
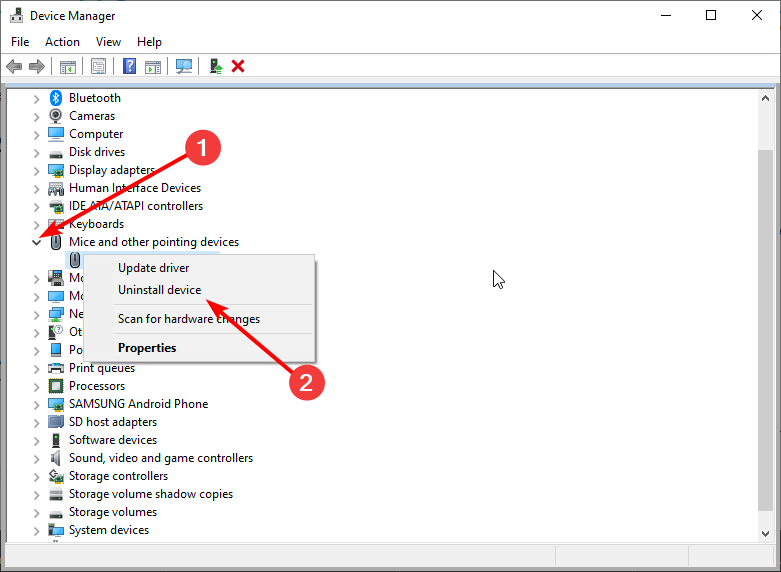
- Expand the Mice and other pointing devices option and right-click the Synaptics Touchpad.
- Now, select Uninstall device.
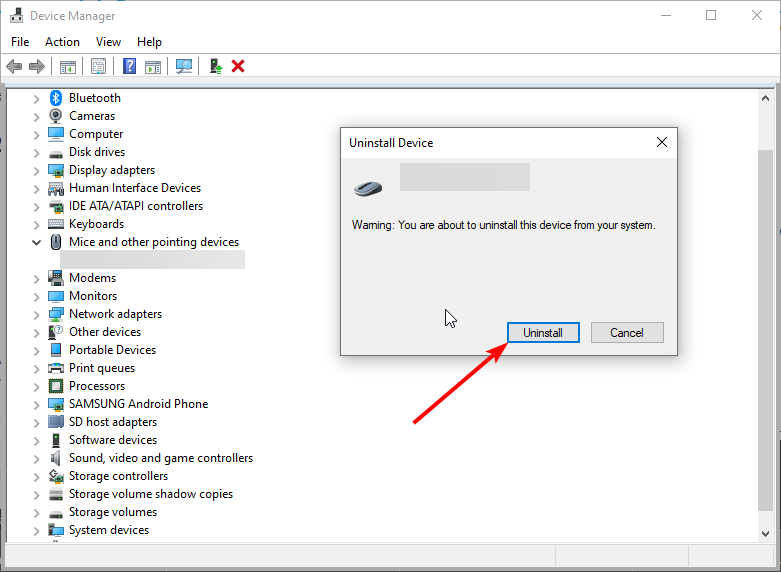
- Finally, click the Uninstall button to confirm the action.
According to users, Windows Shell Common Dll has stopped working error can appear due to Intellipoint software and Synaptics driver.
These two aren’t compatible, and to fix the problem, you need to remove one or both from your PC.
3. Repair system files
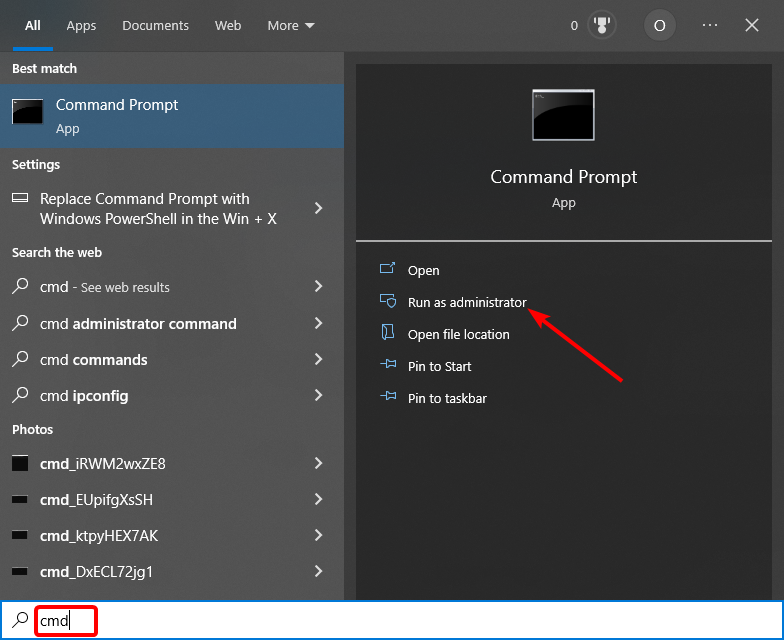
- Press the Windows key + S, type cmd, and choose Run as administrator under Command Prompt.
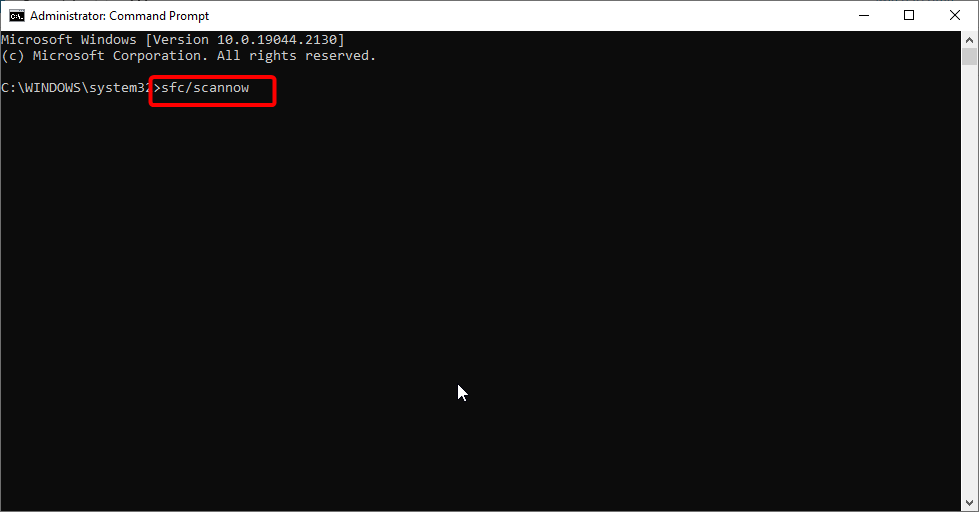
- Type the command below and hit Enter to run it:
sfc /scannow - Finally, wait for the command to finish running and restart your PC.
Sometimes this error can appear if your system files are corrupted. File corruption can occur for various reasons, but you should be able to fix it by performing an SFC scan.
Once the scan is completed, check if the problem still appears. If the issue isn’t resolved or you can’t run an SFC scan, you might have to use a DISM scan instead.
However, if you want to effortlessly fix Windows Shell Common DLL issues, the simplest and fastest way would be to use a third-party DLL fixer.
4. Change the security permissions of the UserChoice key
- Press the Windows key + R, type regedit, and click OK.
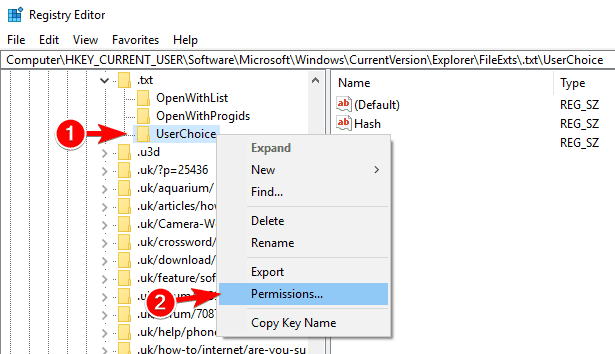
- When Registry Editor opens, navigate to the path below in the left pane:
ComputerHKEY_CURRENT_USERSoftwareMicrosoftWindowsCurrentVersionExplorerFileExts.txtUserChoice - Now right-click the UserChoice key and choose Permissions from the menu.
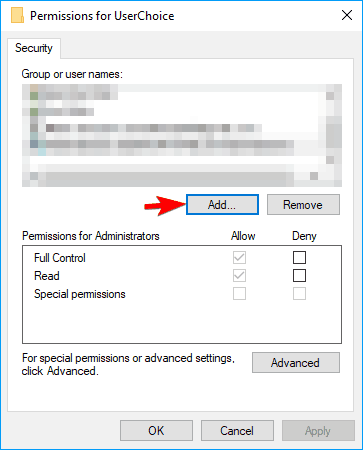
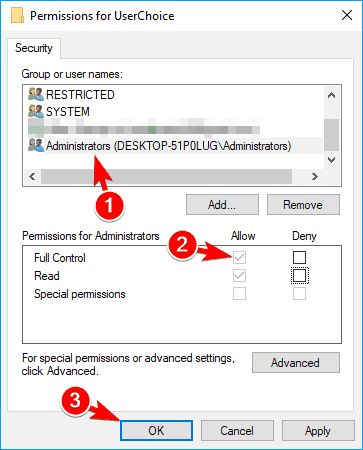
- If Group or user names section is empty, your security permissions are missing, so you’ll need to add them again. This solution won’t apply to you if security permissions aren’t missing. So you can skip it.
- To add missing permissions, click the Add button.
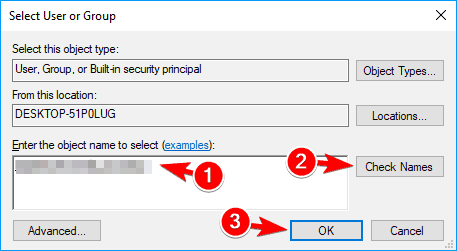
- In Enter the object names to select field, enter Administrators, and click on Check Names.
- If everything is in order, click on OK.
- The Administrators group will be added to the Group or user names list.
- Next, select Administrators from the list and check Full Control in the Allow column.
- Finally, click Apply and OK to save changes.
- Optional: Following the steps above, you might have to add SYSTEM, RESTRICTED, and your user name to the list.
Users reported Windows Shell Common Dll has stopped working error while trying to open .txt files on their PC.
After changing the security settings for the UserChoice key, the problem should be resolved entirely. However, remember that this solution applies only if this error appears while trying to open .txt files.
5. Copy necessary files to the System32 directory
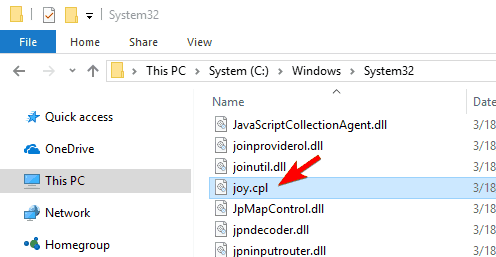
- Launch File Explorer and navigate to the following directory:
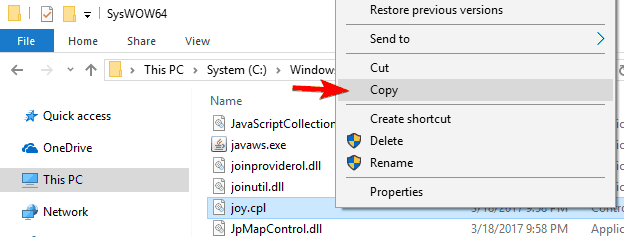
C:WindowsSystem32 - Locate joy.cpl and copy it to your Desktop.
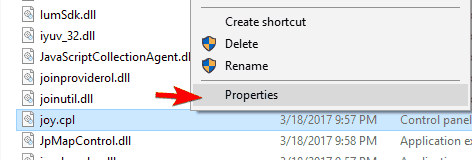
- Right-click joy.cpl and choose Properties from the menu.
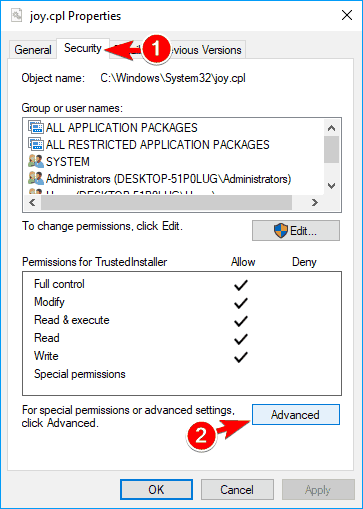
- Navigate to the Security tab and click on Advanced.
- Locate the Owner section and click on Change.
- Now, enter your username in the Enter the object name to select and click on Check Names.
- If everything is in order, click on OK to save changes.
- After doing that, click Apply and OK to save changes.
- After taking ownership of joy.cpl, you can now delete it.
- Once you delete the file, go to the following directory:
C:WindowsSysWOW64 - Locate joy.cpl and copy it to
C:WindowsSystem32
Once you copy the file, the problem should be resolved, and you can access gamepad settings from Windows without any issues.
According to users, Windows Shell Common Dll is not responding error appears while trying to configure gamepad settings.
To fix the problem, copy a single file to your System32 directory, as we showed you above.
6. Disable the Hardware graphics accelerator in Office
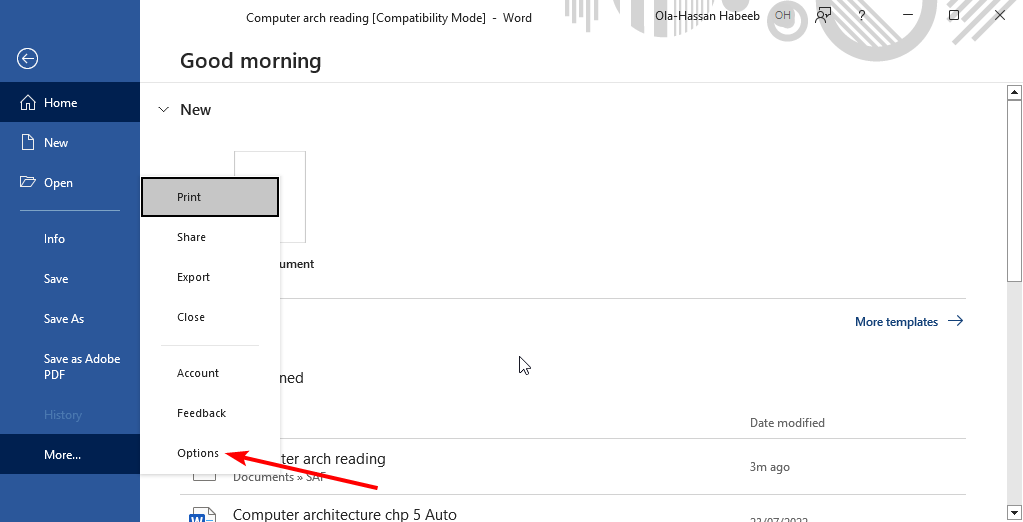
- Open Outlook or any other Office application.
- Choose File > Options.
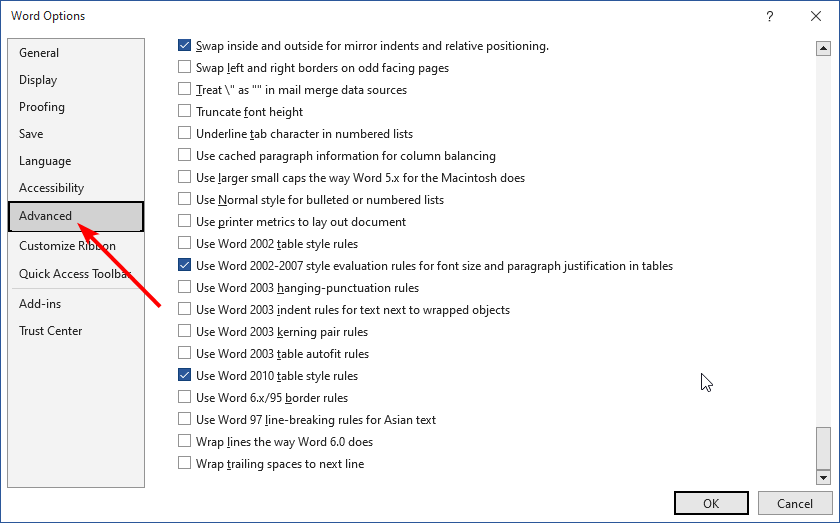
- Now, select Advanced.
- Finally, locate and disable the Hardware graphics accelerator option.
Windows Shell Common Dll is not responding error can affect almost any application, and Outlook is no exception. However, you can fix this problem simply by disabling the Hardware graphics accelerator.
After you disable this feature, the error message should stop appearing, and you’ll be able to use Outlook without any problems.
7. Configure Windows to accept certificates
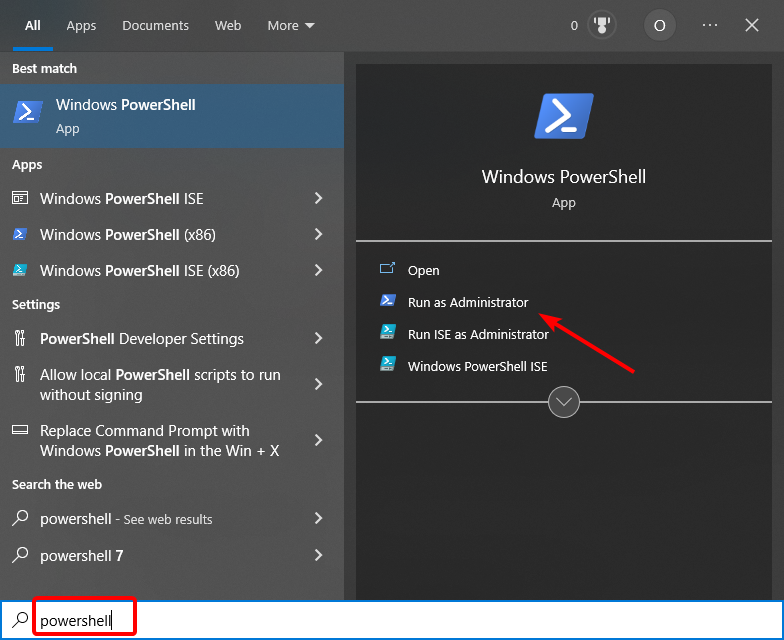
- Press the Windows key + S, type powershell, and select Run as administrator under Windows PowerShell.
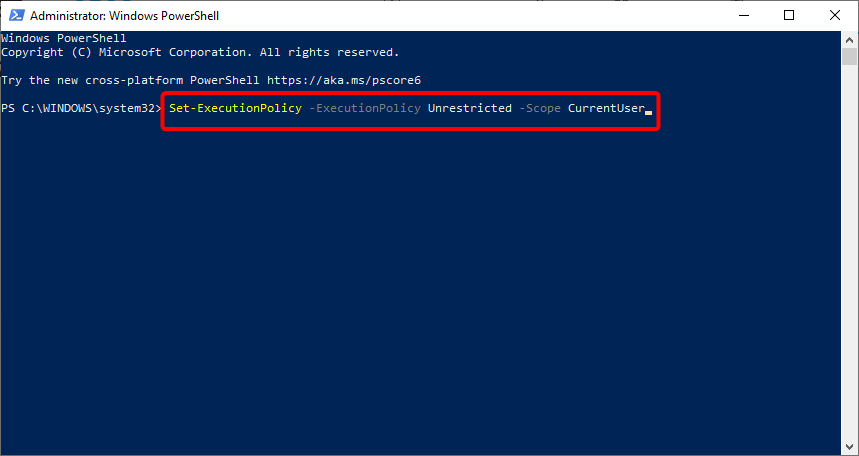
- Type the command below and hit Enter to run it:
Set-ExecutionPolicy -ExecutionPolicy Unrestricted -Scope CurrentUser
The Windows Shell Common Dll is not responding error can appear because Windows isn’t configured to accept certificates. However, you can quickly fix this problem by using PowerShell.
8. Use System Maintenance
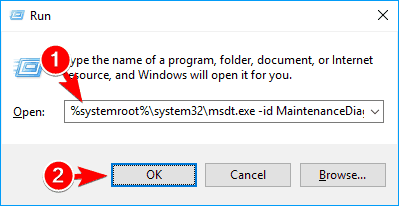
- Press the Windows key + R and type the command below:
%systemroot%system32msdt.exe -id MaintenanceDiagnostic - Now, click OK to run it.
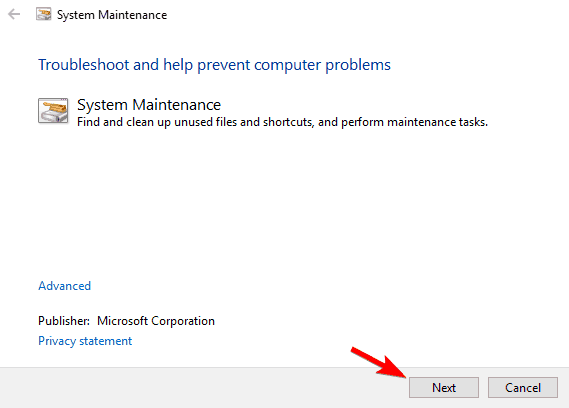
- The System Maintenance tool will now appear. Click on Next to continue and follow the instructions on the screen.
Few users claim they fixed the problem simply by running System Maintenance Troubleshooter. However, this is a built-in tool, and it can sometimes fix various issues with Windows.
9. Re-register your DLLs
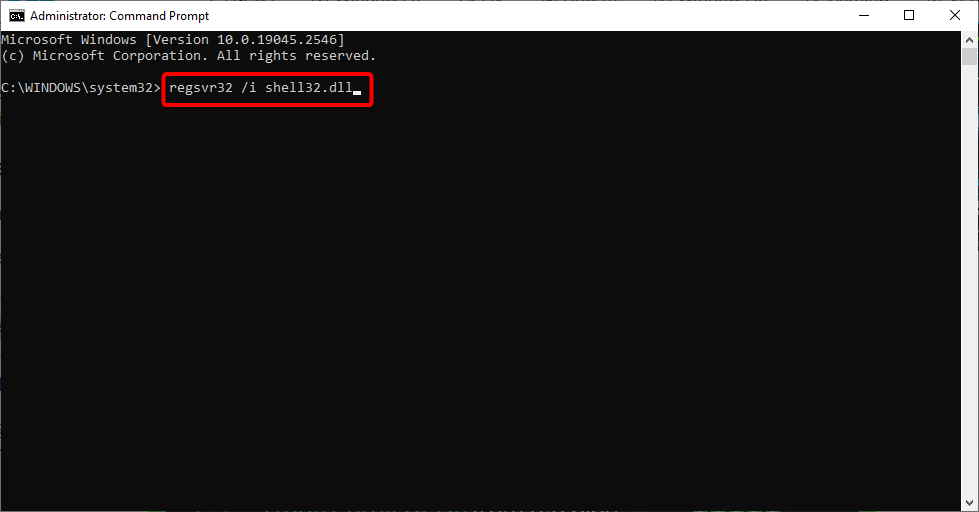
- Open Command Prompt as administrator.
- Type the command below and hit Enter to run it:
regsvr32 /i shell32.dll - Then, finally, wait for the command to finish running.
If you’re getting Windows Shell Common Dll has stopped working error message, the cause can sometimes be your DLL files, specifically shell32.dll.
This can be because the DLL files became unregistered for some unknown reason. To fix this problem, you have to re-register shell32.dll.
10. Perform a clean boot
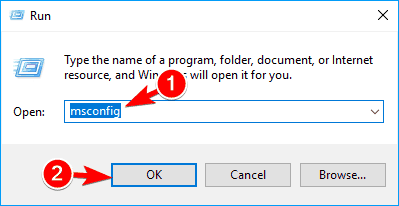
- Press the Windows key + R, type msconfig, and click OK.
- Select the Services tab, check the box for Hide all Microsoft services, and click Disable all.
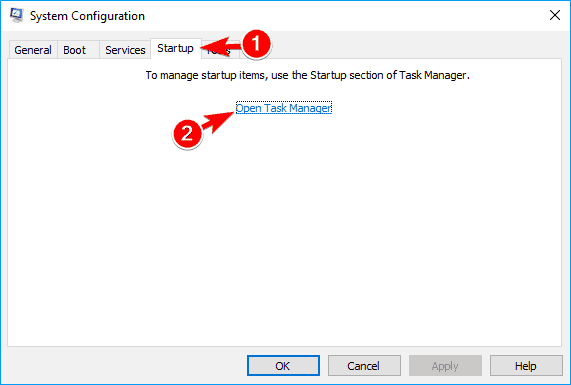
- Navigate to the Startup tab and click on Open Task Manager.
- Right-click each of the apps there and choose Disable from the menu.
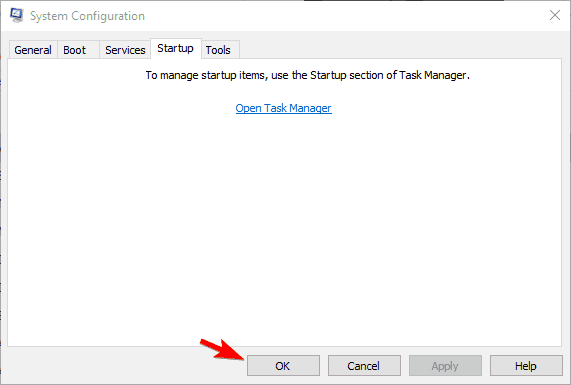
- Afterward, return to the System Configuration window and click Apply and OK.
- Finally, restart your PC.
If Windows Shell Common Dll has stopped working error message frequently appears on your PC, a third-party application may be causing it.
So, you need to perform a clean boot to start your PC with the required services and processes. If this solves the problem, you must enable the apps and services in batches to know the faulty ones.
11. Install the latest Windows updates
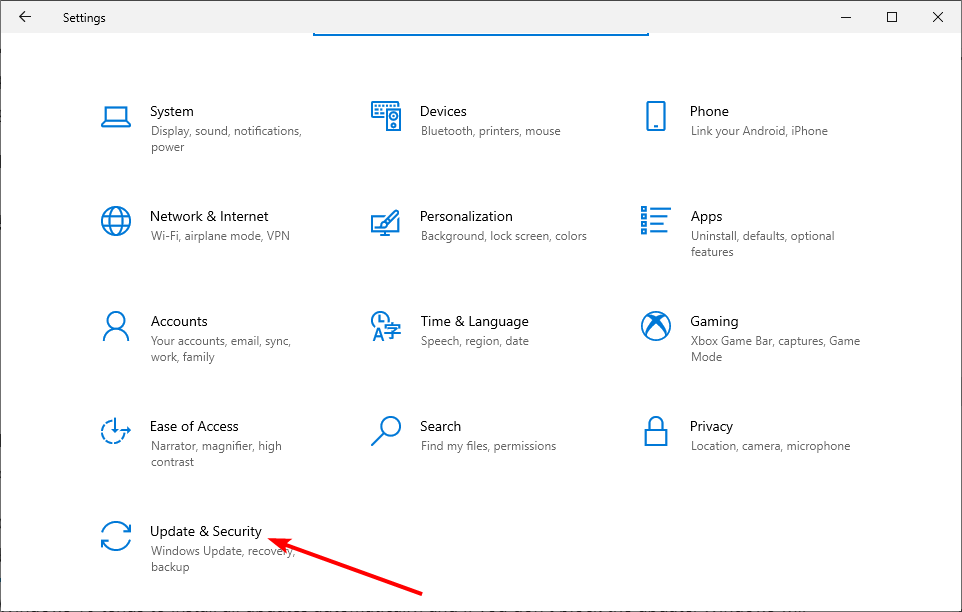
- Press the Windows key + I to open the Settings app and select Update & security section.
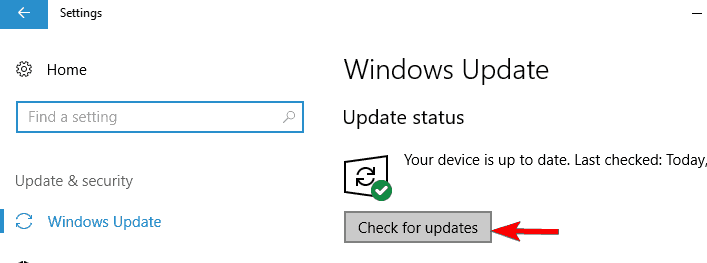
- Now, click the Check for updates button.
- Finally, download and install any available updates.
After you download the updates, they’ll be installed automatically once you restart your PC. According to users, you might be able to fix this problem simply by installing the latest Windows updates.
We have come to the end of this detailed guide on fixing the Windows Shell Common DLL has stopped working issue. You should now be able to solve the problem if you follow the steps therein carefully.
If you are facing other issues, like Shell Infrastructure Host has stopped working, check our guide to fix it effortlessly.
In the comments below, let us know the solution that helped you fix this issue.


