How to install WMIC for Linux and monitor Windows machines
4 min. read
Updated on
Read our disclosure page to find out how can you help Windows Report sustain the editorial team. Read more
Key notes
- WMIC for Linux is a command-line tool that allows you to monitor and manage a remote Windows system.
- We tell you all about its features, how to install it on a Linux system and how to use it.
- You will also find below a list of variables that you can input for the several WMIC commands.

When monitoring a Windows machine, whether it’s a server or workstation, the key is to avoid installing third-party software on that system.
Everybody knows how to do that by installing an agent and then controlling it remotely from a different station but without it, it’s a lot more difficult.
That’s where WMIC comes into play, a white-hat hacker tool that can become very useful in managing remote Windows systems.
What is WMIC and how does it help?
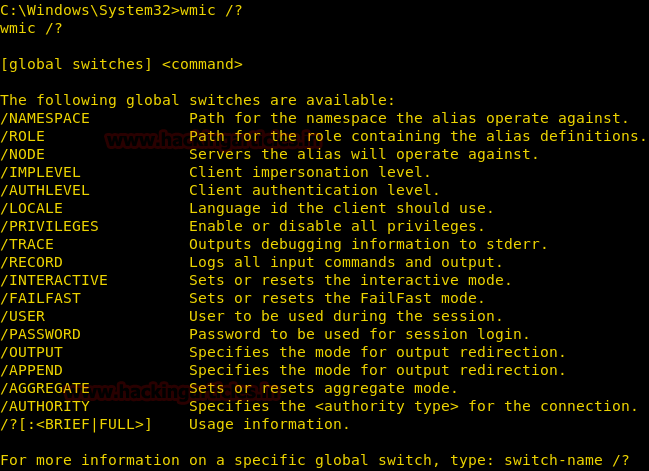
WMIC or Windows Management Instrumentation Command-line is a tool that uses the Windows Management Instrumentation (WMI) for Windows machines management.
Essentially, it’s how Microsoft combined the Web-Based Enterprise Management (WBEM) and the Common Information Model (CIM) standards.
For short, it’s a tool that will allow you to control and manage Windows systems remotely by using command lines.
It was designed for Windows and it works perfectly in command-line tools but here, we will show you how to install it on a Linux machine.
The Linux client is not as powerful as its Windows iteration because it is limited to a list of possible requests but it can be really handy if you don’t want to start your Windows VM.
Once installed, WMIC provides information about the status of local or remote computer systems.
But you can also perform actions on remote systems like configuring the security settings, changing the system properties, changing permissions for authorized users and user groups, and a lot more.
How do I install WMIC for Linux?
Use the following set of commands to install WMIC for Linux:
$ sudo aptitude install autoconf

$ cd /data/tools/
$ wget http://www.openvas.org/download/wmi/wmi-1.3.14.tar.bz2
$ bzip2 -cd wmi-1.3.14.tar.bz2 | tar xf -
$ cd wmi-1.3.14/
$ sudo make "CPP=gcc -E -ffreestanding"
$ sudo cp Samba/source/bin/wmic /usr/local/bin/
To use WMIC, input this general command: wmic -U user%password //host "query"
Here are the most important WMIC list of options:
| Variable | Effect |
| -?, –help | Show this help message |
| -A, –authentication-file=FILE | Get the credentials from a file |
| –delimiter=STRING | Delimiter to use when querying multiple values, default to ‘|’ |
| -d, –debuglevel=DEBUGLEVEL | Set debug level |
| –debug-stderr | Send debug output to STDERR |
| -i, –scope=SCOPE | Use this Netbios scope |
| -k, –kerberos=STRING | Use Kerberos |
| -l, –log-basename=LOGFILEBASE | Basename for log/debug files |
| –leak-report | Enable talloc leak reporting on exit |
| –leak-report-full | Enable full talloc leak reporting on exit |
| -m, –maxprotocol=MAXPROTOCOL | Set max protocol level |
| –namespace=STRING | WMI namespace, default to root\cimv2 |
| -N, –no-pass | Don’t ask for a password |
| -n, –netbiosname=NETBIOSNAME | Primary netbios name |
| –option=name=value | Set smb.conf option from command line |
| -O, –socket-options=SOCKETOPTIONS | Socket options to use |
| –password=STRING | Password |
| -P, –machine-pass | Use stored machine account password (implies -k) |
| –realm=REALM | Set the realm name |
| -R, –name-resolve=NAME-RESOLVE-ORDER | Use these name resolution services only |
| –simple-bind-dn=STRING | DN to use for a simple bind |
| -S, –signing=on|off|required | Set the client signing state |
| -s, –configfile=CONFIGFILE | Use alternative configuration file |
| –usage | Display brief usage message |
| –use-security-mechanisms=STRING | Restricted list of authentication mechanisms available for use with this authentication |
| -U, –user=[DOMAIN\]USERNAME[%PASSWORD] | Set the network username |
| -W, –workgroup=WORKGROUP | Set the workgroup name |
WMIC usage examples
As you can see, WMIC is pretty generous in what it offers and controlling a system remotely without using an agent is always a great advantage.
So, let’s see just a few examples on how to use WMIC to get valuable information about a remote system.
Enter the command below to get all the system information from the system:
wmic -U unknown //192.168.1.12 "select * from Win32_ComputerSystem"
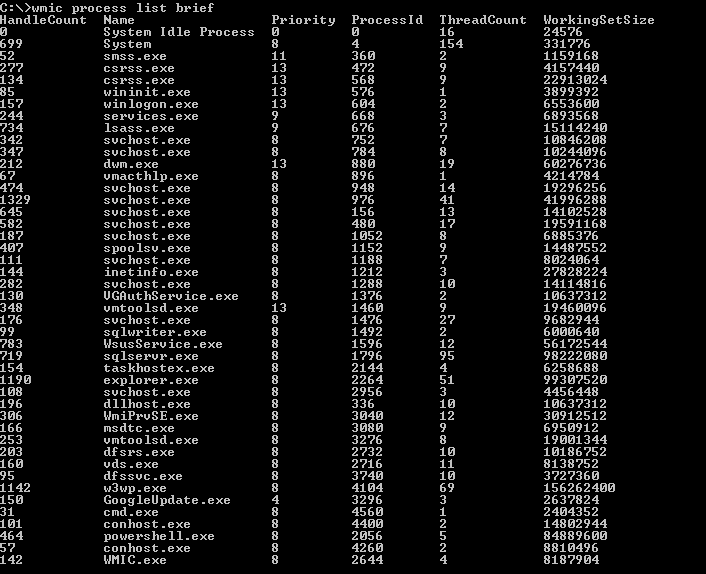
If you want to know about all the running processes on the remote system, input the following command:
wmic -U unknown%oopsoops //192.168.1.12 "select caption, name, parentprocessid, processid from win32_process"After running the command, you will see a list of processes just like the one above except the one in our screenshot was obtained on Command Prompt.
We hope that our article helped you instal WMIC on your Linux machine and now you are able to manage the remote Windows system.
For more information, you might also be interested in our article about the differences between Windows kernel and Linux kernel.
Did you manage to install and use WMIC? Tell us all about your experience in a comment on the dedicated section below.


User forum
0 messages