Xbox Controller Drift: 6 Tips to Get Rid Of It
Clean your Xbox controller to fix the problem
6 min. read
Updated on
Read our disclosure page to find out how can you help Windows Report sustain the editorial team Read more
Key notes
- Xbox controller drift causes your thumbstick to start moving without you touching it.
- Accumulated dust and grime generally cause this problem.
- Carefully cleaning the joystick using compressed air easily fixes the drift issue.
Like other gaming controllers, Xbox controllers are prone to wear and tear, which causes several issues to develop on their own, including the frustrating Xbox controller drift problem.
The controller drift in Xbox causes the analog stick to move automatically even if you do not touch or move it. The Xbox controller drift is an irritating problem that needs to be resolved quickly, and this guide will provide you with the proven fixes to deal with it successfully.
Why do I face the Xbox controller drift issues?
The primary reason the Xbox One controller drift occurs is dust, debris, and grime build-up. Similarly, food particles, lint, pet fur, and dead skin clog the Xbox controller causing it to develop the drift issue. Apart from this, there can be other reasons which can cause the controller to drift.
- Natural wear and tear – The controller quality greatly varies according to the brand, and natural wear and tear can cause drift-related issues to develop.
- Bad joystick unit – The thumbstick includes a boxy sensor component soldered to the controller circuit board, which if broken, can cause drift issues with the Xbox controller.
- Worn-out thumbstick pads – The worn-out moveable shaft of the thumbstick and dirty thumbstick pad can cause drift-related problems.
- Broken thumbstick springs – If the springs on the thumbstick sensor get damaged, you will start to notice Xbox controller drift when gaming.
Now that you know why the drift issues occur in the Xbox controller, let’s see how you can resolve it yourself.
How do I fix the Xbox controller drift issue?
Some of the simple tricks to try before implementing the advanced solutions are as follows:
- Press and hold the Xbox button to power off the Xbox controller and repeat the same steps to turn it back on.
- Similarly, restart your Xbox console.
- Try changing the batteries of the Xbox controller to see if it helps.
If none of these workarounds help, jump to the complex solutions mentioned below.
1. Clean your Xbox One or Xbox Series X|S controller
1.1 Using compressed air can
- Power off your Xbox controller and grab a compressed air can.
- Place the tube of the compressed air can near the analog stick base and blow the compressed air in short bursts.
- Now, slowly move the analog stick around to release the trapped dirt and grime.
- Repeat the same process several times until you successfully remove any blockage that may be the root cause for the drift issues in the Xbox controller.
1.2 Using Isopropyl alcohol
- Remove the batteries from the compartment.
- Soak a cotton ball with rubbing alcohol and use it to clean the base of the thumbstick.
- Move the thumbstick in all directions to ensure you thoroughly clean the base and cavity as much as possible.
- Wait until the alcohol dries completely, and then re-insert the batteries.
- Power on the Xbox controller and see if the controller drift no longer exists.
Accumulation of dirt within your Xbox controller causes the joystick to malfunction. Fortunately, you can easily clean the thumbstick and surrounding cavity using a compressed air can and isopropyl alcohol to remove all the trapped particles, resolving the problem.
2. Repair the Xbox controller
Proceed with the following steps if the above methods did not troubleshoot the drift issue and your Xbox controller is not under the warranty period.
- Make sure that your Xbox controller is powered off and remove its batteries.
- With the relevant tools handy, remove the left and right corner grips and the screw in the battery compartment.
- Next, unscrew the screws on each side under the plastic grips.
- Now that all the screws are safely removed, carefully take off the plastic cover of the Xbox Wireless Controller to access its internal components.
- With all the internal parts of your Xbox Wireless Controller accessible, carefully examine the controller for any object obstructing the analog stick. If you find any, carefully get rid of it.
- Next, ensure that the thumbstick springs and other components are working properly and there are no signs of wear and tear. If an internal competition is damaged, you may have to replace the joystick altogether.
3. Adjust Deadzone
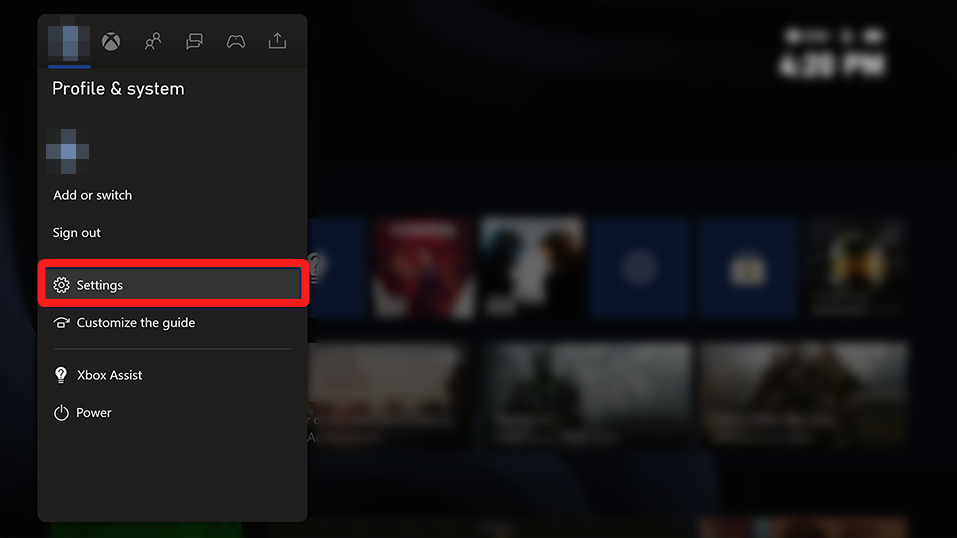
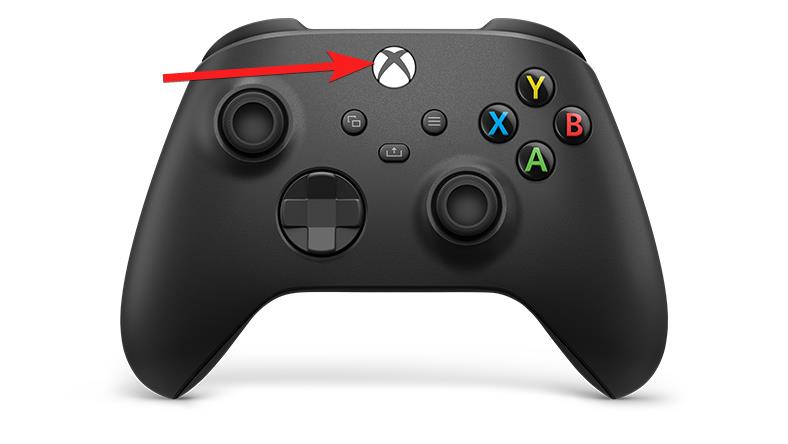
- Press the Xbox button on the Xbox controller to access the Guide menu.
- Select the Gear/Settings tab, followed by Settings from the next menu.
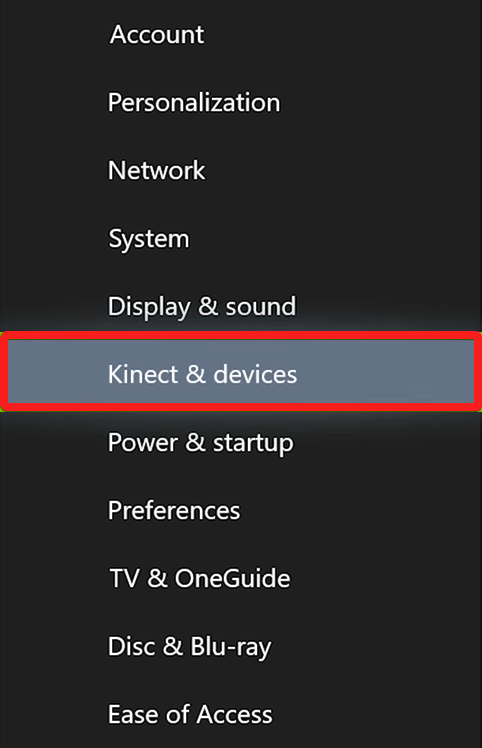
- Next, choose Kinect & devices.
- Choose the Devices & Accessories option to access the list of connected devices.
- Select your controller from the list and press the Menu button.
- Choose Adjustments from the next screen.
- Access the slider bar below the Deadzone option to increase the range of the Deadzone to your preference.
The Deadzone is that area around the joystick where you can move the stick without causing any movement. If you experience that the drift issues are causing the joystick to lean by itself, expanding the Deadzone area can successfully resolve the problem.
4. Resync the Xbox controller
- Ensure your wireless Xbox controller has batteries and Power on your Xbox console.
- Long press the Xbox button on the Xbox controller to power it on. The light on the Xbox button will start blinking, indicating that the controller is not yet synced to your Xbox console.
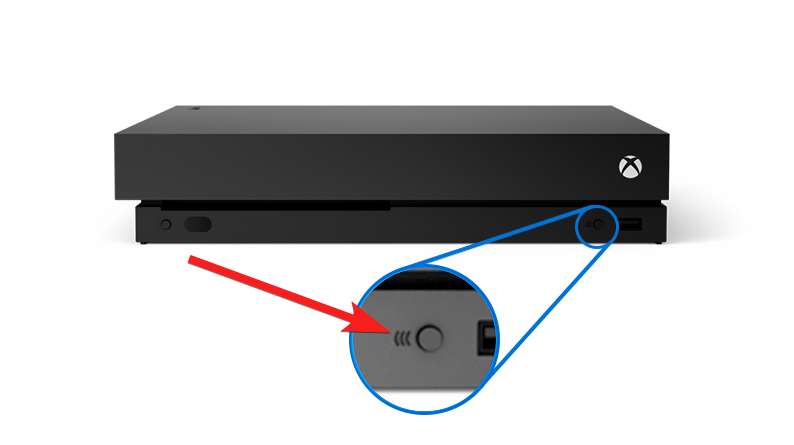
- Now, Press and release the Connect button located on the left side of the Xbox One console.
- Press and hold the Connect button located on the left side of the controller within 20 seconds of pressing the Connect button on the console.
- Release the Connect button as soon as the light on the Xbox button flashes quickly and becomes solid, indicating that the Xbox controller is synced with the console.
If the controller drift occurred suddenly due to a troublesome connection between the Xbox console and the controller, resyncing the components will help resolve it.
That’s pretty much it! Hopefully, the solutions listed in this guide could successfully resolve the controller drift issue in Xbox Xbox One or Xbox Series X|S.
To prevent this stick drift from happening again, always store it in less dirty places and do not touch it with dirty hands. Needless to say, keep your Xbox Controller up to date at all times to avoid such shortcomings in the future.
Which of these tricks worked for you? Do let us know in the comments section below.

User forum
0 messages