How to Clear VRAM on Your PC: 10 Ways to Do It

If your PC runs out of GPU memory, you’ll encounter performance issues, and this is why many want to know how to clear VRAM properly.
This isn’t as hard as you think, and in this guide, we’ll show you the best ways to do that.
How do I free up VRAM?
Table of contents
- How do I free up VRAM?
- 1. Adjust paging file settings for the game drive
- 2. Update the graphics driver
- 3. Use the 3GB switch
- 4. Tweak the graphics card settings
- 5. Check for unnecessary background programs
- 6. Lower In-Game Graphics Settings
- 7. Reduce Display Resolution
- 8. Disable Hardware Acceleration in Apps
- 9. Close Background Apps Using GPU Memory
- 10. Use Lighter Game Mods or Texture Packs
Before we start, be sure to keep all your software up to date to minimize the chance of bugs. Also, try reducing the game resolution and graphics quality as a workaround.
1. Adjust paging file settings for the game drive
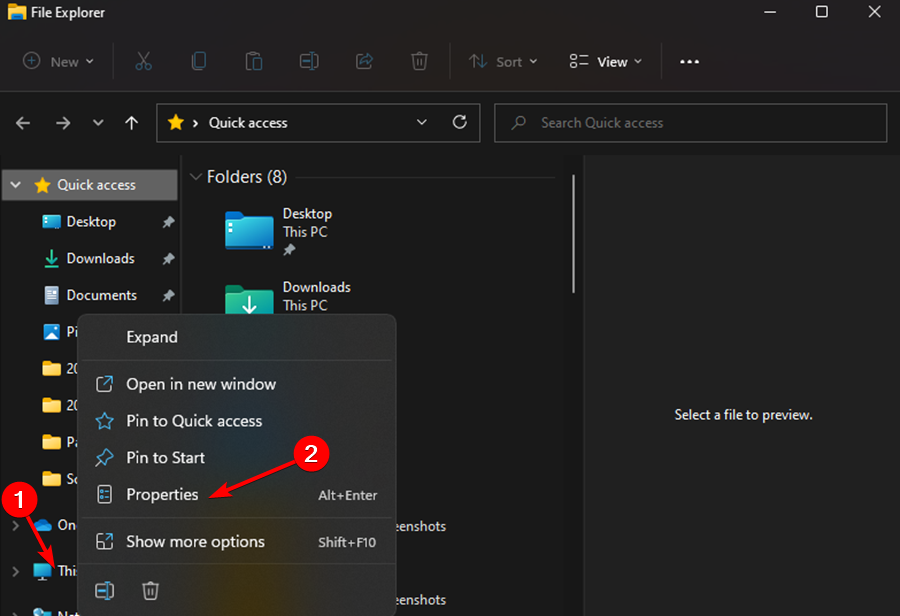
- Open your File Explorer, then right-click This PC and open Properties.
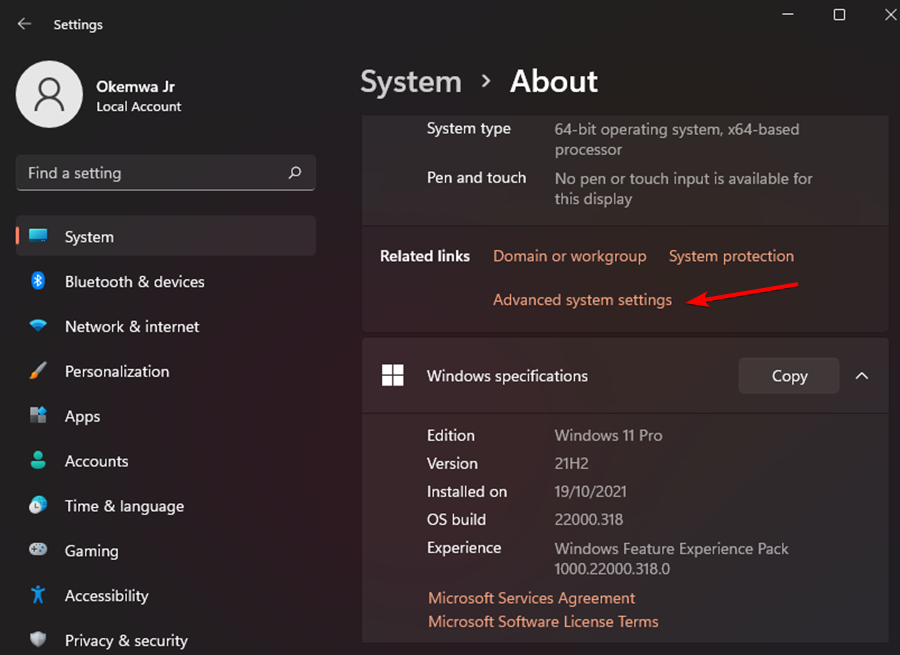
- Select Advanced system settings on the left pane.
- Click the Advanced tab and now click Settings under the Performance category.
- Open the Advanced tab in the Performance Options window that just opened. Under the Virtual Memory category, click Change.
- Select your system drive, and then select System managed size. Click Set.
- Now select the drive where you’ve installed the game on. Then, click No paging file. Click Set once again. Finally, click on OK.
2. Update the graphics driver
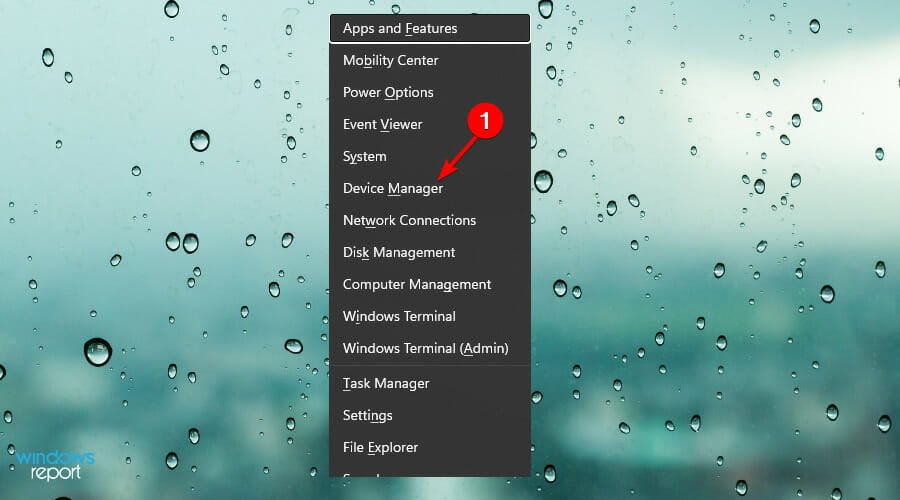
- Press the Windows + X key, then select Device Manager from the menu.
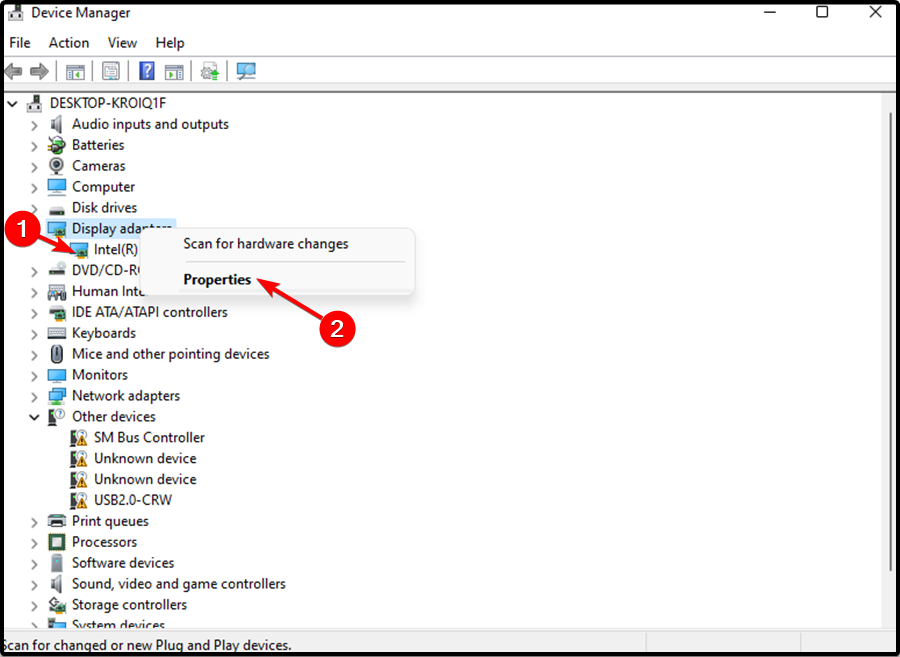
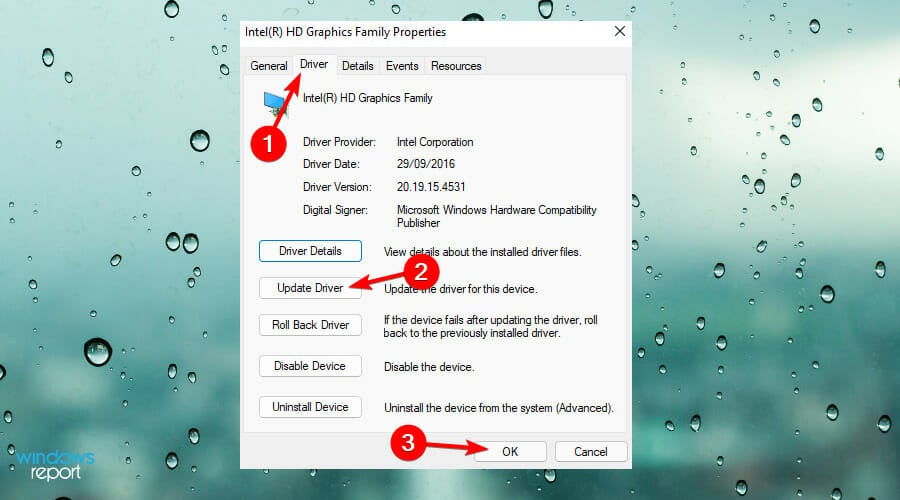
- Expand Display adapters and then right-click the listed graphics card to choose Properties.
- Then, click on the Driver tab and then click Update Driver. Then, click on OK.
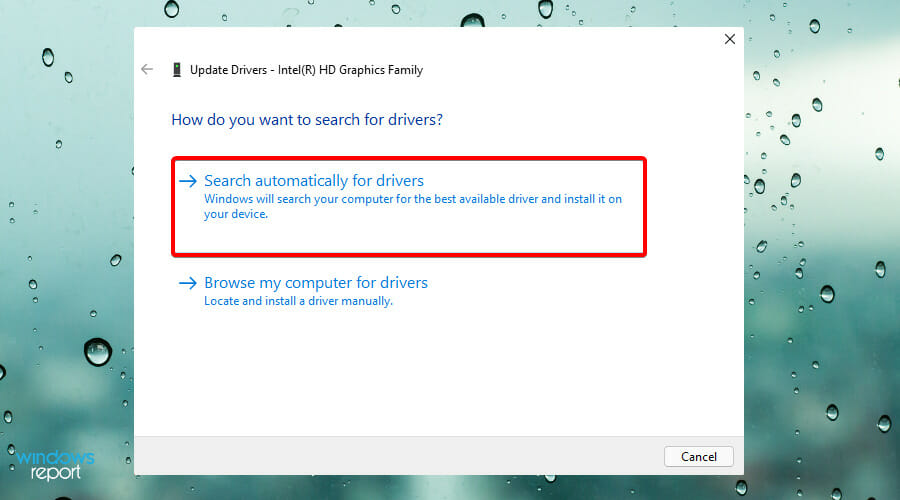
- Finally, click Search automatically for updated driver software. Then, follow through with the on-screen instructions to complete updating the driver.
Once you update your device, you will be able to protect it from malware and hardware failures and also prevent system crashes such as Your GPU memory is full, which is also caused by outdated driver problems.
If you don’t like Device Manager, we recommend you to use a dedicated program such as PC HelpSoft Driver Updater. Whenever you run this software, it scans your PC to detect outdated or missing drivers.
It will then present detailed reports. At a click of a button, you can select what drivers you want to update, install or repair.
⇒ Get PC HelpSoft Driver Updater
3. Use the 3GB switch
 NOTE
NOTE
- Search for Command Prompt in the Start menu, then right-click it, and select Run as administrator.
- Now, type in the following command and press Enter:
bcdedit /set IncreaseUserVa 3072 - Finally, restart your device.
For users with a 32-bit version of Windows, this fix will come in handy to correct the problem. As an alternative, you could also get the 64-bit version of Windows.
4. Tweak the graphics card settings
- Press Windows + R to open Run, type control panel in the text field, and click OK.
- Once the window appears, set the View by option as Large icons.
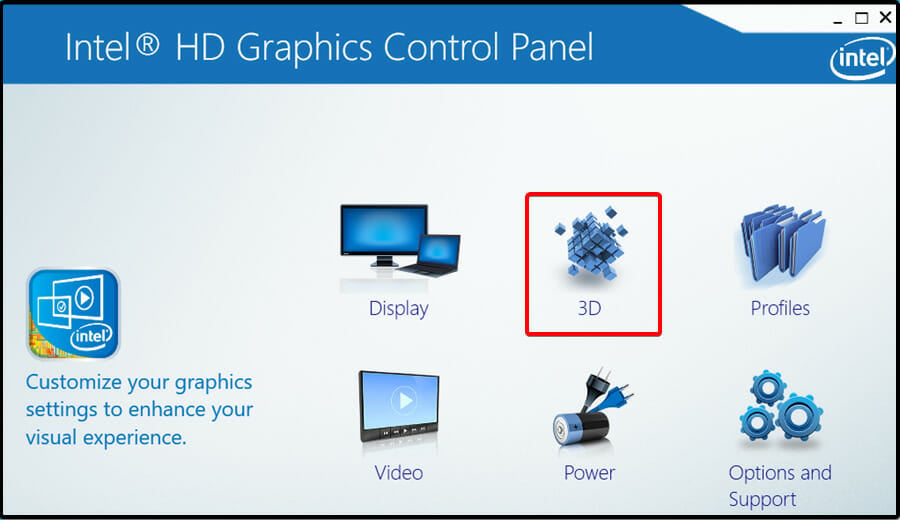
- Find Intel HD Graphics.
- Click the 3D option to open the 3D settings.
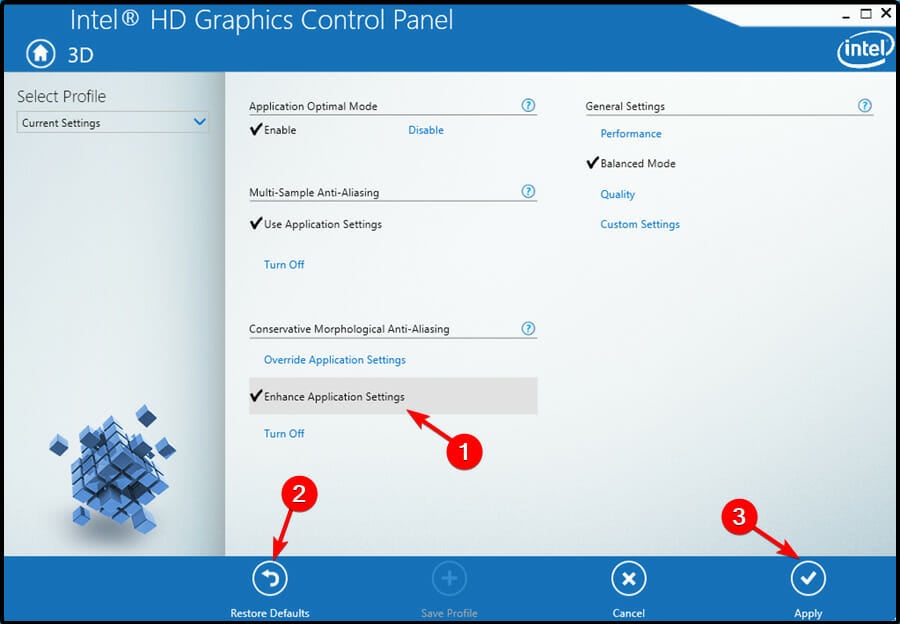
- Click on Enhance Application Settings, then select Restore Defaults. Finally, click the Apply button to save the changes.
5. Check for unnecessary background programs
- Press Ctrl + Alt + Delete simultaneously to open the Task Manager.
- Look at the Processes running, verify the amount of memory allocated to each, and make an informed decision on which programs should be terminated.
6. Lower In-Game Graphics Settings
High-res textures, shadows, and effects demand large amounts of VRAM. Reducing these settings helps prevent memory overuse and crashes.
Adjust these settings first:
- Texture quality
- Shadows
- Anti-aliasing
- Draw distance
- Post-processing
7. Reduce Display Resolution
Lowering your screen resolution reduces the VRAM required for rendering, especially in full-screen games.
Steps:
- Right-click the desktop > select Display settings.
- Under Display resolution, choose a lower value (e.g., 1600×900).
- Confirm the change.
8. Disable Hardware Acceleration in Apps
Apps like Chrome, Discord, and Adobe tools use GPU memory unnecessarily when hardware acceleration is enabled.
Chrome example:
- Go to Settings > System.
- Turn off Use hardware acceleration when available.
- Relaunch the browser.
9. Close Background Apps Using GPU Memory
Some apps—browsers, overlays, launchers—can eat into VRAM even when minimized.
Steps:
- Press
Ctrl + Shift + Escto open Task Manager. - Under Processes, sort by the GPU Memory column.
- Right-click unnecessary GPU-consuming apps > choose End Task.
10. Use Lighter Game Mods or Texture Packs
High-resolution mods can push your GPU over its memory limit. Opt for performance-oriented texture packs to reduce VRAM usage.
Tip: Choose “Lite” or “Optimized” versions of mods when available, especially on modding sites like NexusMods.
When a GPU runs out of memory, it struggles to display images properly. You might experience longer load times, noticeable lag in games, and a drop in FPS.
Flushing GPU memory can help, but it’s only safe to do so after saving your work, as premature deletion can lead to permanent data loss. Signs of a failing GPU include screen glitches and BSOD errors.
Now that you know how to clear VRAM, you can check our guide to learn how much VRAM you have. If the issue is still there, our guide on increasing VRAM on Windows 11 should be able to help you.
Did the above fixes help you resolve the issue with your graphics card? Share your thoughts with us in the comments section below.
Read our disclosure page to find out how can you help Windows Report sustain the editorial team. Read more







User forum
0 messages