0x800707e7 - 0x3000d Error: What is it & How to Fix it
A third-party program is often the cause behind the 0x800707E7 error
Key notes
- When trying to upgrade to the latest version of Windows, you may often come across the 0x800707e7-0x3000d error with the message, Installation failed.
- It can also lead to a BSOD error in some cases, and in most cases, the issue seems to be related to a third-party program, corrupted files & folders, or faulty Windows update components.
- If you have too many redundant user profiles, that can also be why you see the 0x800707e7 error during the upgrade.

You are not alone if you are trying to upgrade to Windows 11 but getting the 0x800707E7 – 0X3000D error.
As the upgrade reaches a certain percentage, the system restarts again, rolls back to the previous Windows version, and shows the following error code, 0x800707E7 – 0X3000D.
What causes Windows 11 update error 0x800707e7?
Some of the reasons that we have identified that may trigger the Windows 11 upgrade error 0x800707E7 are as below:
- Services and startup items – Certain services, and startup items like trace sessions or apps may interfere with the update causing the issue.
- Conflicting external devices – Sometimes, connected peripherals like a USB, pen drive, or keyboard may interrupt the upgrade process, thus, showing the 0x800707E7 error.
- Problematic software/applications – It could be possible that a certain third-party app or software may be the reason behind the error.
- Outdated drivers – If the system drivers are not updated, it can trigger the 0x800707E7 error.
- Corrupted system files – Broken or damaged system files are often the reason behind many errors including the Windows 11 upgrade error.
- Faulty or too many user profiles – Chances are that you have redundant or corrupt user profiles that may create a conflict with the process.
- Incorrect path of the index location – Sometimes, even the index location path may trigger the 0x800707e7-0x3000d error.
How do I fix Windows 11 update error 0x800707e7-0x3000d?
You can try some of the preliminary checks to possibly fix the issue:
- Run Windows troubleshooter to detect and fix the issue automatically.
- Disable and remove conflicting external devices.
- Uninstall problematic software and applications.
- Disconnect the LAN cable to stop downloading updates.
- Disable the services and startup items.
However, if none of the above methods work, we have some effective solutions to help you fix the 0x800707e7-0x3000d error during the Windows 11 upgrade.
1. Disable Trace Session
- Press the Win + R keys simultaneously to launch the Run console, type performance.exe, and hit Enter to open the Performance Monitor.

- On the left, expand the Data Collector Sets section, and select Startup Event Trace Sessions.

- Now, on the right, look for NPETraceSession, right-click on it, and select Properties.

- In the Properties dialog, go to the Trace Session tab, and uncheck the box next to Enabled. Press Apply and then OK to save changes.

Now, restart your PC and check if you can now upgrade to Windows 11 without the 0x800707e7 error.
2. Delete unrecognized user profiles
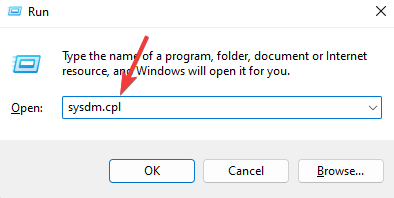
- Open the Run dialog by pressing the Win + R keys together. Type sysdm.cpl and hit Enter to launch the System Properties window.
- Next, select the Advanced tab, and under User Profiles, click on Settings.

- Now, in the User Profiles dialog, look for any unknown profiles. If you find any, select the profile and press the Delete button.

- Press Yes in the prompt to confirm.

- Repeat the process for any other unknown user profile.
Once done, press OK to exit, reboot your PC, and you should not encounter the 0x800707E7 – 0X3000D error anymore.
3. Remove the corrupted user profile from the registry editor
 NOTE
NOTE
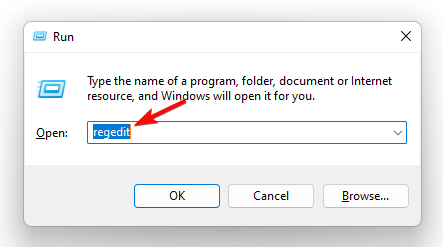
- To open the Run console, press the Win + R shortcut keys, type in regedit in the search bar, and hit Enter to launch Registry Editor.
- In the Registry Editor window, navigate to the below path:
HKEY_LOCAL_MACHINE\SOFTWARE\Microsoft\Windows NT\CurrentVersion\ProfileList - Now, under the ProfileList key on the left, select the user profile, and on the right, look for the ProfileImagePath string value.

- Under Data you should see the profile name that can help you identify if it’s an unknown account. If it is, delete the associated registry key under ProfileList.
- You should also delete any key under ProfileList with a .bak extension.
- Now, navigate to the below path and repeat Steps 3 to 5 for this as well:
Computer\HKEY_LOCAL_MACHINE\SOFTWARE\WOW6432Node\Microsoft\Windows NT\CurrentVersion\ProfileList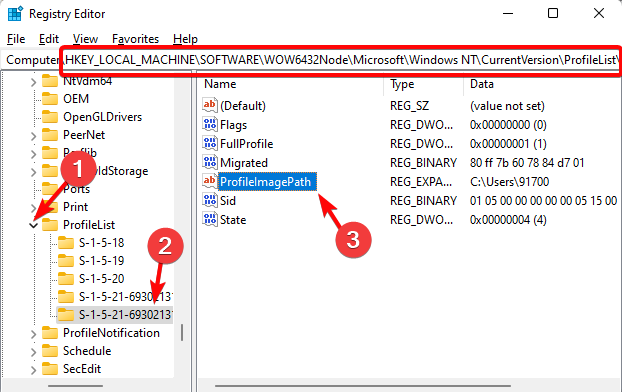
Once you have successfully deleted the unknown user profiles, restart your PC and check if the issue is resolved or if it still persists.
4. Uninstall conflicting software
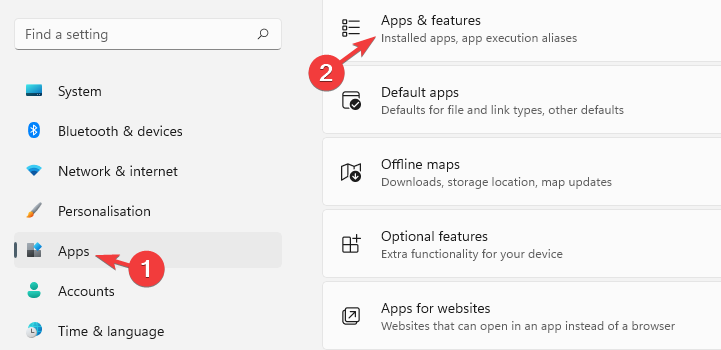
- Press the Win + I keys together to launch Windows Settings. Click on Apps on the left and then click on Apps & features on the right.
- On the next screen, go to the right, and under the App list, look for the problematic app. It’s usually Microsoft’s Zune Software or the Kaspersky Antivirus.

- Go to the app, click on the three dots next to it, and select Uninstall.
- Press Uninstall again to confirm.

Once the software is completely uninstalled, reboot your computer and check if the 0x800707e7 is gone.
5. Set the Indexing Location to the default path
- Go to Windows Search, type Indexing Options in the search bar, and click on the result.

- In the Indexing Options dialog, click on Advanced.

- Next, in the Advanced Options window, under Index Settings, go to Index Location. Here, check if the path is set to
C:\ProgramData\Microsoft
- If not, then click on Select new, and then set the path to C:\ProgramData\Microsoft. Press OK.

Once done, restart your PC, try upgrading to Windows 11 and check if you still encounter the 0x800707e7 error.
Alternatively, you can also reset the Windows update components following the process mentioned in our detailed post, which is also applicable to the 0x800707e7 error.
However, if all of the above methods fail to work, you may refer to our guide on how to perform a repair upgrade (also applicable to Windows 11) to fix the issue.
For any other queries on Windows 11 upgrade issues, do leave a message in the comments box below.
Read our disclosure page to find out how can you help Windows Report sustain the editorial team. Read more


Improve this guide


User forum
0 messages