Windows 11 HDMI Audio Not Working: 7 Ways to Fix it
These solutions have been all confirmed by our team of experts
5 min. read
Updated on
Read our disclosure page to find out how can you help Windows Report sustain the editorial team. Read more
Key notes
- Users can’t hear any sound from video streams when Windows 11 HDMI audio is not working.
- The audio troubleshooter may help some users fix HDMI when there’s no sound through HDMI in Windows 11.
- Users have also confirmed updating sound drivers to be another potential resolution when Windows doesn’t detect HDMI audio.
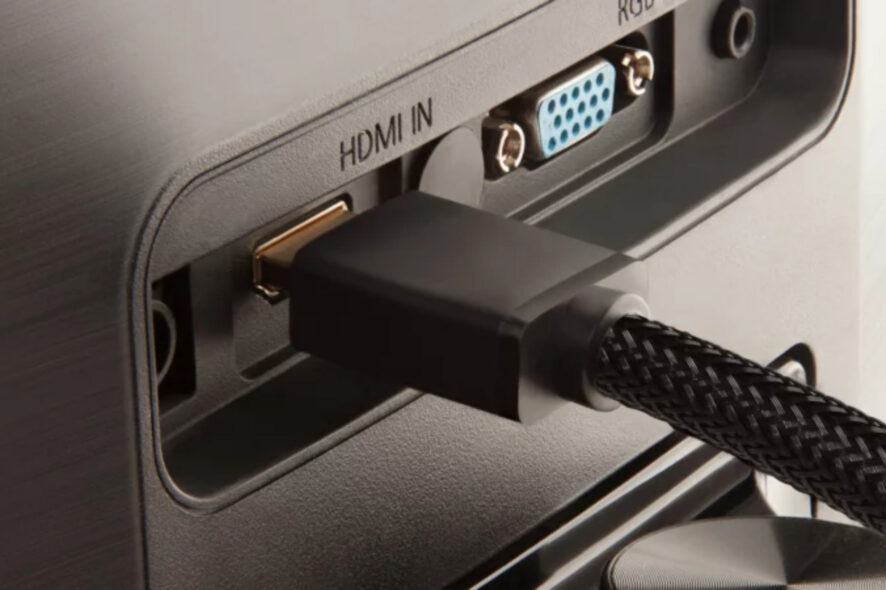
HDMI is a video and audio interface with which users stream media from TVs to their Windows 11 PCs. The HDMI standard delivers superior picture and sound quality for streamed content.
However, a common HDMI issue many users often face is missing audio. They can see the video on PCs and TVs connected with HDMI but can’t hear any audio to go with it.
Thus, the HDMI video works but the sound doesn’t for those users. Are you another user who needs to fix the same HDMI audio issue in Windows 11? If so, try applying the fixes below.
Why is audio not working with HDMI?
Here are a few reasons audio is not working with HDMI in Windows 11:
- Issues with the connection: Usually, it’s a loose or improper connection that leads to audio issues.
- Damaged cables: Whenever faced with this problem, you should check the cable for external damages since it, too, might be the reason the audio is not working with HDMI.
- Corrupt, incompatible, or outdated driver: When you have incompatible, corrupt, or outdated drivers, the corresponding device starts to throw errors. Reinstalling or updating the driver should do the trick.
- Misconfigured audio settings: The problem can also arise if you have the built-in audio device set as default instead of the one connected via an HDMI cable.
What can I do if HDMI is not playing audio in Windows 11?
Before trying any advanced solutions, here’s what you should do:
- Try reconnecting your PC’s monitor with the TV by unplugging the HDMI cable and plugging it back in. Double-check that you’ve connected them correctly with the HDMI cable. One thing to note is that some HDTVs (high-definition TVs) have multiple HDMI ports. So, try reconnecting your PC with a different HDMI port on your TV if it has one.
- Also, check the condition of the HDMI cable before reconnecting. If you have an alternative HDMI cable available, try using that one instead.
1. Run Windows 11’s Sound Troubleshooter
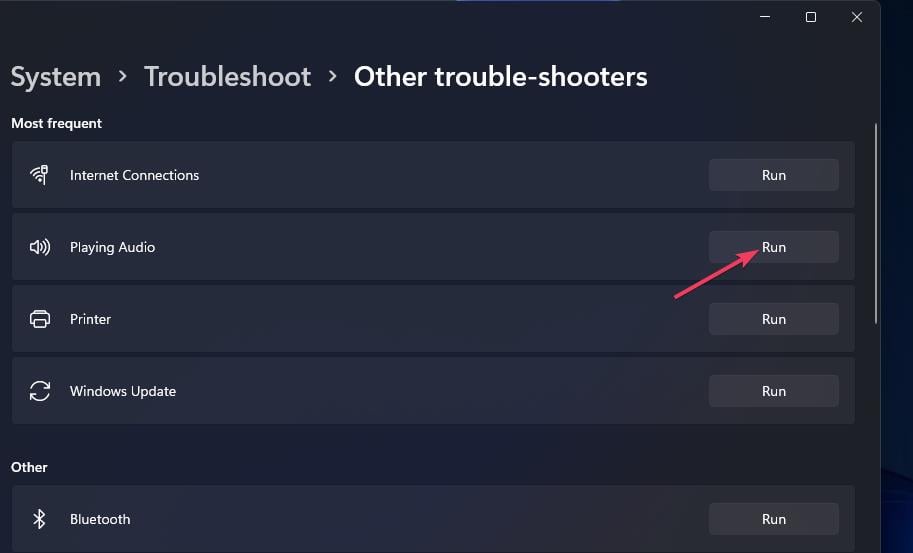
- Launch Settings (press Windows key + I), and select Troubleshoot in that app.
- Click Other trouble-shooters to view a list of Windows 11’s troubleshooters in the Settings app.
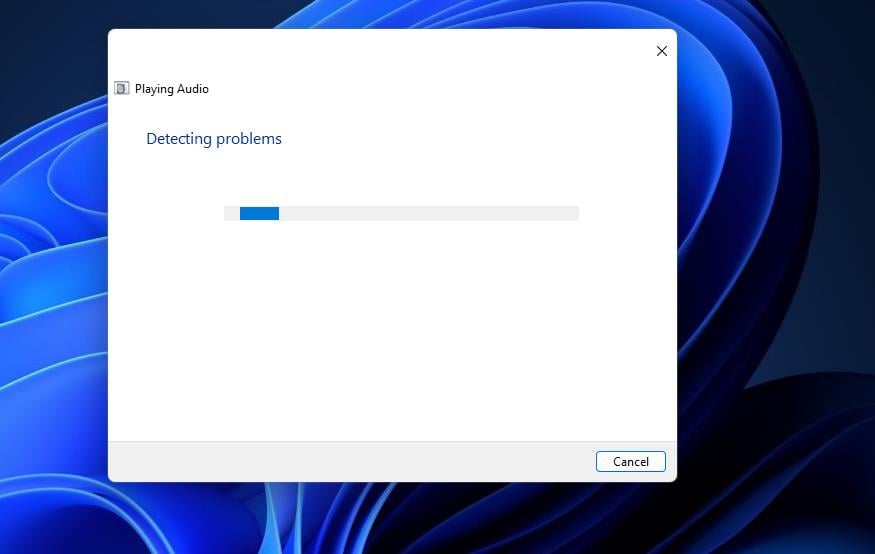
- Select the Play Audio troubleshooter’s Run button.
- Apply any resolutions suggested by the troubleshooter.
When the NVIDIA HDMI audio is not working in Windows 11, a quick trick is to run the built-in dedicated troubleshooter.
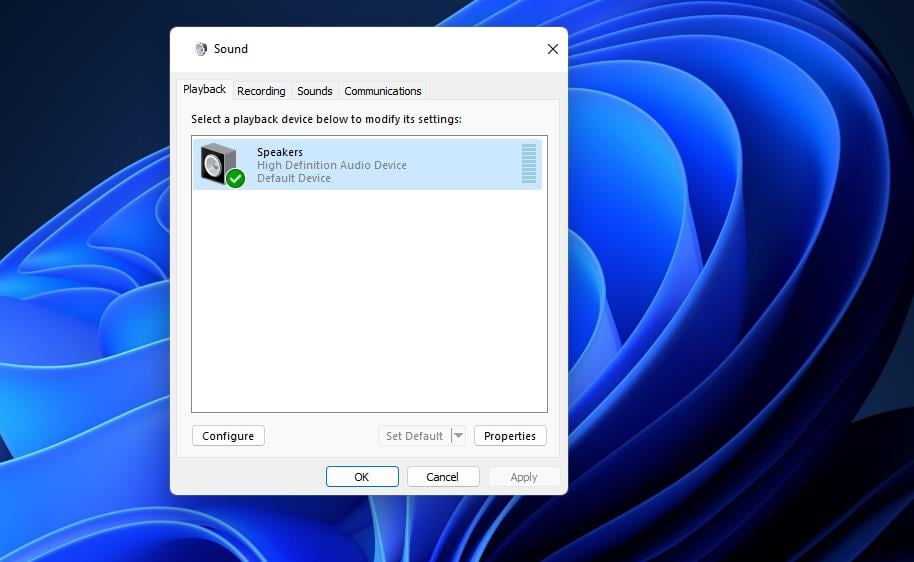
2. Make sure your HDMI is set as the default playback device
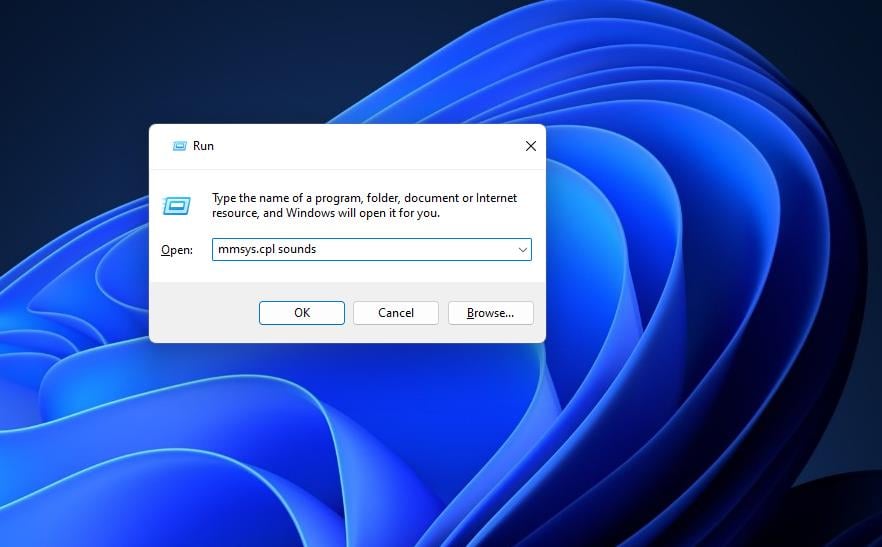
- Press the Windows and R buttons on your keyboard simultaneously.
- Then input this command for opening sound settings:
control mmsys.cpl sounds - Click OK to open the Sound window.
- Right-click an HDMI output device on the Playback tab to select Enable.
- Select the HDMI output device, and press the Set Default button.
- Click Apply and OK to save the new sound settings.
3. Update sound drivers
- Press Windows + X to select the Device Manager option on the Power User menu.
- Then double-click the Sound, video, and audio controllers category.
- Right-click the High Definition Audio category to select Update driver.
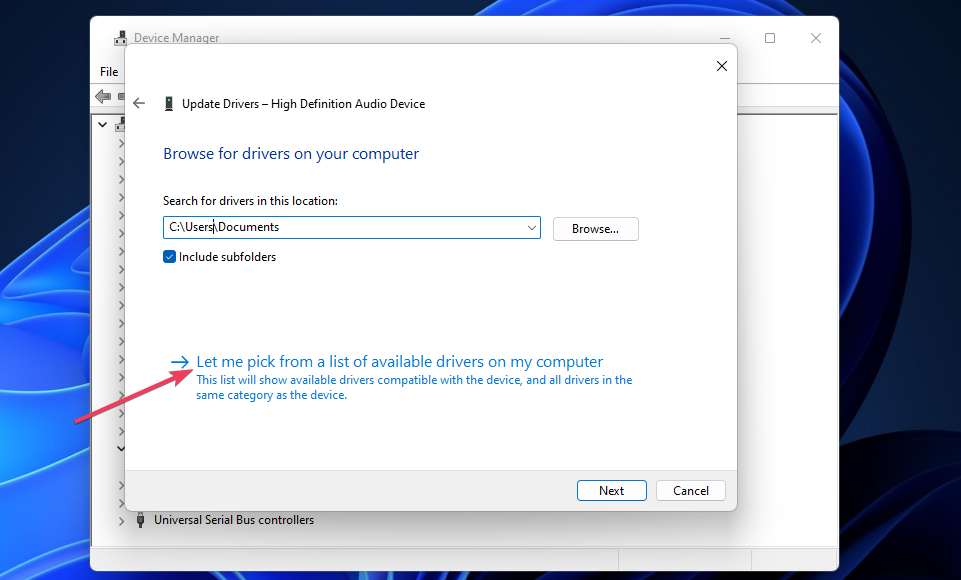
- Select the Browse my computer for drivers option in the Update Drivers window.
- Click the Let me pick option.
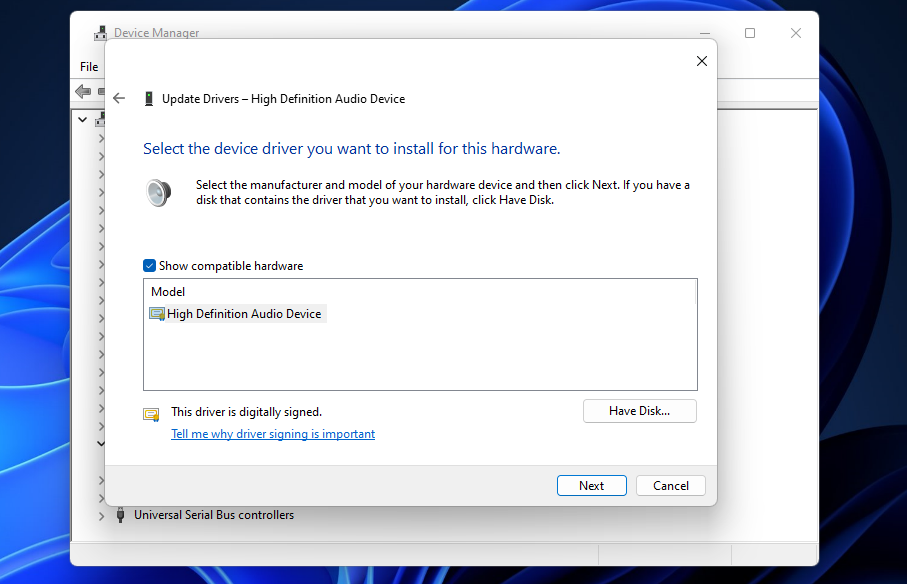
- Select High Definition Audio Device, and click the Next button.
- Click Yes on the Update Driver Warning window.
You can also update the audio driver with software like Outbyte Driver Updater. It is a driver updater utility that includes options for scanning and automatically updating device drivers on your PC.
4. Reinstall sound drivers
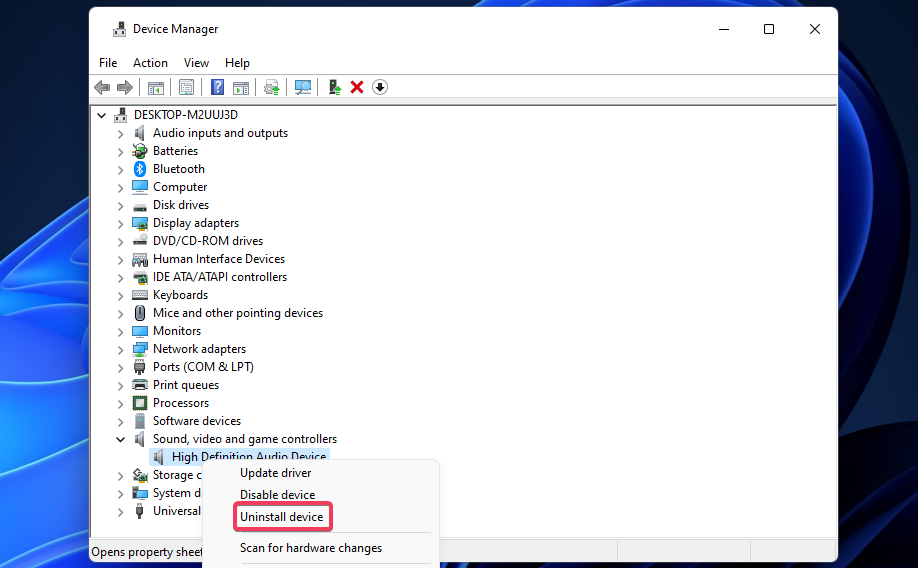
- Open the Sound, video, and audio controllers category in Device Manager as covered in steps one and two of method four.
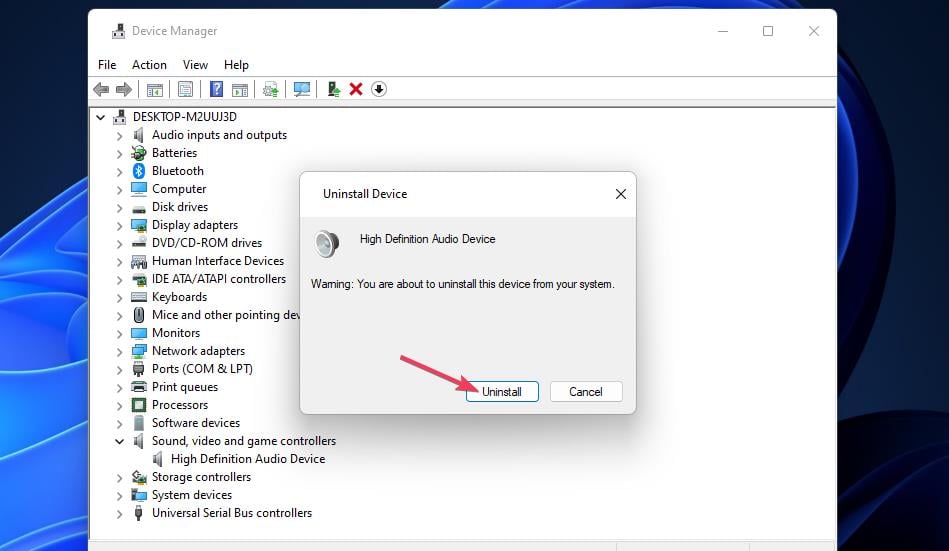
- Click High Definition Audio Device with the right mouse button to select Uninstall device.
- Select the Uninstall option.
- Press Alt + F4 to select Restart.
If HD audio is not working in Windows 11, reinstalling the sound drivers may do the trick.
5. Restart the Audio Service
- Bring up Run by pressing the Power User menu’s Win + X hotkey and selecting it there.
- Type in this Run command for the Services tool:
services.msc - Click OK to launch Services.
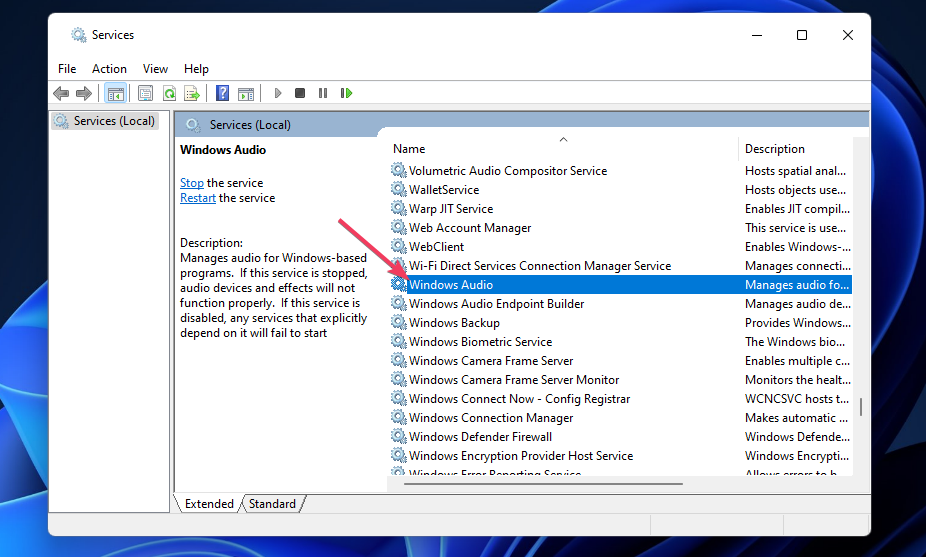
- Double-click the Windows Audio service.
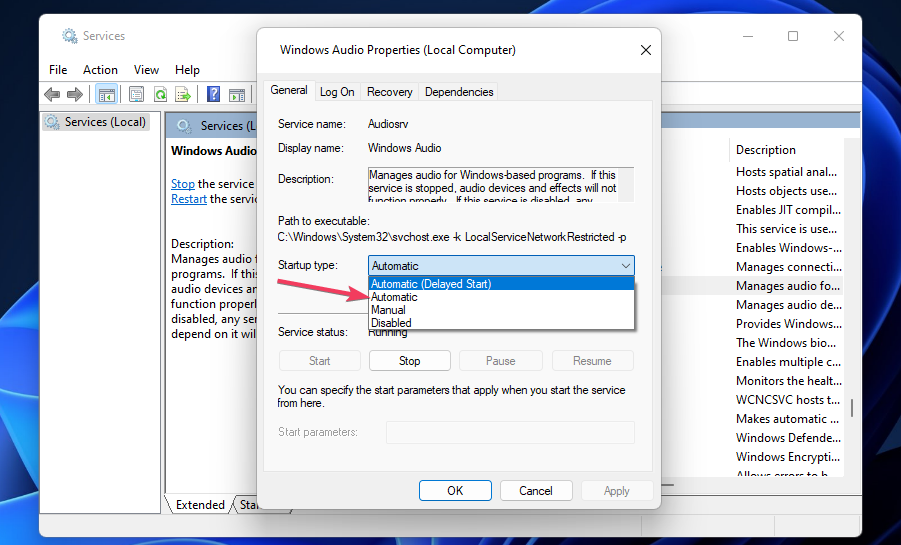
- Select Automatic on the Windows Audio service’s drop-down menu if that service is disabled.
- Click the service’s Start button.
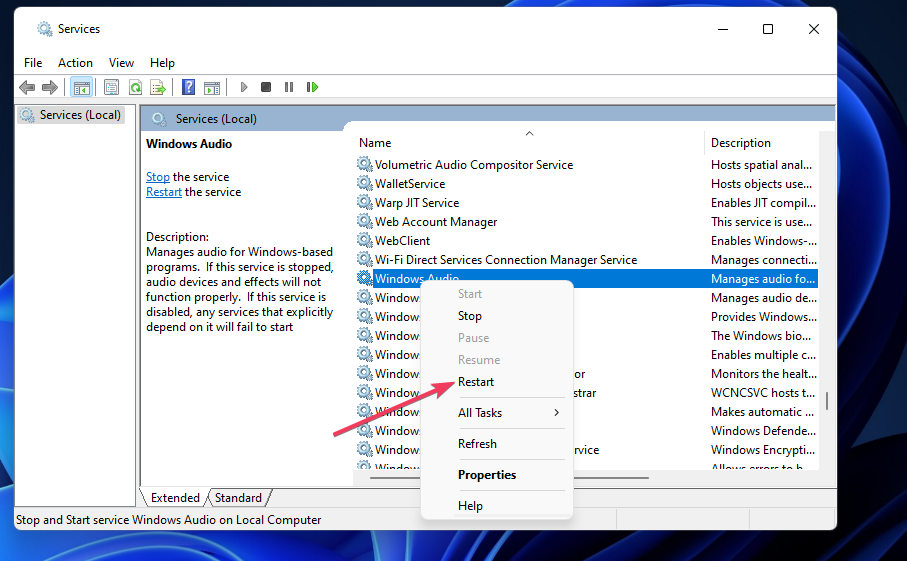
- If that service is already enabled, right-click Windows Audio and select a Restart option for it.
- Repeat the above steps for the Windows Audio Endpoint Builder service.
6. Enable all audio controllers
- Open Device Manager as outlined in previous resolutions.
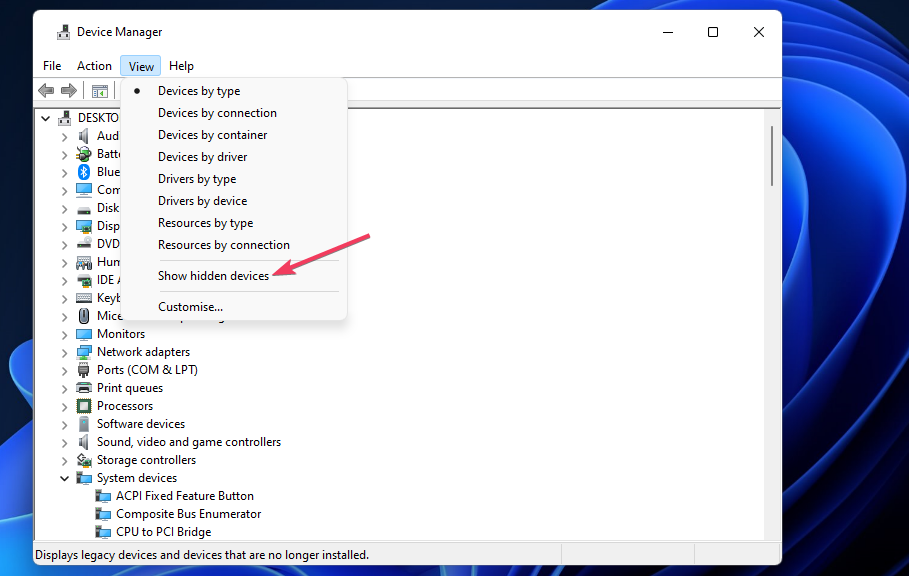
- Click the View menu, and select its show Show hidden devices option.
- Double-click System devices to extend that category.
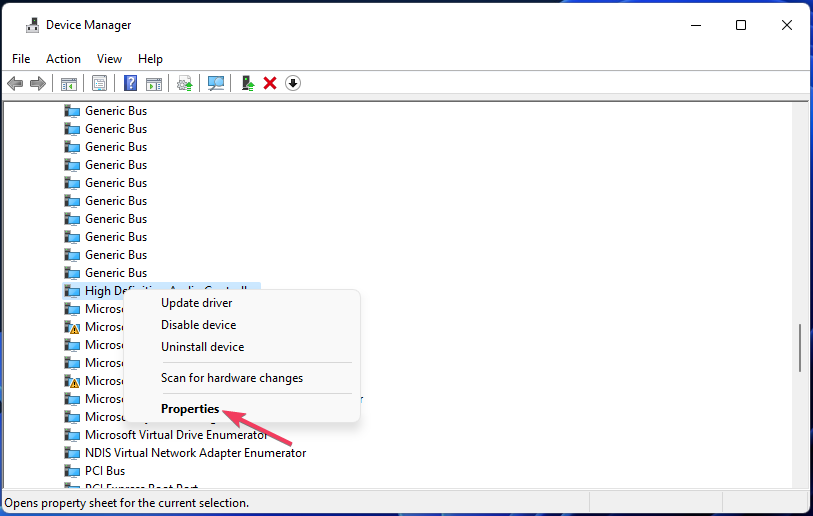
- Right-click High Definition Audio Controller and select Properties.
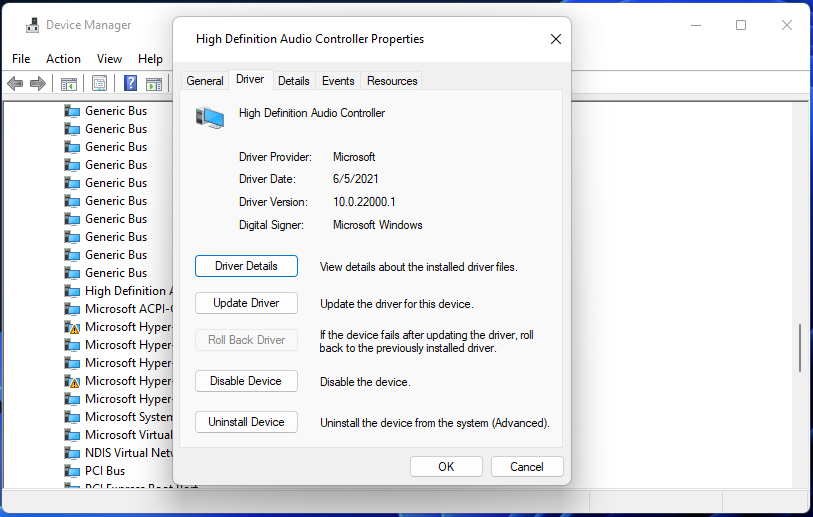
- Select the Driver tab.
- Click Enable if that option is available on the tab.
- Repeat those steps for any other audio devices listed for that category.
What HDMI version is needed for Dolby Atmos?
You can utilize Dolby Atmos with any HDMI cable type. HDMI 2.0 will be sufficient, but the higher bandwidth HDMI 2.1 cables deliver higher resolution video.
We hope one of those resolutions fixes the HDMI audio issue on your Windows 11 PC. Try applying all of them to find one that works for you.
These methods can also be useful if sound is not working on dual monitors, so be sure to try them.
Feel free to discuss this HDMI audio issue in the comments section below. Users who’ve found other ways to fix HDMI sound not working are welcome to share their resolutions there.



User forum
0 messages