Windows Live Mail Error 0x8de00005: How to Fix It in 5 Steps
You can try to delete the old account and set up a new IMAP account
4 min. read
Updated on
Read our disclosure page to find out how can you help Windows Report sustain the editorial team. Read more
Key notes
- The Windows Live Mail error 0x8de00005 is associated with the fact that the IMAP settings aren't configured properly or there are some issues with your Gmail account.
- You can try deactivating the old account or tweaking the connect Gmail account settings.
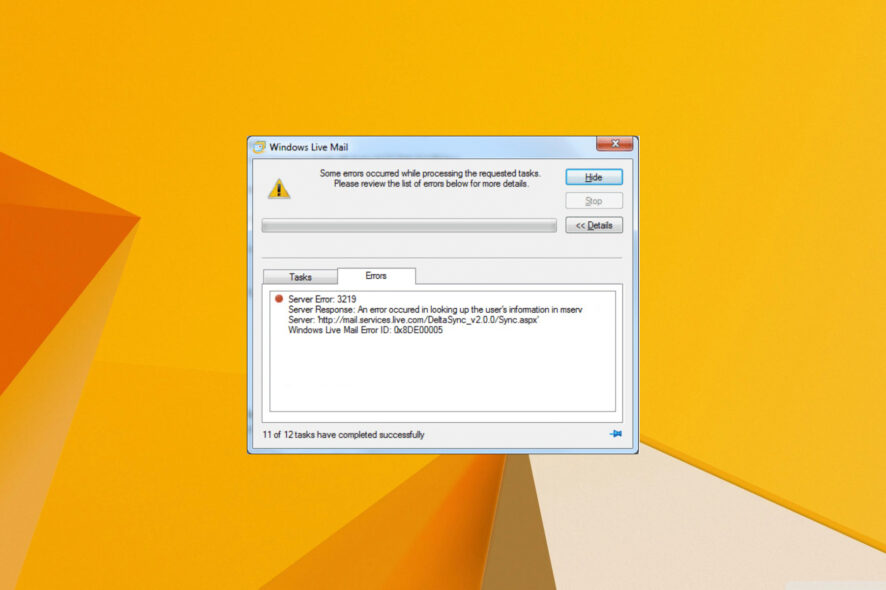
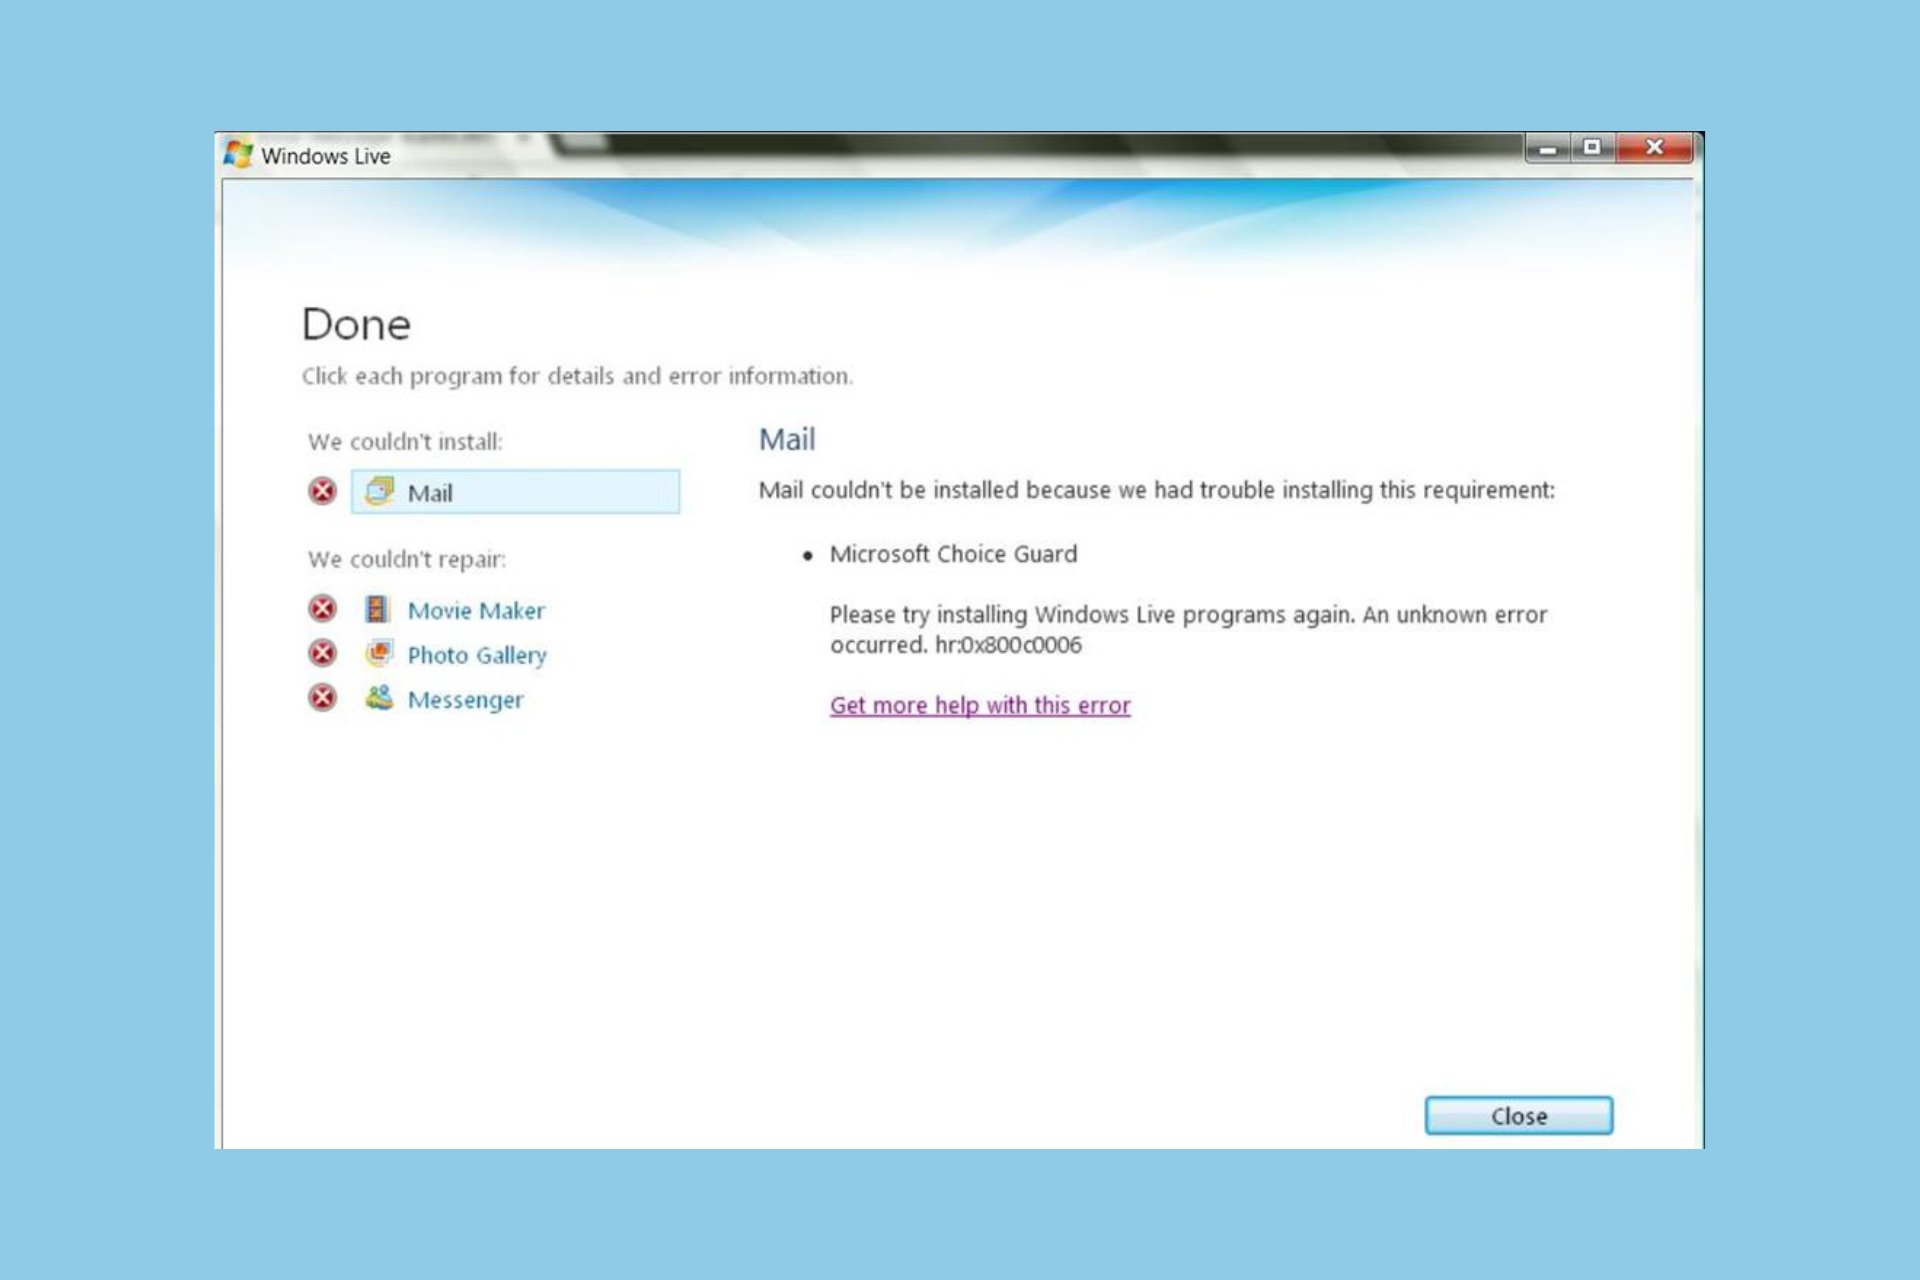
Windows Live Mail users have reported facing 0x8de00005 error, which prevents them from using the mail app. Notably, users aren’t able to send/receive mail using their accounts.
This issue mostly is reported by users on older versions of Windows and it can cause Windows Live Mail to stop working. In this guide, we will give you a bunch of solutions that you can apply to resolve the Windows Live Mail error 0x8de00005 on your PC. Let us get right into it.
What is Windows Live Mail error 0x8de00005?
When your PC throws a Windows Live Mail error 0x8de00005, then you will get either of a couple of the deficiency codes, i.e., 3219 or 3202. The causes are usually the following:
- Network problems – Sometimes routers won’t connect to the Internet, or there might be another network-related issue that is causing this problem.
- Client configuration – A common cause can be your client configuration. Make sure that HTTPS and IMAP are properly configured to fix this problem.
- Account problems – In some instances, you might have an account issue, so you might have to change or even delete your Outlook account.
How can I fix the Windows Live Mail error 0x8de00005?
Here are a few quick things that you can try out before going ahead with the advanced solutions;
- You can try restarting your PC. Certain temporary glitches or bugs can be easily resolved by restarting the PC, as it will load all the system files from scratch.
- Check the Internet connection and make sure that it is working well. A limited Internet connection can often give rise to multiple errors.
- Close the program completely and launch it back again and check if this resolves the error or not.
Now let us take a look at some advanced solutions if the above preliminary ones did not fix the issue.
1. Configure Hotmail correctly
- Launch any web browser on your PC.
- Log in to your Hotmail account.
- Click Options.
- Select More Options.
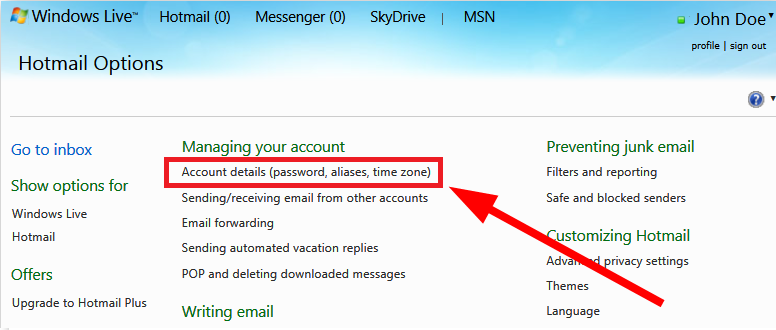
- Click on Account details under Managing your account.
- Provide your password, if asked.
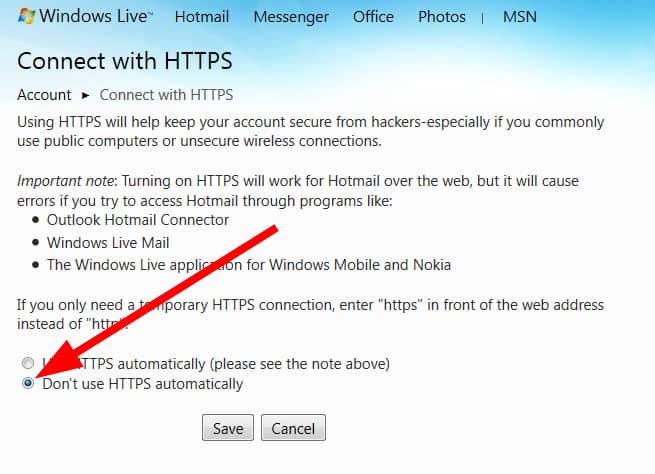
- Under Other options, click on Connect with HTTPS option.
- Tap on the circle for Don’t use HTTPS automatically option.
- Restart your PC.
- Launch Windows Live Mail with your Hotmail account.
- Click the Send/Receive button to re-sync, and check if the problem is resolved or not.
2. Deactivate the old account
- Launch Windows Live Mail.
- Select your email account.
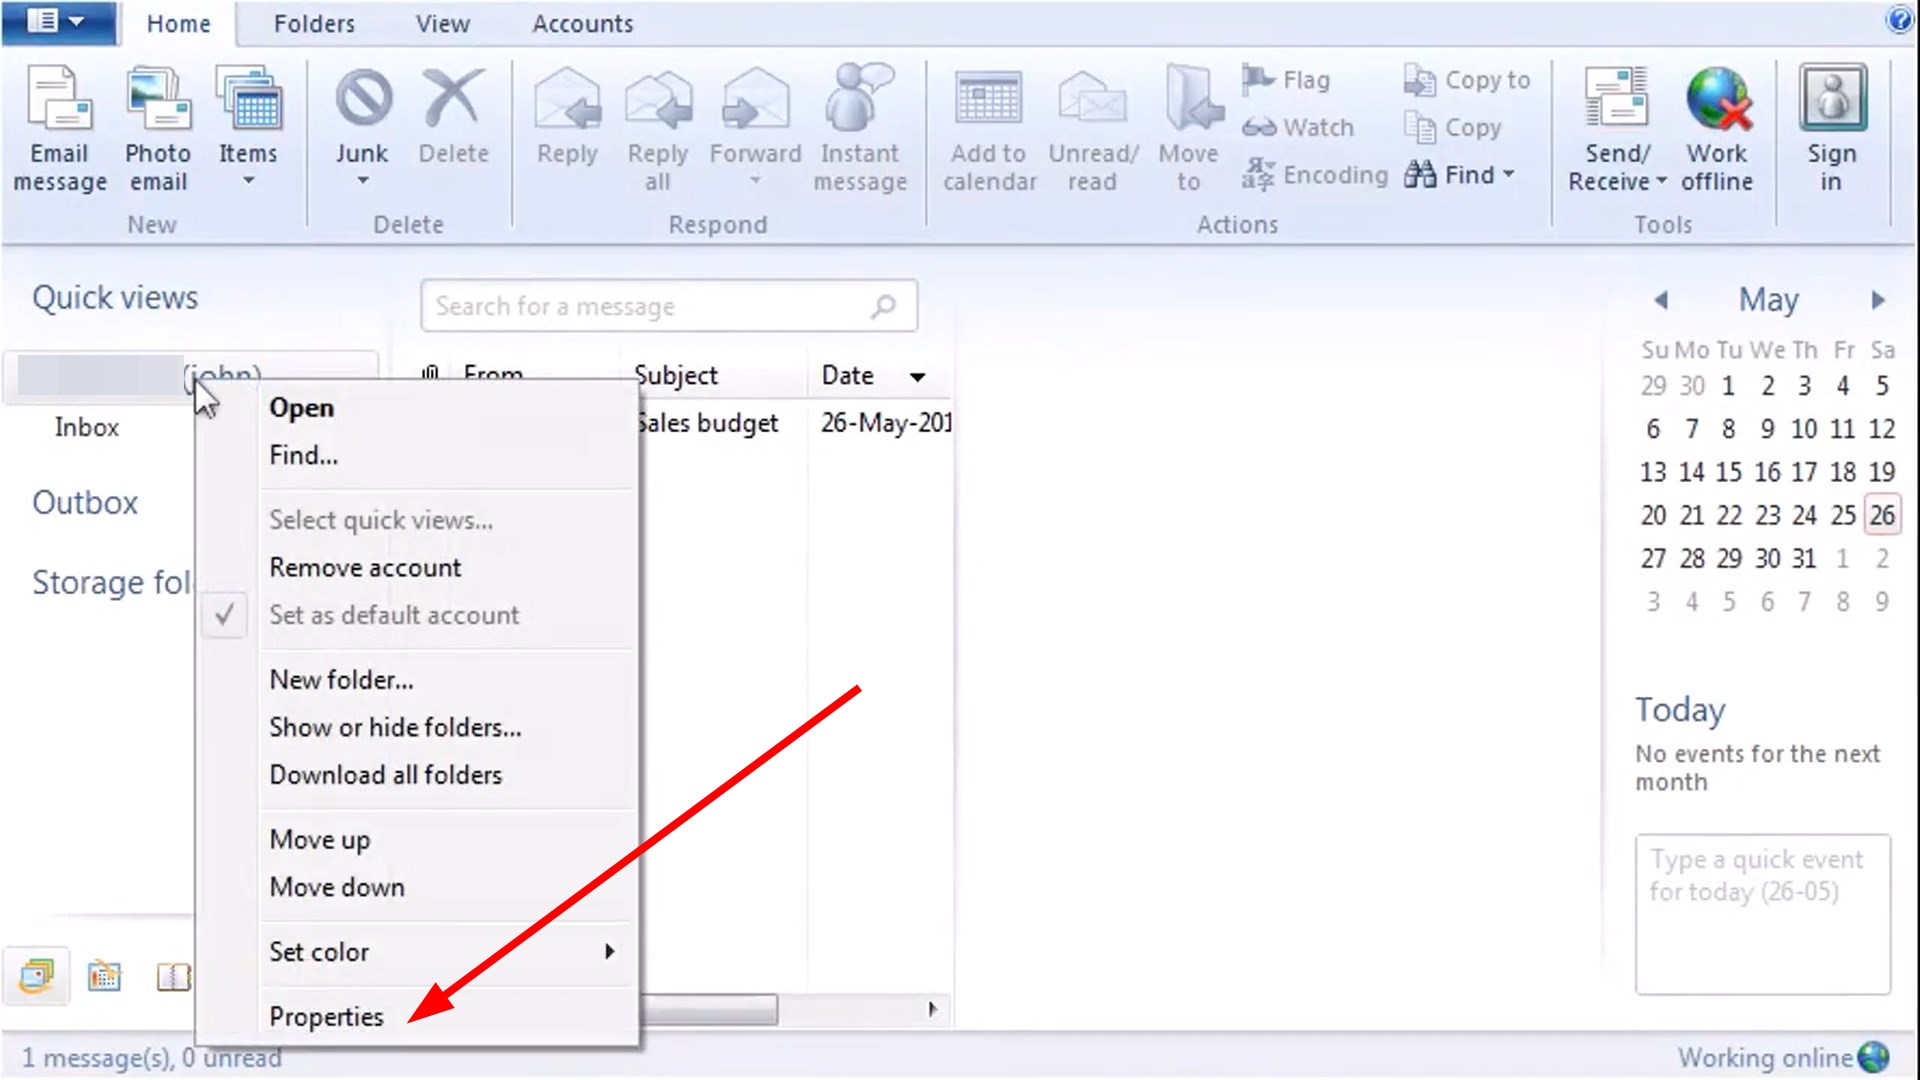
- Right-click on your email account name and select the Properties option from the context menu.
- Deselect the Include this account when receiving mail or synchronizing option from the General tab.
- Click on Apply and OK.
3. Add a new account
- Launch Windows Live Mail.
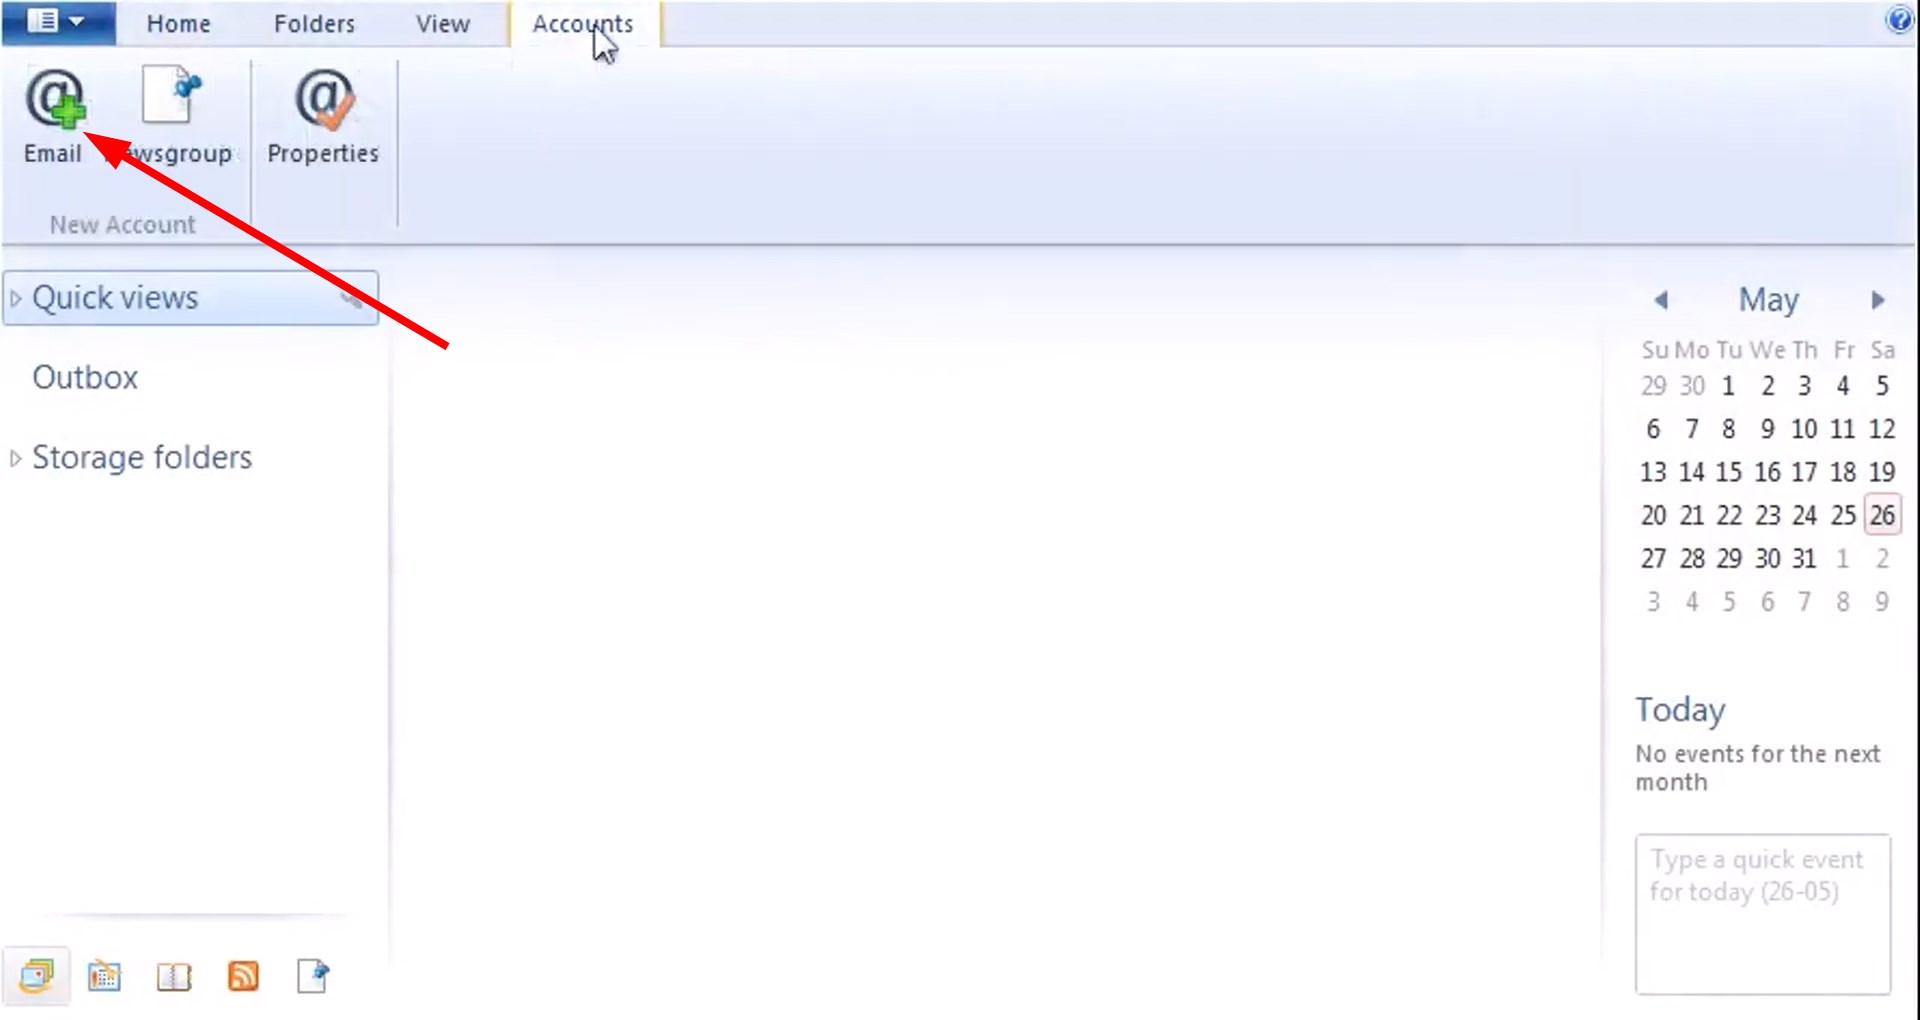
- Click on the Accounts tab.
- Click on the Email button.
- Enter your email address and password.
- Check the Manually Configure Server Settings option.
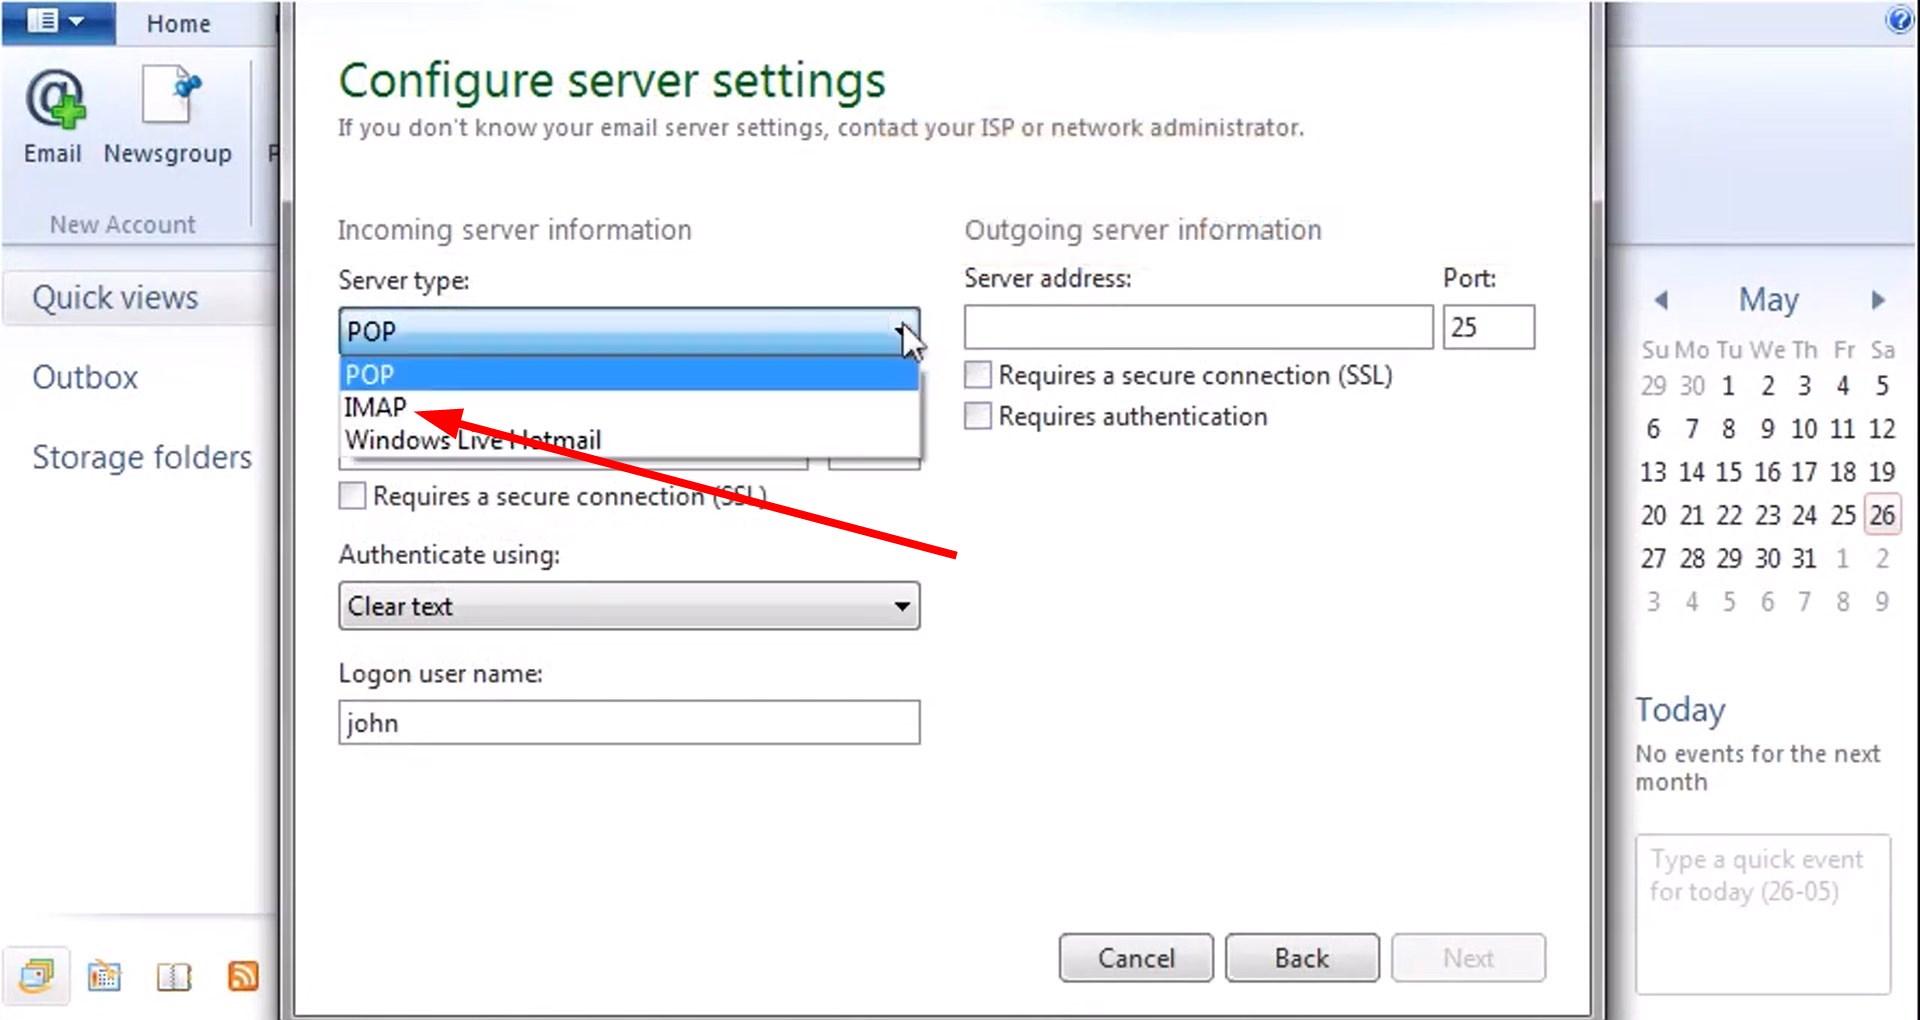
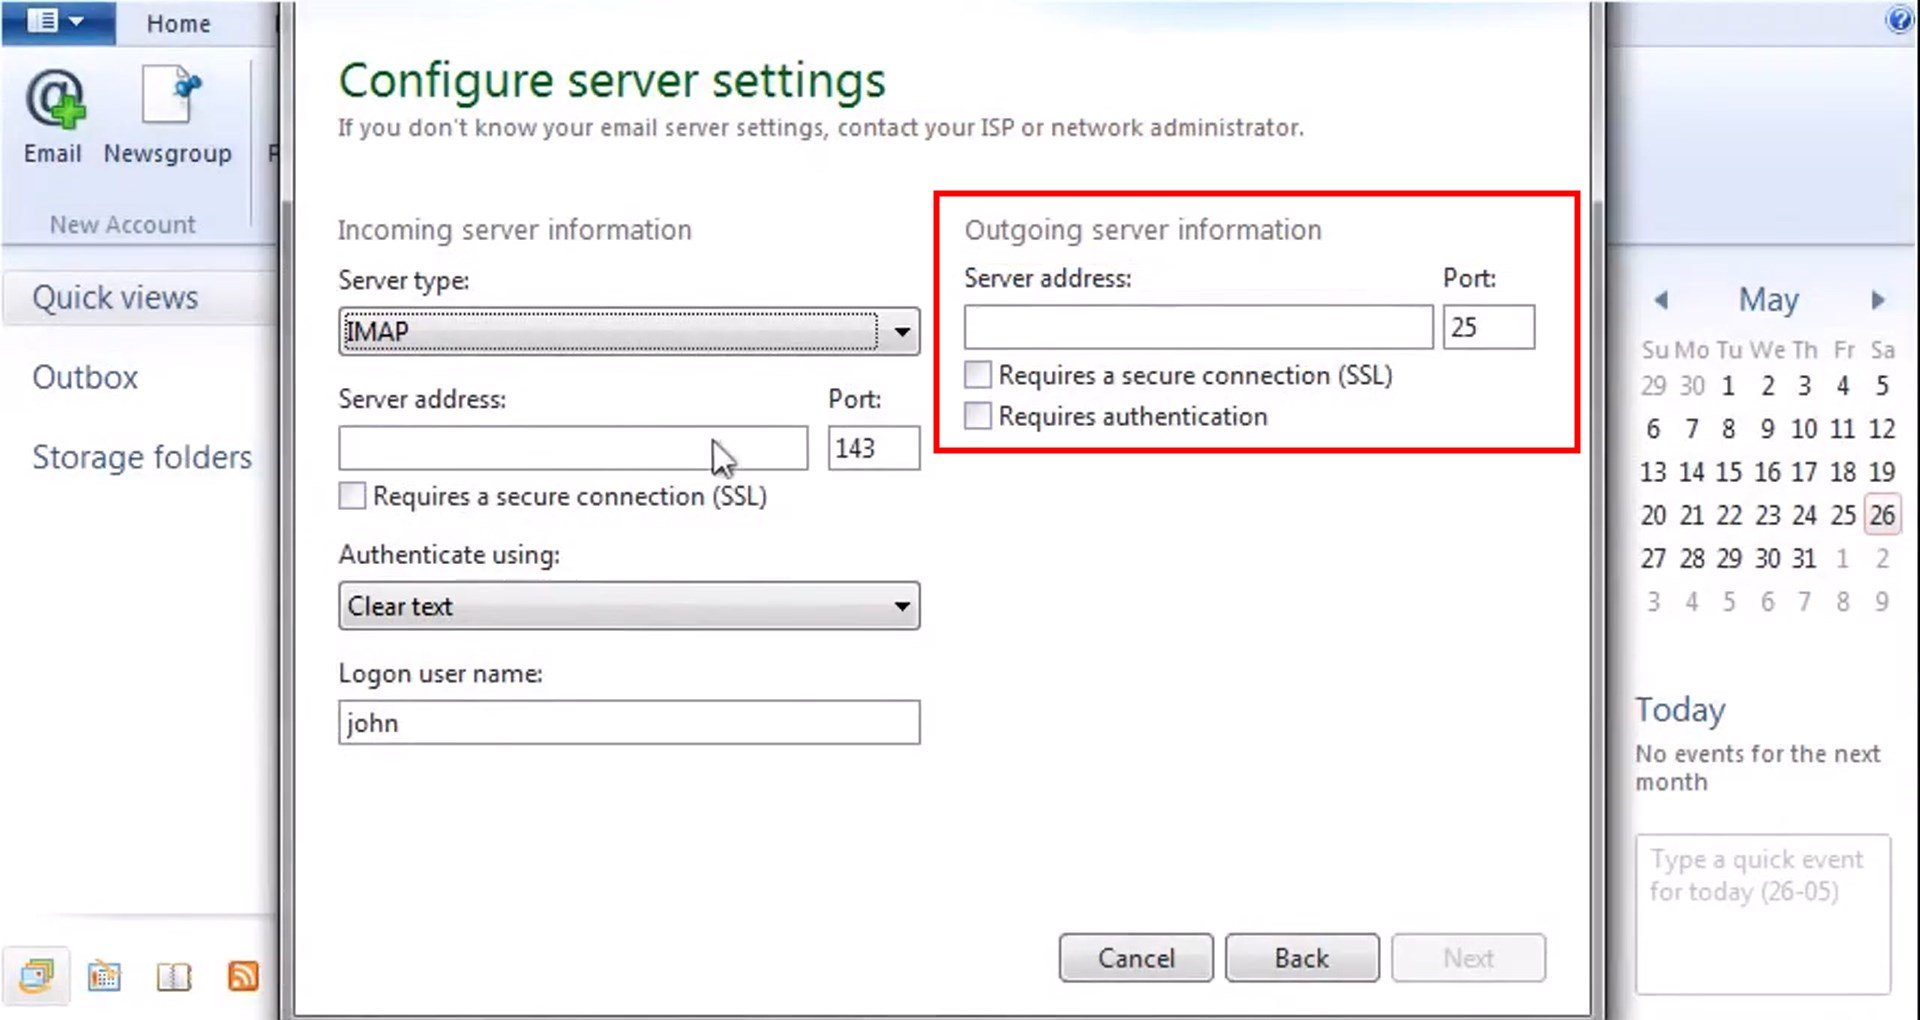
- Under Server type, select IMAP as the server type.
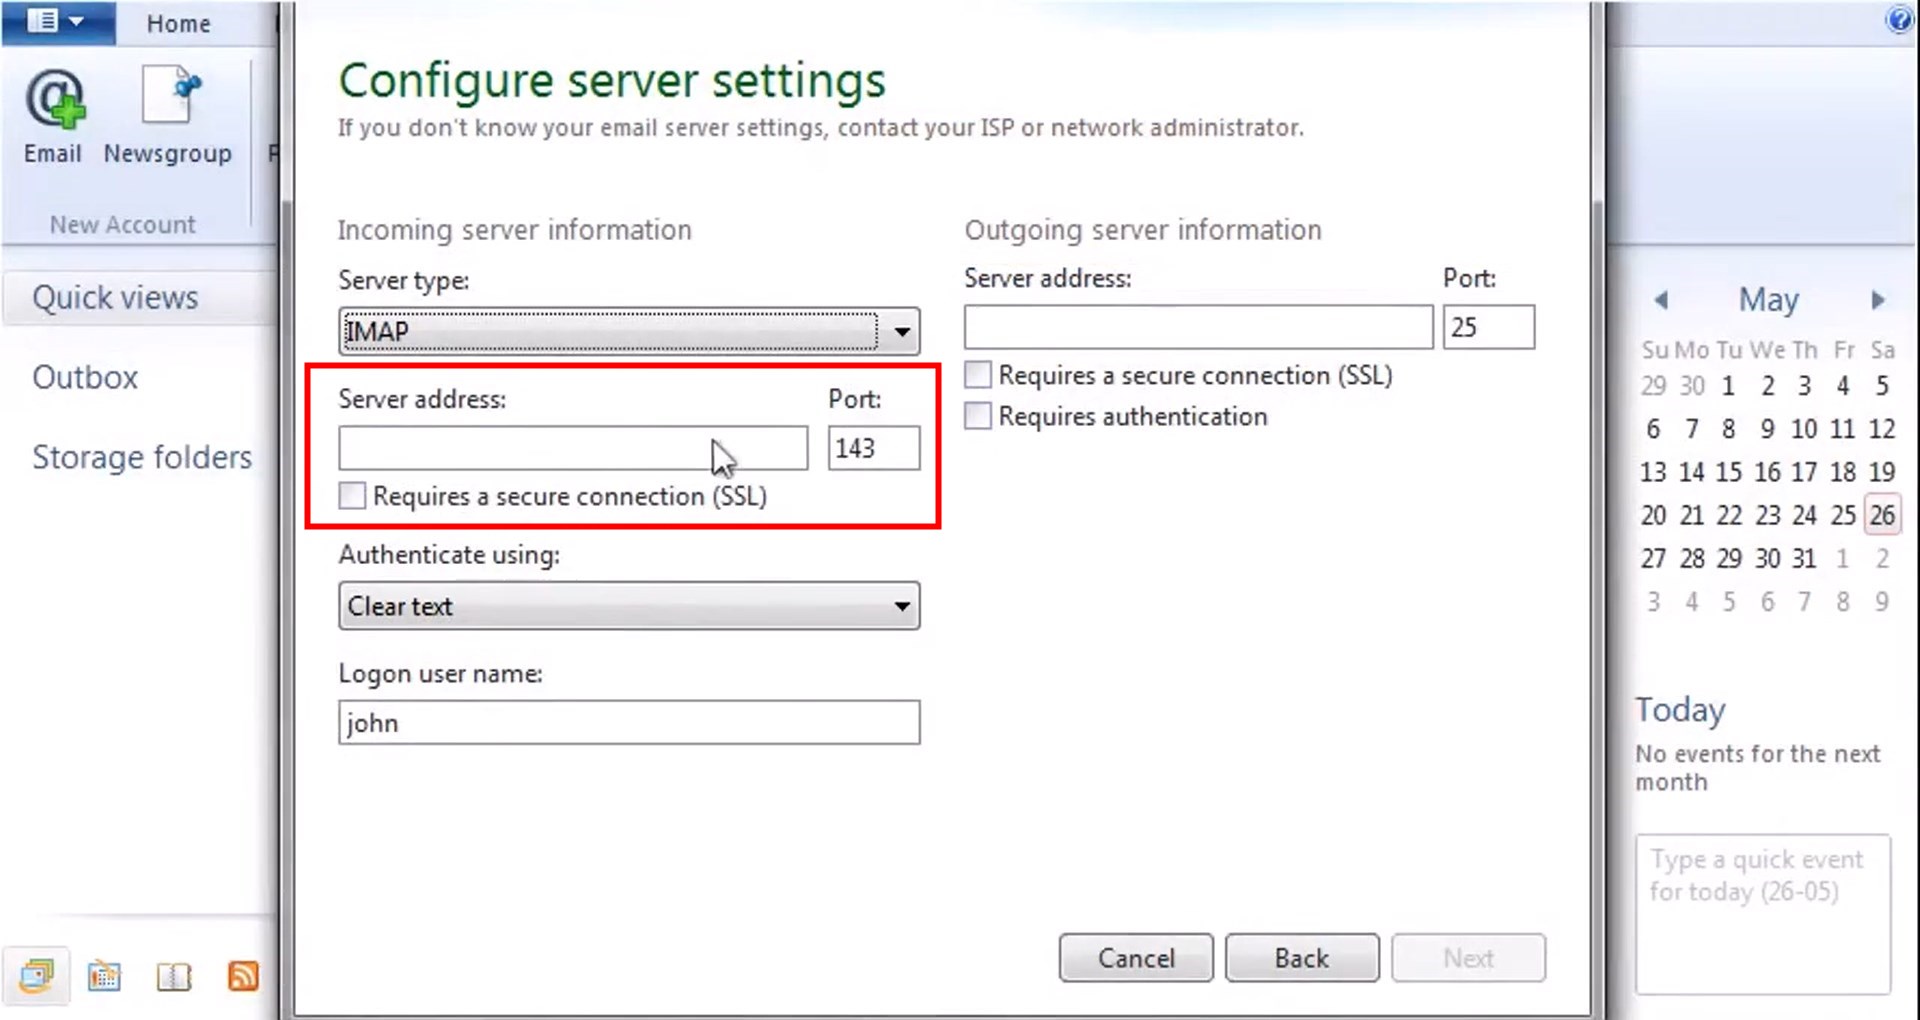
- In the Server Address field, type imap-mail.outlook.com and in port type 993.
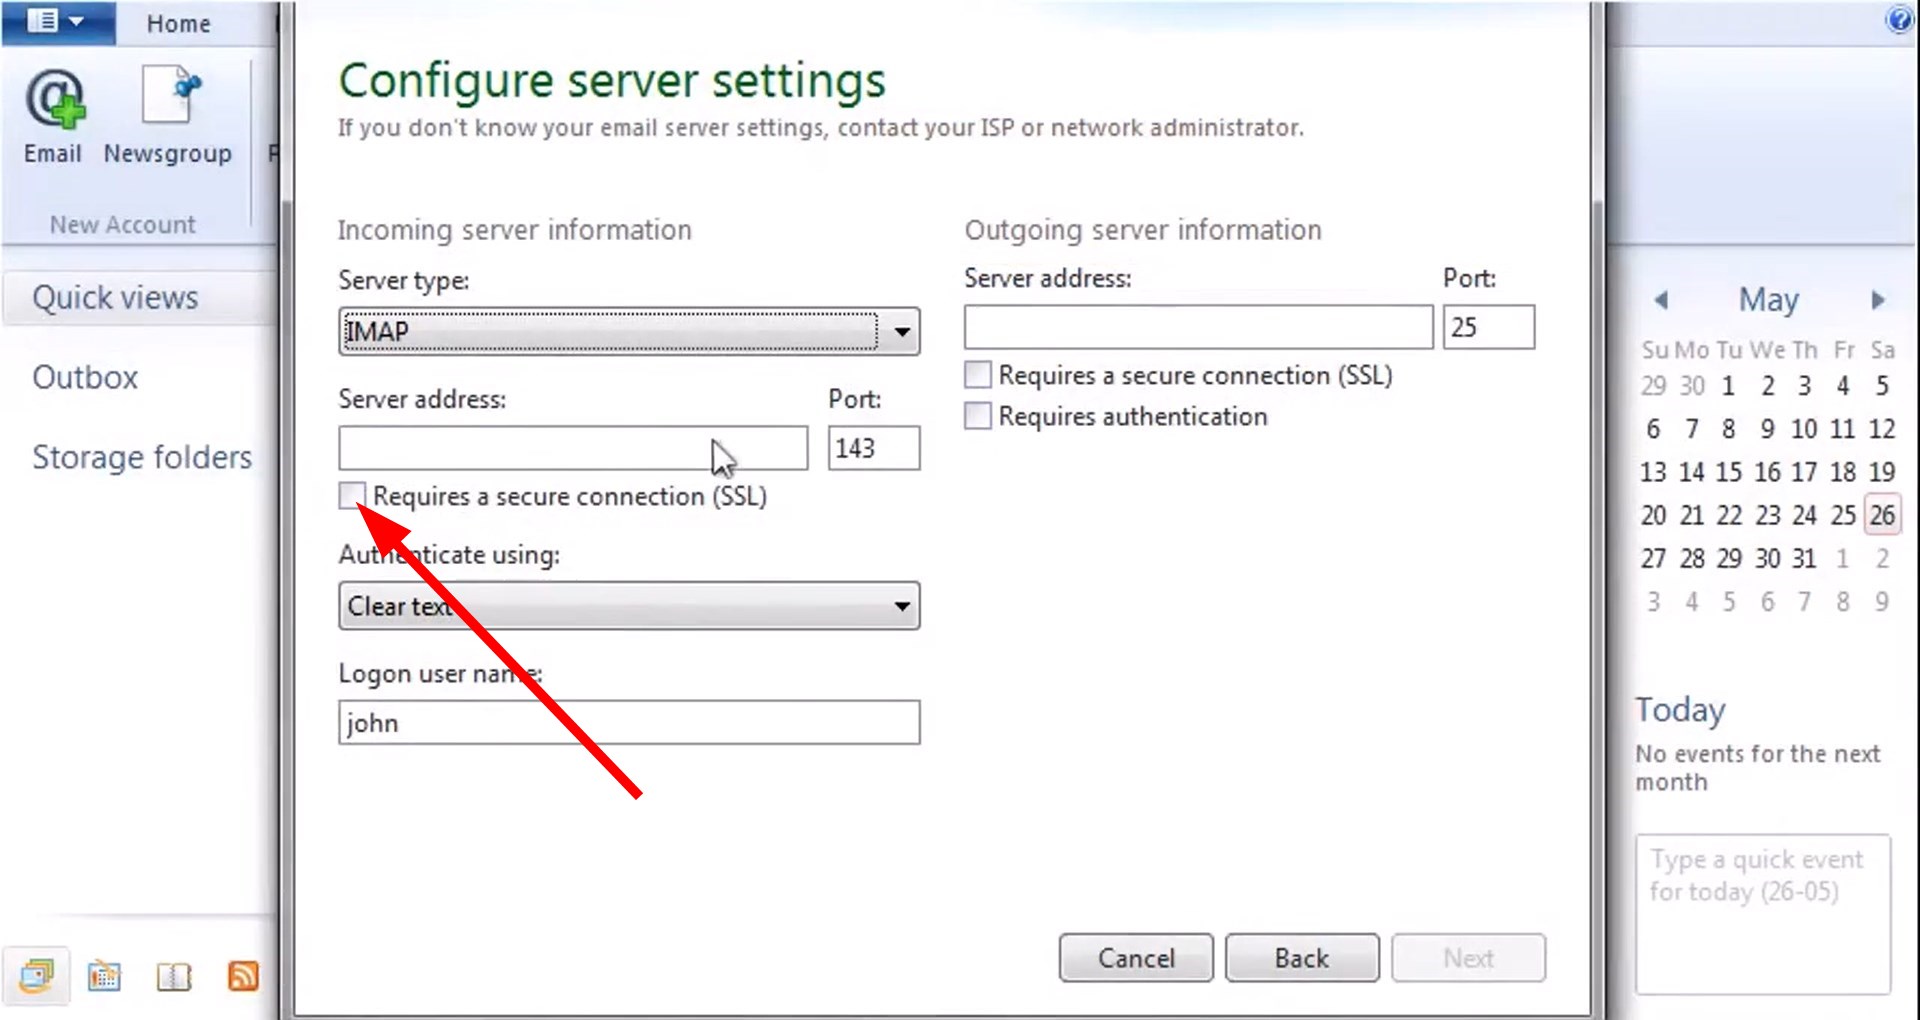
- Check Requires a secure connection SSL option.
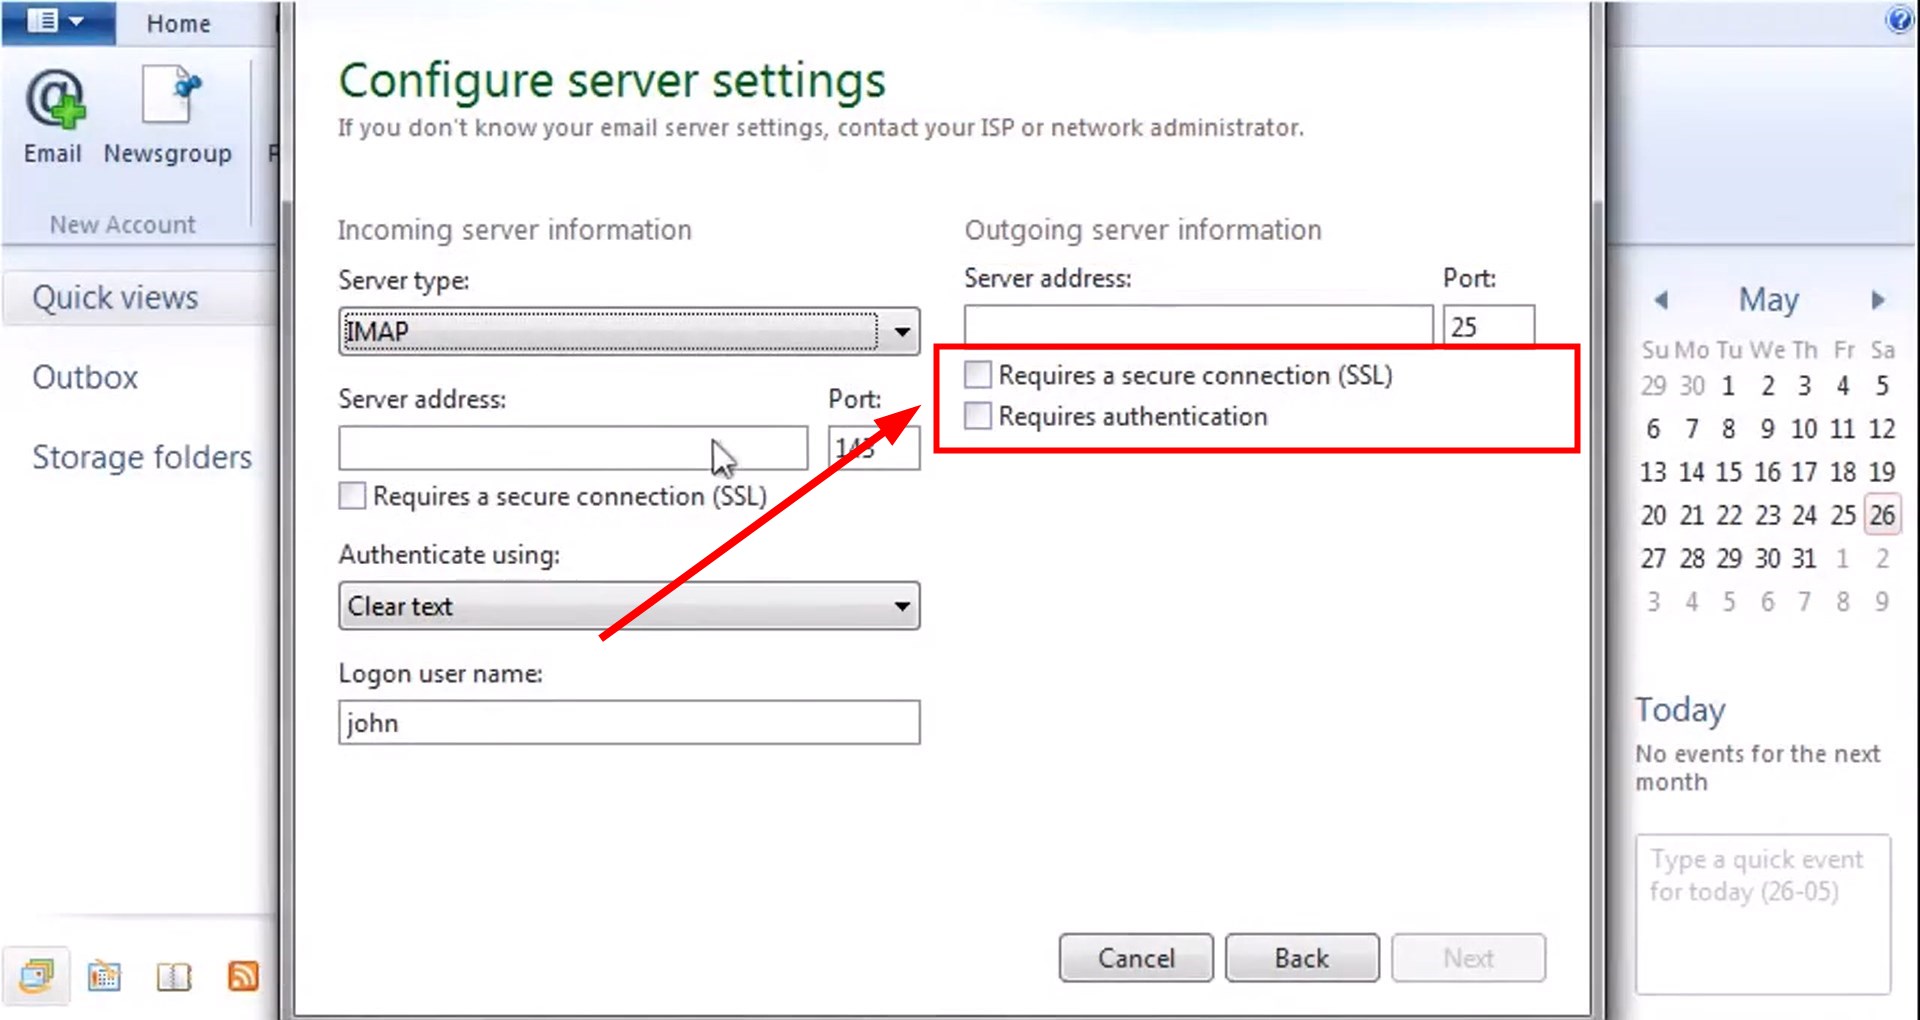
- Under Outgoing Server Information, type smtp-mail.outlook.com as the server address, and in port type 587.
- Check the Requires a secure connection SSL and Requires Authentication options.
- Click Next.
- Click Finish.
4. Remove the old account
- Launch Windows Live Mail.
- Select your email account.
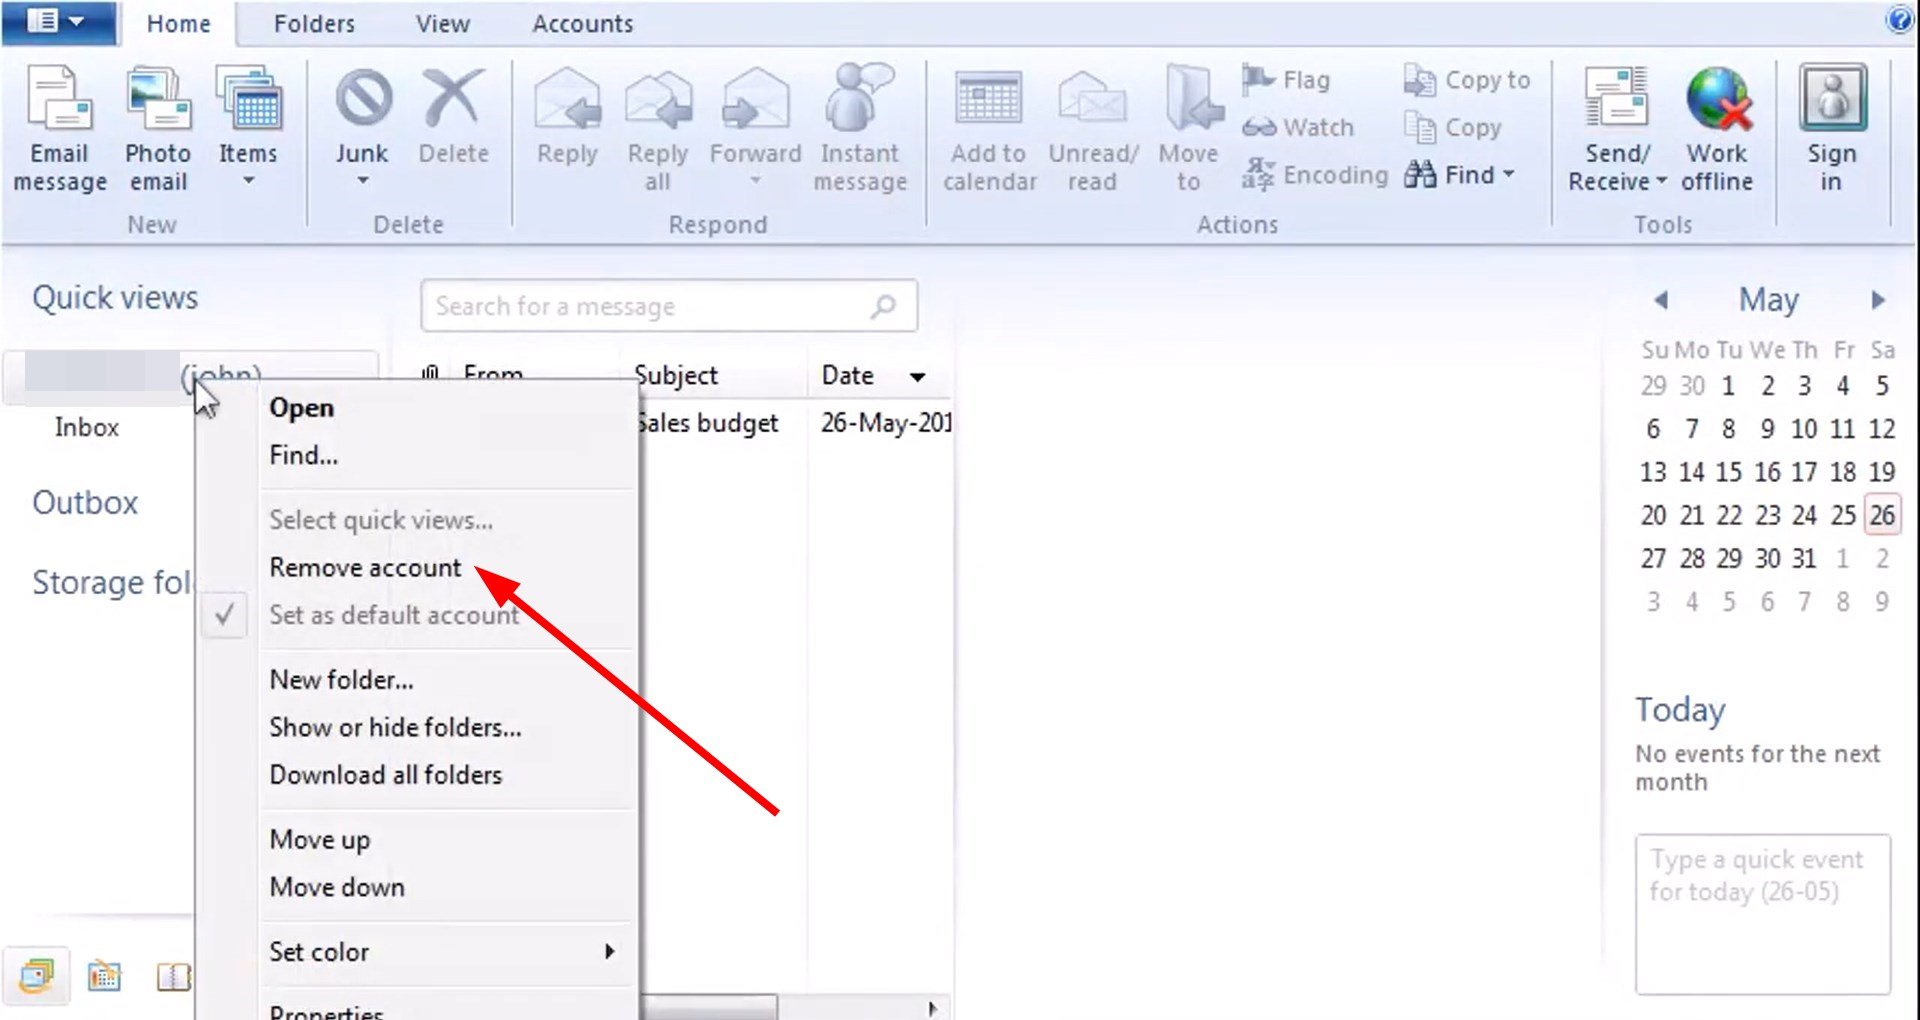
- Right-click on your email account name and select the Remove account option from the context menu.
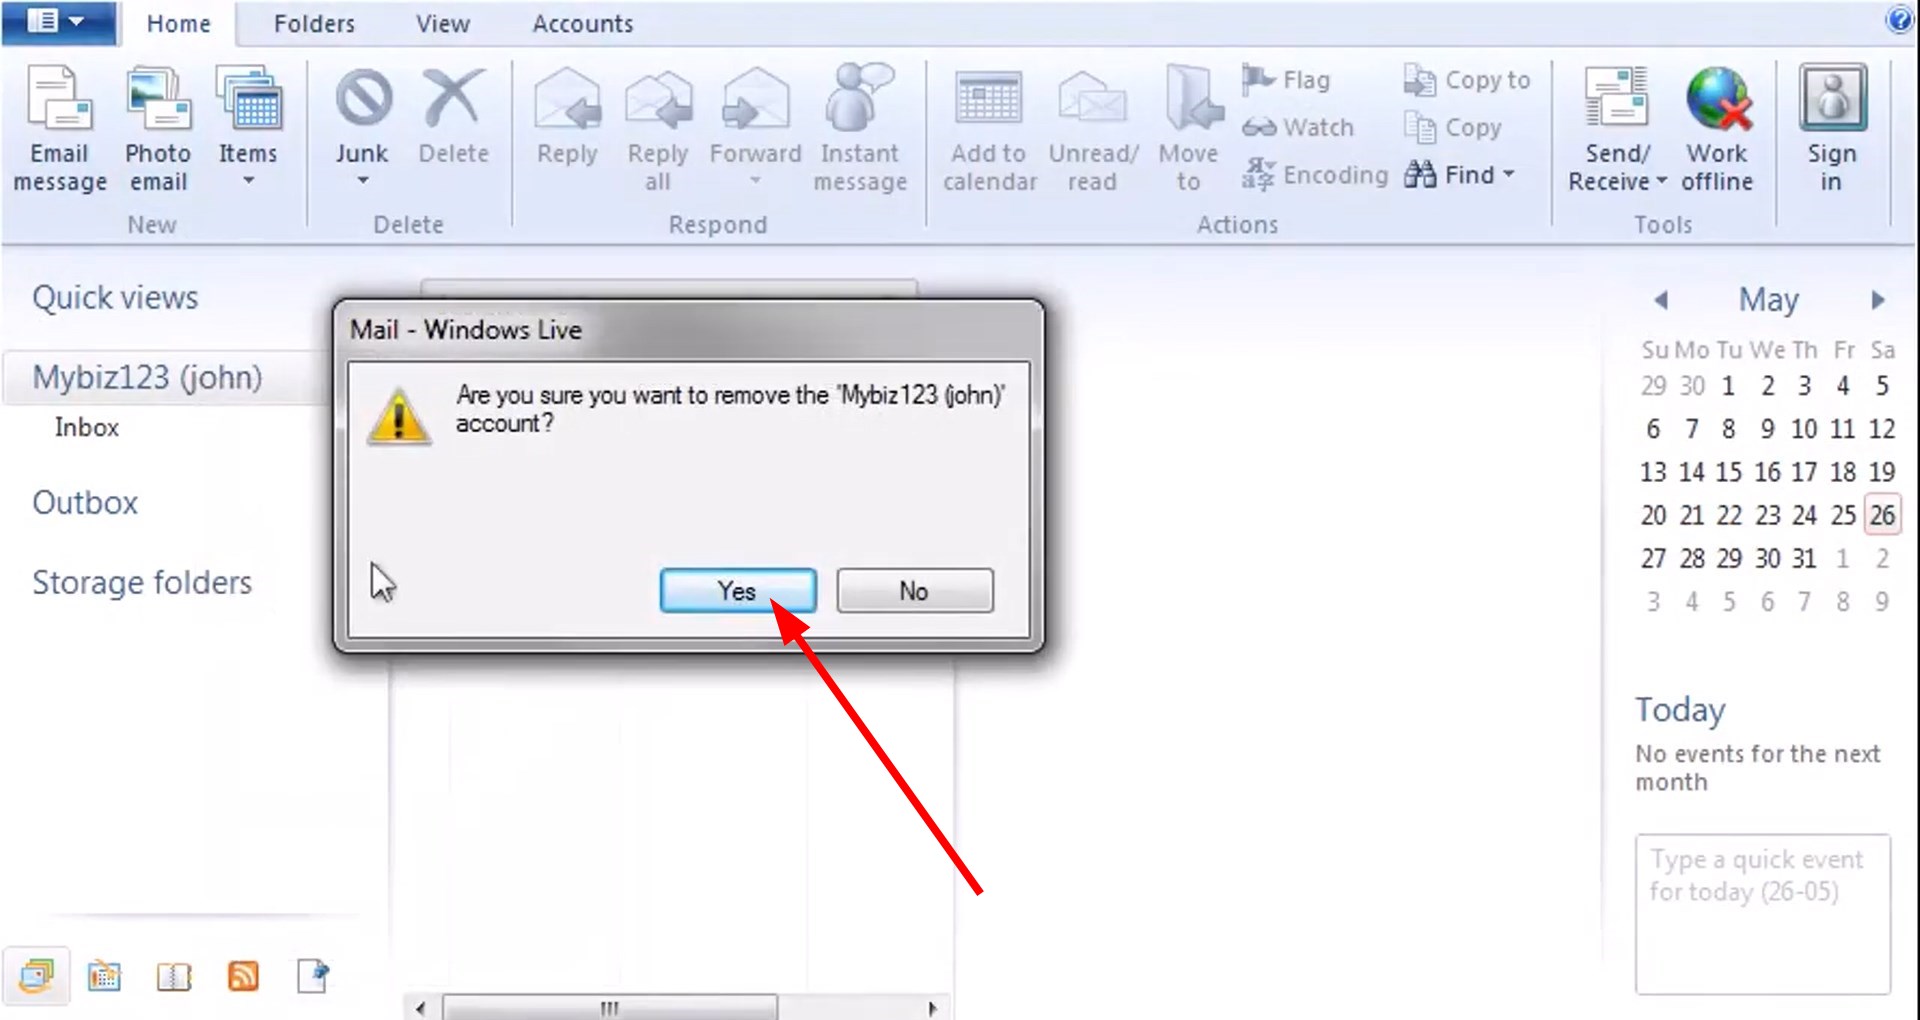
- Click on Yes to confirm the deletion.
Once you have shifted all your email messages from your old account to your new one (which you have added using solution 2), then, you can go ahead and remove your old account following the steps mentioned in this solution.
Do note that removing the account is irreversible, i.e., you won’t be able to get it back. So, make sure that you have transferred all your emails from your old account to your new one before deleting them.
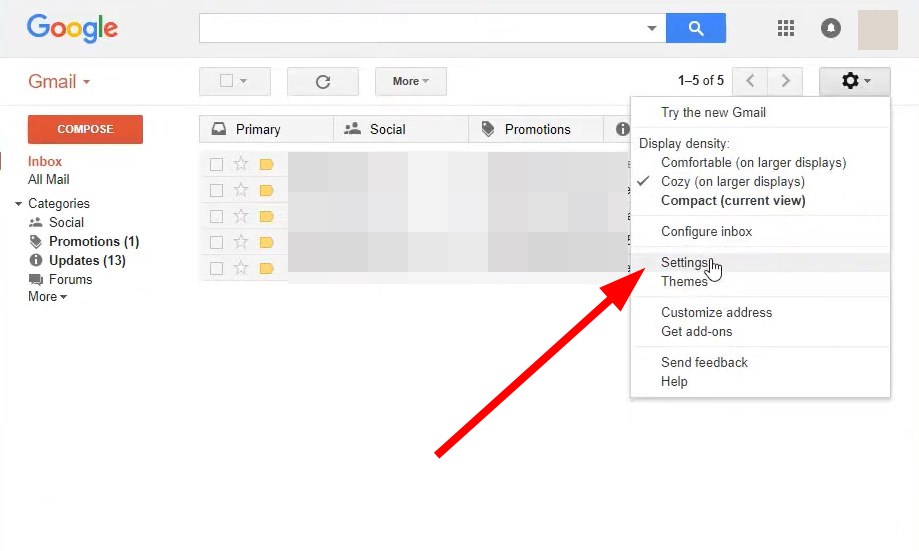
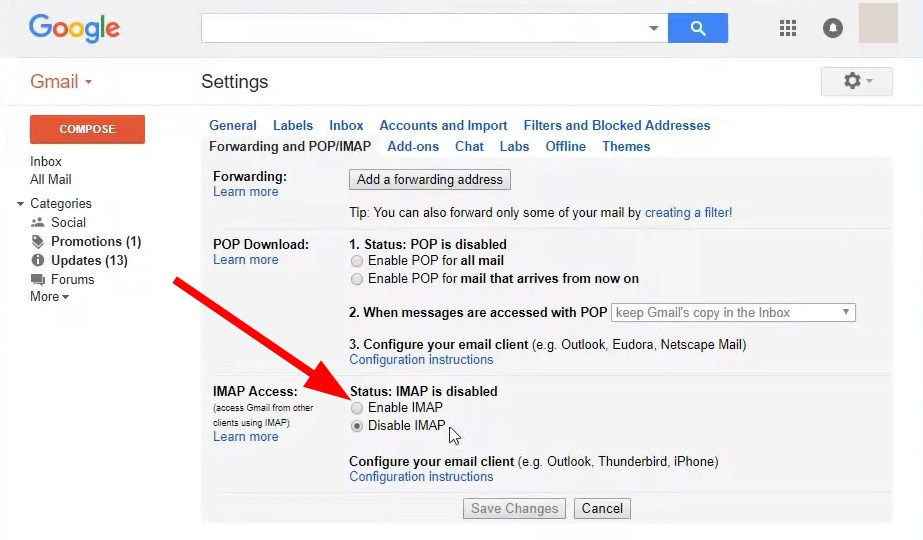
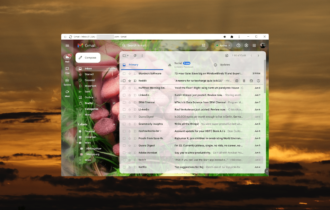
5. Enable IMAP in your Gmail account
- Open Google Chrome.
- Click on the Settings icon.
- Select Settings.
- Switch to the Forwarding and POP/IMAP tab.
- Click on Enable IMAP.
- Click on Save Changes.
That is it from us in this guide. We also have a guide that will help you resolve the Outlook cannot log on error message. And if Outlook won’t open on your PC, there’s a dedicated article for that as well.
Let us know in the comments below, which one of the above solutions helped you resolve the Windows Live Mail error 0x8de00005.






User forum
0 messages