Fix: Windows 10 Settings won't Open from Start Menu
Restore the Settings app and gain back control of your system
4 min. read
Updated on
Read our disclosure page to find out how can you help Windows Report sustain the editorial team. Read more
Key notes
- Not launching the Settings app is incredibly annoying because you've lost a basic Windows function.
- Such an error can be caused by corrupt files or out-of-date software.
- To fix this, install any pending patches, but if that doesn't work, you may need to re-register Settings.
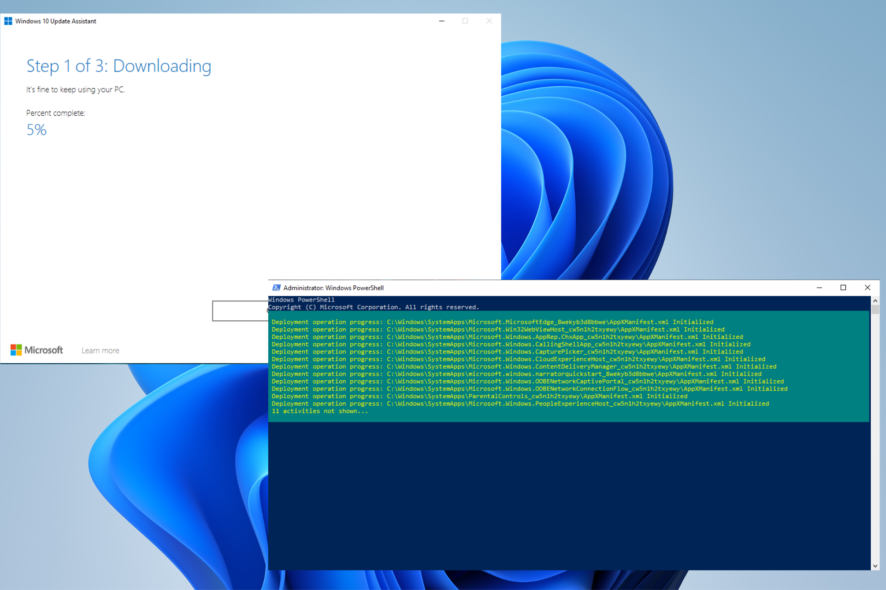
The Windows Settings app and Start menu are ideal tools for any computer system, so it can be hard to imagine either one not working. But it’s entirely possible.
Nothing on a computer, including the Settings app, is immune to bugs or glitches. And it’s essential to learn how to fix this issue to regain control over your machine.
What causes the Settings app not to open?
The Windows Settings app not opening can be a pretty annoying error. You’ve essentially lost access to the most basic of computer tools.
Before going through the solutions, it’s essential to learn what causes this problem in the first place.
- Your computer has corrupt data files: Corrupt files can cause problems like disabling base functions. You will need to repair and restore these files to get back to the Settings app.
- Windows 10 is out of date: You must always keep your computer up to date. In addition, we recommend learning how to update offline for better security.
- The Start menu is constantly crashing: A malfunctioning Start menu can result from a glitch. To address this, you’ll need to refresh Windows 10.
How can I fix the Windows 10 Settings app?
There are a ton of things that you can do to fix the Settings app on Windows 10, from more simple solutions to more complex ones. The following are the ones we recommend the most.
- Try out one of the alternate ways to open Settings. For example, pressing the Windows and I keys will launch the app. Going to the Action Center and clicking All settings does the trick too.
- Install any missing Windows updates. Then, after launching Settings with one of the alternate methods, go to the Windows Update section and install the patch from there.
- Create a new local account. This is particularly useful if any files on the other account become corrupt.
- And finally, reboot your computer. Most of the time, restarting your computer will solve all your problems.
1. Re-register Settings via PowerShell
- Bring up Windows PowerShell in the Search bar and select Run as administrator.
- Copy and paste the following into PowerShell, then hit Enter
Get-AppXPackage -AllUsers | Foreach {Add-AppxPackage -DisableDevelopmentMode -Register "$($_.InstallLocation)\AppXManifest.xml"} - Give PowerShell the time it needs to complete the process.
- Once it finishes, restart your computer.
2. Reinstall the Start menu
- Launch WindowsPowerShell with the same administrator permissions as the previous solution.
- Copy and paste the following command, then hit Enter on your keyboard:
Get-AppXPackage -Name Microsoft.Windows.ShellExperienceHost | Foreach {Add-AppxPackage -DisableDevelopmentMode -Register "$($_.InstallLocation)\AppXManifest.xml"} - Restart your computer after PowerShell finishes. After rebooting, open PowerShell with administrator applications again.
- Copy and paste this upcoming command, then hit Enter
Get-AppXPackage -Name Microsoft.Windows.Cortana | Foreach {Add-AppxPackage -DisableDevelopmentMode -Register "$($_.InstallLocation)\AppXManifest.xml"} - Check if Settings can open now.
3. Download and run Windows Update Troubleshooter
- Go to the Windows Update Troubleshooter page and click Check for Windows updates. This will open the Settings menu.
- If a small window appears at the top of the page, click Open.
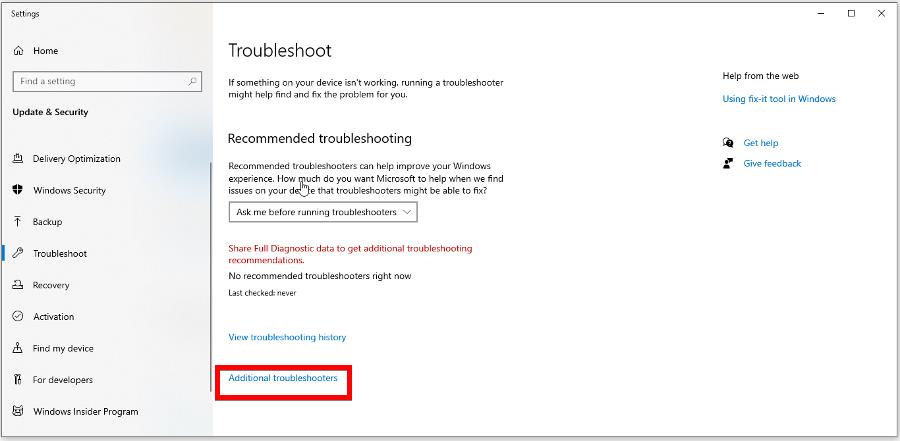
- Select Troubleshoot on the left-hand side, then click Additional troubleshooters.
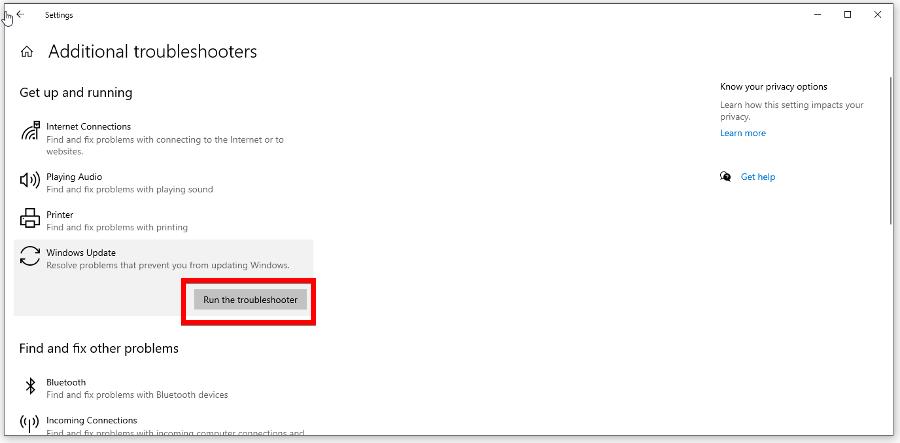
- Under Get up and running, click Windows Update.
- Click Run the troubleshooter.
- Allow the Windows Update Troubleshooter to resolve any problems present and finish up.
4. Run Media Creation Tool
- Go to Windows 10 installation media page and click Update now.
- Run the file that you download to open the Windows 10 Update Assistant. Then, click Update Now to install the latest version of Windows 10.
- Give your computer the time it needs to complete the process. Depending on various factors like internet speed, it may take a while.
- Once it’s done, you will be asked to restart your computer to finish up.
5. Run System File Check
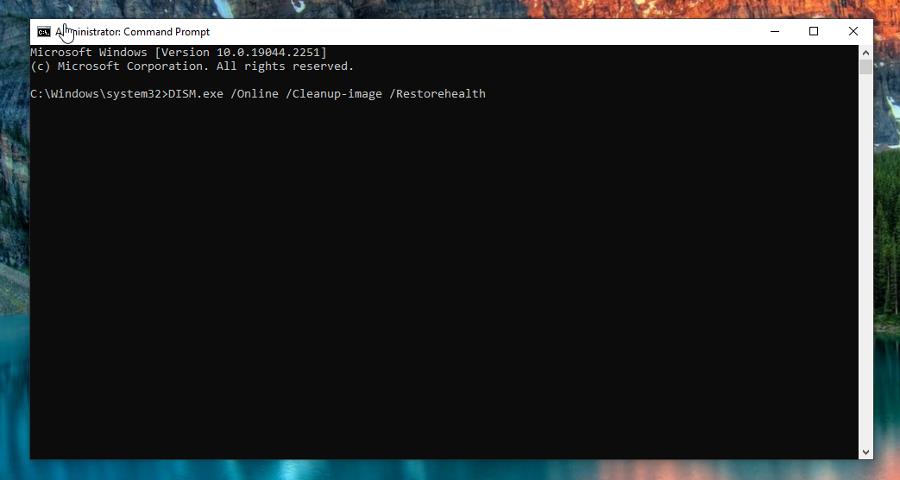
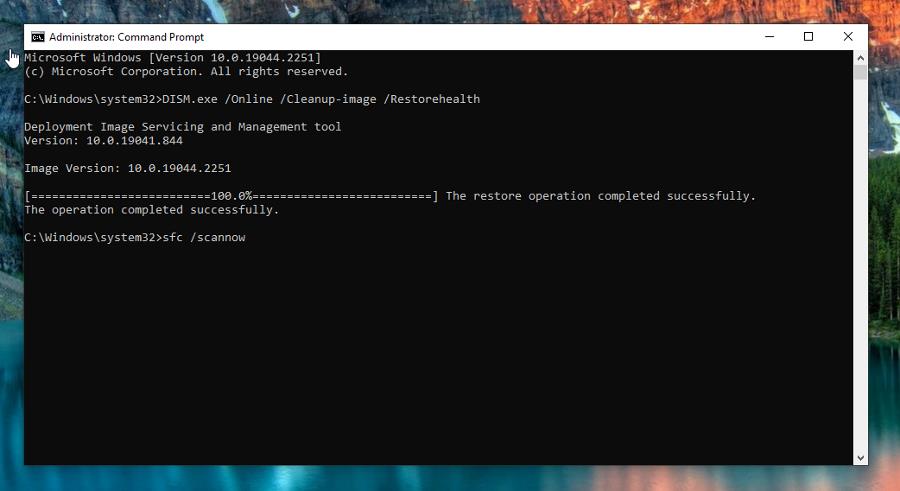
- Use the Command Prompt in the Windows Search bar and click Run as administrator.
- Type in the following command and hit Enter
DISM.exe /Online /Cleanup-image /Restorehealth - After it finishes, enter the following
sfc /scannow
Are there other ways to fix apps not opening?
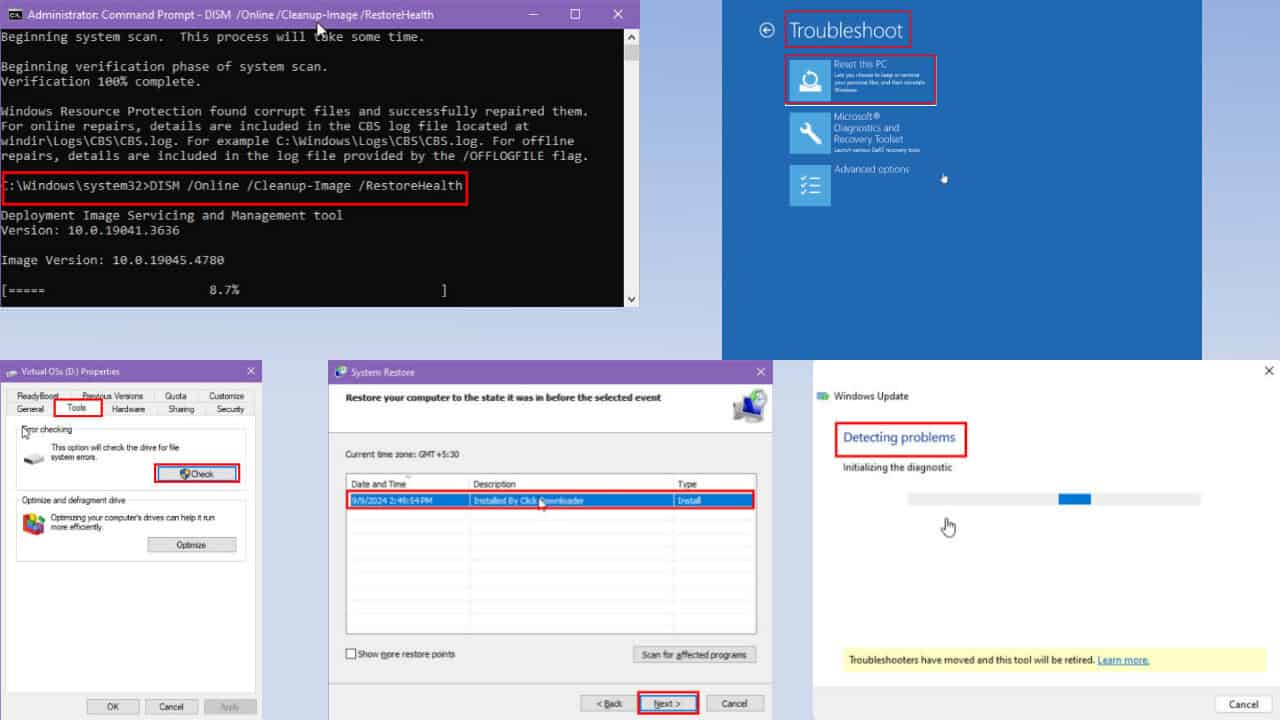
There are multiple ways to fix Windows 10 apps that don’t open. First, you should ensure that the Windows Update service is running. Afterward, download all missing updates for the apps.
We also recommend restoring a total system to revert your computer to an earlier version. However, it doesn’t always work correctly. Some users have had problems with the tool.
If a system restore is completed, we recommend running the tool in Safe Mode or disabling your antivirus. Sometimes antiviral software can interrupt other apps.
Feel free to comment below if you have questions about addressing Windows 10 problems. Also, leave comments about guides you want or information on other software problems.







User forum
0 messages