The Best Windows Settings to Optimize your Blue Yeti Mic
Apply these easy tips to get maximum from Blue Yeti microphones
5 min. read
Updated on
Read our disclosure page to find out how can you help Windows Report sustain the editorial team. Read more
Key notes
- For flexibility and excellent useful features availability, the Blue Yeti microphones have become the best choice among most types of users, including streamers, Youtubers, podcasters, etc.
- However, improper settings may lead to poor performance problems from a decent mic.
- To get the best, you can enable noise reduction and audio enhancements and apply these best Windows settings for Blue Yeti mentioned in this article.
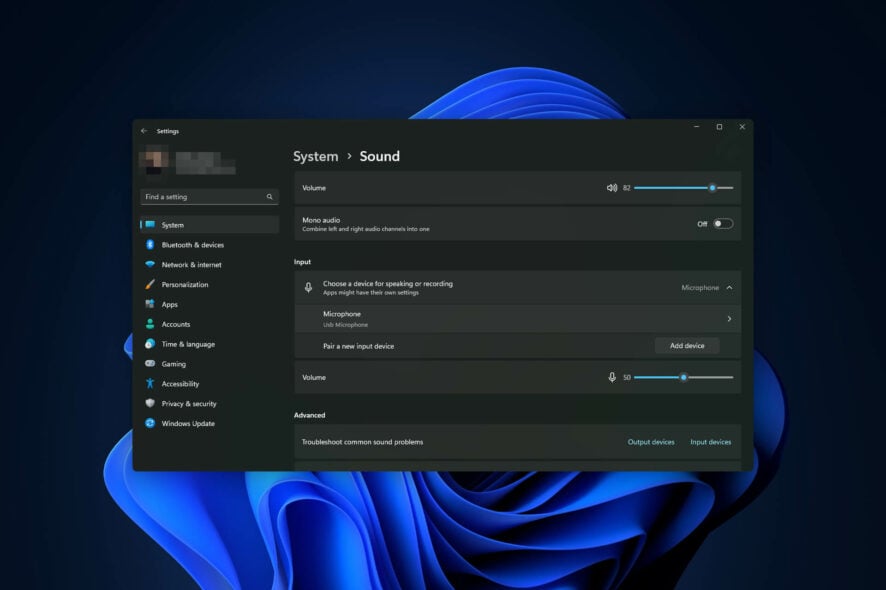
If you want to know about the best Windows settings for Blue Yeti microphones, this article is for you. Here, you will get the best step-by-step instructions along with some crucial information.
What makes a microphone performs better on a Windows PC? Of course, quality plays a significant role. But, the configuration is the key. There are several high-quality mics available on the market. But, among them, the Blue Yeti is the most popular due to its excellent performance.
Blue Yeti features:
There is no magic behind the success of this USB microphone. The Blue Yeti mic has both pros and cons. It has the features that most users, streamers, and podcasters need. These are:
- Multiple patterns: Unlike many other typical professional mics, Blue Yeti supports multiple pattern modes, including cardioid, stereo, omnidirectional and bidirectional modes. It gives a lot of flexibility to any type of user.
- Control: Volume, pattern selection, instant mute, sensitivity, etc., are easily controllable on this microphone.
- Unique design: Yeti has a very positionable design that makes it easier to record comfortably. By using better mic stands, the BY can fit in an even better way.
- Plug and play: This USB mic doesn’t need a special tool. You can plug on a PC or Mac and start using it.
If you get unexpected or stunning performance, from this mic, in most cases, it is because of the settings or configuration.
What are the factors that can impact microphone performance?
The following things have a direct impact on Blue Yeti’s performance:
- Driver: Though you won’t need a separate driver for plug-and-play mics, sometimes, the problematic driver can affect the microphone performance.
- System resources: The capability of PC hardware and other system resources also impact mic performance.
- Software: You don’t need software to use a mic. But, there are various tools to enhance microphone performance. If the software has a problem, the opposite may happen.
- Settings: This is the biggest factor that no one can deny. Faulty settings can bring down a decent microphone performance to the ground. A better setting can boost a typical mic’s performance.
How to apply the best Windows settings for Blue Yeti?
We have found the best settings that work great with the Blue Yeti microphone. Before applying it, we suggest you do the following things first:
- Make sure Windows is up to date.
- If you use audio software that runs in the background and can tweak your microphone and sound quality, disable it.
- Adjust your gain and pattern mode using the selector knobs on your microphone.
Now, follow these steps to gain optimal Blue Yeti performance:
1. Adjust the volume
- Plug the Blue Yeti into your PC. If needed, learn how to fix Blue Yeti not recognized issue.
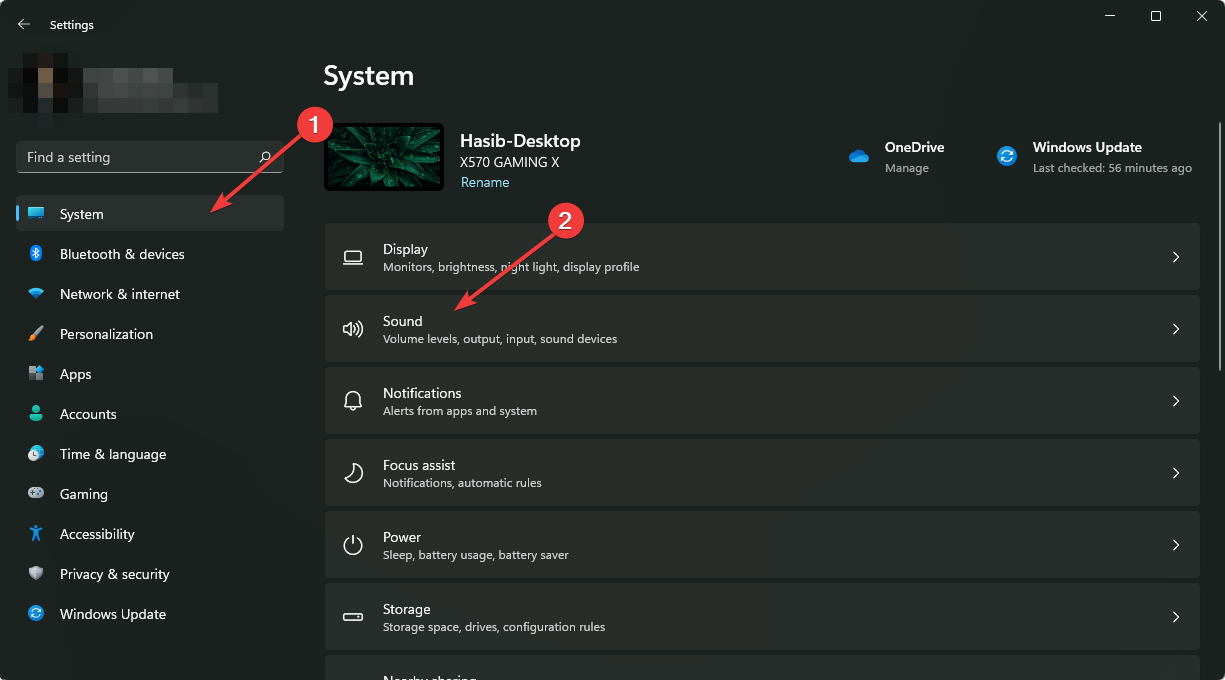
- Press Win + I on the keyboard to open Windows Settings.
- Go to System and then click on Sound.
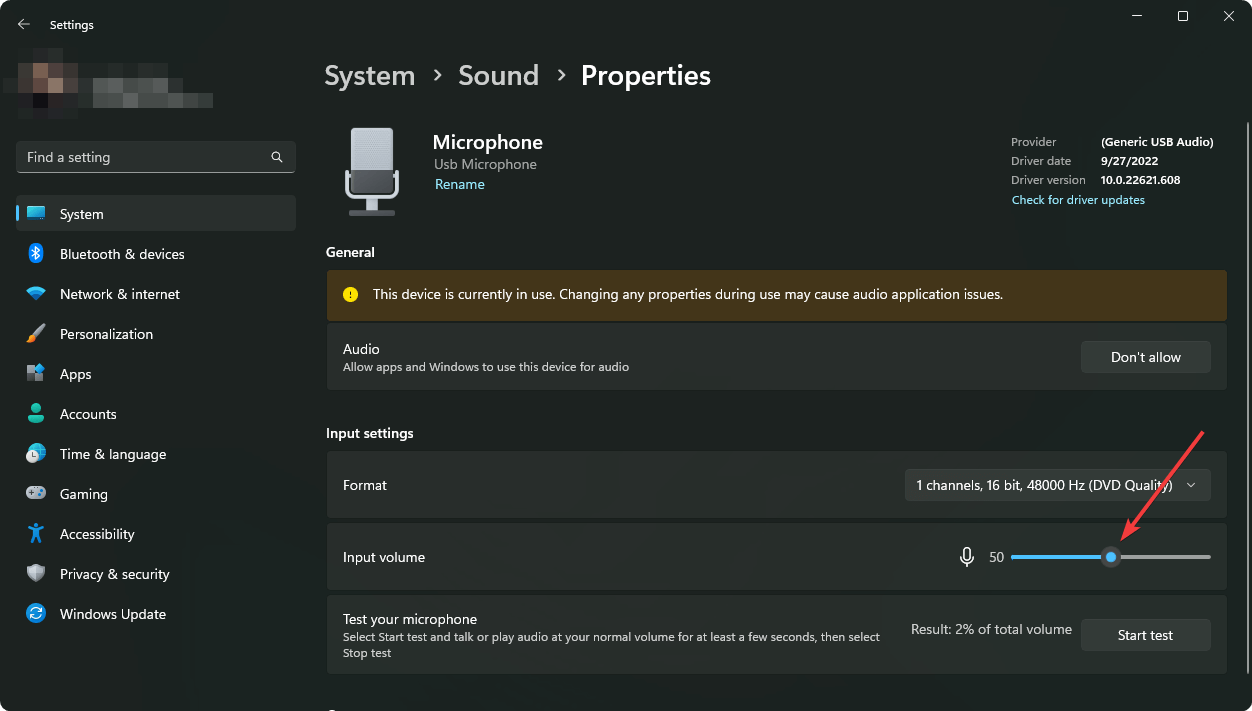
- Click on Microphone from the Input section.
- You can control the Input volume from here.
Usually, you will find 50% volume is ideal. However, it may differ depending on your surroundings and requirements. Rather than using the built-in Windows settings, you also can use Blue Yeti’s software to adjust the volume.
2. Change input quality
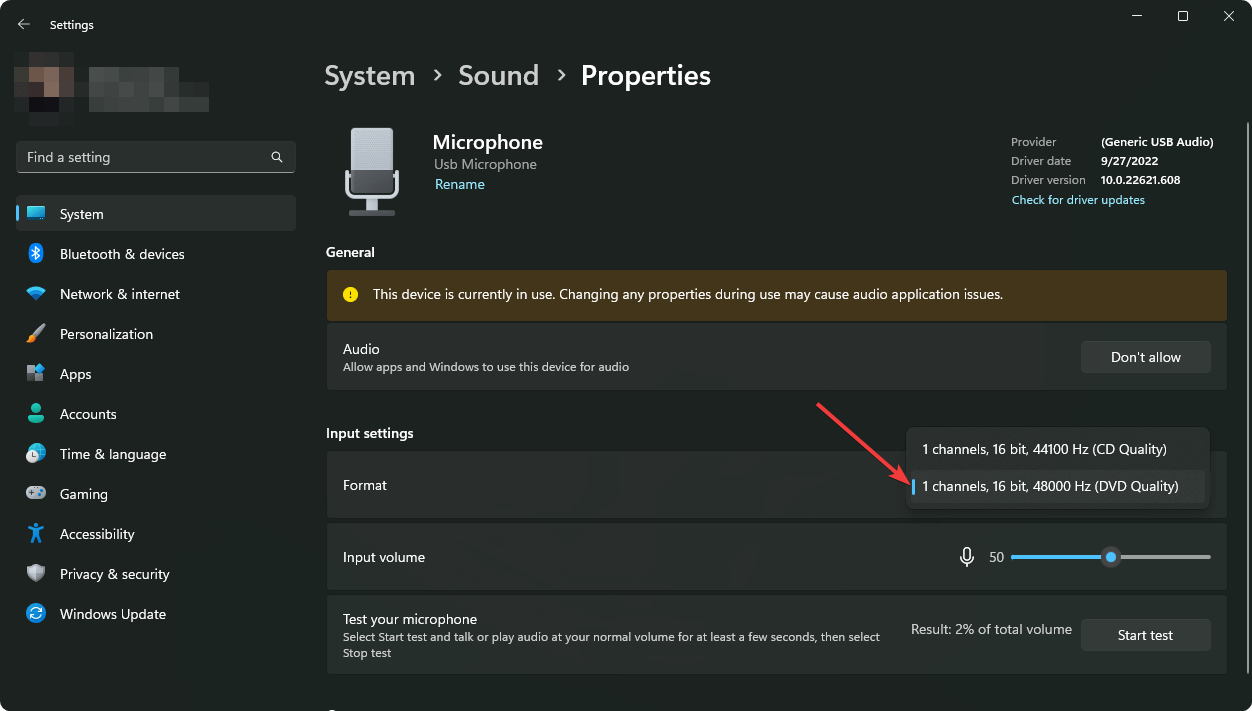
- From the Microphone settings, find Format in the Input settings section.
- Change it to the highest quality.
You will find various studio quality options. Choose the one 16 Bit with 48000 Hz or anything better.
3. Disable AGC
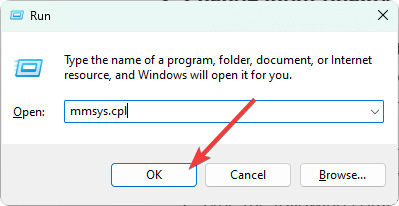
- Press Win + R on the keyboard to open Run.
- Type the following command and press Enter:
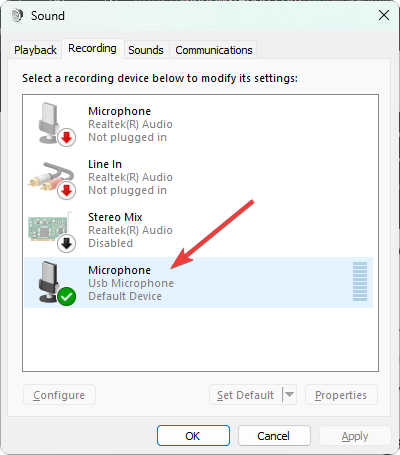
mmsys.cpl - Go to the Recording tab.
- Double-click on the Blue Yeti microphone.
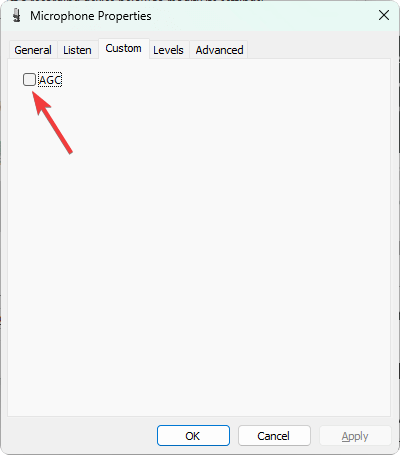
- Go to the Custom tab.
- Uncheck AGC.
- Click on Apply, and then OK.
4. Enable audio enhancement
- Open the Sound properties as shown in method 3.
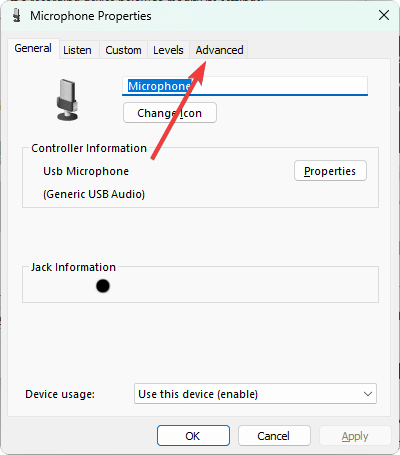
- Double-click on the mic from the Recording tab.
- Go to the Advanced tab.
- Check Enable audio enhancement.
- Save the settings.
5. Adjust voice mode
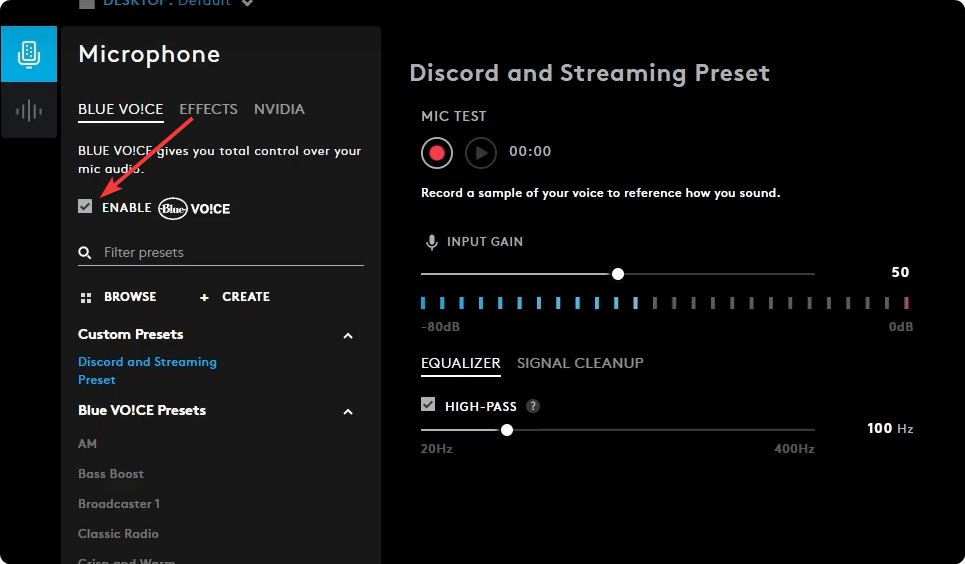
- Go and download Logitech G HUB software.
- Select the Blue Yeti microphone when it detects the mic automatically.
- Enable Blue Voice.
- If necessary, choose a preset or manually adjust it according to your need.
- To get the best from this mic, from Equalizer, enable High-Pass and set it to 100 Hz or anything ideal for you.
- Set Master Output Level to 95 or anything you prefer.
- Adjust the Voice EQ according to your needs.
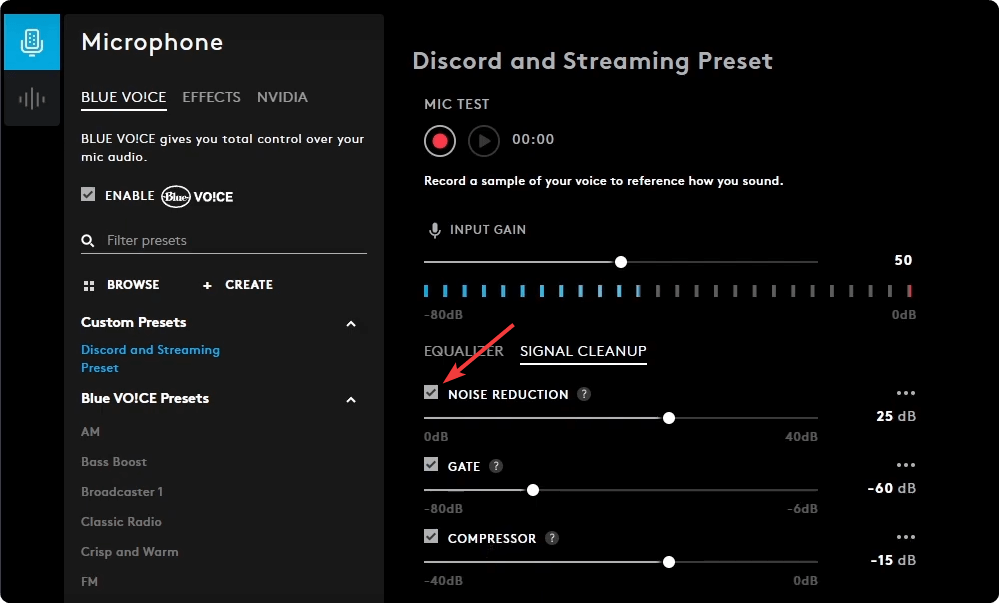
- Enable Noise reduction from the Signal Cleanup tab.
- Set noise reduction level to around 25.
You can modify the settings according to your own preferences. We are recommending what works well for most users.
If you don’t see the mic after opening this software, learn how to solve Logitech G Hub not detecting Blue Yet.
6. Enable NVIDIA Broadcast
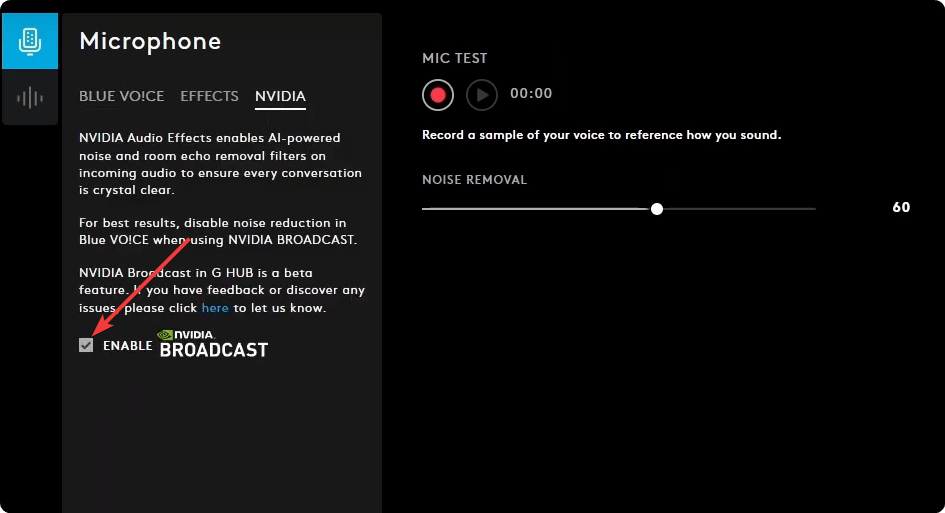
- On Logitech G Hub for Blue Yeti, go to the NVIDIA tab.
- Enable NVIDIA Broadcast.
- You can set Noise Removal to around 60.
These settings will work for most of you. Keep in mind that Blue Yeti has discontinued its software. So, the Logitech G Hub is the officially recommended one. So, we have featured it in our article.
If you are interested, you can check out these best wireless microphones.
These are the best settings for a Blue Yeti mic for a Windows PC for most situations. If you have found your own preferred configuration that works better for you, feel free to let us know in the comments box.


User forum
0 messages