0x80246013 Windows Update Error: 4 Ways to Fix It
Use the Windows Update troubleshooter to diagnose update errors
5 min. read
Updated on
Read our disclosure page to find out how can you help Windows Report sustain the editorial team. Read more
Key notes
- Corrupt system files, among other things, can cause this Windows Update error.
- Try manually downloading the update to if the Windows Update isn't working properly.
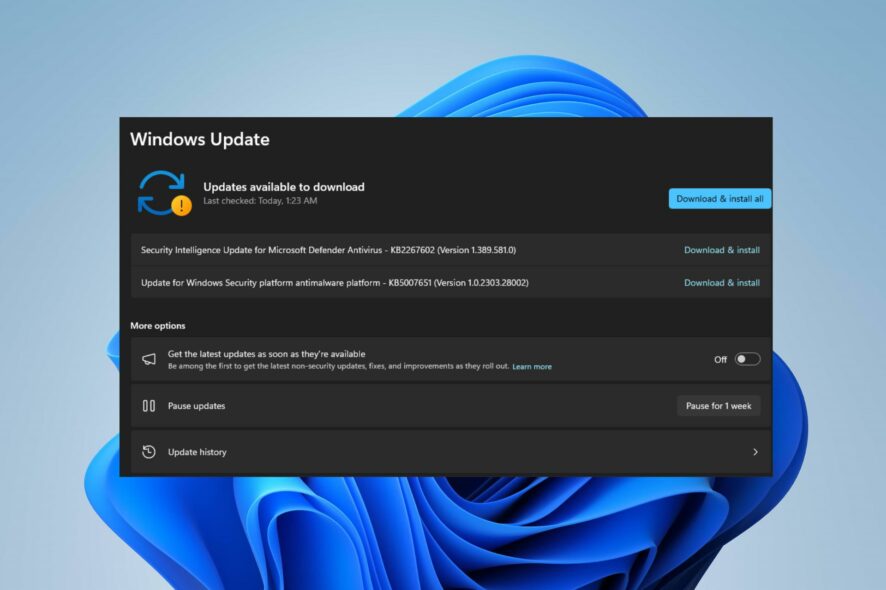
Windows Updates are essential for maintaining a secure and stable operating system. However, sometimes you may encounter errors like the 0x80246013 error code, which can prevent you from downloading or installing your updates.
Therefore, this guide will discuss ways to fix the 0x80246013 Windows Update error. Also, check our detailed guide on ways to fix there were some problems installing update on Windows PC.
What causes the 0x80246013 Windows Update error?
The 0x80246013 error code can be caused by a variety of issues, including:
- Network connection issues – An unstable or slow Internet connection may prevent the Windows Update service from downloading and installing updates, leading to the error. Also, issues like network congestion can impede the update process.
- Corrupted system files – If your system files are corrupted or damaged, it may cause issues with the Windows Update service and cause the Windows update error.
The above factors differ on various PCs. However, we will provide solutions to fix the issue.
How can I fix the 0x80246013 Windows Update error?
Observe the following preliminary checks before proceeding with advanced steps:
- Restart your computer – Restarting your PC is a quick and easy way to fix temporary issues.
- Perform a clean boot on your PC – It will start your PC with a minimal set of drivers/programs to determine if a third-party program is interfering with your update.
- Run the Windows Update troubleshooter – This troubleshooter will identify, diagnose, and fix all Windows update issues.
- Perform an SFC scan – SFC scan will scan all system files and replace corrupted files such as this.
- Perform a system restore – Restoring your system to a point before the update error starts might help troubleshoot it. You can check what to do if System Restore is not working.
If the error persists, proceed with the advanced fixes discussed below.
1. Manually reset Windows Update components
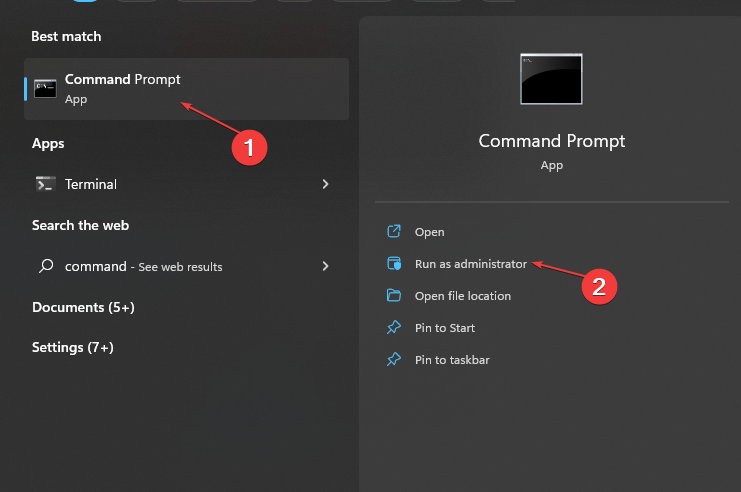
- Left-click the Start button, type Command Prompt, and select the Run as administrator option.
- Click Yes on the User Account Control prompt.
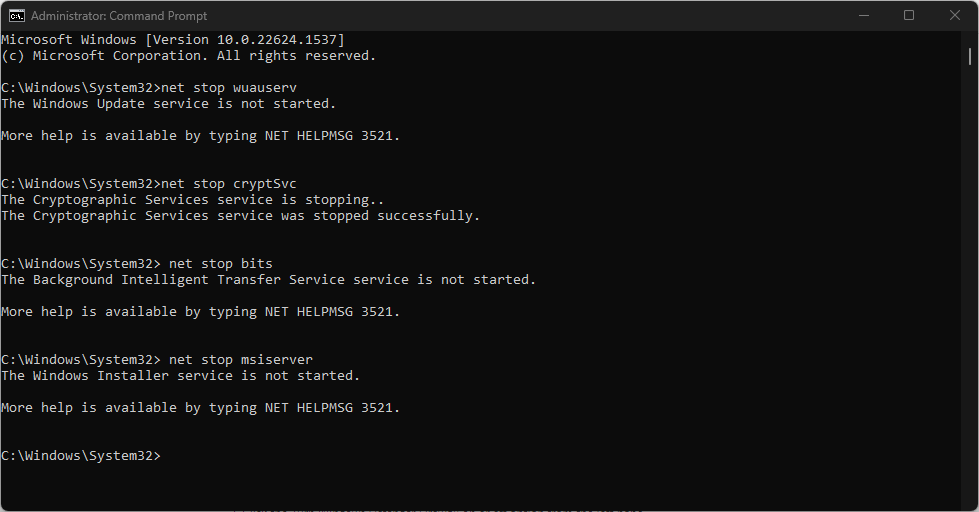
- Copy and paste the following commands and press Enter after each one:
net stop wuauservnet stop cryptSvcnet stop bitsnet stop msiserver - Then, input the following and press Enter after each one:
ren C:\Windows\SoftwareDistribution SoftwareDistribution.oldren C:\Windows\System32\catroot2 Catroot2.old - Input the following commands and click Enter:
net start wuauservnet start cryptSvcnet start bitsnet start msiserver - Exit the Command Prompt and restart your PC.
Resetting the Windows Update components will fix the performance issues and resolve the update error.
Read our article if you encounter issues running the Command Prompt as an administrator on Windows 11.
2. Install the update manually
- Go to the Microsoft Update Catalog page, type the update code, and click the Search button.
- Select an update version compatible with your operating system, then click the Download link.
- Follow the on-screen instructions to download the update.
- Restart your PC and check if the update installs.
Manually installing the update will help get past issues with other updates that can prevent it from installing. It may be beneficial to disable automatic updates on your PC to prevent update errors.
3. Reset your PC using the built-in tool
- Press the Windows + I keys to open Settings.
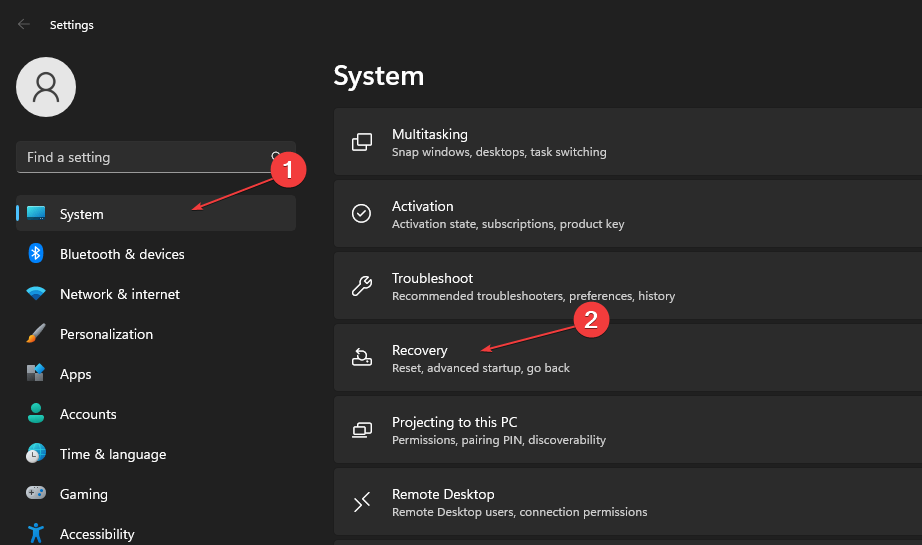
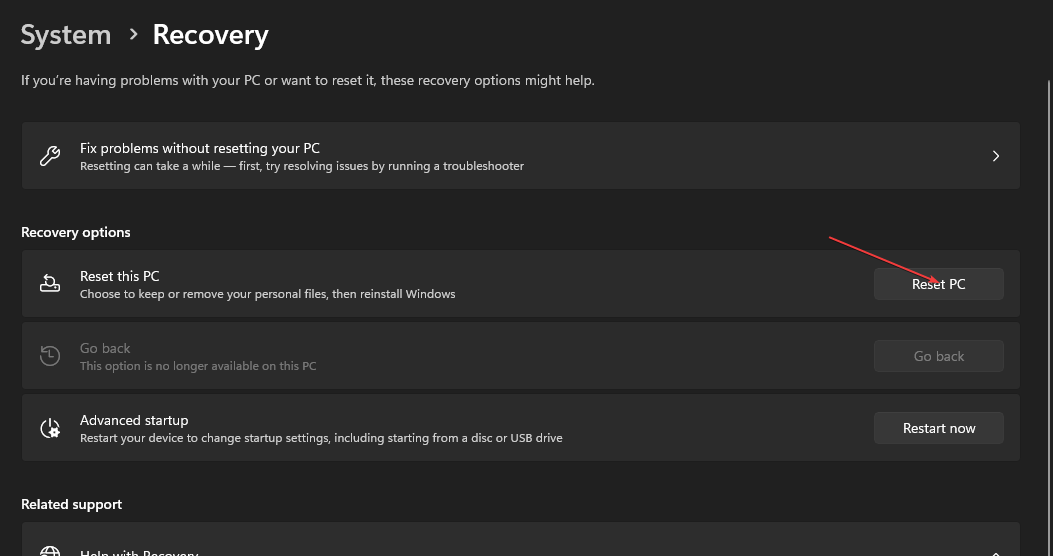
- Go to System and select Recovery.
- Click on Reset PC, from the right side.
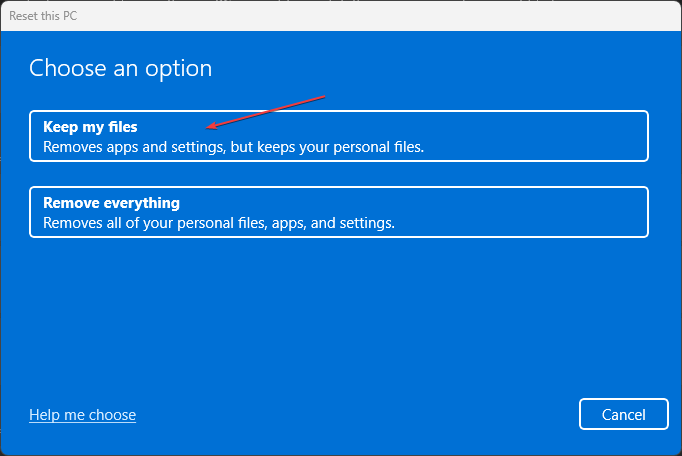
- Choose the type of factory reset you need. We recommend you select keep your personal files.
- Select the option you want to reinstall Windows: Cloud download or Local reinstall. Then, click on Next.
- Finally, press the Reset button.
- Now, your operating system will start the reset process.
By performing a factory reset, potential issues with your PC updates should be fixed. All updates are removed alongside this process, and your PC is restored to a new working condition.
4. Reinstall Windows OS
- Plug the bootable installation media USB flash drive into your PC.
- Restart your PC and press Del or F2 during the boot to enter the BIOS menu.
- Change the boot priority to set your USB flash drive as the default boot device.
- Select your Language and other preferences, then click Next.
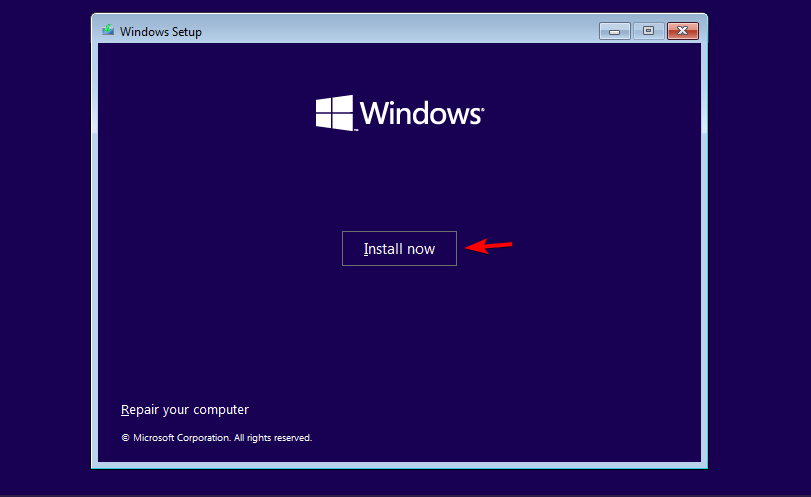
- Click on Install now to proceed.
- If you have a product key, enter it or choose I don’t have a product key.
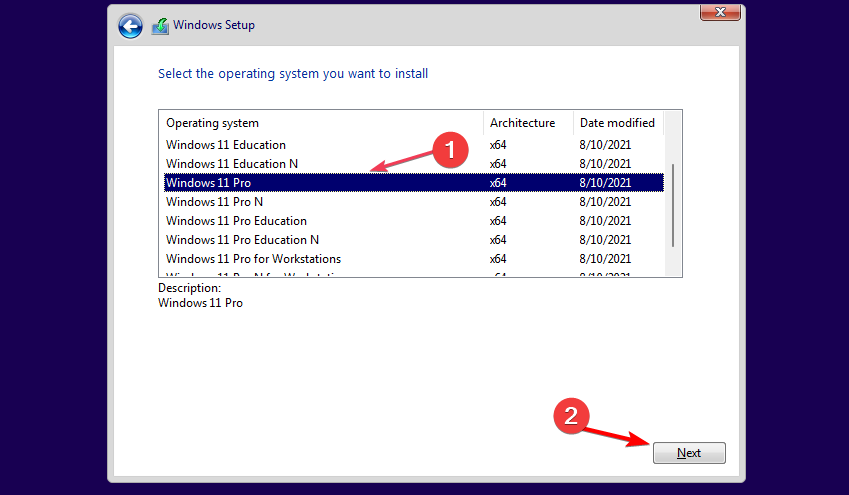
- Select the version that you want to install and click Next.
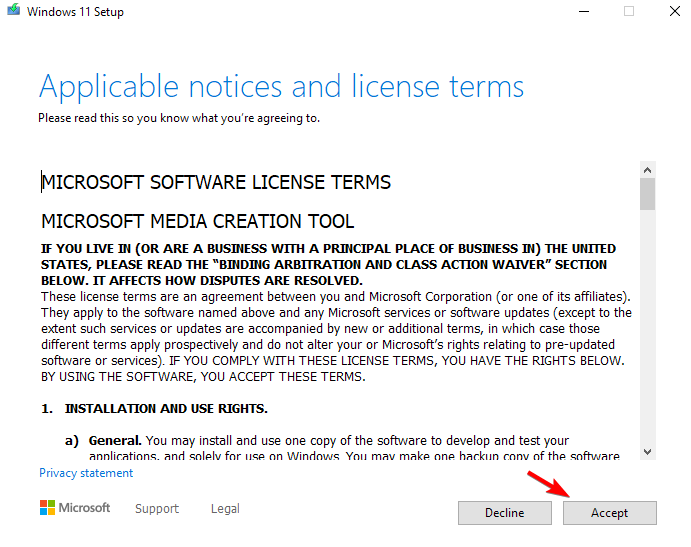
- Click to Accept the terms of service.
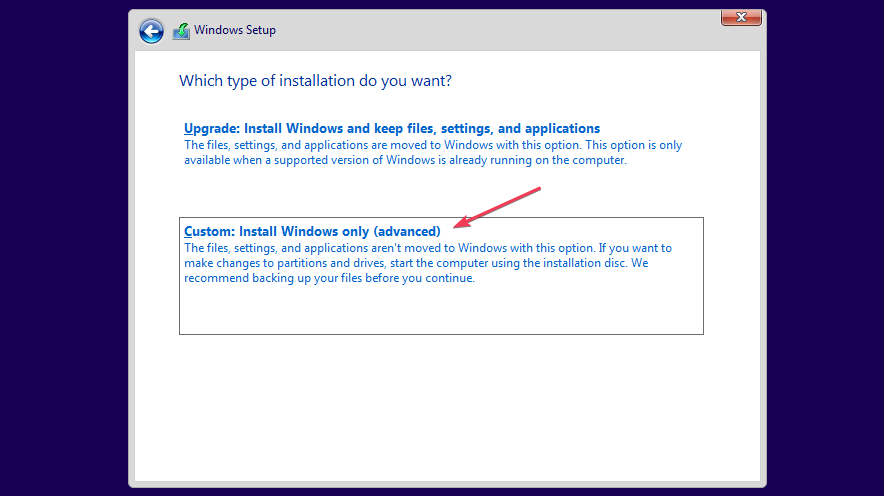
- Choose the Custom: Install Windows only (advanced) option.
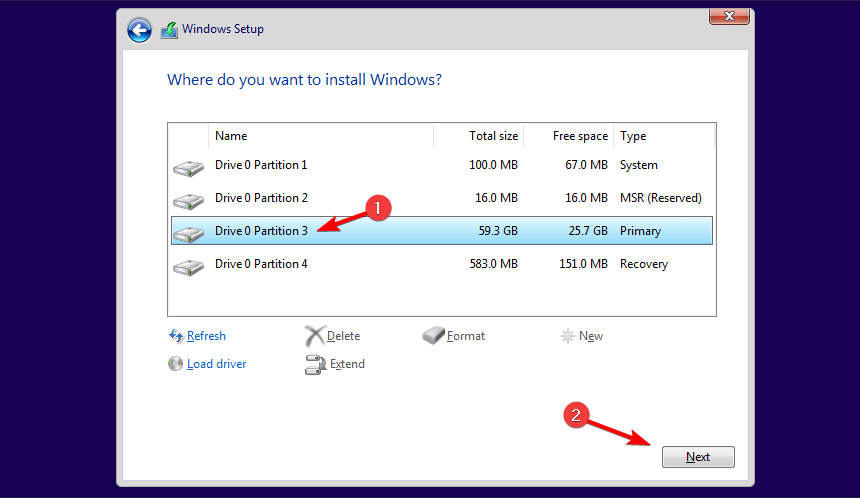
- Select your Primary drive and click Next. Then, follow the prompts to complete the process.
Usually, this is the last resort if none of the steps above work. All the issues regarding the Update error will be fixed by reinstalling your OS. Hence, your next updates should be without further issues.
In addition, check our guide about fixing Windows Update Error 0x80242017 on your PC. Also, you can read our complete guide about how to fix the 0x80072eff Windows update error code on Windows.
If you have any questions or suggestions, kindly drop them in the comments section.





User forum
0 messages