Fix: A Router/Access Point Channel Conflict Has Been Detected
An end to Wi-Fi dead spots when you switch out your channels
4 min. read
Updated on
Read our disclosure page to find out how can you help Windows Report sustain the editorial team. Read more
Key notes
- Many Wi-Fi routers today come with the ability to connect devices using two separate channels.
- Your devices might work fine, but they may sometimes struggle with poor Wi-Fi performance due to interference between the two frequencies.
- We found a way around this channel conflict, so keep reading to restore a stable connection.
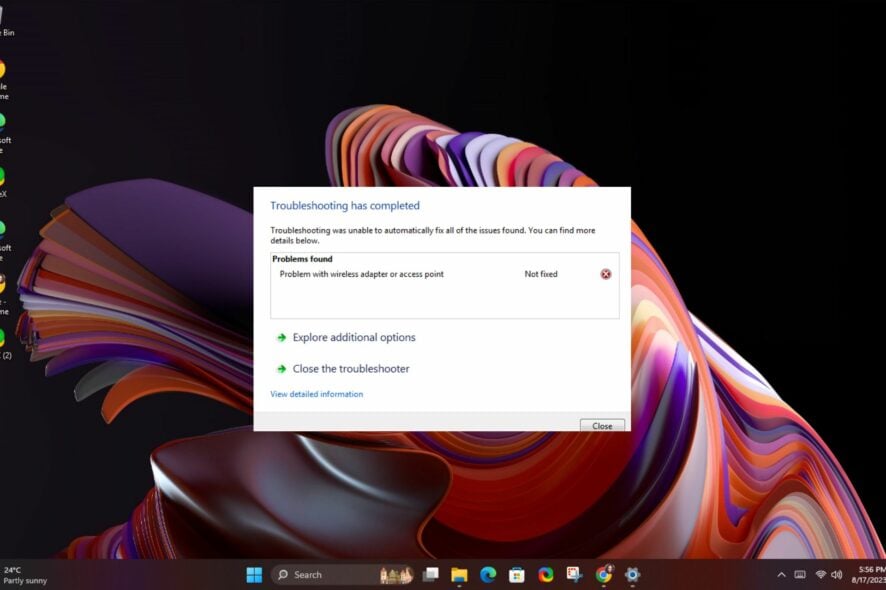
You probably installed your wireless router and joined a local network just fine. But now you are getting an odd error message that an access point conflict has been detected.
Wireless network conflicts happen way more often than you think, but fortunately, they are generally easy to remedy.
What is a Router/Access Point Channel Conflict?
A router or access point sends and receives data packets using radio frequencies. The two most common frequencies for networking are 2.4 GHz and 5 GHz bands. Because these frequencies overlap, two devices on the same network can simultaneously use the same frequency channel.
When this happens, it can cause interference with the signal and make it hard for devices like your printer to stay connected and reduce the overall performance of your network connection.
How do I fix a router/access point channel conflict?
Attempt the following basic fixes before you move to the technical steps:
- Look for signs of interference from other devices and move these devices away from your router until you get better reception or switch to an Ethernet cable.
- If you have multiple Wi-Fi networks within range of each other, try changing the name of your network to something unique.
- Update your router’s firmware to the latest version available for your model number.
- Power cycle your router by turning it off, waiting 30 seconds, then turning it back on.
1. Change your router’s channel
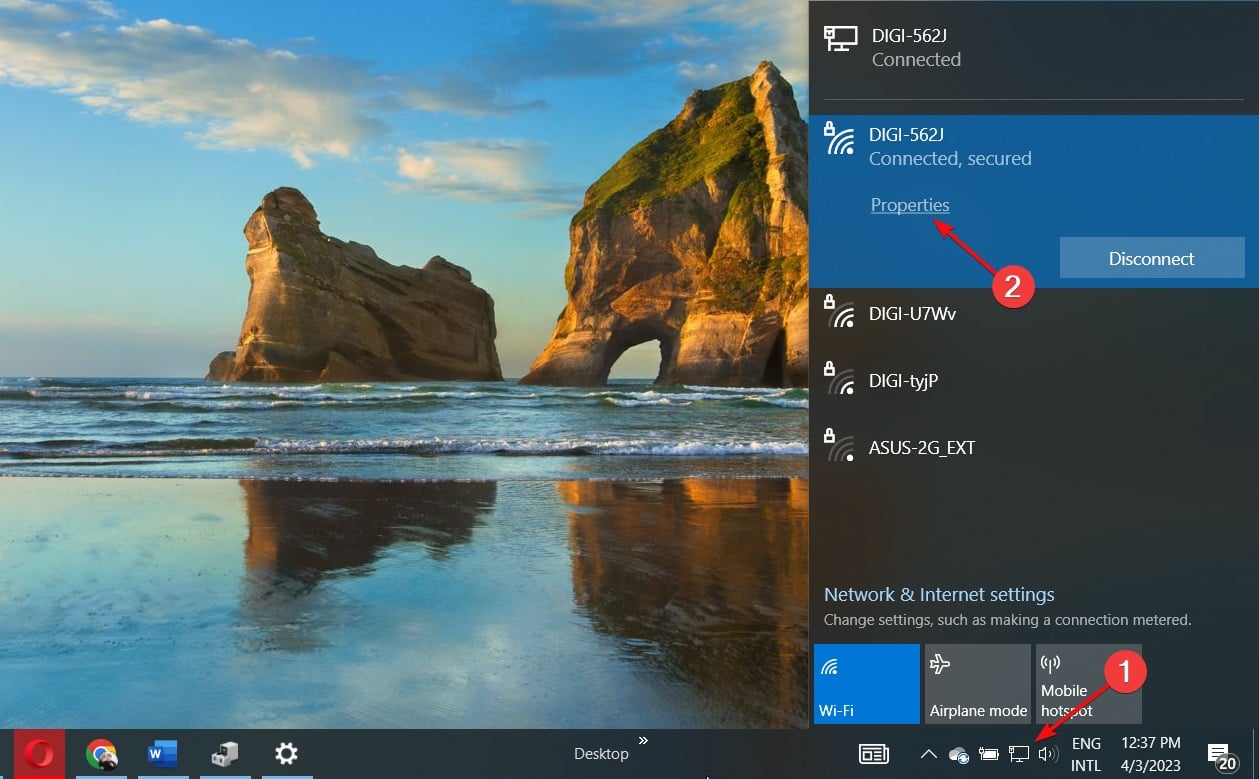
- Click on the Network icon on your taskbar, select your Wi-Fi connection, and click on Properties.
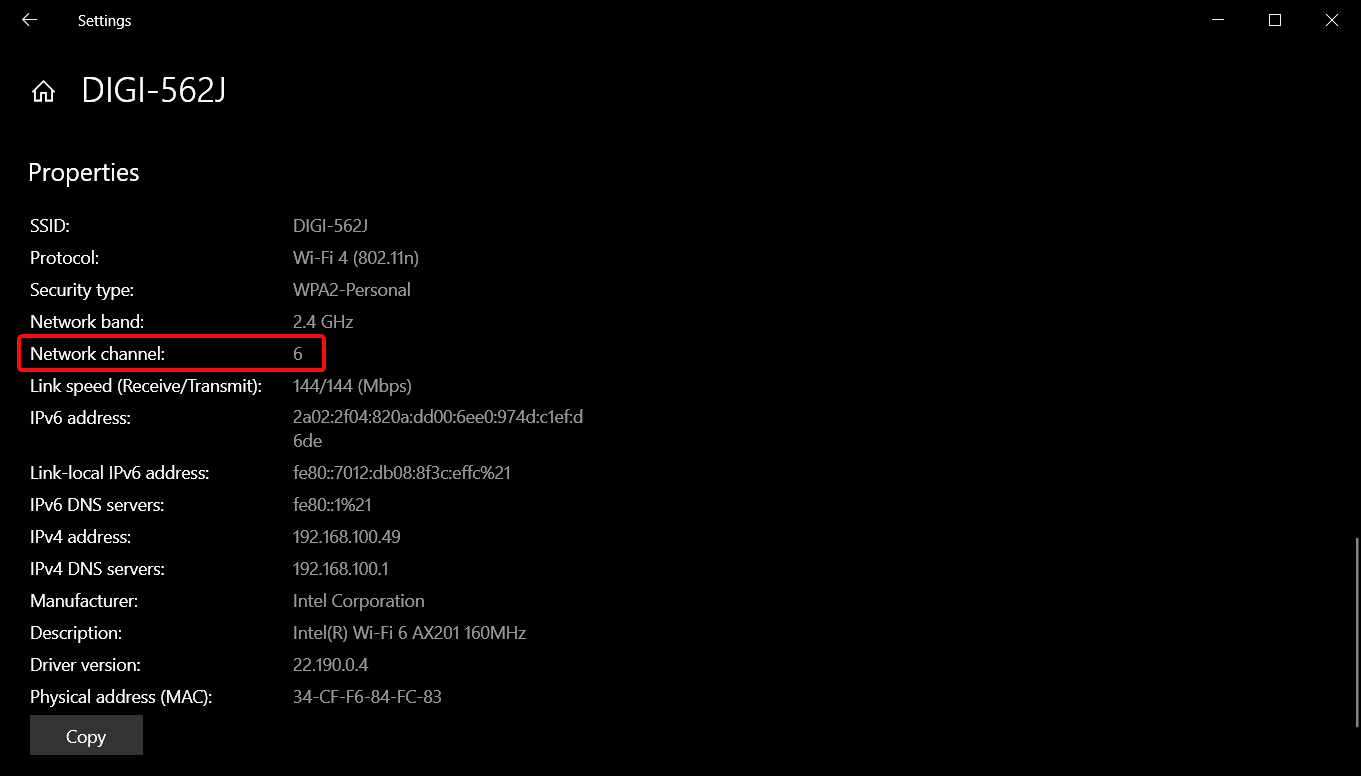
- Now, scroll down and you should see the Network channel for your Wi-Fi connection.
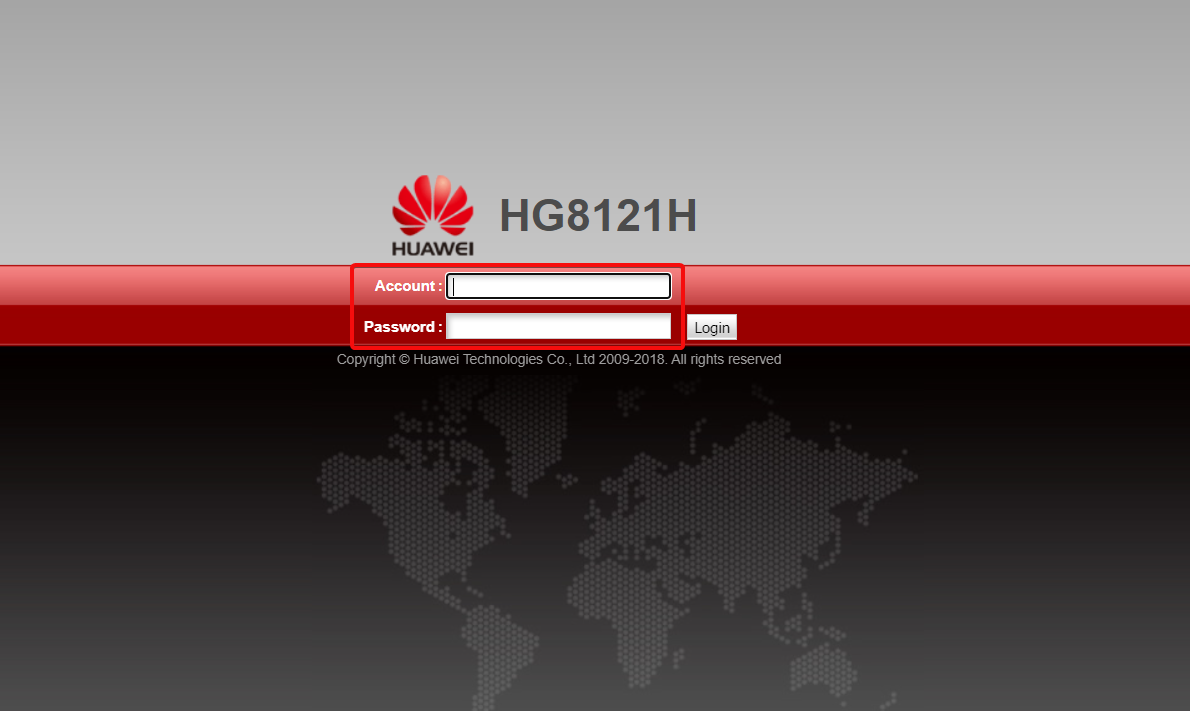
- Navigate to your browser and log into your router with the correct credentials. You can find that info on the router itself or on the manual of the router.
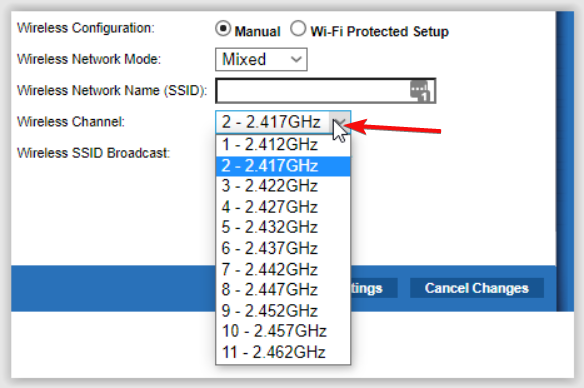
- Go to the Wireless settings of your router and change the router channel to a different one from the default. If you’re using a dual-bound router, make this setting for both bands (2.4GHz and 5GHz).
Alternatively, you can let an automatic tool do this work for you. Setting your Wi-Fi channel manually doesn’t guarantee you’re switching to the best option and can sometimes cause more problems, like your PC not connecting to your printer anymore.
However, a Wi-Fi channel scanner can analyze your wireless network, detect the most efficient channel, and connect your router to avoid overloading and overlapping.
2. Enable auto channel selection
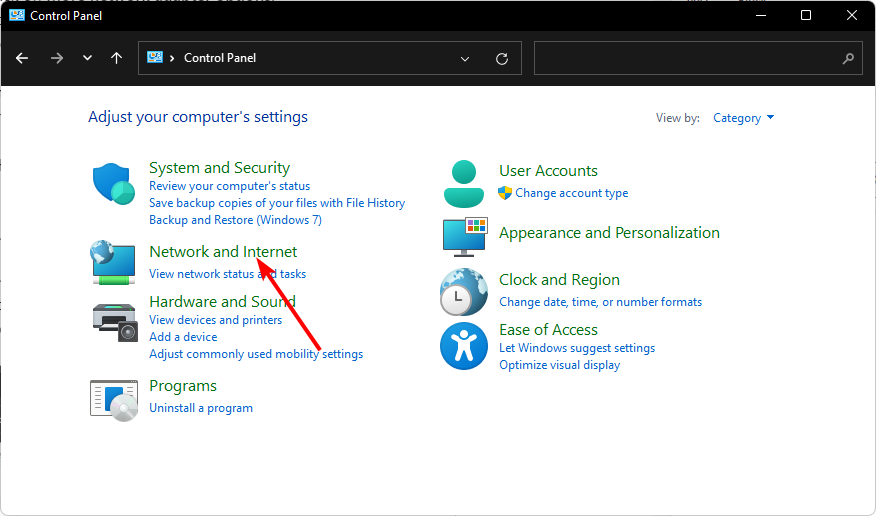
- Hit the Windows key, type Control Panel in the search bar, and click Open.
- Click on Network and Internet.
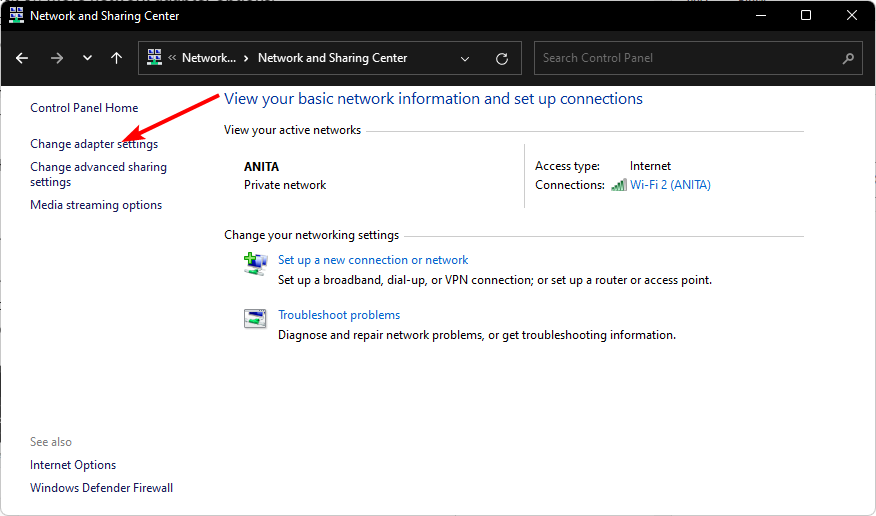
- Select Network Sharing Center, then click on Change adapter settings.
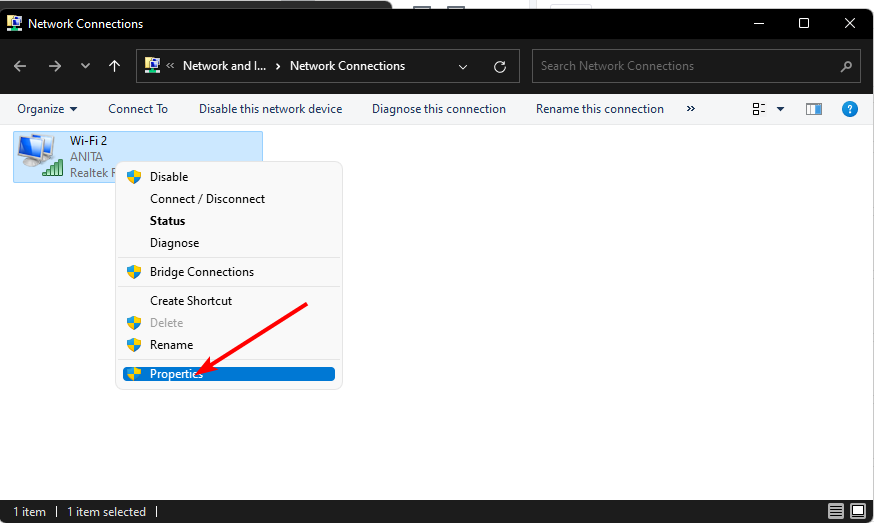
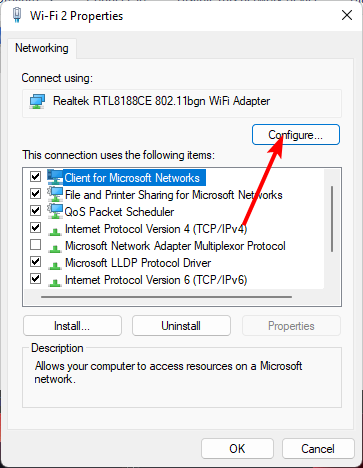
- Locate the Network adapter you’d like to change network priority, right-click on it, and select Properties.
- Click the Configure button.
- Go to the Advanced tab.
- Locate 802.11n Channel Width for band 2.4 and set it to Auto.
- Click OK to save changes.
3. Change your network band
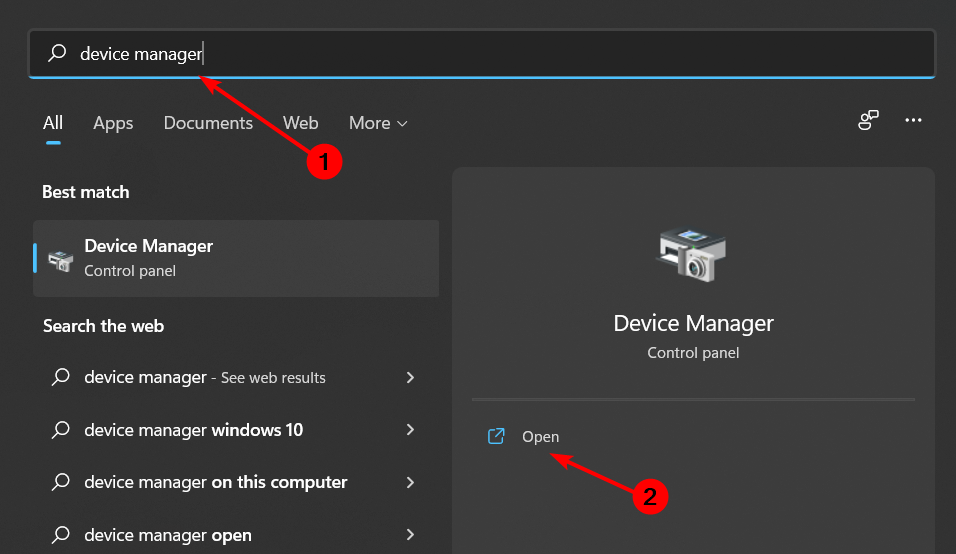
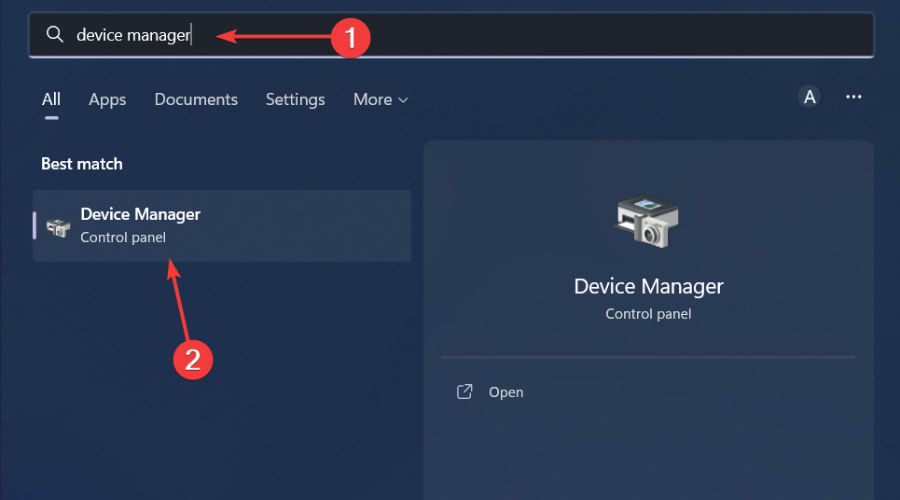
- Click on the Start Menu icon, type Device Manager in the search bar, and click Open.
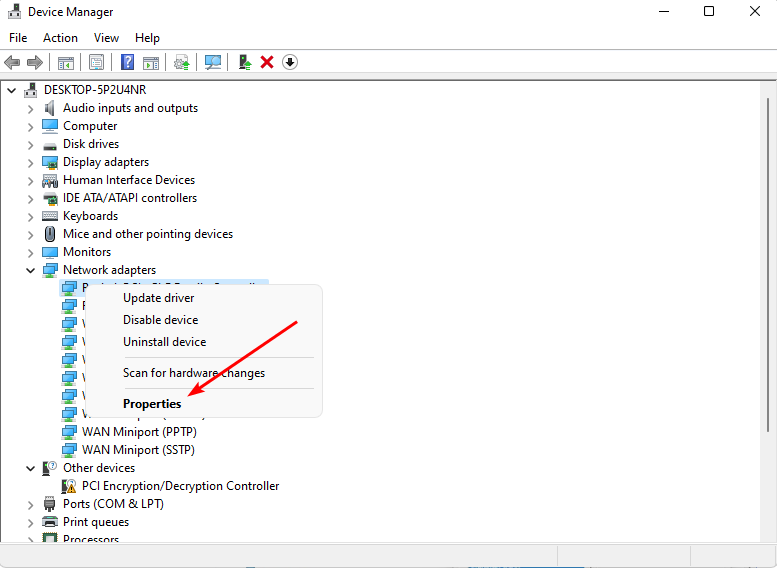
- Navigate to Network adapters and double-click to expand.
- Right-click on your network adapter and select Properties.
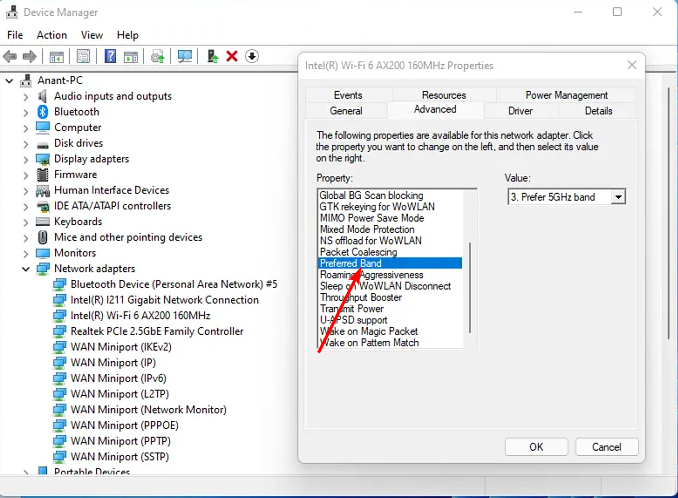
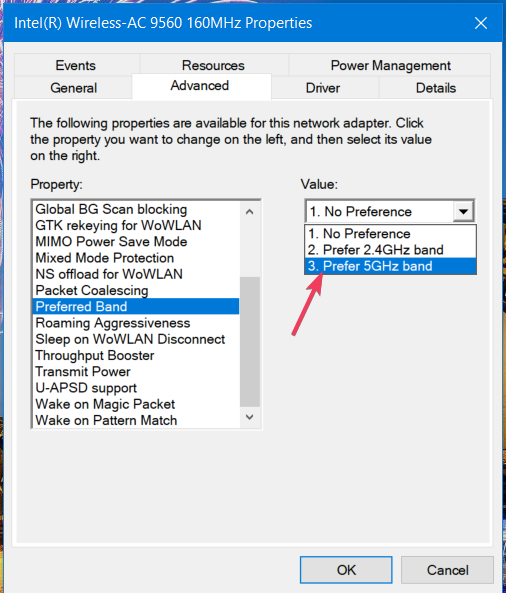
- Click on the Advanced tab and locate the Preferred Band.
- In the Value drop-down menu, select Prefer 2.4GHz band then hit Enter.
- Restart your PC.
4. Update your Network driver
- Hit the Windows key, type Device Manager in the search bar, and click Open.
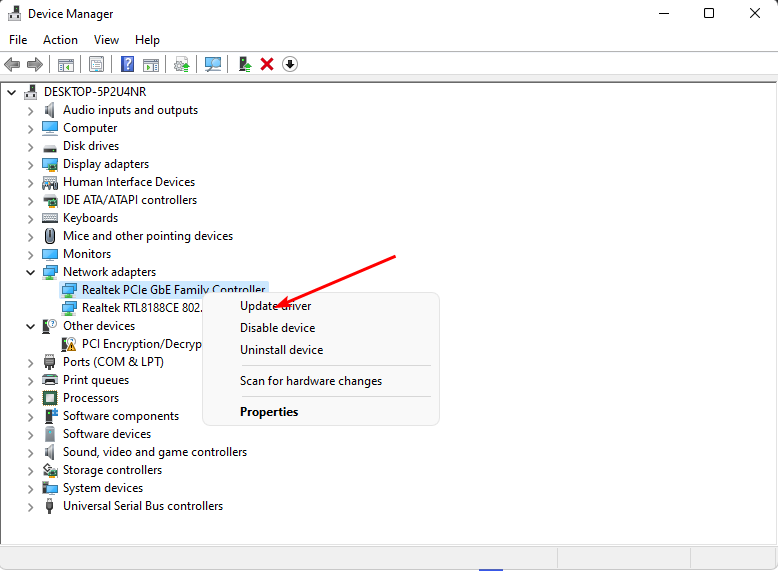
- Navigate to your Network adapter, right-click on it, and select Update driver.
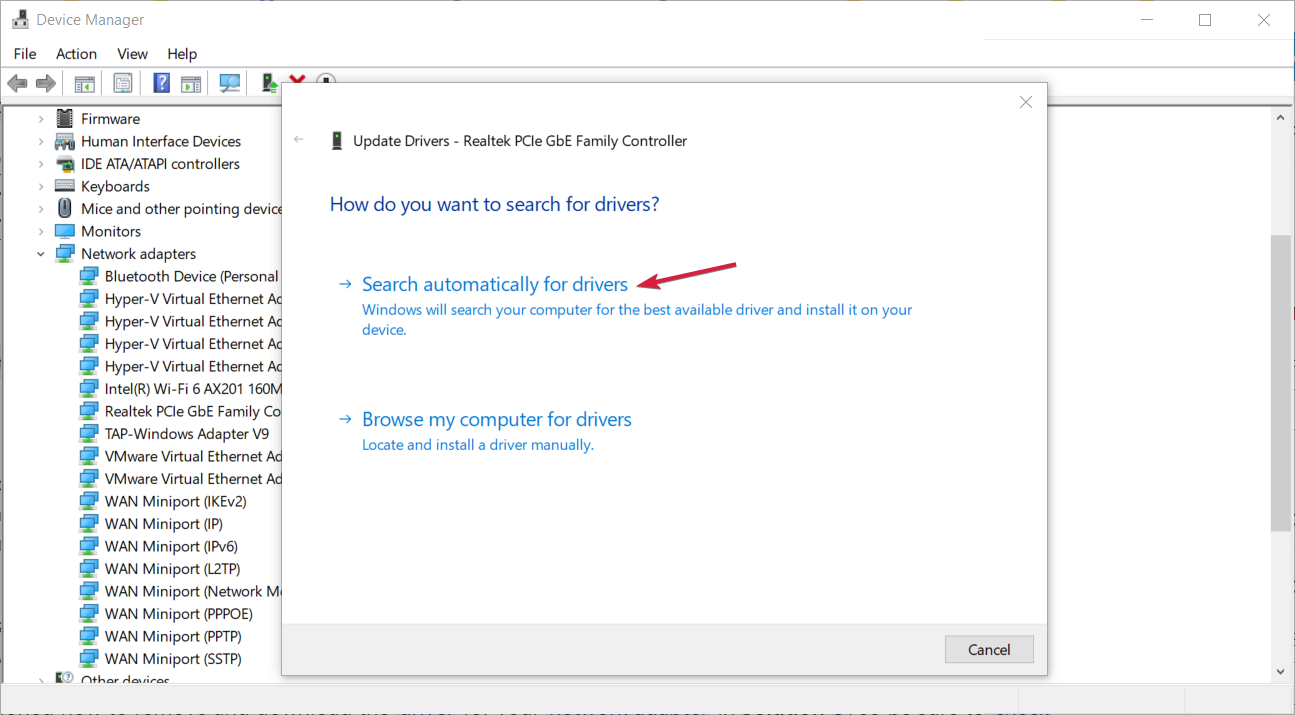
- Select Search automatically for updated drivers.
Updating your network drivers will fix many issues, including problems with your access points, and is a prerequisite to connecting an access point to a wireless router without cable.
- Download and install the Outbyte Driver Updater app.
- Launch the software and wait for the app to detect all incompatible drivers.
- Now, it will show you a list of all outdated drivers to select the ones to Update or Ignore.
- Click on Update & Apply Selected to download and install the latest versions.
- Restart your PC to ensure the applied changes.

Outbyte Driver Updater
Maintain your device healthy by letting OutByte Driver Updater find the latest driver options.5. Reset your network
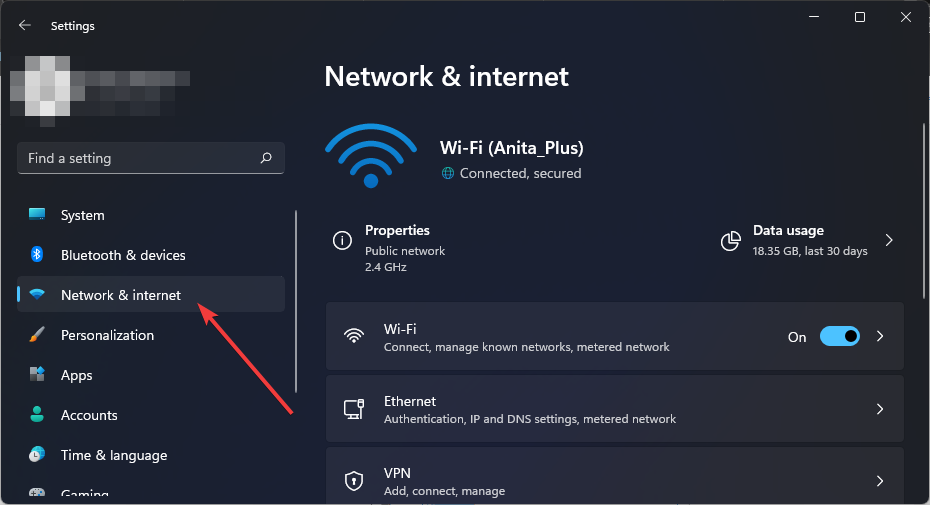
- Hit the Windows key and click on Settings.
- Navigate to Network & internet.
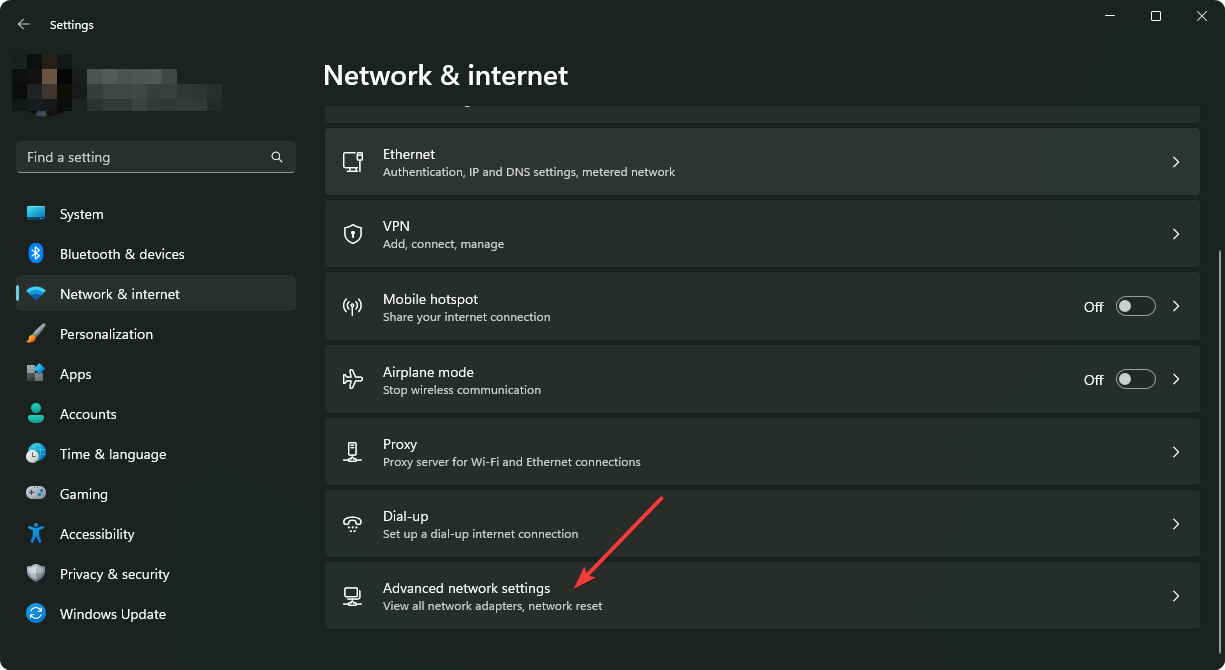
- Select Advanced network settings.
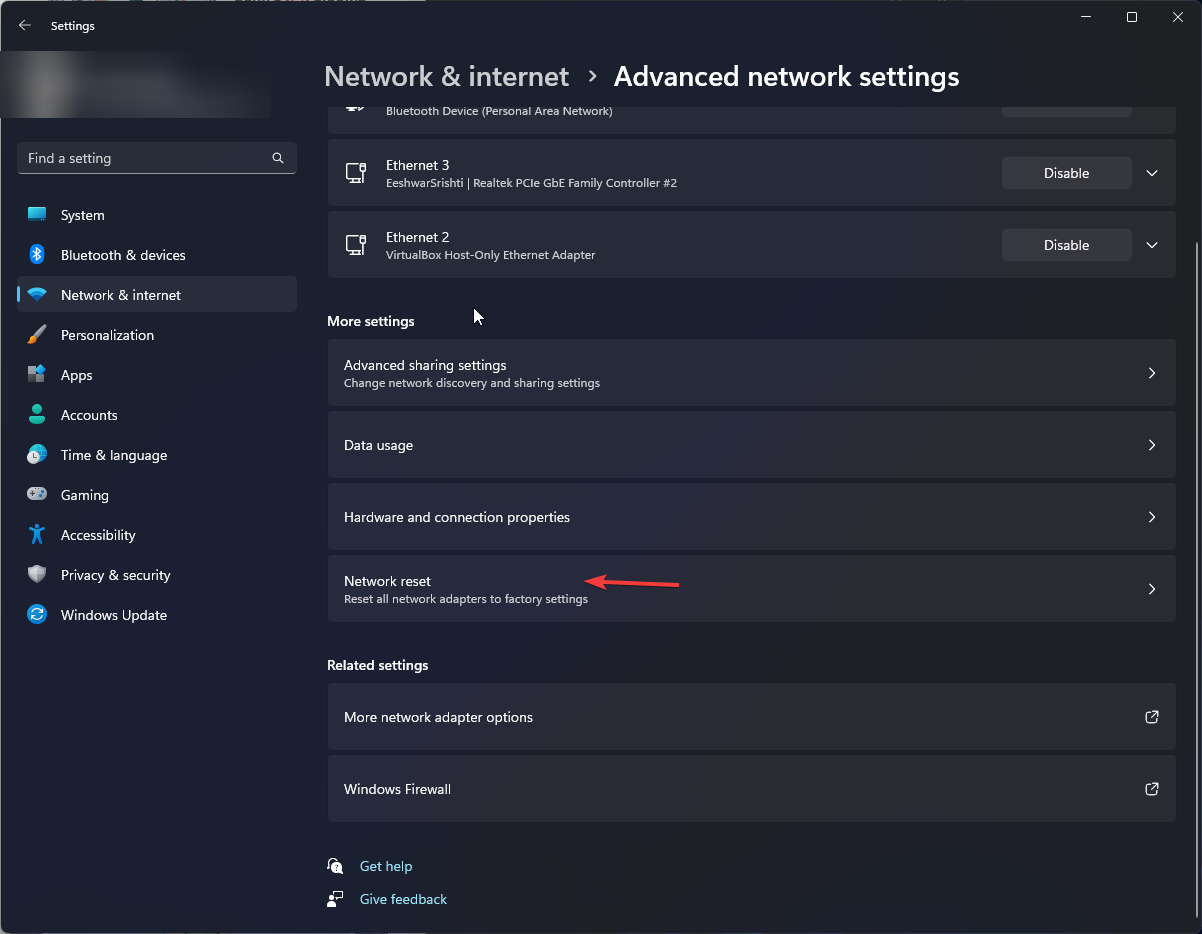
- Click on Network reset.
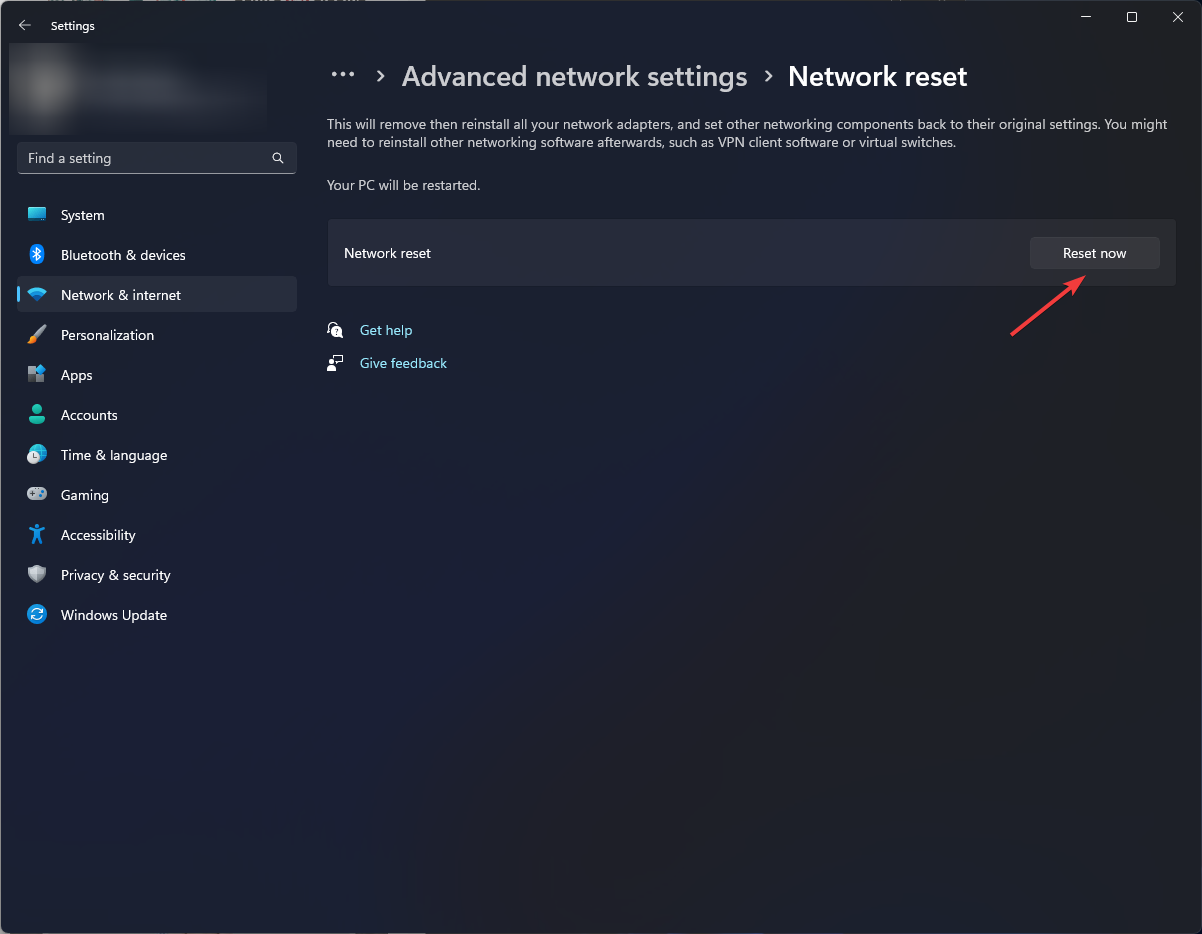
- Next, hit the Reset now button.
Still, wireless adapters vary widely in how they handle channel conflicts. You may have adjusted your router settings, but you get another access channel point is full error, or a printer won’t recognize your router. If so, you should consider getting a dual-band or tri-band router.
Other times, you may have set up your access point to have a similar SSID to your router, which brings about the conflict.
We hope this article has been illuminating and you’ve figured out your network connection issues. Ultimately, the best thing you can do to avoid problems with your routers is to prevent them from happening in the first place.
Regular power cycling your router, updating its firmware, and minimizing interference is a good start.
We’d love to hear your feedback, and if this guide was helpful, please let us know as well.






User forum
0 messages