4 Simple Ways to Initialize a Drive in Windows 11
Get your drive in gear
5 min. read
Published on
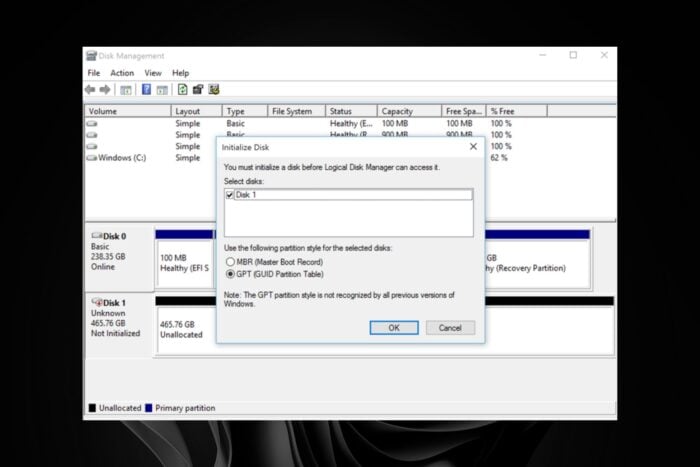
If you’ve ever inserted a new HDD in your Windows 11 PC but it was not detected or invisible on your File Explorer, it’s probably because you need to initialize the drive first.
When you insert a new hard drive, your OS needs to recognize the drive so that it can be configured properly. And it’s not just for recognition purposes. Proper drive initialization reduces the risk of data corruption or data loss, setting up of proper partitioning and storage allocation.
Other times, your hard drive may not appear in File Explorer after a Windows update so you need to re-initialize it.
How do you initialize a drive in Windows 11?
 NOTE
NOTE
1. By using Disk Management
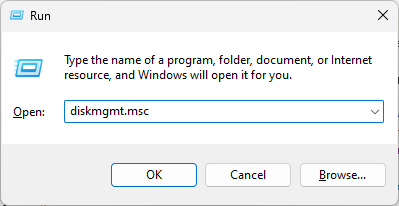
- Press the Windows + R keys to open the Run command. Type diskmgmt.msc in the run dialog box to launch Disk Management.
- You’ll see all connected hard drives listed when the Disk Management window opens. Look at the list, and find a drive listed as Disk 1, or Disk 10 (other names are possible, as well).
- You’ll recognize this drive because it is not initialized and is listed as Unknown, and unallocated. Right-click on it and select the Initialize Disk option.
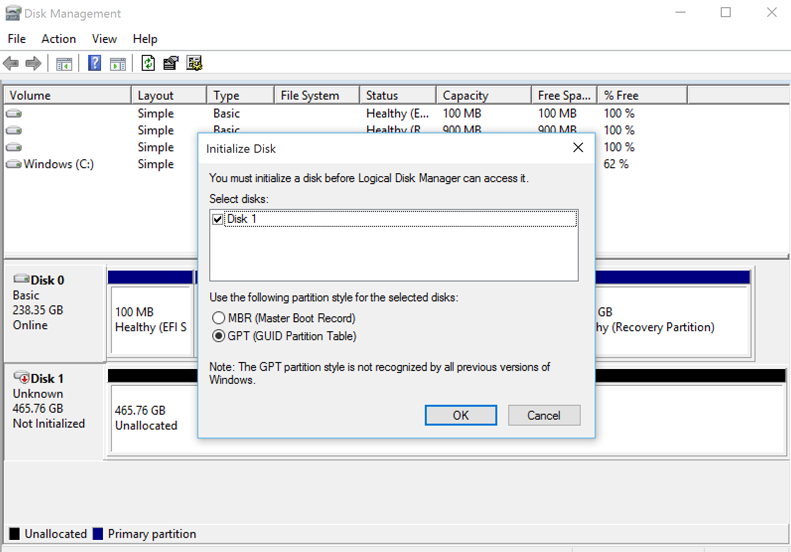

- Right-click on that partition, and select Initialize Disk from the right-click context menu.`
 `
` - Once you initiate the process, it will ask you to choose between a Master Boot Record (MBR) or a GUID Partition Table (GPT). We advise you to choose a GPT. Click OK.
- Once you do this, you’ll get back to the main window, where your new drive will be listed as Basic and Online, but it will still have unallocated space.
- To fix that, right-click on the stripped box, and select New simple volume…

- Click Next, and assign a drive letter.
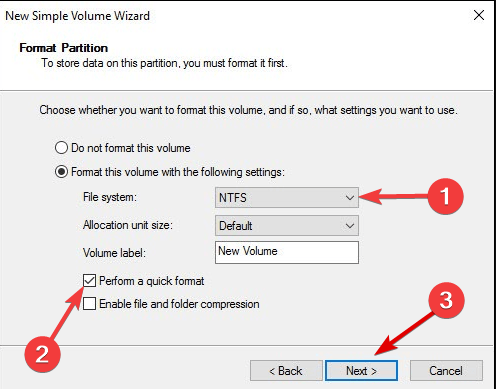
- Now you need to format your new drive. For the best results, choose the NTFS file system, and Perform a quick format, then hit Next.
- Finish the process.
2. By using the Command Prompt
- Press the Windows key, type cmd in the search bar and click Run as administrator.
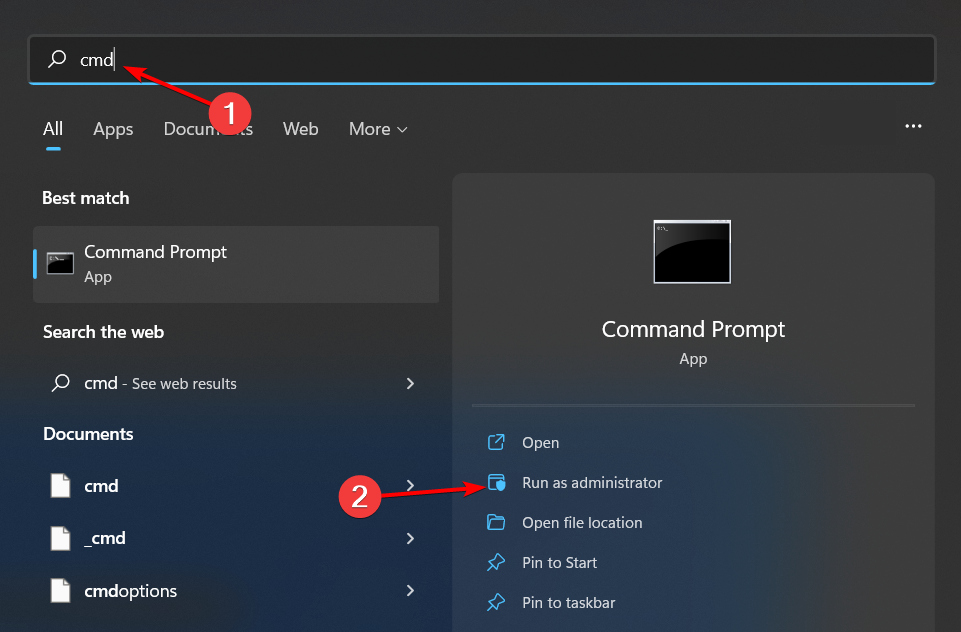
- Type diskpart in the Command prompt window and press Enter.
- Next, type list disk and press Enter. This will list all drives on your PC.
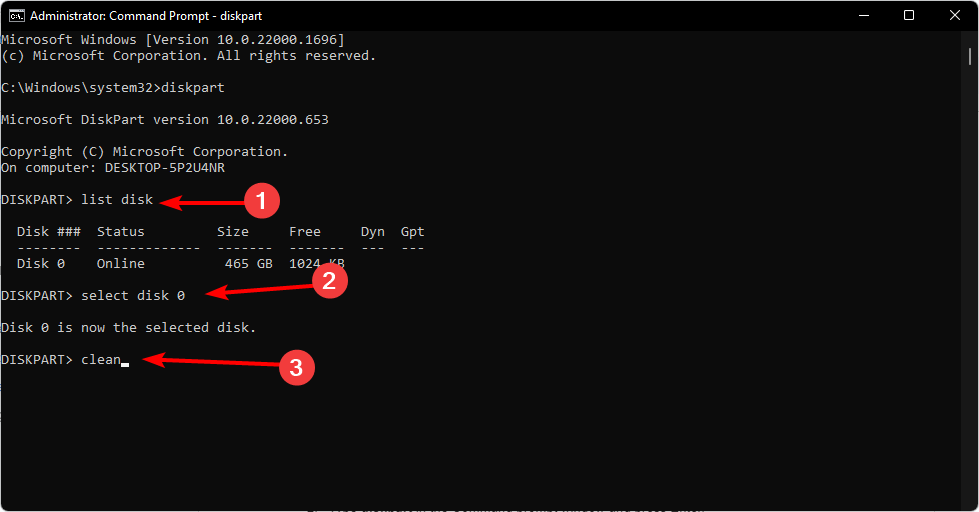
- Type the following commands and press Enter after each one: Remember to replace X with the corresponding number matching the uninitialized hard drive:
select disk Xcleanconvert gpt
3. By using Windows PowerShell
- Press the Windows key, type Windows Powershell in the search bar and click Run as administrator.
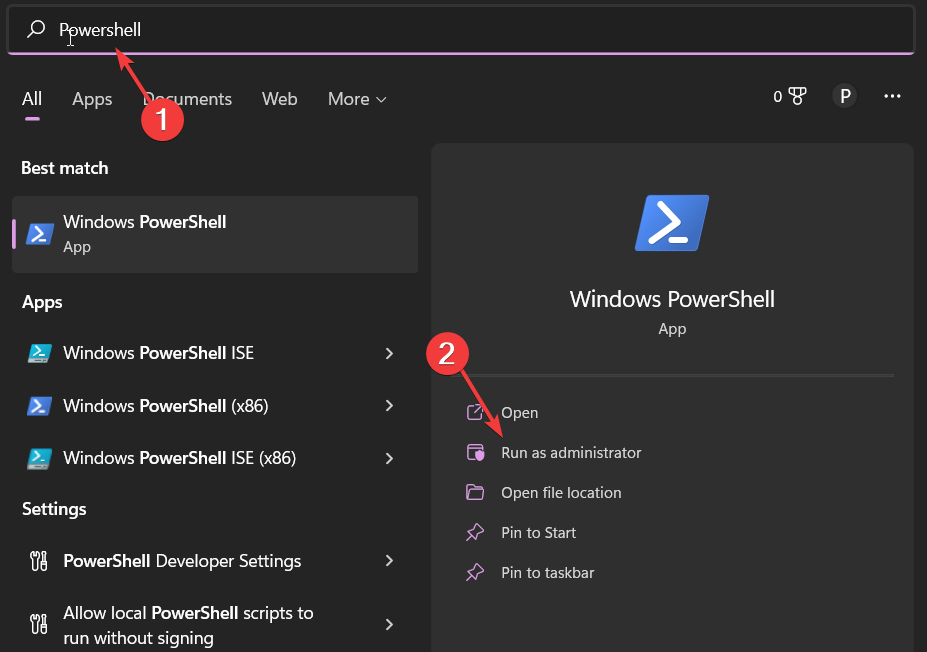
- Type and Enter the following command.
get-disk - Your uninitialized disk should appear as RAW. Next, type the following command and hit Enter to initialize it. Remember to replace n with the actual number represented by the uninitialized disk:
initialize-disk n - The disk will be initialized in the GPT partition style by default but if you wish to use the MBR style, type in this command:
initialize-disk n –PartitionStyle MBR
4. By using a third-party tool
In all these manual talks, it’s probably time-consuming to initialize a drive on your Windows 11. Luckily, you don’t have to go through this as there are a host of partition manager software that can do the job automatically and with fewer errors.
Further, these tools can help you out with partitioning and allocating space in your drive especially if you don’t know what partition style to use or Windows fails to create a partition. However, the main advantage over these manual methods is that they don’t wipe out your data.
Should I initialize MBR or GPT?
Selecting MBR or GPT is not based on guesswork. You have to consider the OS version you’re on, the size of the drive and your PC’s BIOS mode. Also, if you plan to expand in future, you need to consider a partition table with more flexibility.
Further, MBR is used for older Windows systems and has a size limit. GPT is newer, supports a larger size limit and is more secure.
Still, if you started off with MBR, you can convert to GPT without fear of data loss. And just in case you’re unable to convert MBR to GPT, we have it covered.
Hopefully, you’re now able to initialize a drive on your Windows 11. If you can’t initialize your drive, we have a few ways you can force it. And once you’ve successfully forced it but your hard drive still won’t show up on your File Explorer, check out this article on how to make it resurface.
Finally, if all these fail, perhaps your hard drive has reached its end of life and it’s time to upgrade to a newer and faster hard drive.
That’s a wrap from us but we’d love to hear your experiences with initializing your hard drives. How easy or difficult was it? Did you use Windows built-in tools or dedicated tools? Let us know in the comment section below.



User forum
0 messages