Sysdm.cpl is Not Working or Missing: 5 Ways to Fix it
Creating a new user profile does the trick
4 min. read
Published on
Read our disclosure page to find out how can you help Windows Report sustain the editorial team. Read more
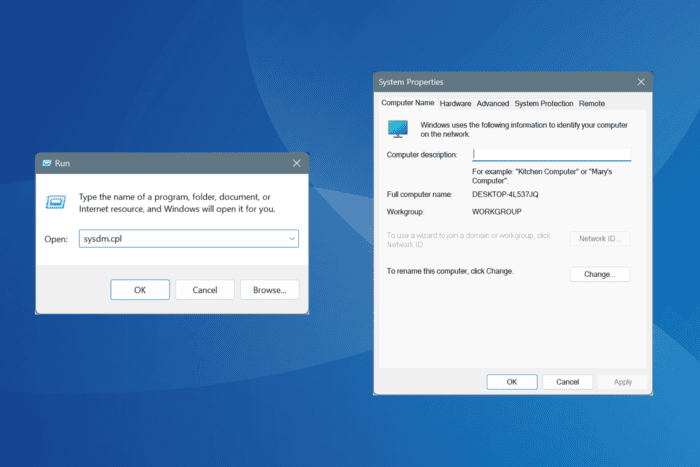
Recently, on one of my PCs, I found that sysdm.cpl was not working. When opening System Properties via Control Panel, it returned an error stating that sysdm.cpl is missing!
This happens due to corrupt system files, issues with the user profile, misconfigured Registry, or if you accidentally move/delete the sysdm.cpl file itself. If you are wondering why sysdm.cpl not opening is a problem, that’s because you won’t be able to perform a system restore or increase the virtual memory, amongst other critical changes.
What can I do if sysdm.cpl is not opening or working?
1. Manually copy sysdm.cpl from another PC
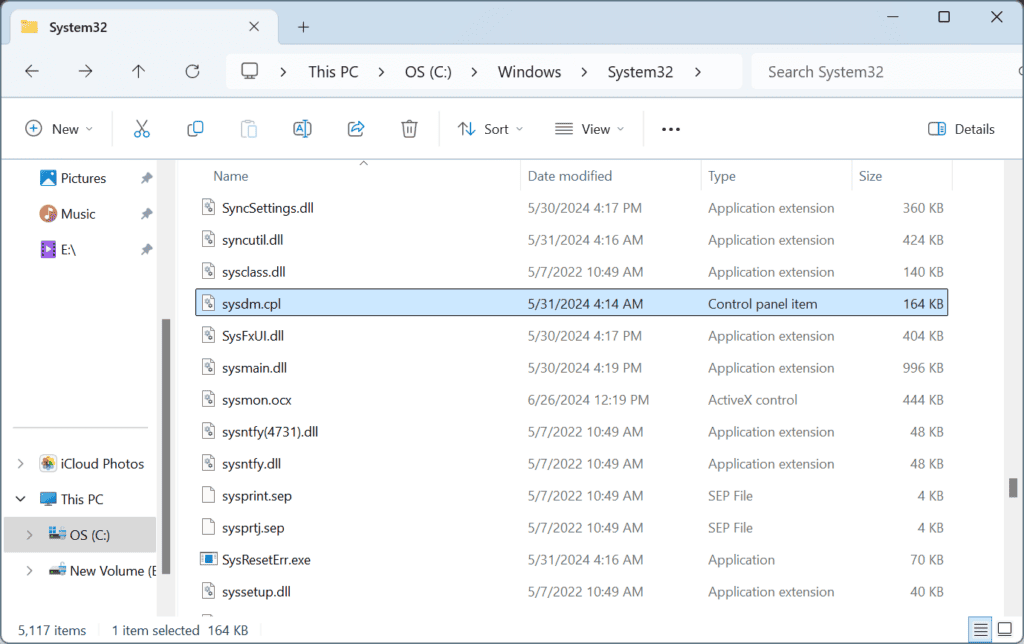
As surprising as it may sound, simply copying the sysdm.cpl file from another computer to the affected PC fixes things in no time!
As for the sysdm.cpl location, it’s: C:\Windows\System32
All you need to do is head to the System32 folder on another PC > locate the sysdm.cpl file > copy it to an external storage drive > move the file to the System32 folder on the affected PC.
2. Repair the corrupt system files
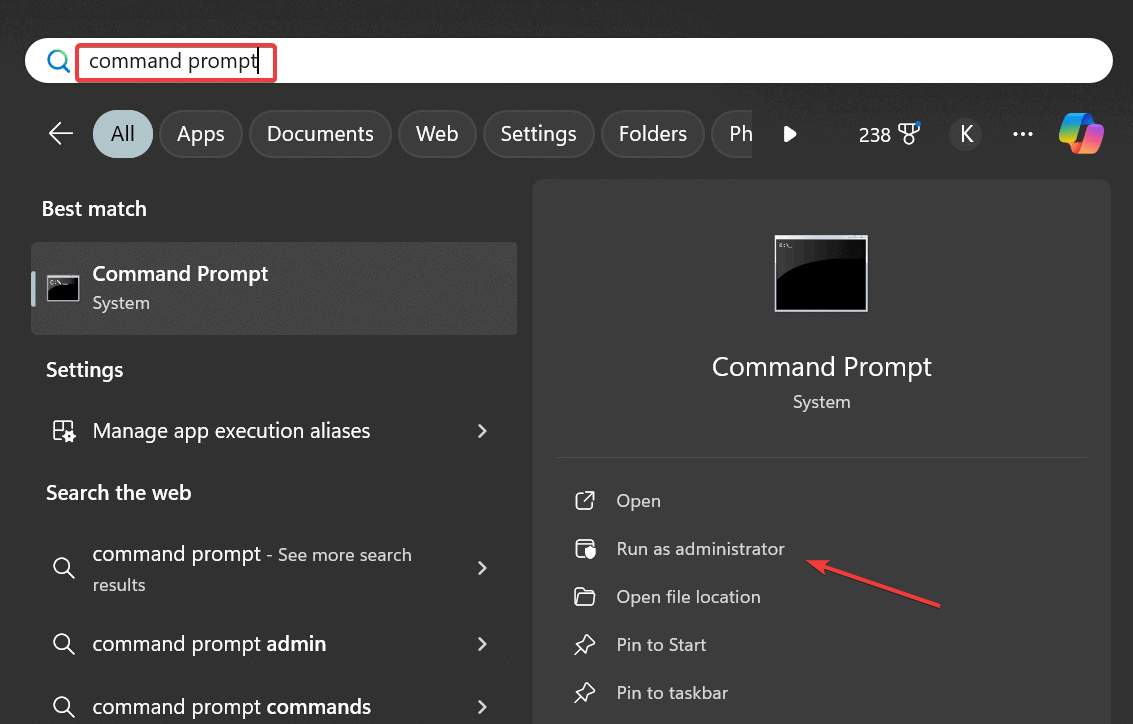
- Press Windows + S to open Search, type Command Prompt in the text field, and click on Run as administrator.
- Click Yes in the UAC prompt.
- Paste the following DISM commands individually and hit Enter after each:
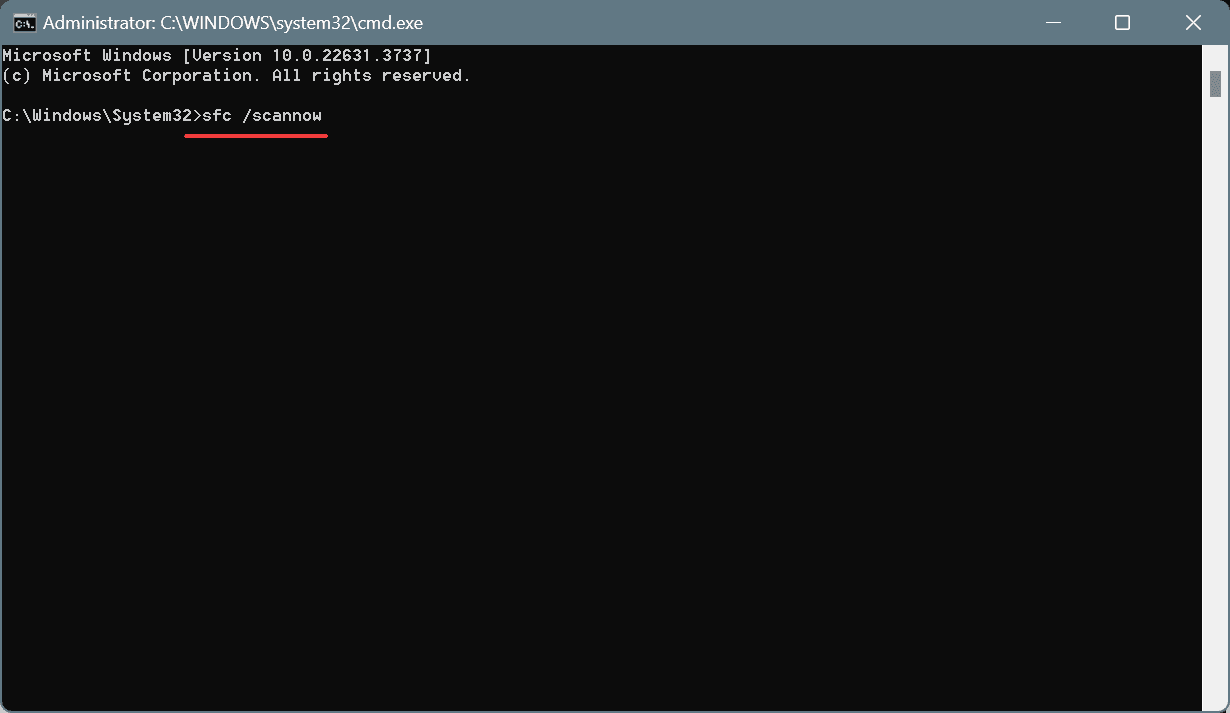
DISM /Online /Cleanup-Image /CheckHealthDISM /Online /Cleanup-Image /ScanHealthDISM /Online /Cleanup-Image /RestoreHealth - Next, run this command for the SFC scan:
sfc /scannow - Once done, restart the computer for the changes to come into effect.
Missing or corrupt system files can often be the reason sysdm.cpl is not working in Windows 11. In this case, running the DISM commands and SFC scan will replace the corrupt/missing system files with their cached copy.
If this doesn’t work and the error message highlights a DLL, use an effective DLL repair tool to replace it with a fresh copy.
3. Delete problematic keys in the Registry
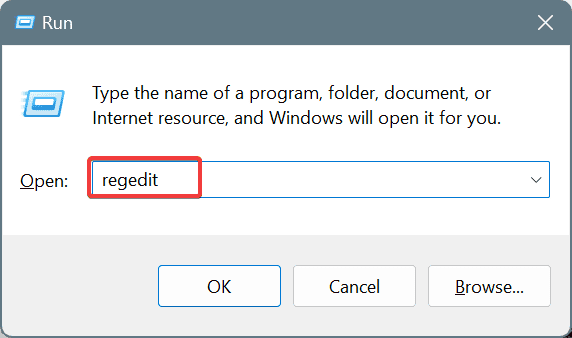
- Press Windows + R to open Run, type regedit in the text field, and hit Enter.
- Click Yes in the UAC prompt.
- Paste the following path in the address bar and hit Enter:
HKEY_CURRENT_USER\Software\Microsoft\Windows\CurrentVersion\Policies\Explorer - Now, if you find the NoPropertiesMyComputer or NoControlPanel entry (DWORD) here, right-click on it and choose Delete.
- Click Yes in the confirmation prompt.
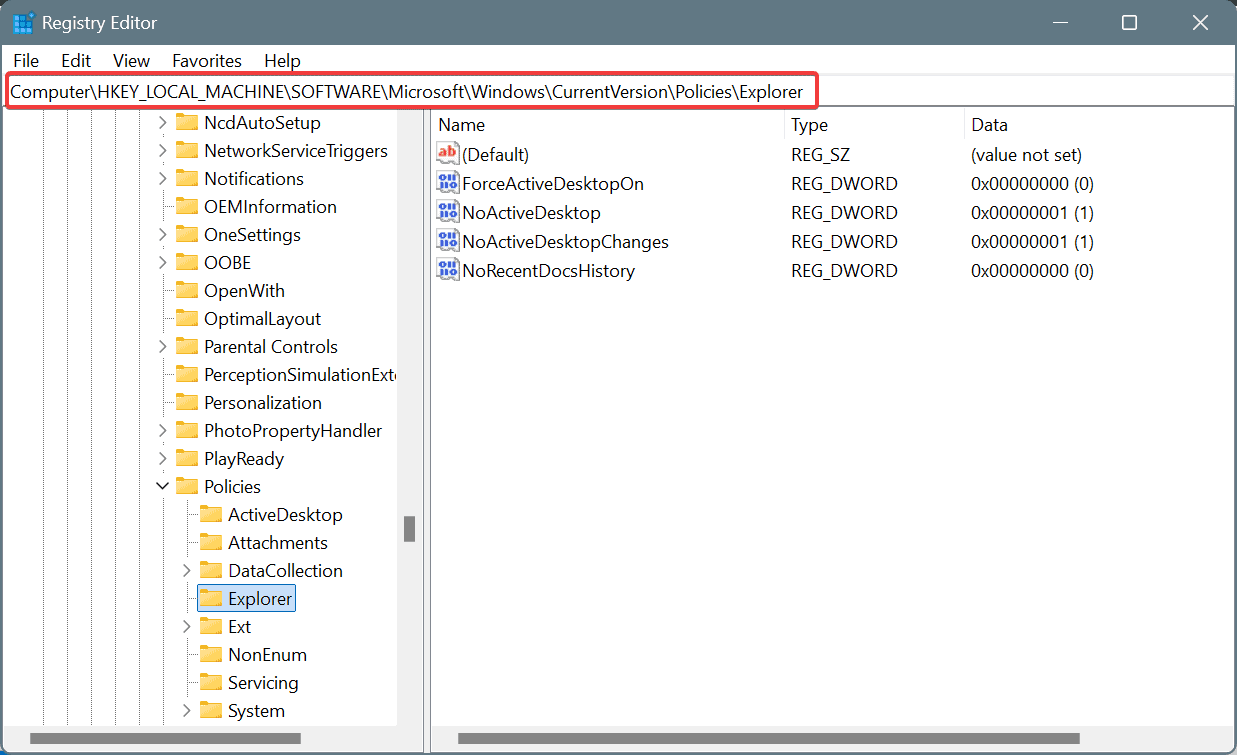
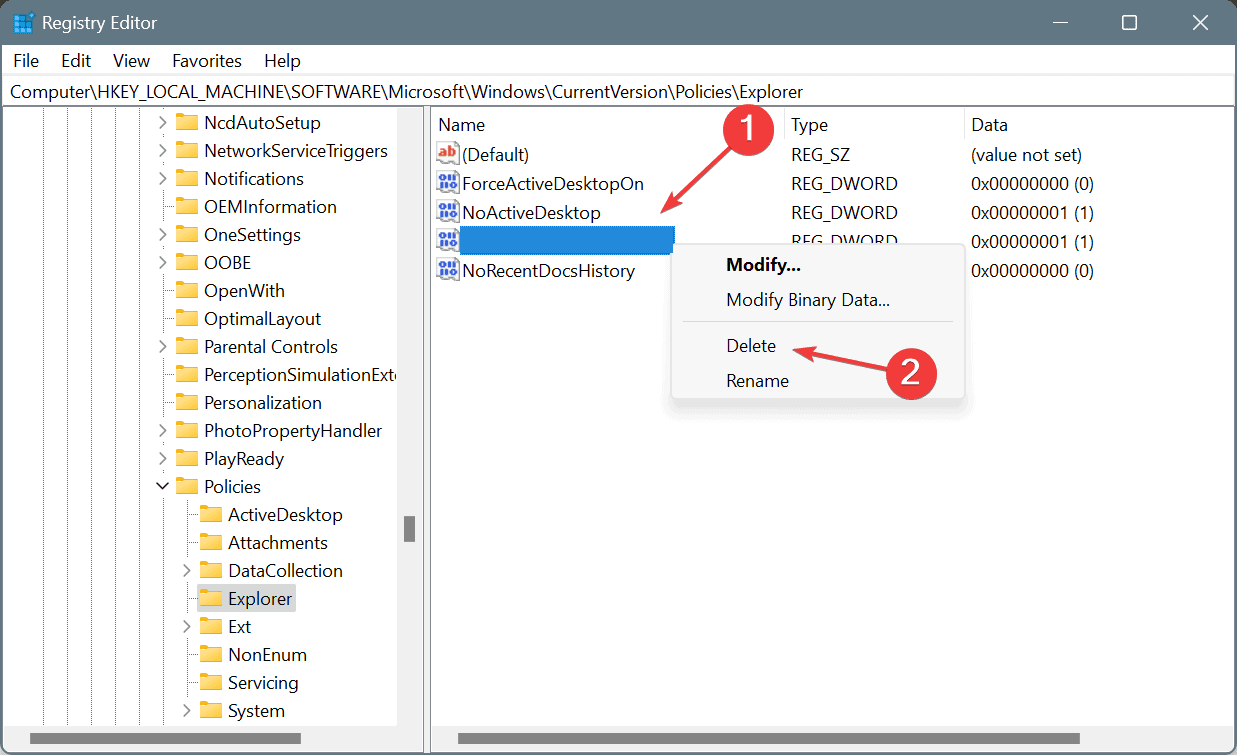
- Also, check for the two entries in the following path and delete them:
HKEY_LOCAL_MACHINE\Software\Microsoft\Windows\CurrentVersion\Policies\Explorer
4. Create a new user profile
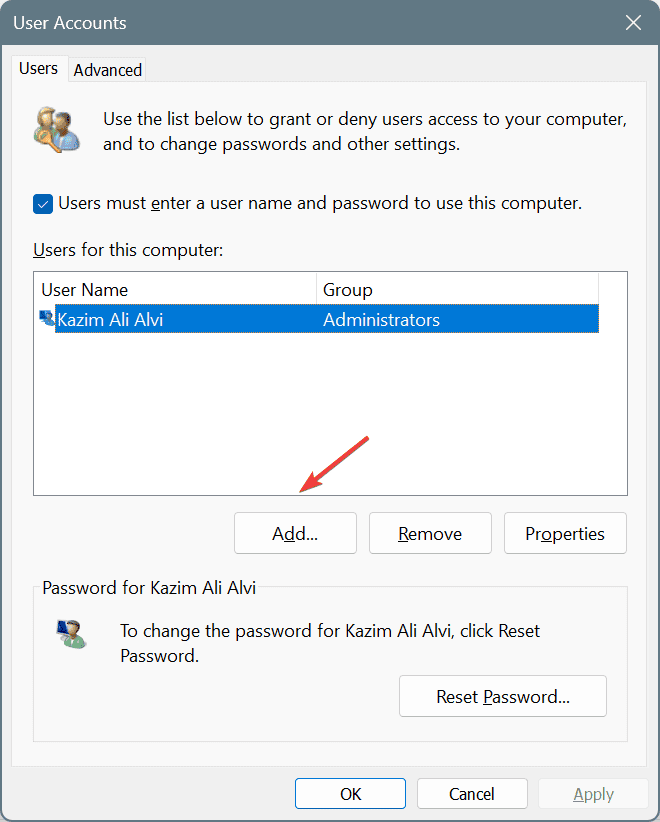
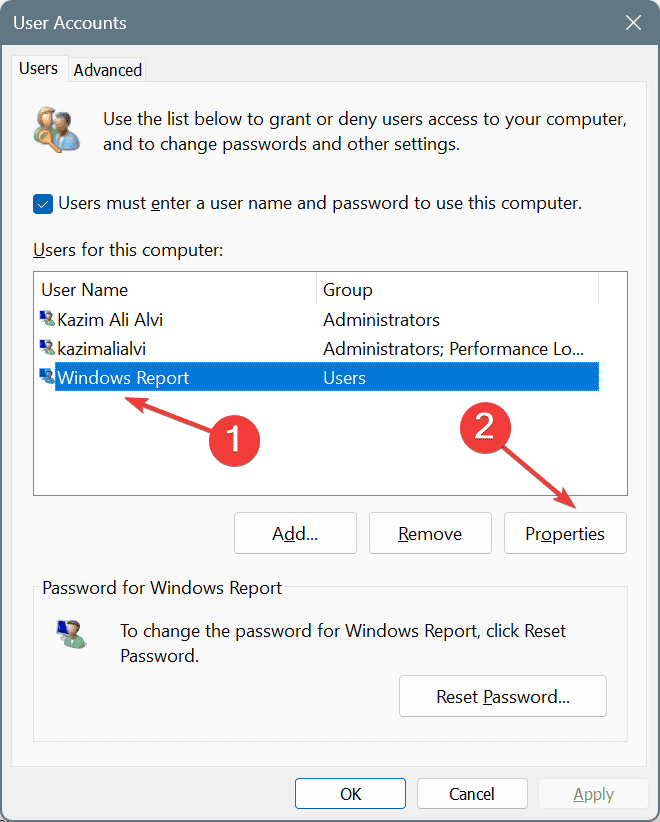
- Press Windows + R to open Run, type netplwiz in the text field, and hit Enter.
- Click the Add button.
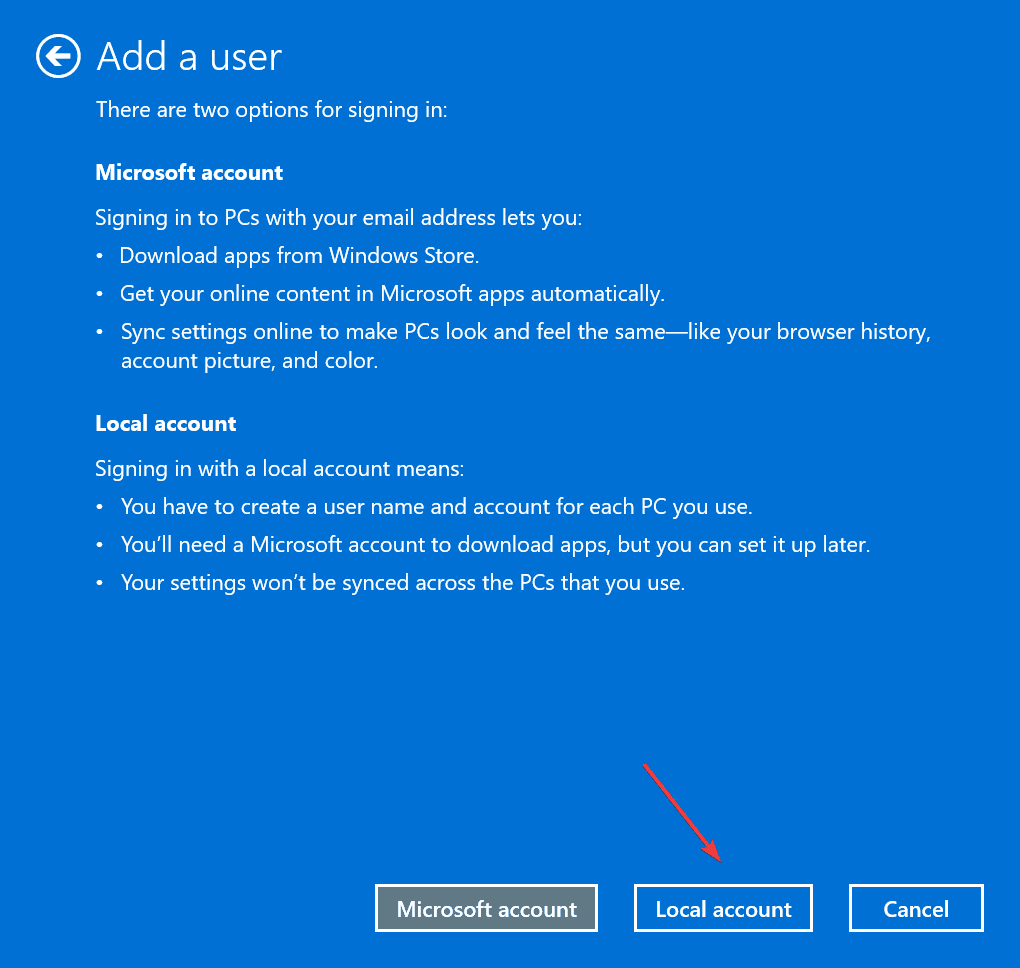
- Click on Sign in without a Microsoft account.
- Now, click the Local account option.
- Enter a username and password (not mandatory) for the account, and click Next.
- After creating a new account, select it from the list, and then click on Properties.
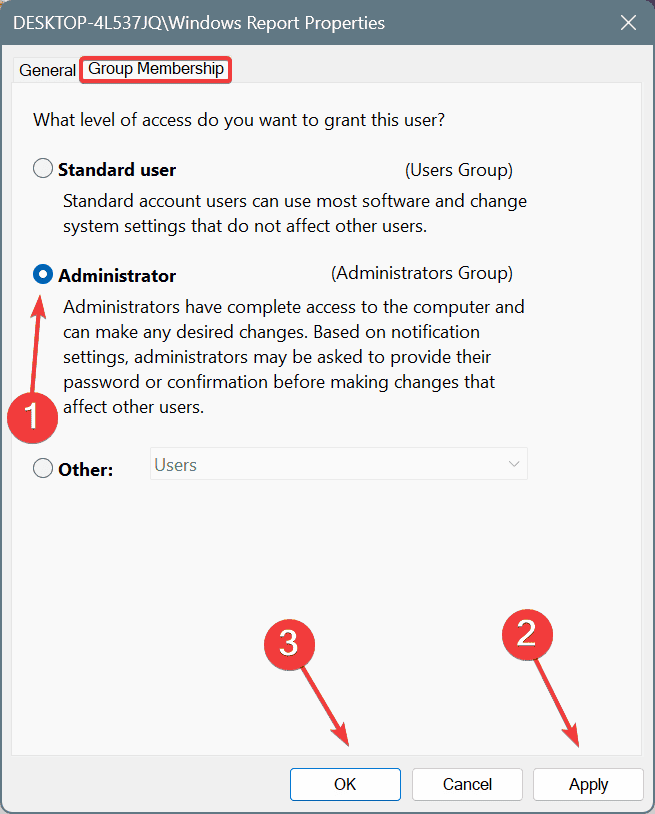
- Go to the Group Membership tab, select Administrator, and click Apply and OK to save the changes.
- Finally, sign in with the new account and verify whether sysdm.cpl is still not working.
If sysdm.cpl starts working on a new account, the previous user profile is corrupt. In this case, use an external storage to move all personal files from the affected profile to the new profile. As for installed programs, you can have apps available to all users on the PC!
5. Perform an in-place upgrade
 NOTE
NOTE
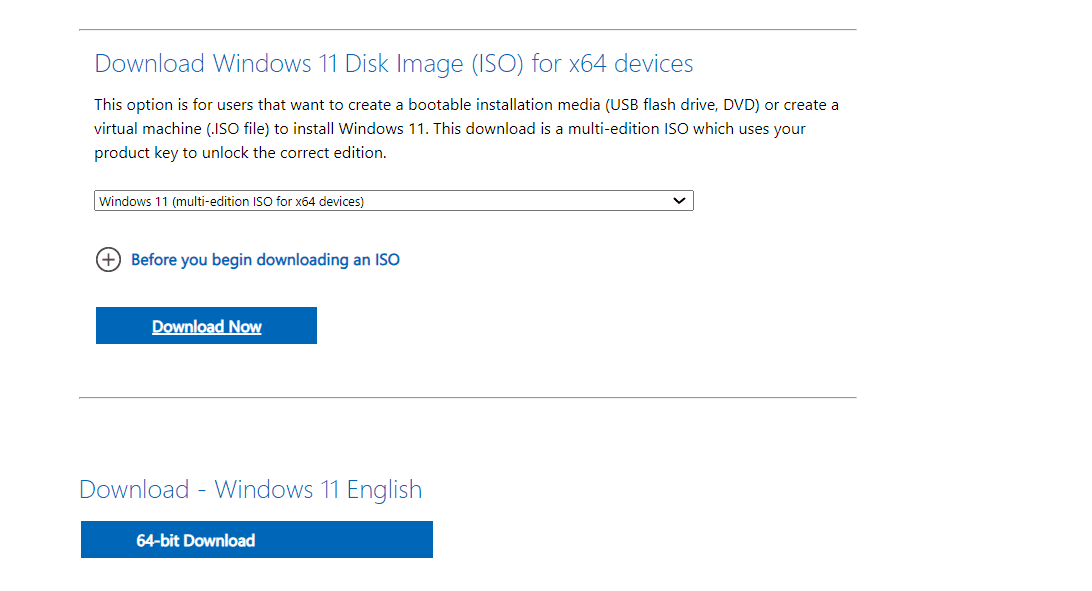
- Go to Microsoft’s official website, choose the OS edition and product language, and then download the Windows 11 ISO.
- Right-click on the downloaded ISO file, and choose Mount.
- Click Open in the confirmation prompt.
- Run the setup.exe file, and click Yes in the UAC prompt.
- Click on Next to proceed.
- Click Accept to agree to Microsoft’s license terms.
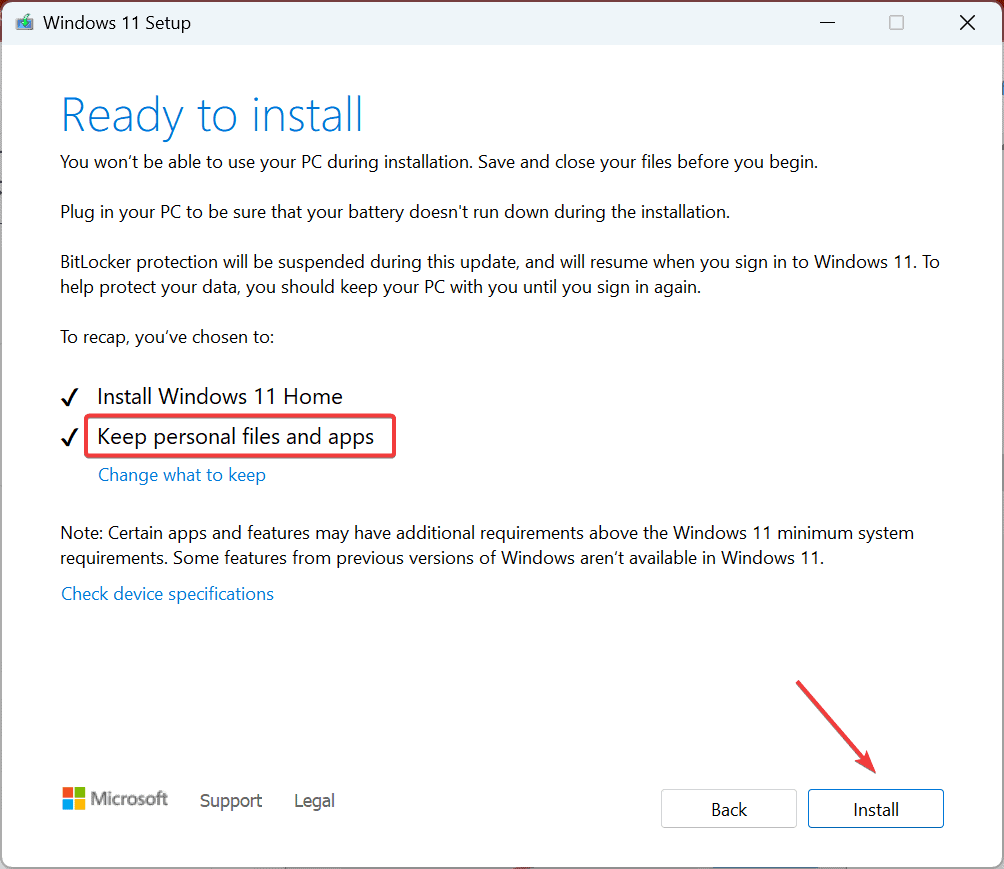
- Make sure the setup reads, Keep personal files and apps, and click on Install.
- Wait for the process to complete. It may take 1-3 hours.
System errors like sysdm.cpl command not working often call for an in-place upgrade as a fix. Remember, this is what worked for me!
An in-place upgrade is like a reinstall, except for the fact that your personal files and apps remain unaffected. And if this, too, fails for some reason, you can always create a bootable Windows USB, change the boot order to the USB, and reinstall Windows 11 from scratch.
Which fix worked for you? Share with our readers in the comments section.



User forum
0 messages