How to Increase Virtual Memory in Windows 11 [2 Ways]
Learn how to boost your PC's performance
Key notes
- Virtual memory acts as RAM when the latter is full, thus freeing up space and improving the system's performance. So, check how to increase virtual memory in Windows 11.
- Keep it 1.5-3 times the available RAM on your computer when increasing the virtual memory.
- Also, find out how to increase video memory in Windows 11.

If you are noticing a certain lag when running high-end applications or games, it could be that the RAM is full. This is where increasing the virtual memory, or page file size in Windows 11, comes to aid.
Virtual memory or page file is one of the most misunderstood concepts, and many myths surround it. However, no matter what others say or do, a thorough understanding of it is imperative to get the best performance from your computer.
In the following sections, we will walk you through the steps to increase virtual memory in Windows 11 and help you understand its importance and optimal virtual memory size.
What is a good virtual memory size for Windows 11?
Every person uses the computer differently; likewise, the optimal size for virtual memory will also differ. While some run video editing apps or play games which consume high resources, others may use the computer for relatively lighter tasks.
For both these types of users, an excellent virtual memory size wouldn’t be the same. While the former would require a higher virtual memory, the latter might be better off with the bare minimum.
Microsoft recommends keeping the virtual memory size between 1.5 to 3 times the available RAM on your computer. So, to set or increase the page file, you first need to check the RAM on a Windows 11 system.
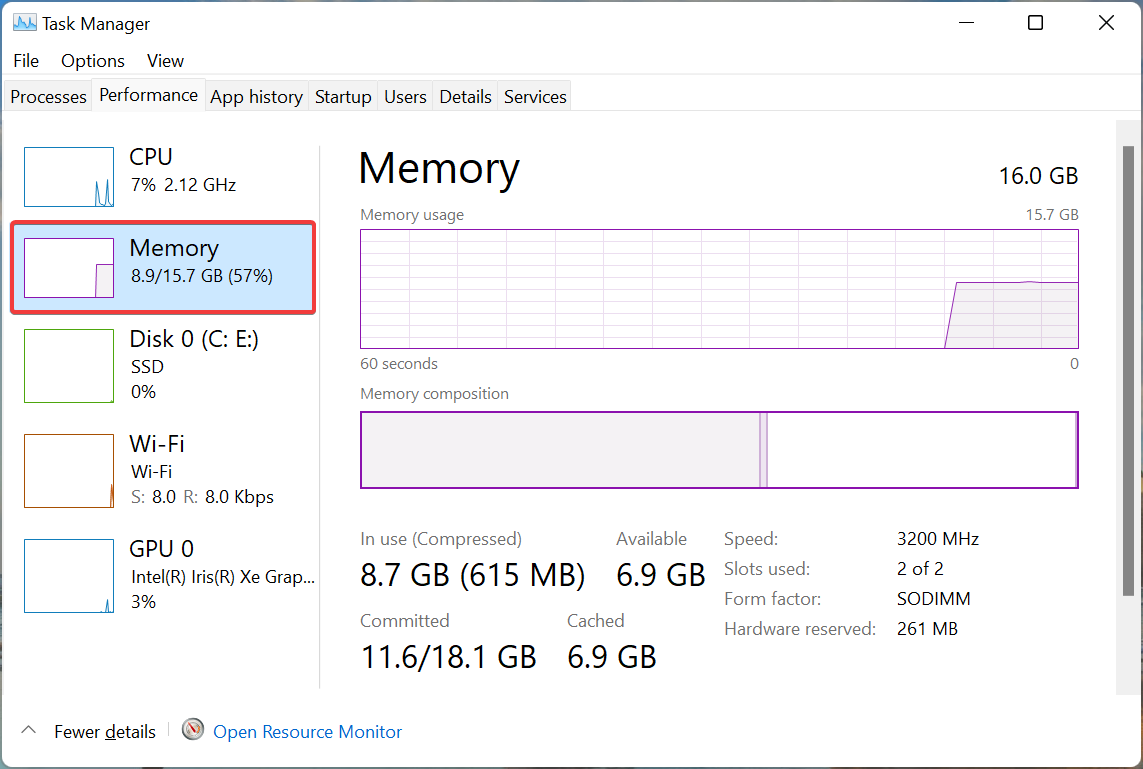
Once you have checked the available RAM, you can easily set up the virtual memory or page file in Windows 11. For example, say the available memory is 4 GB, so the minimum virtual memory to be set up is 4 x 1.5= 6GB while the maximum would be 4 x 3 = 12 GB.
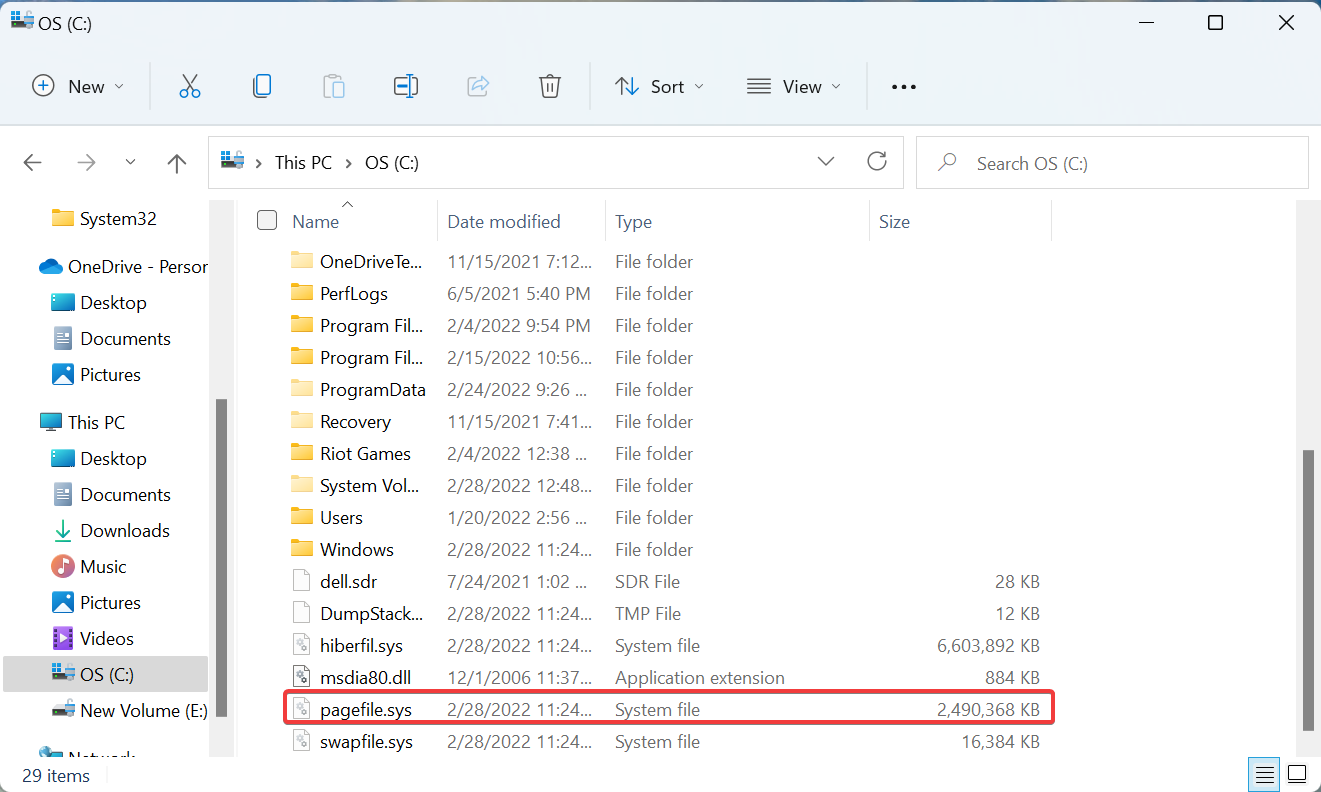
Also, the page file is, by default, stored in the system drive, i.e., where Windows is stored, though you can change it.
So, if you have configured the settings such that protected operating system files and hidden items are visible, there would be a pagefile.sys entry in the C: drive.
How do I check virtual memory in Windows 11?
- Right-click on the Strat menu and select Terminal (Admin).
- In the Terminal, type the code below and hit Enter:
systeminfo.exe - Then, scroll down, and you will see the values for Virtual Memory: Max Size, Available, and In Use.

Also, it’s important to mention that Windows can, on its own, take care of the virtual memory or page file. But, if you are facing freezing or lagging issues in Windows 11, increasing it manually might help.
Quick Tip:
A great workaround to resolve RAM-related issues is to use another capable browser like Opera One.
With this optimized browser, you can improve your overall memory due to the lightweight system impact, secured browsing with a free VPN, or ask questions to the built-in AI.

Opera One
Navigate on this browser with tab optimization and light resource usage.How can I increase the virtual memory and page file values in Windows 11?
1. Using the Settings app
1. Press Windows + S to launch the Search menu.
2. Enter View advanced system settings in the text field at the top, and click on the relevant search result that appears.

3. In the Advanced tab, click on the Settings button under Performance.

4. Navigate to the Advanced tab in the Performance Options window.

5. Next, click on Change under Virtual memory.

6. Untick the checkbox for Automatically manage paging file size for all drives.

7. If Windows was managing the virtual memory earlier, it’s best to clear the previously set value and then increase it.
To do that, click on the drive with System managed listed, select No paging file, and click on Set.

8. Click Yes on the confirmation prompt that pops up.

9. Now, choose a drive or partition from the list, select the Custom size option and enter the same value under Initial size and Maximum size fields in MB (1GB=1024MB), taking cue from the previous section.

10. Once done, click on Set and then on OK at the bottom to save the changes.

11. Next, restart the computer for the changes to come into effect.
If you are looking to boost system performance, you can quickly increase the page file size through your PC’s built-in settings. You can increase the virtual memory for every disk or partition separately.
2. Using a script
- Click the Windows search, type PowerShell, and open the app.

- Type the script below and hit Enter.
Get-Volume
- Make a note of the drive with the Windows installation.
- Type the following script followed by Enter.
Update-HostStorageCache - Type the following code, including your Windows drive letter, and hit Enter.
Get-PartitionSupportedSize -DriveLetter C
- Run the following command:
$size=Get-PartitionSupportedSize - DriveLetter C - Type the script below, followed by Enter:
Resize-Partition -DriveLetter C -Size $size.SizeMax - Verify the increase using the script below:
Get-Volume
You now know how to increase virtual memory or page file size in Windows 11 and can use it to boost the system’s performance.
But remember that though virtual memory works the same way as the available RAM, it’s certainly not as fast. Please read the next section to understand all about it.
That’s all there’s to increasing virtual memory in Windows 11. Once you have raised it using the steps listed here, the computer should perform better, and applications should stop crashing if that was the case earlier.
Also, check what to do if Windows 11 is not using all the available RAM in Windows 11.
In the comments section below, tell us whether increasing the virtual memory helped your system perform better.
Read our disclosure page to find out how can you help Windows Report sustain the editorial team. Read more


Improve this guide


User forum
0 messages