How to Solve ERROR_REQ_NOT_ACCEP in 4 Easy Methods
The bug is caused by various software issues.
![]() 3 min. read
3 min. read
![]() Published on
Published on
Share this article
Improve this guide
Read our disclosure page to find out how can you help Windows Report sustain the editorial team. Read more
System error 71, officially known as ERROR_REQ_NOT_ACCEP, occurs when the remote computer refuses to accept more connections because it has reached its limit. It commonly appears on Windows 10, 8, 7, Vista, and XP. According to Microsoft labelling, the hexadecimal code for this error is 0x47.
What is causing the ERROR_REQ_NOT_ACCEP?
When this error occurs, users must find and address the root cause. Various factors, such as misbehaving hardware or software, can cause this error.
Windows system error codes usually result from the OS trying to communicate a problem to the user. They can be triggered by various issues, from software conflicts to hardware problems. Recent Windows or driver updates and corrupted system files could cause the ERROR_REQ_NOT_ACCEP to appear.
How to Fix the ERROR_REQ_NOT_ACCEP in 4 Easy Methods
Method 1: Run an SFC scan and Repair Windows
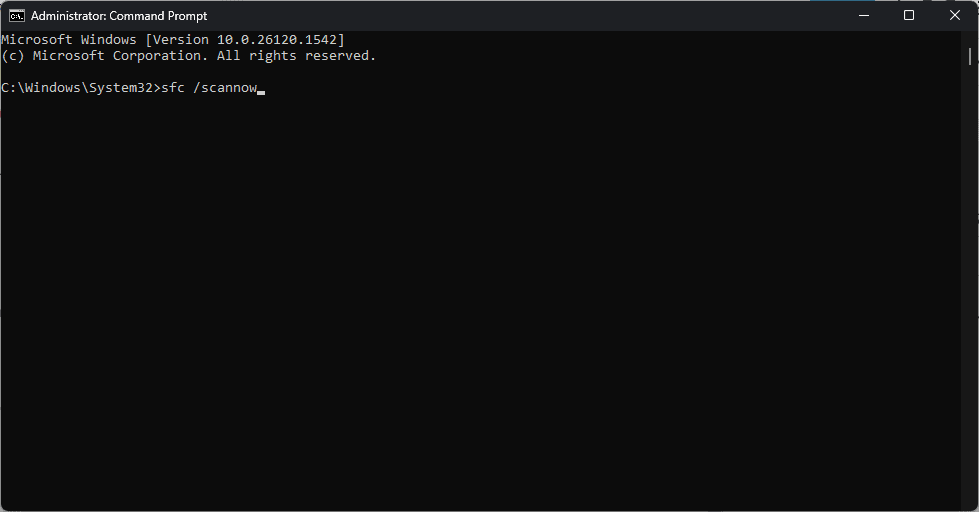
One way to fix this issue is using the System File Checker tool built into Windows. This command-line utility scans for and repairs corrupted or missing system files, which can lead to fixing the ERROR_REQ_NOT_ACCEP.
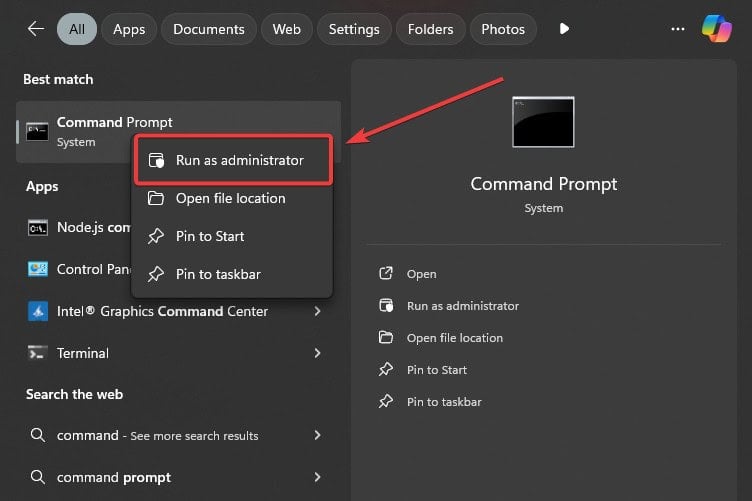
- Open Command Prompt with Admin Rights.

- Type in the following command:
sfc /scannow
- Let Windows run the process, and then restart your PC.
Method 2: Updating/Reinstalling/Rolling back drivers
The root of the problem could also be a device driver. Users can try reinstalling or updating the driver, or rolling back to a previous driver version may also work. First, identify the faulty driver, and then:
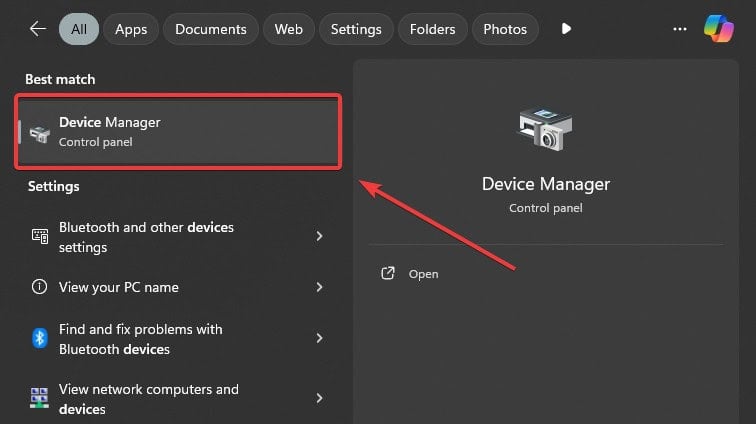
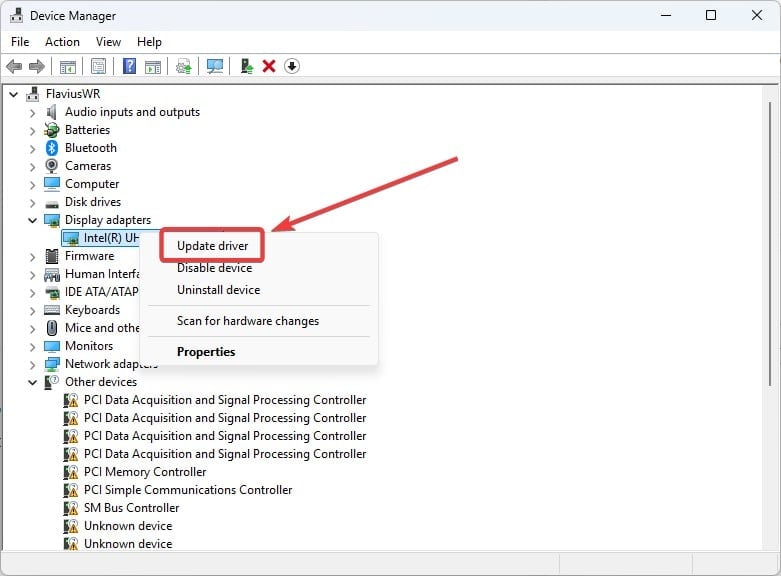
- In the Search box, type in Device Manager and click on it.

- Click on Display Adapters, right-click on your native display adapter and select Update driver.

- Select your preferred choice, and let Windows run the updating process.
To reinstall the faulty driver, follow the same steps, but instead of selecting Update driver, select Uninstall driver. Then click Uninstall.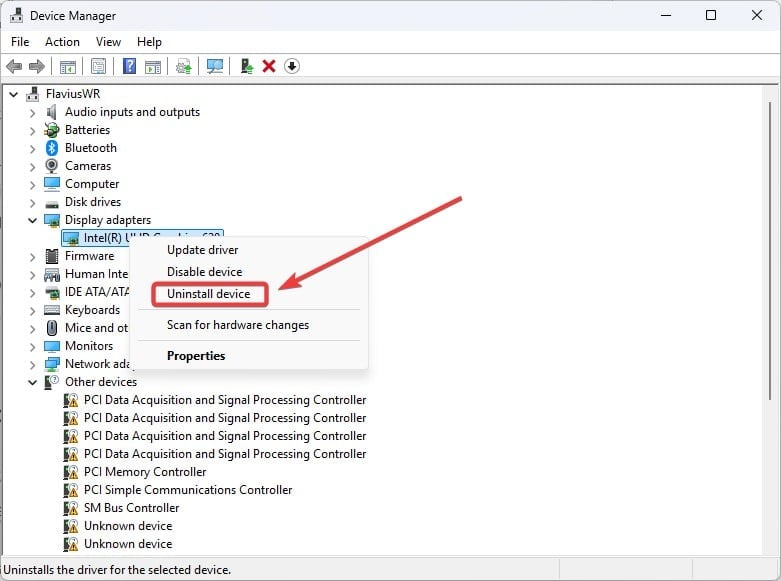
Make sure to download and install the proper version of your driver. Reboot your PC, and see if the ERROR_REQ_NOT_ACCEP is fixed.
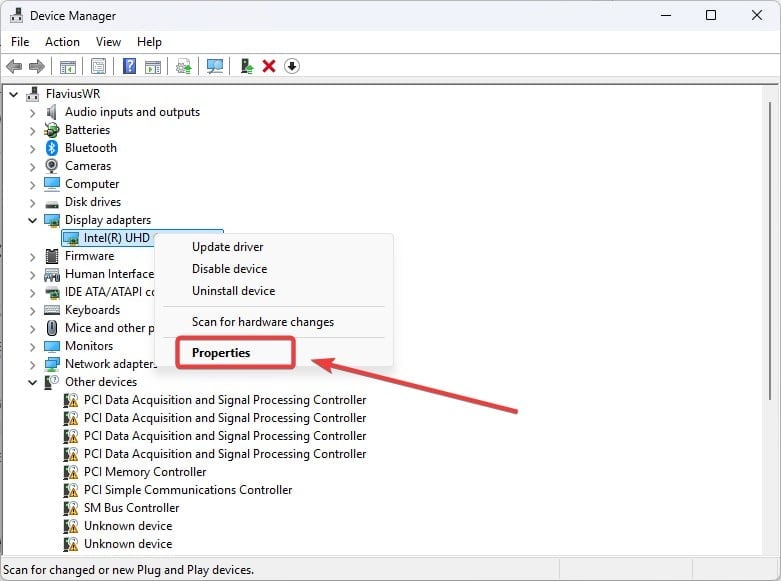
As we mentioned, rolling back the driver to a previous version could also fix the issue.
- In Device Manager, right-click on the affected driver and select Properties.

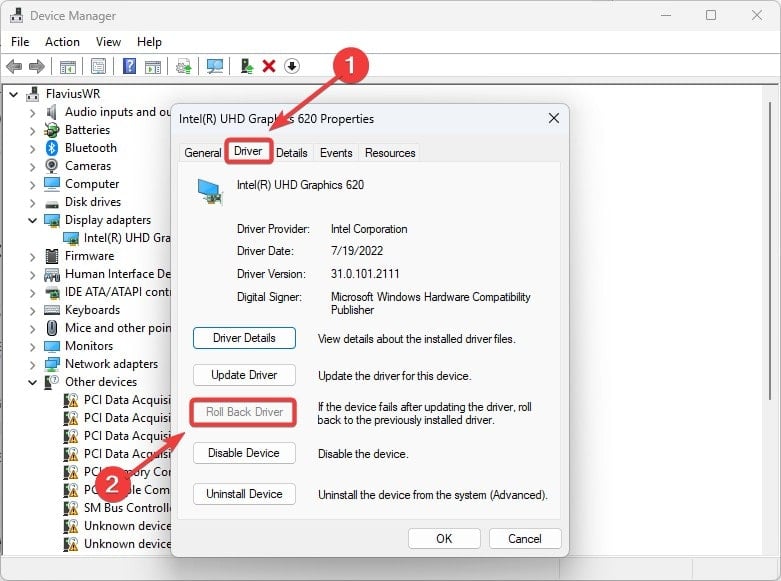
- Go to the Driver section, and select Roll Back Driver.
- Follow the steps, and then reboot your PC.
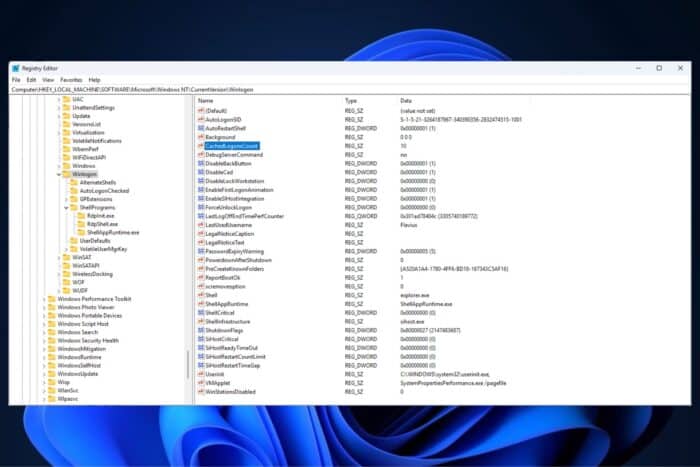
Method 3: Modify the CachedLogonsCount string
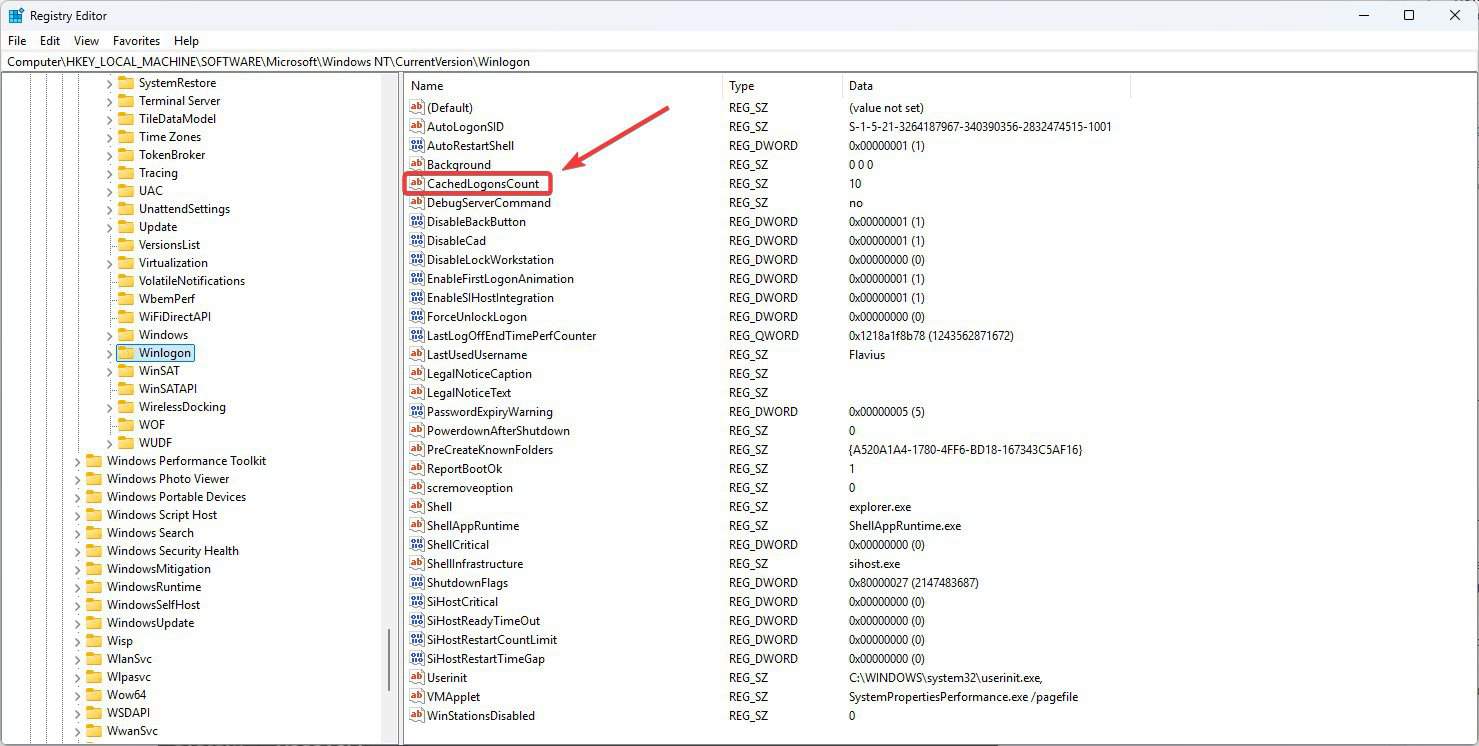
Making sure the CachedLogonsCount string from the Registry Editor is set to the correct value could also fix the ERROR_REQ_NOT_ACCEP. To do this, you’ll need to:
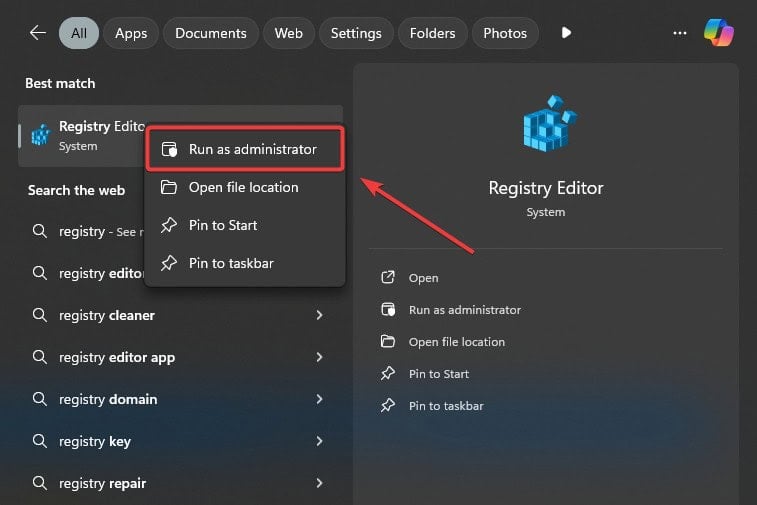
- Open Registry Editor with Admin rights.

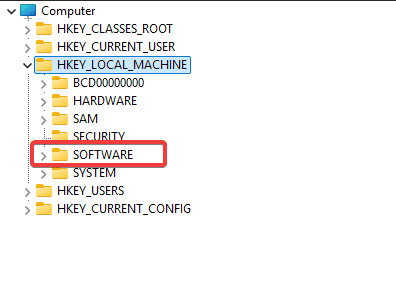
- Open the Computer section and select the HKEY_LOCAL_MACHINE.

- Scroll down to SOFTWARE and open it.

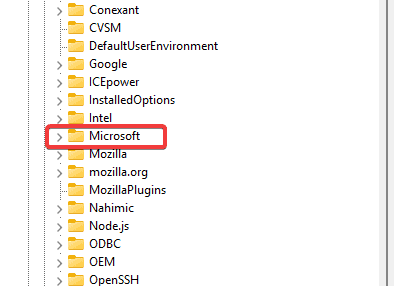
- Then go to Microsoft.

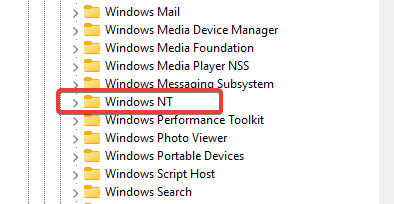
- Scroll down to Windows NT.

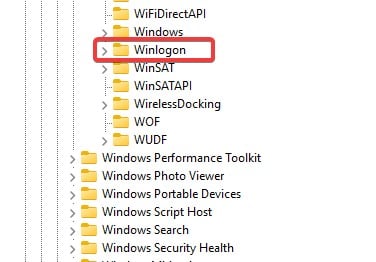
- Locate Winslogon, and click on it until it opens the right panel.

- Open ChachedLogonsCount.

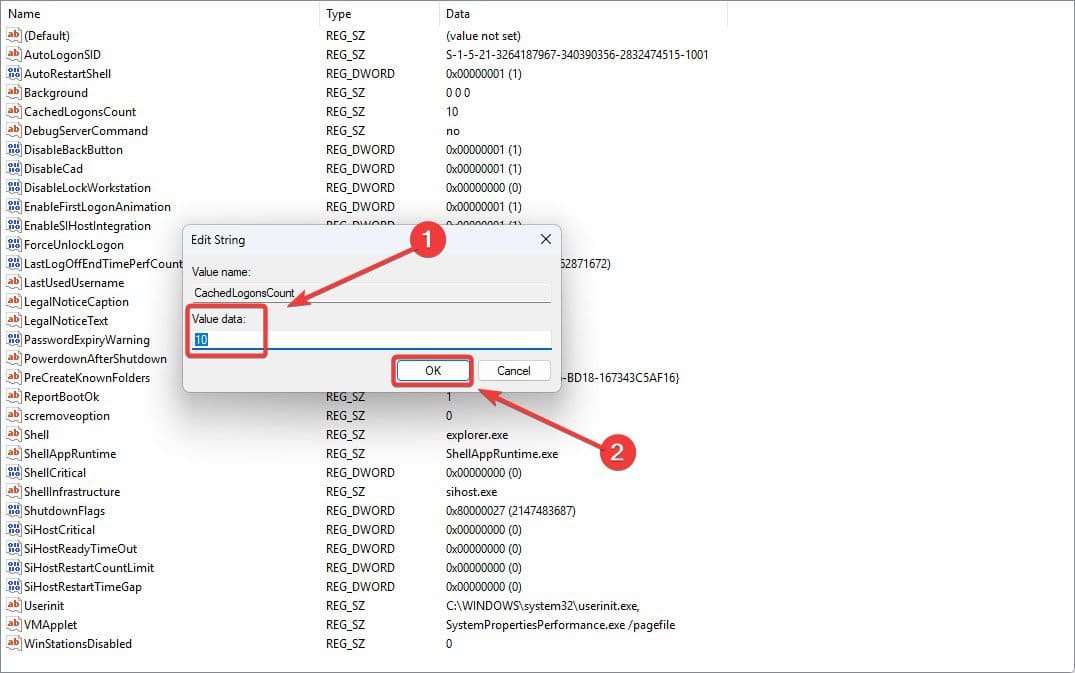
- Change the Value Data from 10 to the preferred limit, and then click OK.

- Close Registry Editor, and then reboot your PC.

Method 4: Perform a System Restore on the Windows device
If none of the solutions above work, a System Restore might be worth trying. This will eliminate all the corrupted files and restore the device to a state before the issue occurs.
To perform a System Restore, hit the Restart Now button from the Advanced Startup pane and follow the instructions. 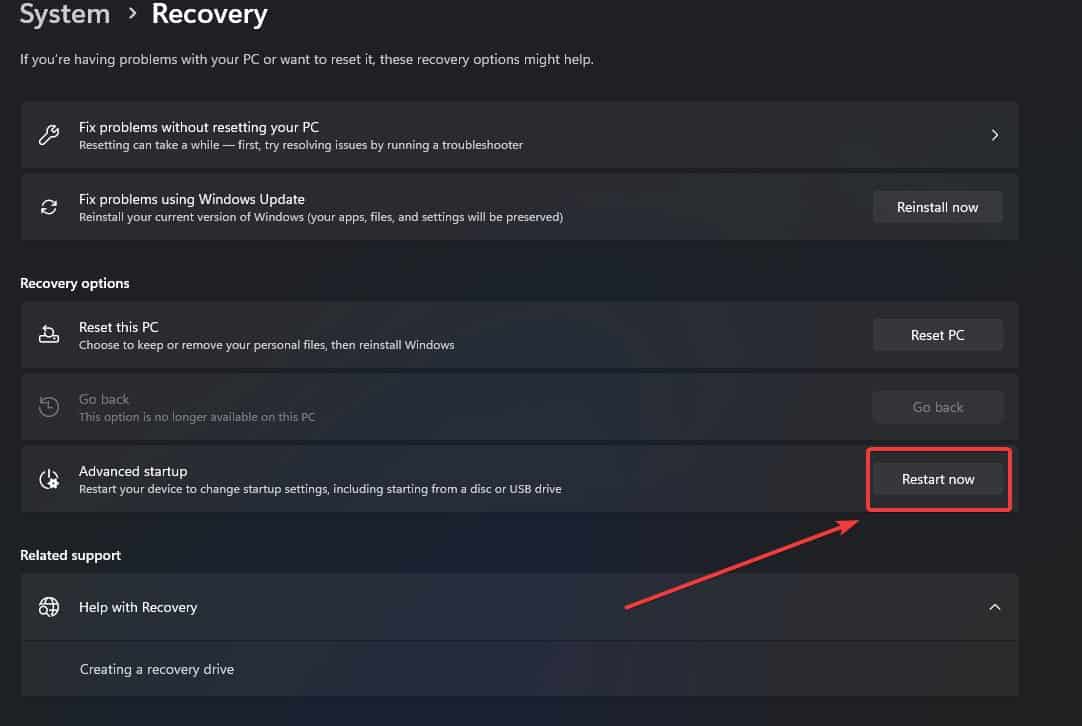
This step is not difficult, but it’s not easy either, and you’ll need some more detailed guidance, which you can find here.
ERROR_REQ_NOT_ACCEP is a frustrating bug, but you can eliminate it using the workarounds above. However, if you have your fix, share it with us in the comments below.


User forum
0 messages