Add Safe Mode to Boot Menu on Windows 10: 2 Ways to do it
Everything you need to make Safe Mode easily accessible
3 min. read
Updated on
Read our disclosure page to find out how can you help Windows Report sustain the editorial team. Read more
Key notes
- Safe Mode is a vital troubleshooting option that allows you to start your PC with limited drivers.
- You can add Safe Mode to your Windows 10 boot menu by running some commands.
- It would be best if you tweaked your System Configuration to make the option readily available.

If you like the old boot menu of the Windows 7 operating system with the Safe Mode feature included, the good news is that you can add the Safe Mode to your Windows 10 boot menu too.
This requires just a few tweaks and commands, and we will show you how to do it in this guide.
Can you enter Safe Mode from the boot menu?
You can enter Safe Mode from the boot menu, among other options, to enable the troubleshooting mode. However, unlike Windows 7, you need to add Safe Mode to your boot menu on Windows 10.
This is relatively easy to do, as shown in the following sections of this guide.
How can I add Safe Mode to the boot menu on Windows 10?
1. Add Safe Mode Minimal using Command Prompt
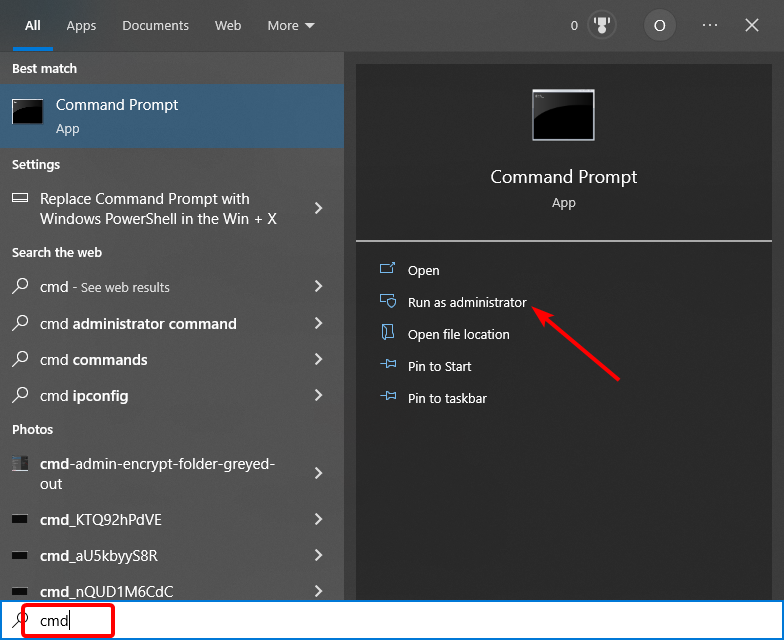
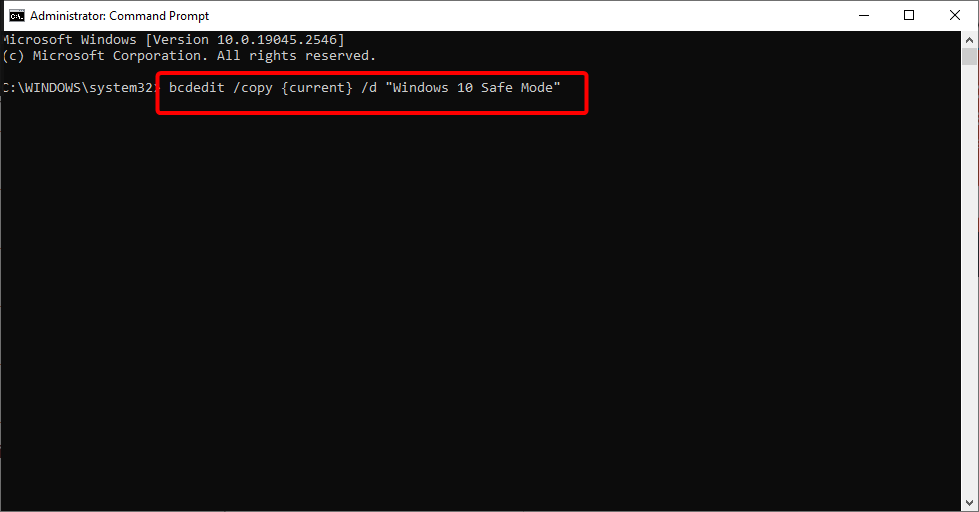
- Press the Windows key, type cmd, and select Run as administrator under Command Prompt.
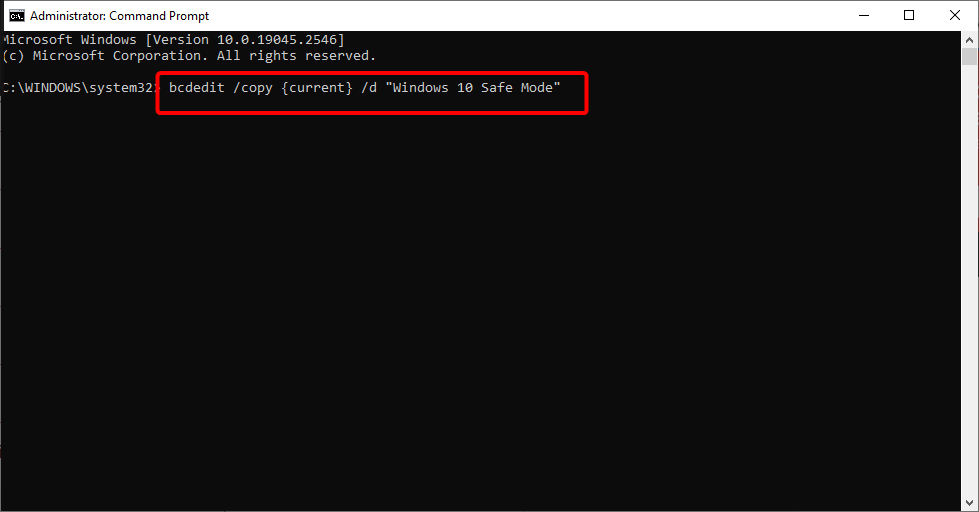
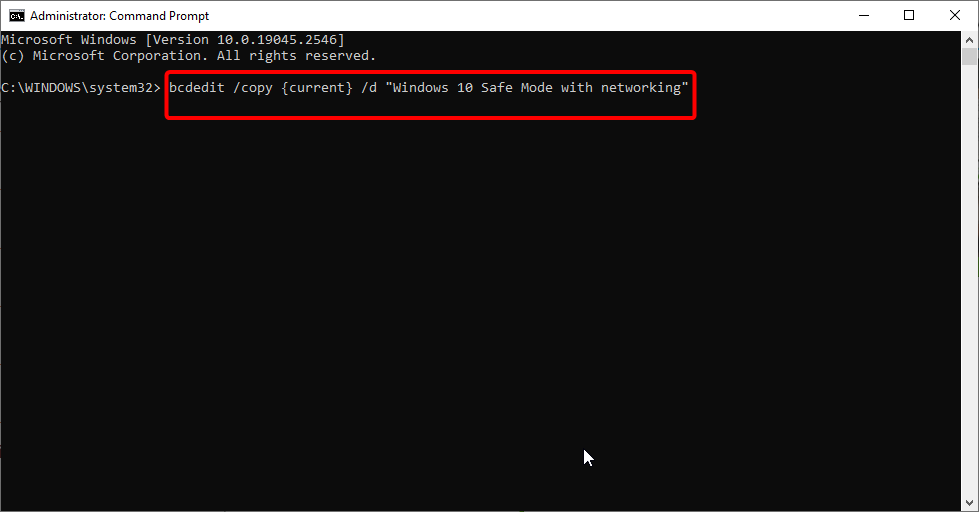
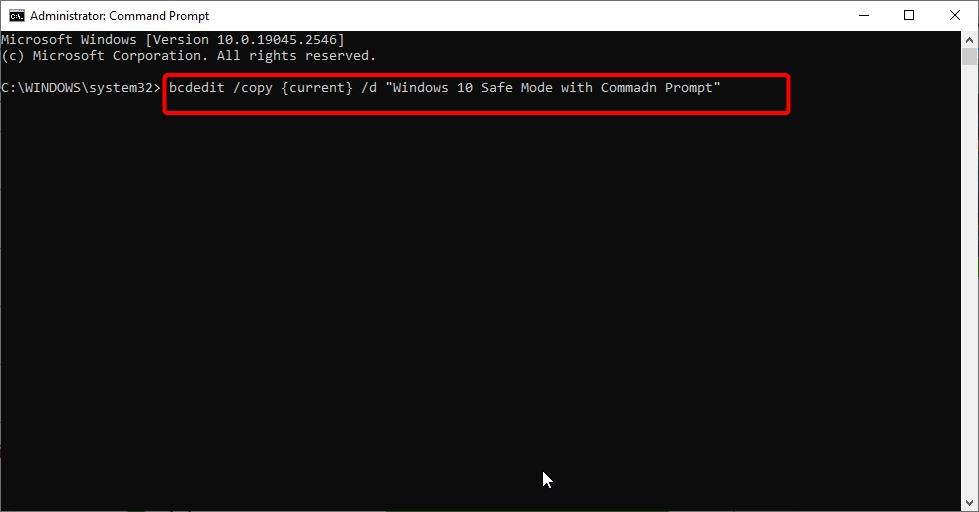
- Type any of the commands below for the type of Safe Mode you want to add and hit Enter:
bcdedit /copy {current} /d "Windows 10 Safe Mode"or
bcdedit /copy {current} /d "Windows 10 Safe Mode with networking"or
bcdedit /copy {current} /d "Windows 10 Safe Mode Command Prompt" - Finally, wait for the command to finish running.
The first step towards adding Safe Mode to the boot menu on Windows 10 is to activate it by running some commands. After doing this, you must proceed to solution 2 to make the Safe Mode option available on the boot menu.
2. Enable the option in System Configuration
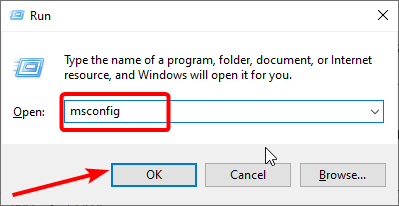
- Press the Windows key + R, type msconfig, and click OK.
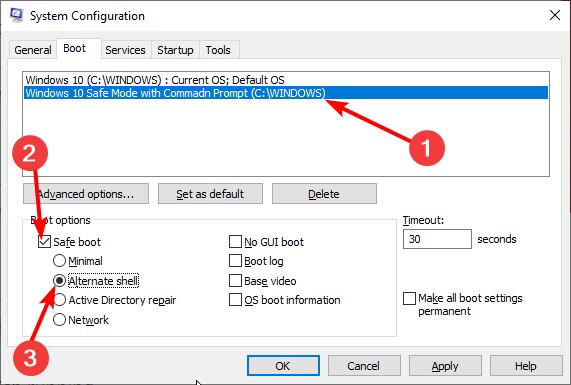
- Click the Boot tab at the top.
- This will show your default OS boot option and the new entry you created in solution 1.
- Now, select the entry you created.
- Check the Safe Boot box.
- Next, tick the radio button for Minimal to enable Safe Mode, Network for Safe Mode with networking, or Alternate shell for Safe Mode with Command Prompt.
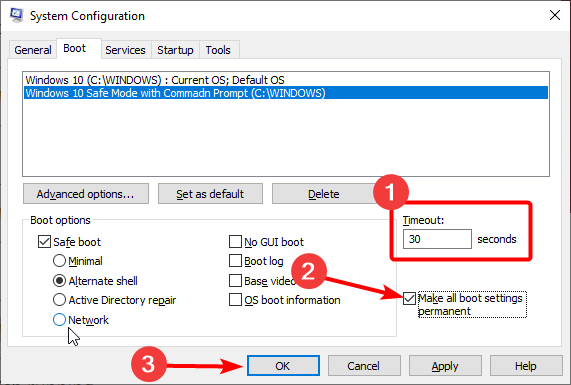
- Now, enter the seconds you want the boot option to be available in the Timeout box.
- Mark the box for Make all boot settings permanent.
- Click the OK button.
- Finally, choose your preferred option to restart your PC.
After restarting your PC, Safe Mode should be successfully added to your boot menu on Windows 10.
How to start Windows 10 in Safe Mode while booting?
- Power off your PC. Now, power it on and press and hold the Power button to forcibly shut it down when the manufacturer’s logo comes up. Repeat this twice to bring up the Advanced startup menu.
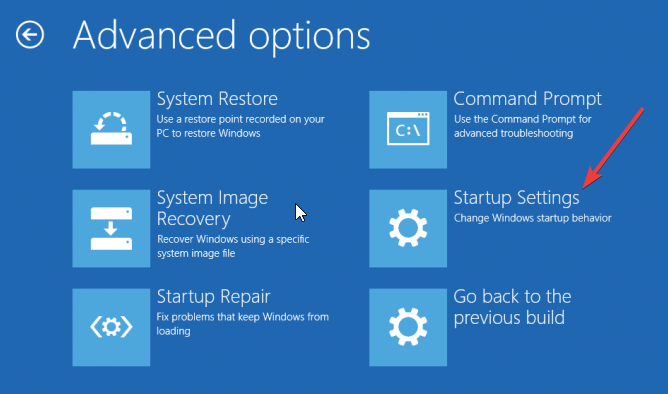
- Now, select Troubleshoot > Advanced options.
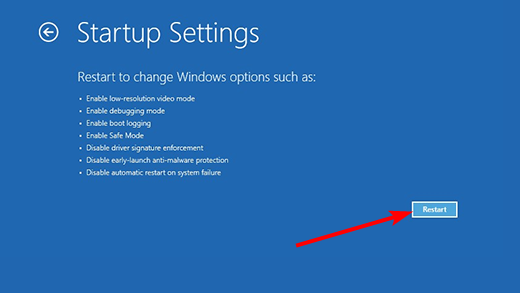
- Choose the Startup Settings option.
- Next, click the Restart button.
- Finally, when your PC restarts, choose the corresponding button to select your preferred Safe Mode option.
This is the way to boot Windows in Safe Mode from power.
Safe Mode is a vital troubleshooting option that starts your PC with only the required drivers and processes.
Adding Safe Mode to your boot Menu on Windows 10, as shown above, saves you the stress of going to the Advanced startup menu whenever you need it.
If Safe Mode keeps crashing on your Windows 10 PC, check our detailed guide to fix it.
Feel free to let us know in the comments below if you encounter any problems applying the steps in this guide.



User forum
1 messages