How do I backup Windows 7 before upgrading to Windows 10/11?
![]() 3 min. read
3 min. read
![]() Updated on
Updated on
Share this article
Improve this guide
Read our disclosure page to find out how can you help Windows Report sustain the editorial team. Read more
Windows 7 is nearing the end of support, and more and more users are preparing to migrate to the more advanced Windows 10. The problem is that when it comes to migrating to a new OS, you may want to take all of your files and folders along with you.
These include user profiles, documents, games, pictures, etc. Thankfully enough, there are plenty of ways you can backup your Windows 7 PC and prepare for migration towards Windows 10.
That is why we’ve compiled this step-by-step guide that will run you through all the methods so that you can backup all of your data and prepare for the new OS.
How do I backup Windows 7 documents?
1. Use Windows 7’s Backup and Restore feature
The default method of performing a Windows 7 backup is through the Windows Backup and Restore feature. However, keep in mind that you will need 3 items before proceeding with these steps:
- Your Windows 7 PC
- An external storage device
- The PC you will install Windows 10 on
If you do have these items, then you can proceed with the Backup and Restore procedure.
1. Create a Windows 7 Backup
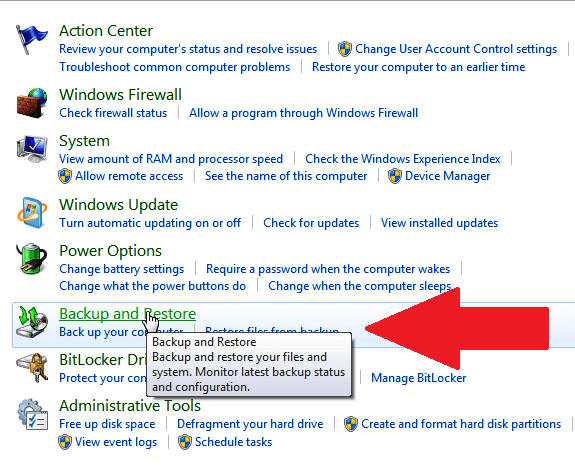
- Press Start
- Go to the Control Panel
- Select System and Security
- Choose Backup and Restore

- Select Set up backup
- Connect your external storage device to the Windows 7 PC
- Under Backup Destination, select your external storage device
- Click Next
- Select Let me choose
- Click Next
- Normally, all files under Documents, Music, Pictures, and Videos will be backed up.
- You can choose to add other files to the list as well during this stage.
- Unselect Include a system image of drives
- Click Next
- Choose Change schedule
- Unselect Run backup on a schedule
- Click OK
- Select Save settings
- Run backup

2. Restore files on a Windows 10 PC
- Connect the external storage device where you backed up your files to your Windows 10 PC
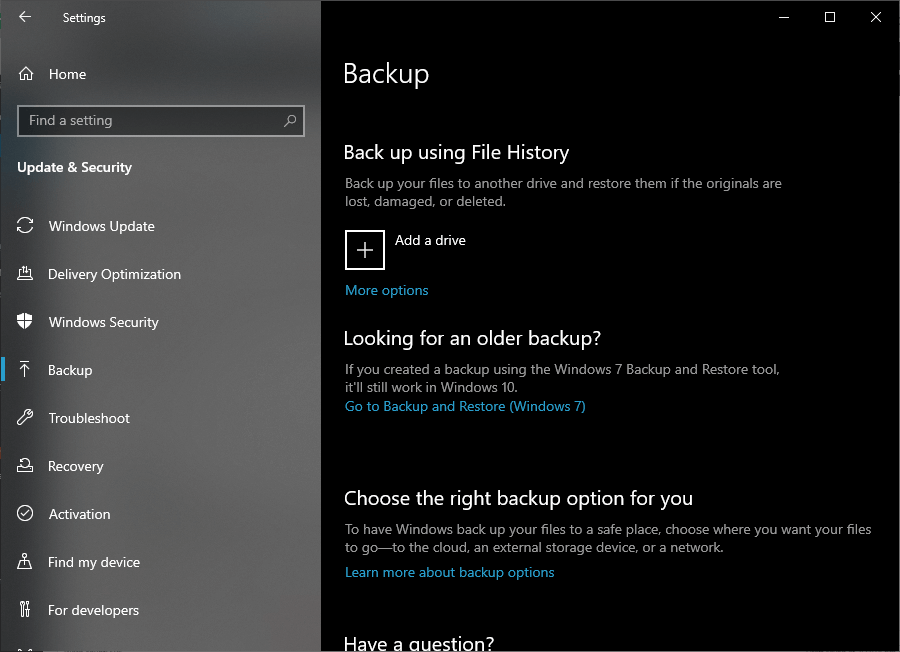
- Press Start
- Go to Settings
- Select Update & Security
- Select Backup
- Go to Backup and Restore (Windows 7)
- Choose Select another backup to restore files from
- Select the backup created from your Windows 7 PC
- Click Next
- Choose Select all files from this backup
- Click Next
- Select Restore to start restoring files to the Windows 10 PC
This is the default method used to backup and restore data from a Windows 7 PC to a Windows 10 PC while using Windows’s proprietary backup tools.
However, if you find these steps to be too complicated or too redundant you can always choose third-party backup tools that can do the work for you.
2. Use a third-party backup tool
There are plenty of backup-tools out there that can finish the job fast and quicker than Windows 7‘s Back and Restore feature. These tools will either finish the job faster, require fewer steps, or a combination of both.
While each of these tools has different steps to follow, suffice it to say they are simple enough that they do not require their own guides.
Here are a few examples of good third-party backup tools that can prepare your Windows 7 PC for a Windows 10 upgrade:
By using any of the methods listed above, you will be able to successfully backup all of your personal files and documents and migrate them for your Windows 7 PC to your Windows 10 PC.
What method do you prefer when backing up your Windows 7 PC? Let us know in the comment section below.
RELATED ARTICLES YOU SHOULD CHECK OUT:


User forum
0 messages