How to run Windows 10 on a Chromebook
5 min. read
Updated on
Read our disclosure page to find out how can you help Windows Report sustain the editorial team. Read more
Chromebooks don’t officially support Windows, but this doesn’t mean that you cannot run Windows on a Chromebook. Let us assure you that there are a couple of workarounds to use Windows desktop programs on a Chromebook too.
Google is constantly updating its Chrome OS with new features, but it cannot be compared to Windows, Mac, or even some Linux distributions. That’s why this thought of running Windows 10 on your Chromebook gives you no peace of mind.
Even if Chromebooks ship with a special type of BIOS designed for Chrome OS, you can install Windows on many Chromebook models. We just hope you’re not afraid of those unofficial ways to run Windows.
However, if getting your hands dirty isn’t the best option for you, access to the Office suite might sound like a great alternative. Here we’ll give you detailed steps for both options.
How can I run Windows 10 on a Chromebook?
1. Get the Office suite
- Access the official Microsoft Office site from your Chrome browser.
- Click on Use Free at Office.com.
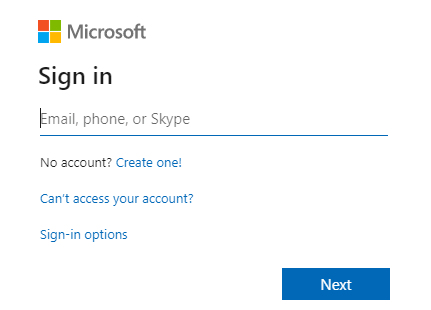
- Click on Sign In.
- You are now asked to enter your Microsoft Account ID and Password.
- Up next, you will be taken to the office.com page.
- Click on the application that you wish to use.
- You will be redirected to the website of that particular application. Start using the online application there.
If you’re only after getting the Office suite, that’s the easiest solution we’re recommending. Be though prepared for giving up on all other apps offered on Windows 10.
2. Install Windows on your compatible Chromebook
- Turn off your Chromebook and flip it over.
- Unscrew all the screws at the bottom to remove the plastic panel and gain access to the motherboard.
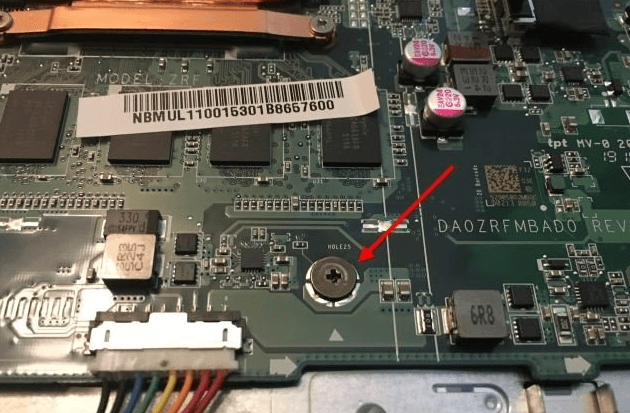
- You must now find the write-protect screw. Remove it.
- Then, re-attach the bottom cover of the Chromebook.
- You may now press Esc+Refresh+Power while the Chromebook is still powered off.
- Your Chromebook will boot up and display a message saying that Chrome OS is missing or damaged.
- Press Ctrl+D and Enter to turn OS verification OFF. Then, you’ll boot into developer mode.
- You are now ready to flash your Chromebook’s BIOS From within Chrome OS. To open a terminal window, press Ctrl+Alt+T.
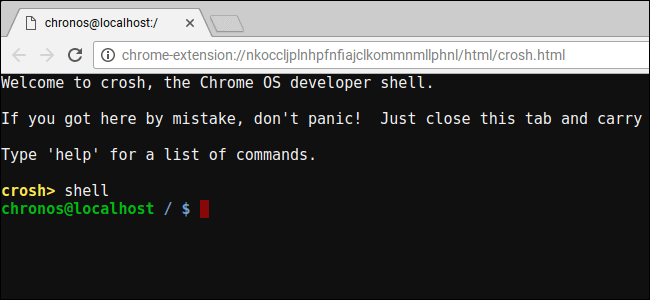
- In the terminal, type shell and hit Enter to access the more powerful Linux shell environment.
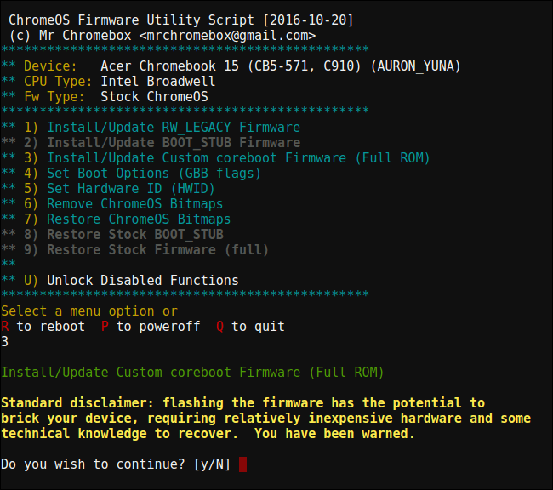
- In the terminal window run this command: cd ~; curl -L -O http://mrchromebox.tech/firmware-util.sh; sudo bash firmware-util.sh. This downloads the script file, and runs it with root privileges.
- Select the Custom coreboot Firmware (Full ROM) option by typing 3 and Enter.
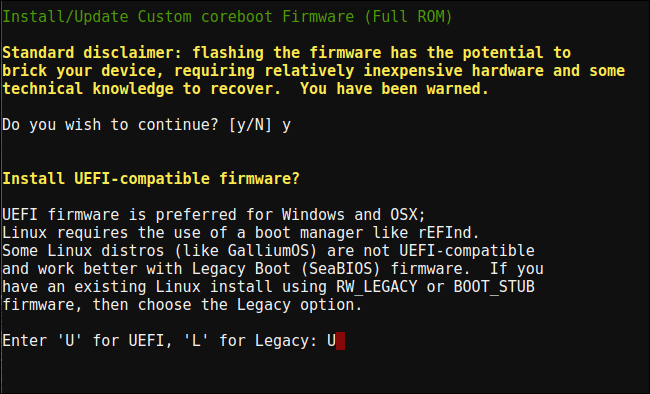
- Enter Y to agree to flash your firmware.
- Then, enter U to install the UEFI firmware.
- The script will offer to create a backup copy of your Chromebook’s stock firmware and place it on a USB drive for you. Agree to that.
- After the backup process is finalized, the script will download the replacement Coreboot firmware and flash it onto your Chromebook.
- Power the Chromebook off.
- You may re-install the write-protect screw if you want.
- Go to the microsoft.com website.
- Click on Download tool now.
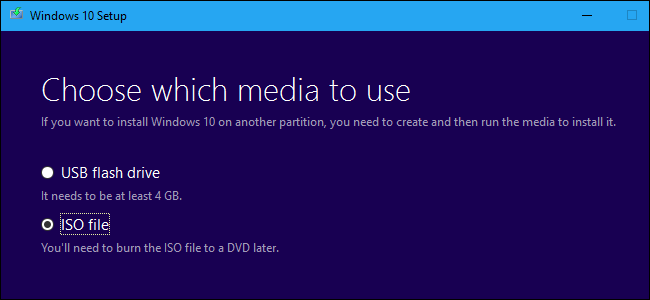
- Select Create installation media for another PC, and download an ISO file.
- Download and run the PowerISO processing tool.
- Plug a USB drive into the PC.
- Select your USB, then GPT partition scheme for UEFI and NTFS.
- Select the downloaded Windows 10 ISO image.
- Click on the Start button to create a Windows USB drive installation media.
- You’re now ready to install Windows on the Chromebook, so insert the USB drive into the Chromebook.
- Switch it on. It should now boot from the USB.
- Up next, connect either a USB mouse or a USB keyboard or both to your Chromebook.
- Normally install Windows like on any other PC.
- Remove your USB drive when the Windows installer restarts.
- Then, restart your Chromebook. It will boot Windows from your Chromebook’s internal drive and will complete the setup process.
Note: Windows doesn’t ship with hardware drivers for various pieces of hardware incorporated into many Chromebooks. Look for third-party drivers that could give Windows support for these components.
As you can see above, you need to install a replacement BIOS for your Chromebook. This can only be done on supported Chromebook models, so first check if your Chromebook is supported or not.
A PC running Windows to create the USB installation media is not optional either. Moreover, the built-in keyboard and mouse of your Chromebook won’t work in the installer. So, you’ll also need a USB keyboard and mouse to complete the installation.
No less important, you’re obviously about to wipe your Chromebook. Make sure not to take any action before backing up anything important stored on it.
Have you successfully completed the above procedure? Remember that we’re here to answer any questions you might have. Just reach for the comments section below.




User forum
2 messages