Fix: Windows Defender not Scanning on Windows [Full Guide]
Follow the steps below to solve the Windows Defender scan problem
8 min. read
Updated on
Read our disclosure page to find out how can you help Windows Report sustain the editorial team. Read more
Key notes
- If the Windows Defender is not scanning your PC, it might be due to another installed antivirus.
- The first thing you need to do is to check your Windows Defender exclusions list.
- We encourage you to uninstall your current antivirus and switch to a better one.
- Performing a system scan can also troubleshoot and fix the Windows Defender scan not working.

Running an antivirus program it’s essential for your system’s security. Windows 10 and Windows 11 come with a built-in antivirus, Windows Defender, that can protect your system against a variety of malware and related threats.
Microsoft’s antivirus program can perform three types of scans: quick, full, and custom.
Getting the antivirus to scan your computer is pretty simple, all you have to do is check one of the three options and wait for the scan to complete.
Unfortunately, recent user reports have revealed that Windows Defender won’t do a quick scan due to an incorrect group or resource state.
Windows Defender is a solid antivirus, but sometimes Windows Defender won’t be able to perform a quick scan. This can be a problem, and speaking of Windows Defender, here are some similar issues that users reported:
- Windows defender unable to scan, won’t scan – These are some relatively common problems with Windows Defender, but you can fix them using one of our solutions.
- Your PC couldn’t be scanned Windows Defender – This is another problem that can appear with Windows Defender. If you encounter it, be sure to check if you don’t have a third-party antivirus running in the background.
- Windows Defender will not complete scan – Sometimes Windows Defender is unable to complete the scan. If this happens, be sure to check the exclusions list and remove any suspicious exclusions.
- Windows Defender not scanning Windows 10/11 – If Windows Defender isn’t scanning, the problem might be the missing updates. Simply update Windows 10/11 to the latest version and check if that helps.

Secure your devices with award-winning cybersecurity technology.

Maximize your PC's security and performance with top-notch digital threat detection.

Keep secure with groundbreaking AI detection and prevention technology.

Browse the web securely for up to 3 devices across Windows, Mac, iOS or Android systems.

Best security tool for intense browsing activity.
How do I fix Windows Defender not doing a quick scan?
1. Check the exclusions list
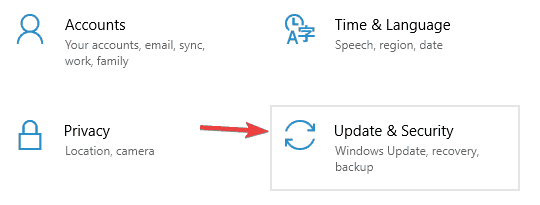
- Press Windows Key + I to open the Settings app.
- When Settings app opens, go to Update & Security section.
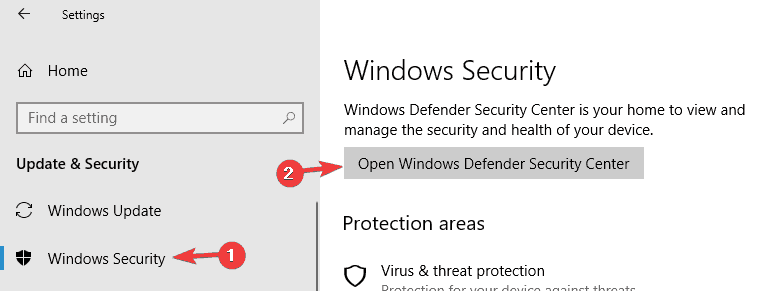
- From the menu on the left select Windows Security.
- In the right pane click Open Windows Defender Security Center.
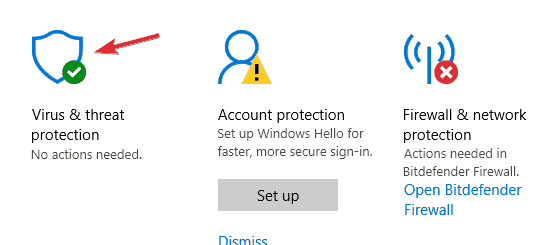
- Select Virus & threat protection.
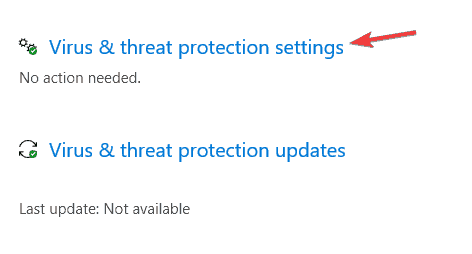
- Now select Virus & threat protection settings.
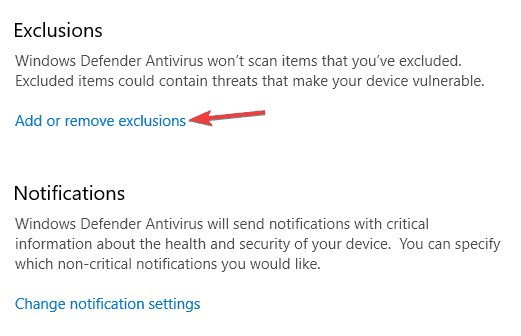
- Scroll down to the Exclusions section and click Add or remove exclusions.
- If your system drive is on the list, be sure to remove it.
- You might also have to remove other exclusions from the list.
If your Windows Defender won’t scan, the problem might be your exclusions list. According to users, sometimes malware can add an entire drive to the exclusions list in order to prevent Windows from finding it.
However, you can fix the problem simply by checking your exclusions list. To do that, follow these steps:
After doing that, the problem should be completely resolved.
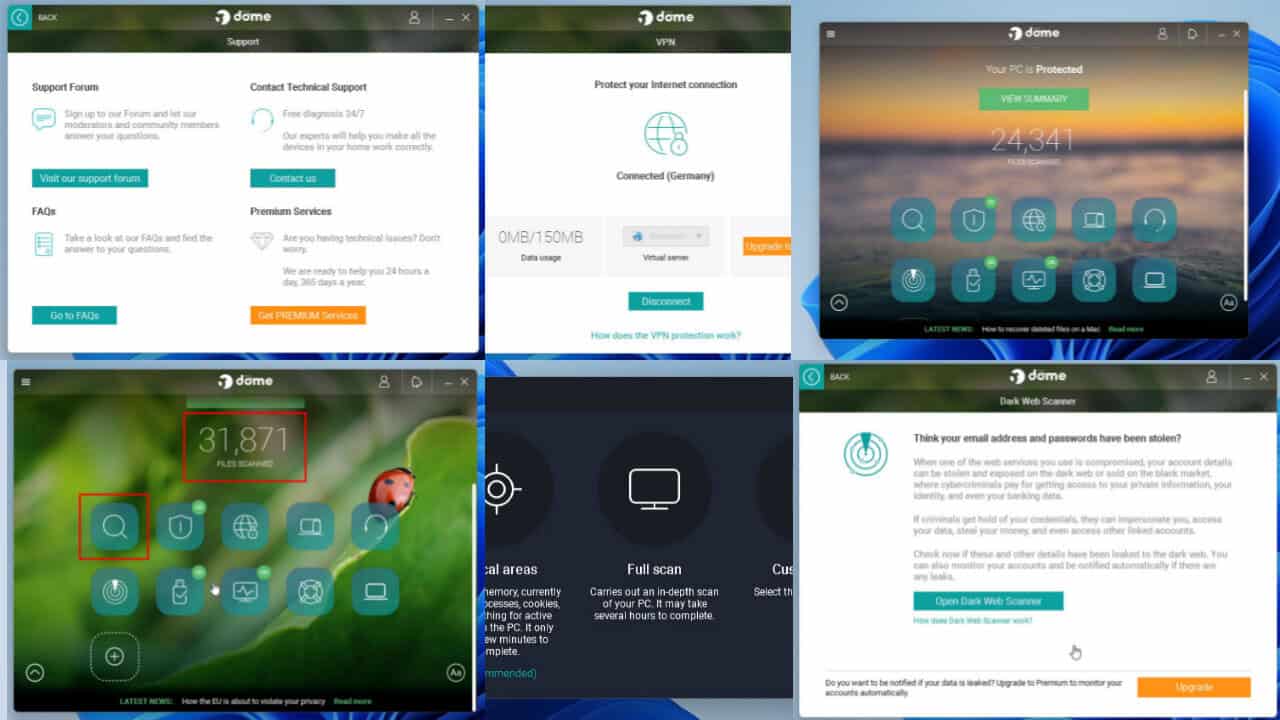
2. Try a third-party antivirus
If Windows Defender won’t perform a quick scan, maybe the best option is to switch to a different antivirus software.
There are many great antivirus tools on the market, and if you’re looking for antivirus software that will provide maximum protection without interfering with your system, you should consider using one.
Many antivirus programs offer better protection and lots of other useful tools such as anti-identity and data theft, VPNs, and many others which Windows Defender is lacking.
In addition to scanning your PC for harmful software, these apps will also actively remove dangerous files. Don’t hesitate to strengthen your defenses and install a third-party antivirus as soon as possible.

ESET HOME Security Essential
Try the safest, most popular cybersecurity tool on the market, and always protect your device.3. Change the power options
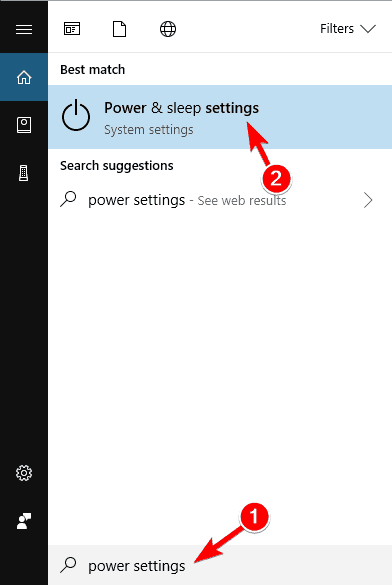
- Press Windows Key + S and enter power settings.
- Select Power & sleep settings from the menu.
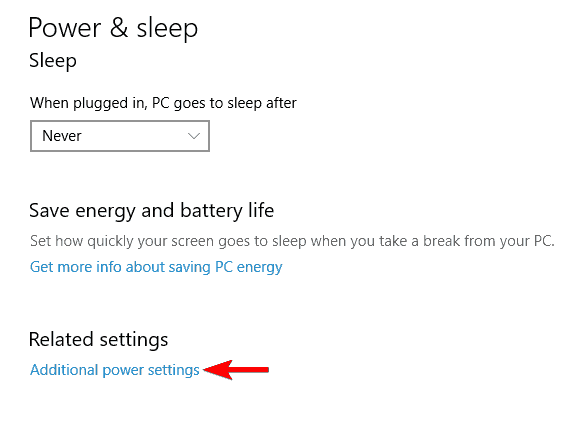
- When Settings app opens, click Additional power settings in the Related settings category.
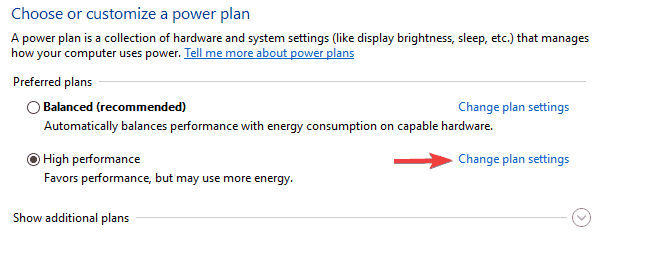
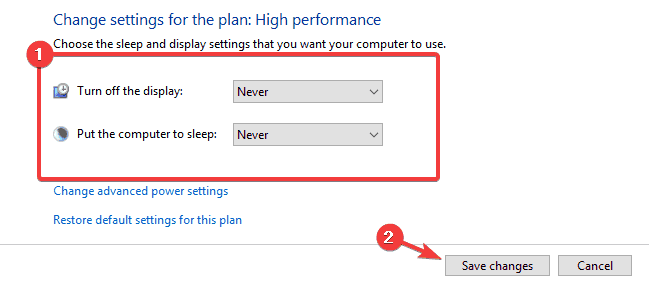
- Now locate your current power plan and click Change plan settings next to it.
- Set Turn off the display and Put the computer to sleep options to Never, then click Save changes.
According to users, if Windows Defender won’t perform a quick scan, the problem might be your power settings.
After doing that, check if the problem is resolved. This sounds like a strange solution, but several users reported that it works, so you might want to try it out.
4. Install the latest updates
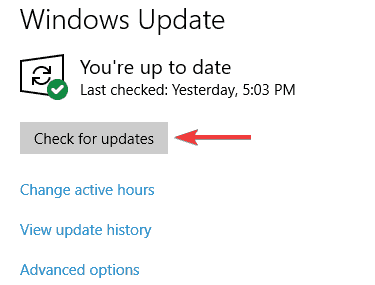
- Open the Settings app and go to Update & Security section.
- Now click Check for updates button in the right pane.
In some cases, you might be able to fix this problem simply by installing the latest updates. Microsoft is working hard to fix Windows 10/11 bugs and issues, and sometimes a Windows Update might fix your problems.
By default, Windows 10 and Windows 11 automatically downloads and installs the updates, but sometimes you can miss an update. However, you can check for updates at any time manually.
If any updates are available, they will be downloaded in the background and installed as soon as you restart your PC. Once your PC restarts, check if the problem is still there.
5. Perform a System Restore
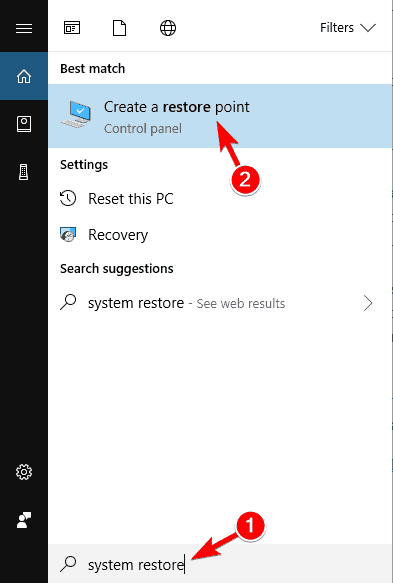
- Press Windows Key + S and enter system restore.
- Select Create a restore point from the menu.
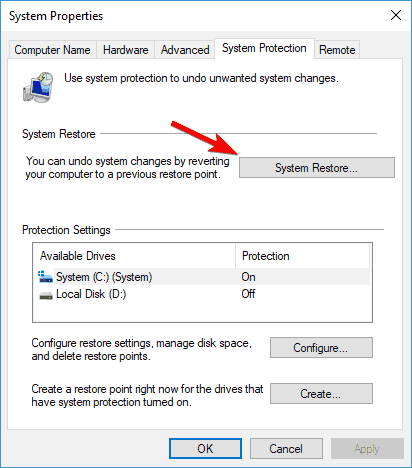
- The system Properties window will open.
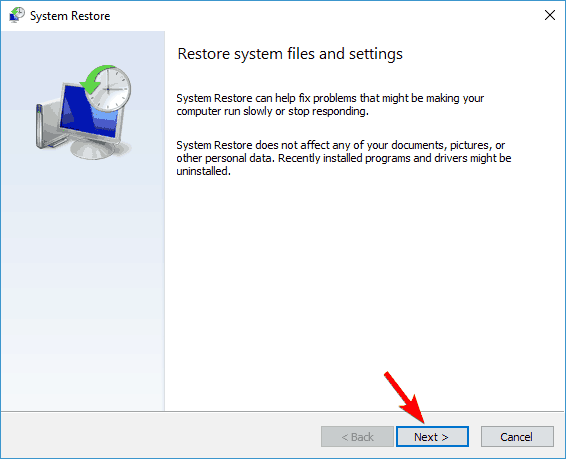
- Click System Restore button.
- System Restore will now start. Click Next to proceed.
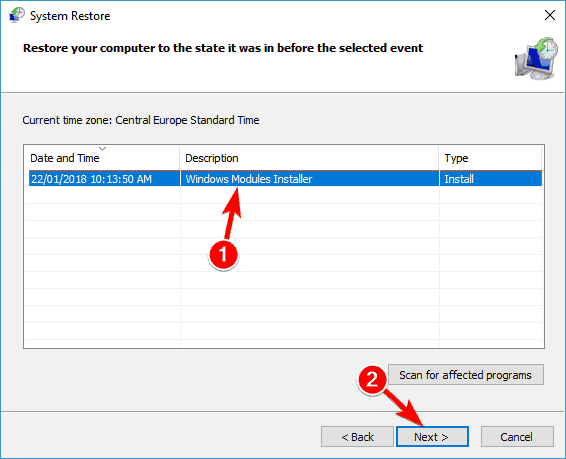
- If available, check Show more restore points option.
- Select the desired restore point and click Next.
- Follow the instructions on the screen to complete the restoration process.
If Windows Defender won’t perform a quick scan, you might be able to solve the problem by performing a System Restore.
If you’re having problems with the System Restore, learn how to fix them with this useful article.
Once the restoration process is finished, check if the problem is still there.
Use a third-party system restoration tool
The Windows system restore tool will bring your OS to a previous version, meaning you will lose any data and software that you installed after the restore point was created, which is not ideal.
Therefore, we strongly encourage you to download a third-party system restoration tool that specializes in finding problematic files and removing them, thus keeping your PC error-free.
6. Perform SFC and DISM scans
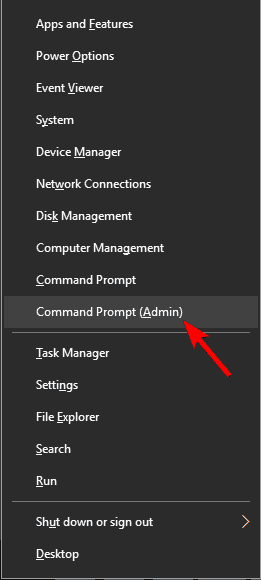
- Press Windows Key + X to open Win + X menu and choose Command Prompt (Admin).
- Alternatively, you can also use PowerShell (Admin).
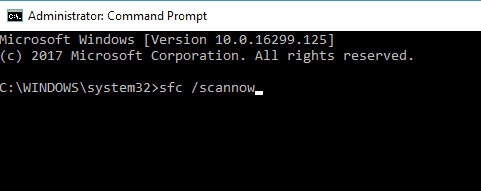
- When Command Prompt opens enter the following command:
sfc/scannow - The SFC scan will now start. The scan can take about 15 minutes, so don’t interrupt it.
Windows Defender is a core component of Windows 10 and Windows 11, and if you can’t perform a quick scan, the issue might be file corruption. Your system files can get corrupted, and that will cause this issue to appear.
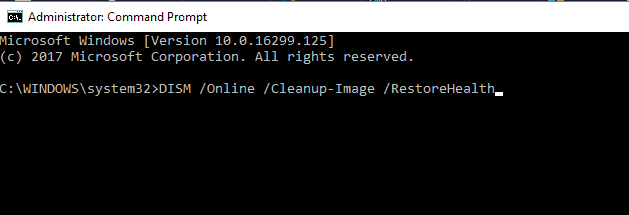
However, you might be able to fix file corruption issues by performing SFC and DISM scans. To do that, follow these steps:
Once the scan is finished, check if the problem is still there. If the issue is still present, or if you’re unable to run an SFC scan, you might have to use a DISM scan instead. To do that, follow these steps:
- Start Command Prompt as administrator.
- Now run the following command:
DISM/Online/Cleanup-Image/RestoreHealth - DISM scan will now start.
- The scan can take about 20 minutes, sometimes more, so don’t interfere with it.
Once the DISM scan is finished, check if the problem is still there. If you want, you can repeat SFC scan once again and all the corrupted files should be repaired.
7. Create a new user account
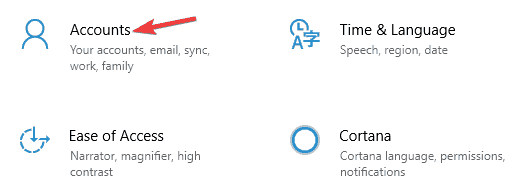
- Open the Settings app and navigate to the Accounts section.
- In the left pane, select Family & other people.
- Now choose Add someone else to this PC.
- Choose I don’t have this person’s sign-in information.
- Select Add a user without a Microsoft account.
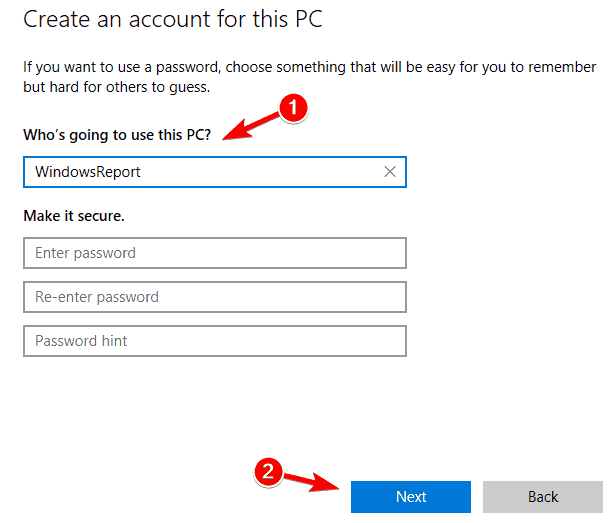
- Enter the username for the new account and click Next.
According to users, sometimes your user account might be damaged, and that can cause issues with Windows Defender to appear.
To fix this problem, it’s advised to create a new user account and check if the problem appears on a new account.
After creating a new user account, switch to it and check if the problem still appears. If not, you’ll need to move your personal files to a new account and start using it instead of your old one.
8. Remove third-party antivirus
Apparently, this error message is a temporary bug that is sometimes accompanied by error code 0x8007139F. Restarting and manually updating Windows Defender should be enough to fix this issue.
If this simple action doesn’t solve the problem, make sure you are not running another antivirus program at the same time. If you do, uninstall it, and keep Windows Defender.
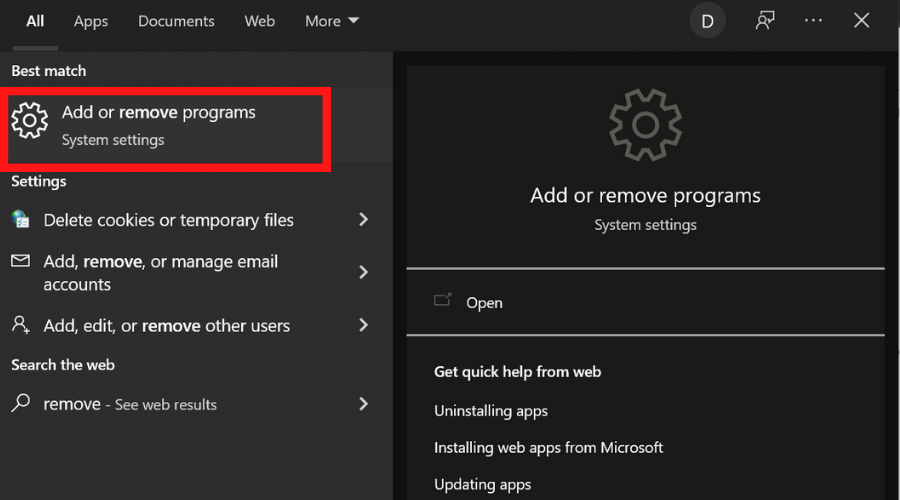
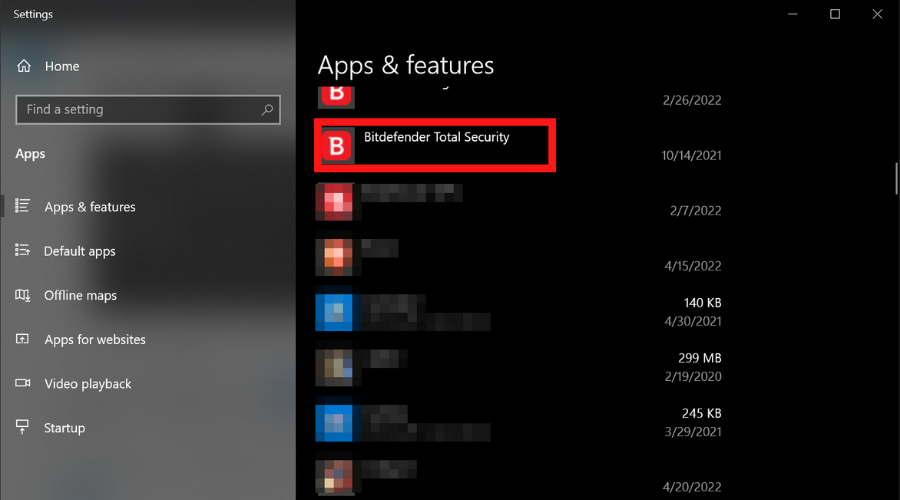
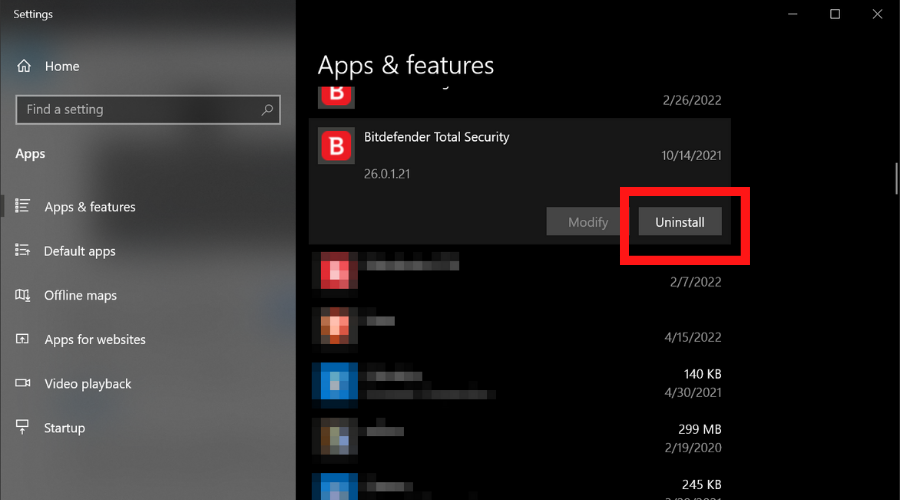
- Type remove in the taskbar to open the Add or Remove programs settings panel.
- Locate your antivirus in the list and select it.
- Click the Uninstall button and wait for the process to complete.
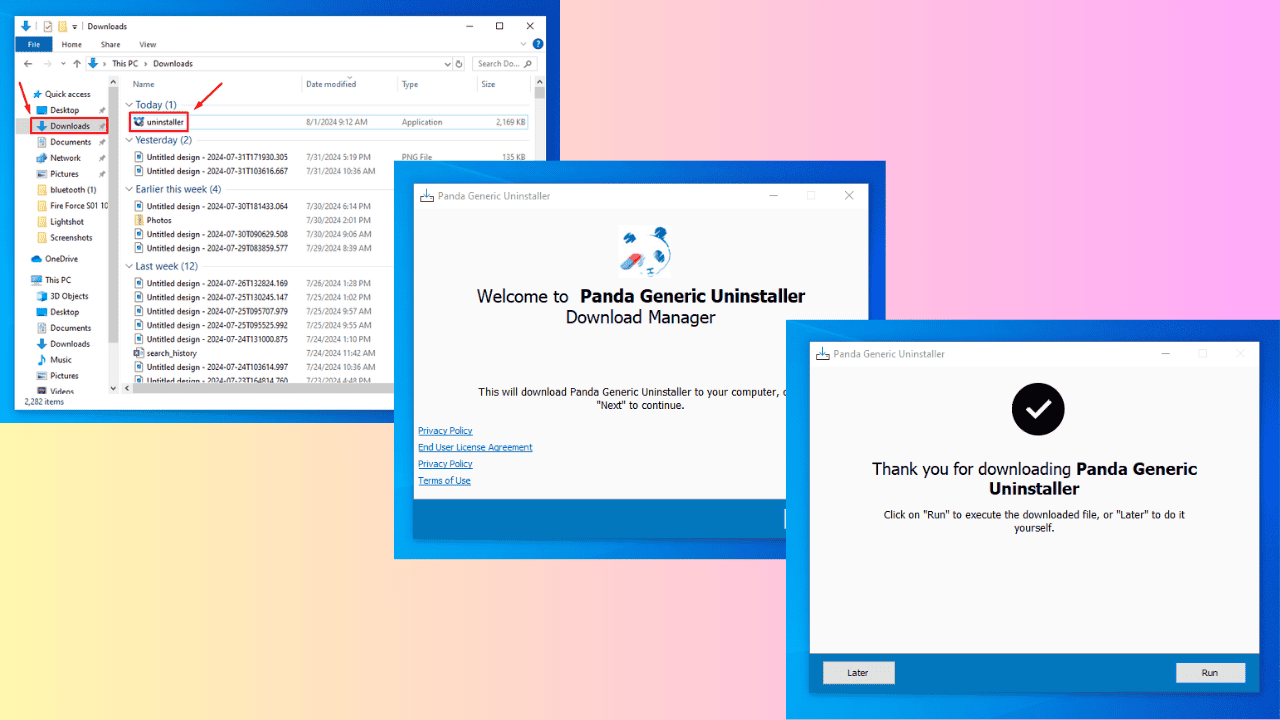
If you previously had a different antivirus, and you’ve recently installed Windows Defender, it’s also possible that remnants of your previous security program are still present.
Not being able to perform a quick scan in Windows Defender can be a big problem, but we hope that you managed to fix this issue using one of our solutions.
We also have a guide on what to do if you can’t open Windows Defender Scans folder, so be sure to visit it.
If you have any recommendations or want to tell us which of the solutions above worked for you, feel free to use the comment section below.




User forum
0 messages