No Audio Output Devices Found in Windows 11: How to Fix it
Make sure you insert the headphones or speakers to the right audio port on your PC
4 min. read
Updated on
Read our disclosure page to find out how can you help Windows Report sustain the editorial team. Read more
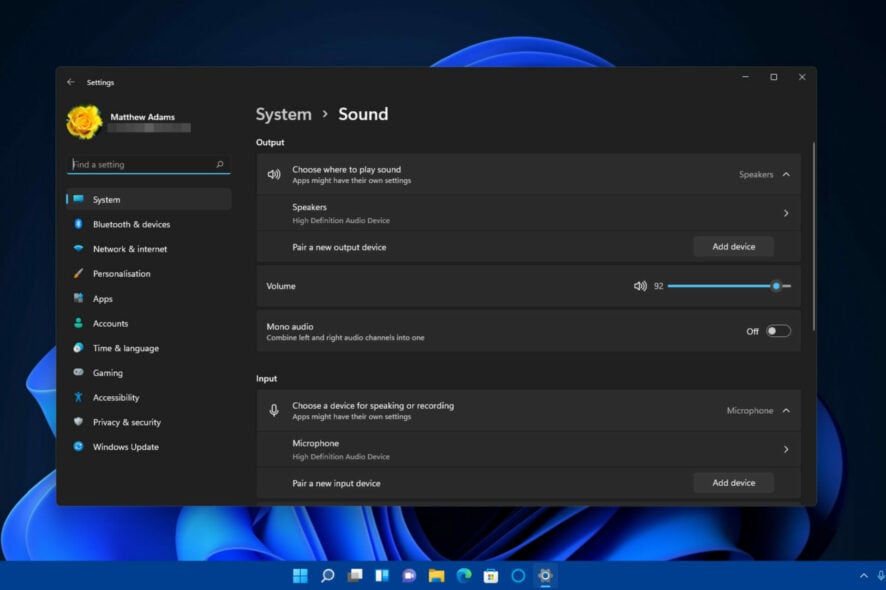
The No output devices found in Windows 11 error arises when there’s issue with your sound card. When that issue occurs, the taskbar’s sound icon has a red x. Outdated drivers or unsigned drivers can often cause this issue. Your audio settings and missing Windows updates can contribute to this error.
Before we try the slightly more complex solutions here, make sure you have the latest updates installed and restart your PC. Also, check if your headphones are connected properly to the right audio port (you can easily mistake the mic and out ports).
How do I fix No output devices found in Windows 11?
1. Reinstall the audio driver
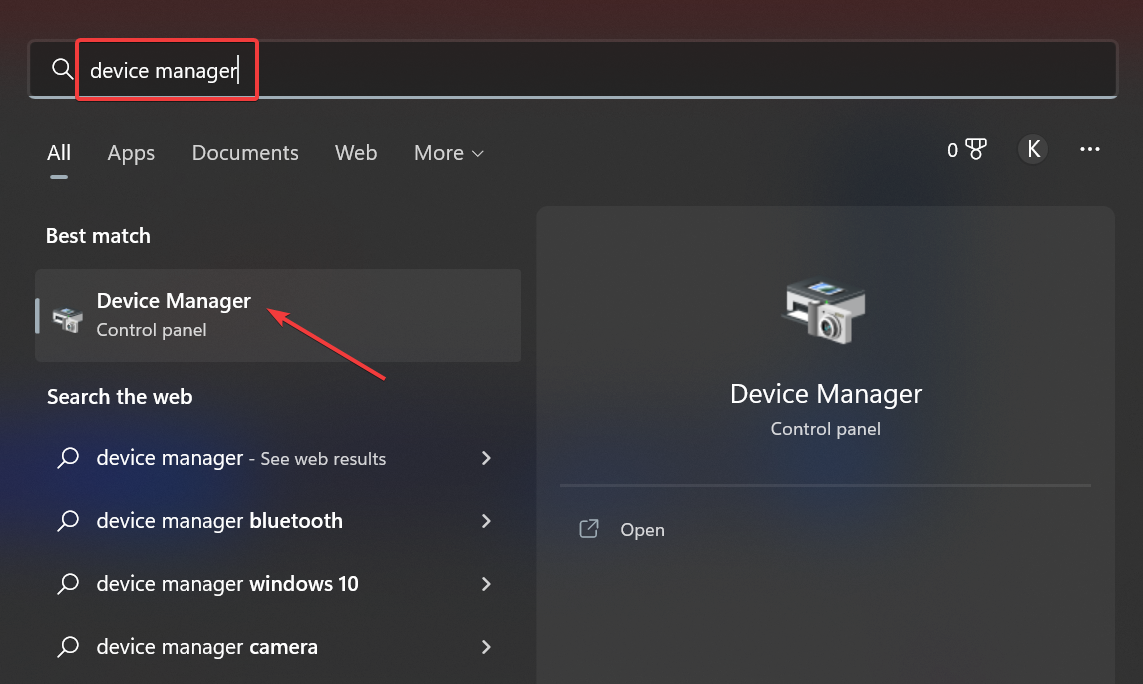
- Press Windows + S to open the Search menu, enter Device Manager in the text field, and click on the relevant search result.
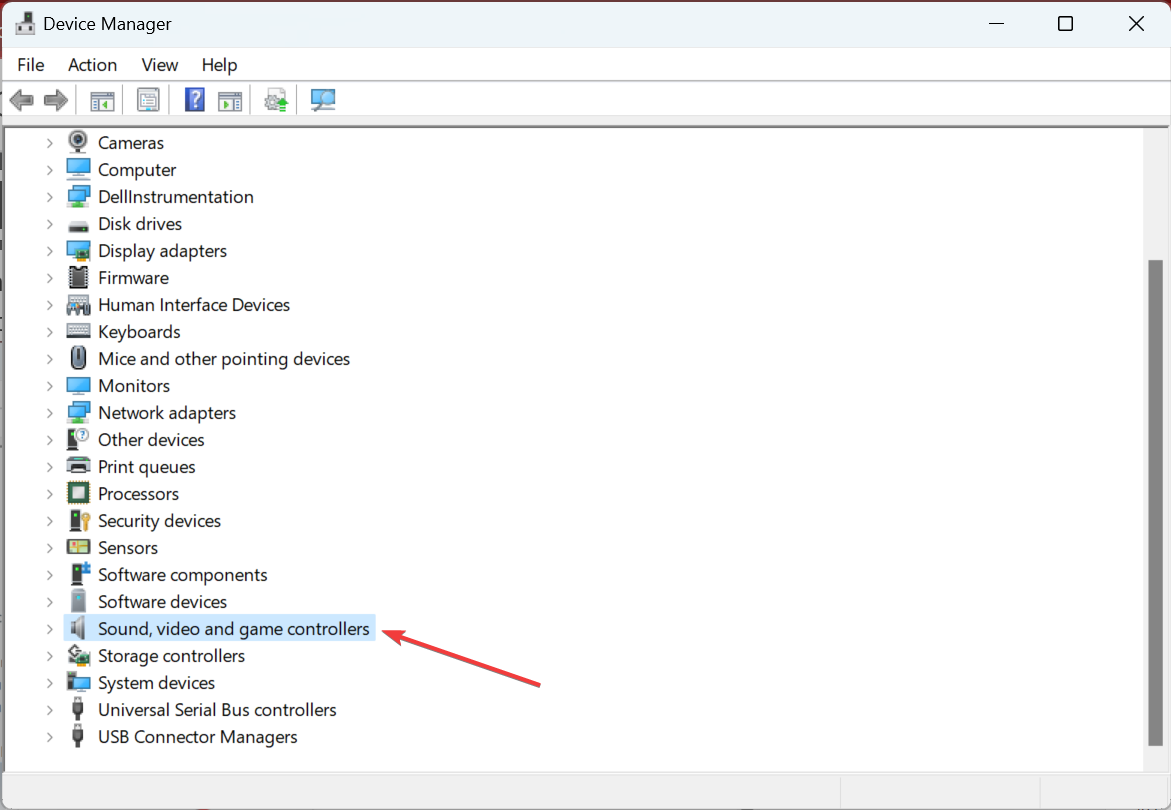
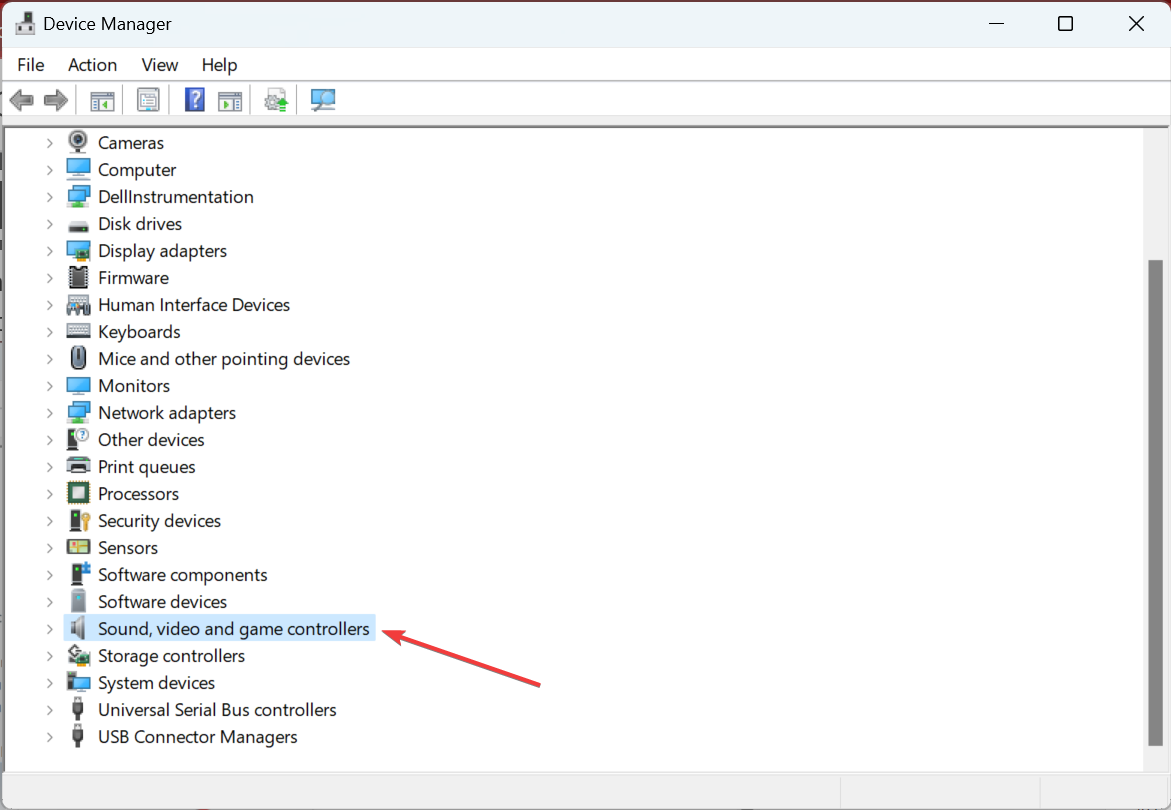
- Double-click Sound, video, and game controllers to view the devices for that category.
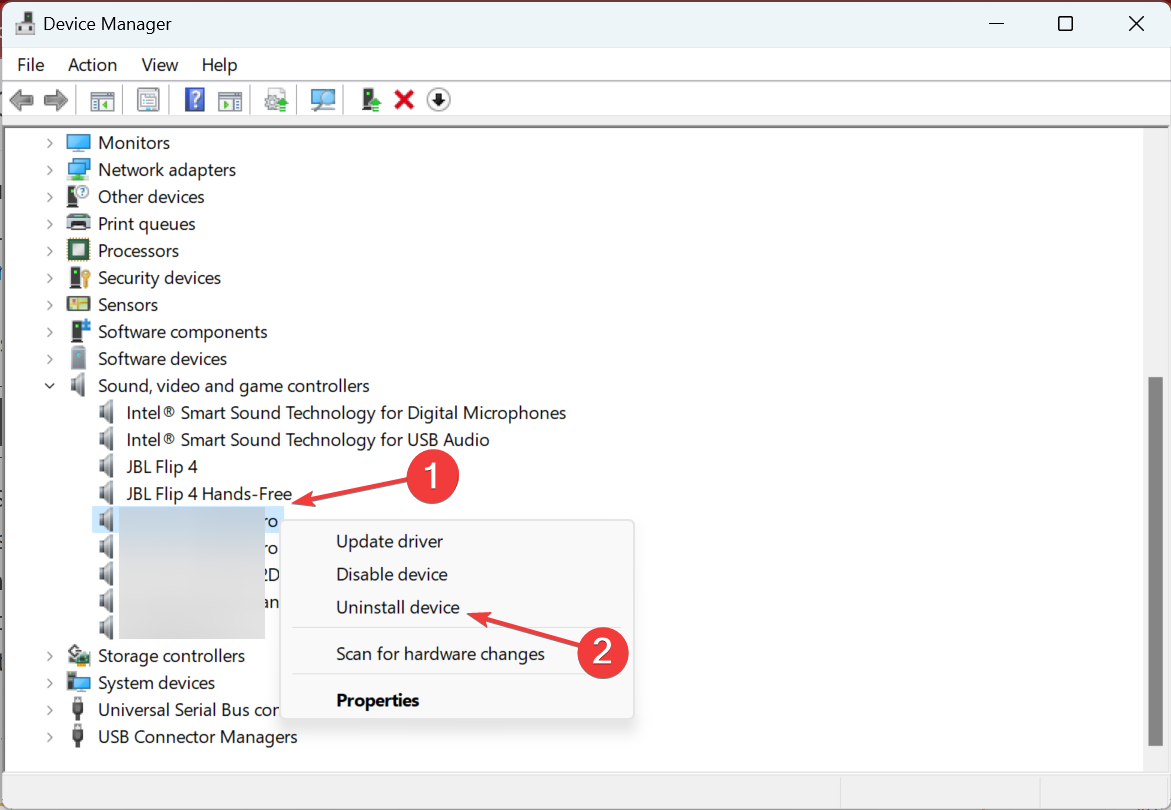
- Next, right-click your PC’s sound device, and select Uninstall device.
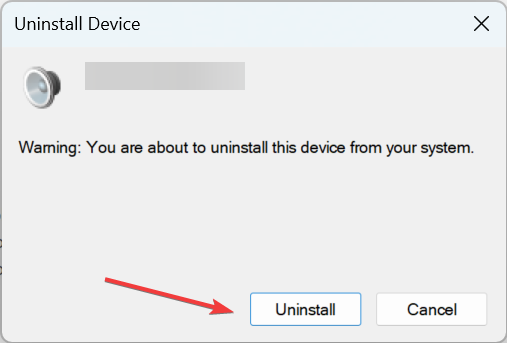
- Click Uninstall in the confirmation prompt that appears.
- Also, look for a device with SST in its name under System devices, and reinstall it too.
- Once done, restart the computer, and Windows will automatically install the best driver for the device.
If Windows doesn’t identify the device after the restart, go to the Action menu, and select Scan for hardware changes.
2. Reset the audio controller
If simply reinstalling the audio controller doesn’t work, you will have to reset the audio controller. To do that, first, uninstall the High Definition Audio Device from the Device Manager.
Once done, shut down the PC, remove the power cable, and then hold the power button for at least 60 seconds. After that, wait another 10 minutes or so, and restart the computer after plugging in the power cable.
This may seem trivial but it often does the tick when there is a problem with your audio device.
3. Update the sound driver
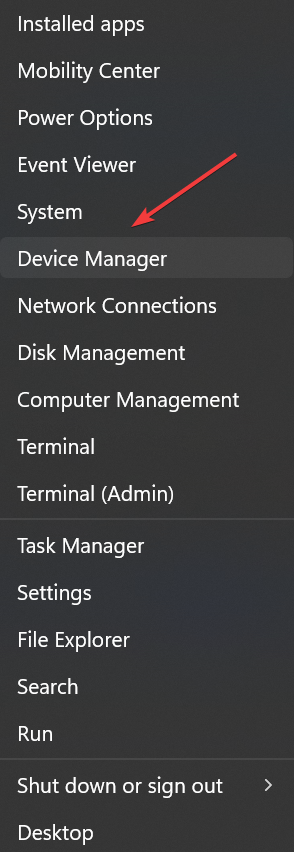
1. Press Windows + X to open the Power User menu.
2. Select Device Manager from the list.
3. Double-click the category for Sound, video, and game controllers.
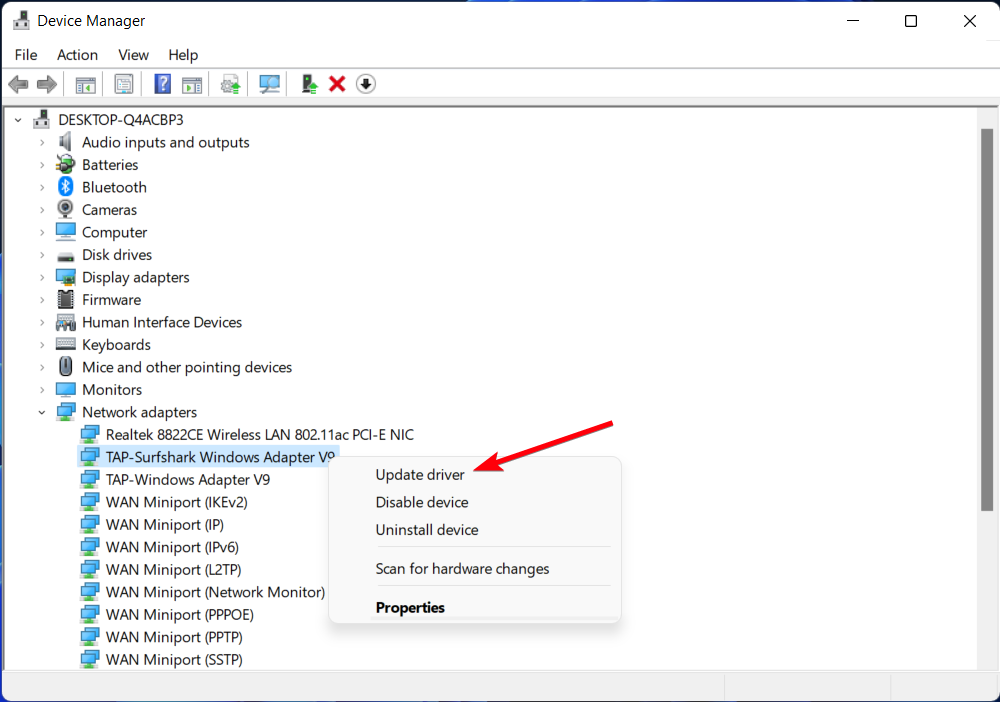
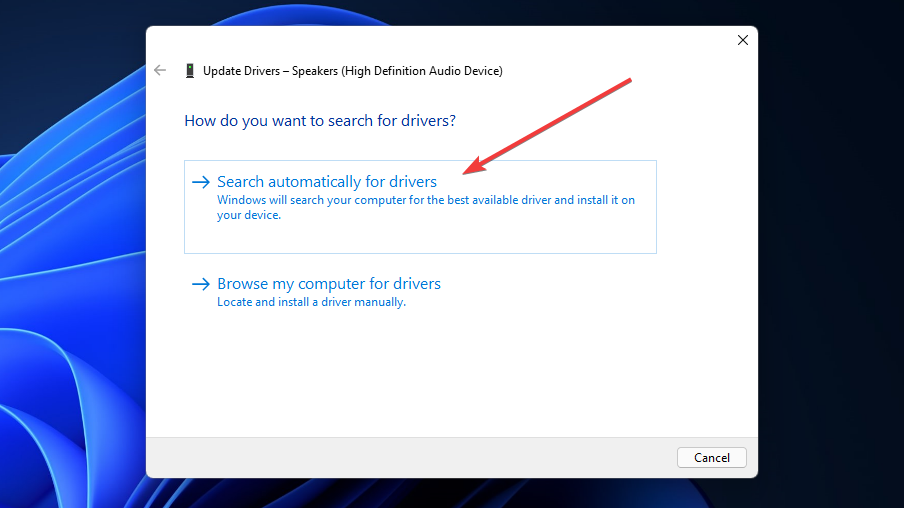
4. Then right-click your PC’s sound device, such as High Definition Audio Device, and select Update driver.
5. Click the Search automatically for drivers option.
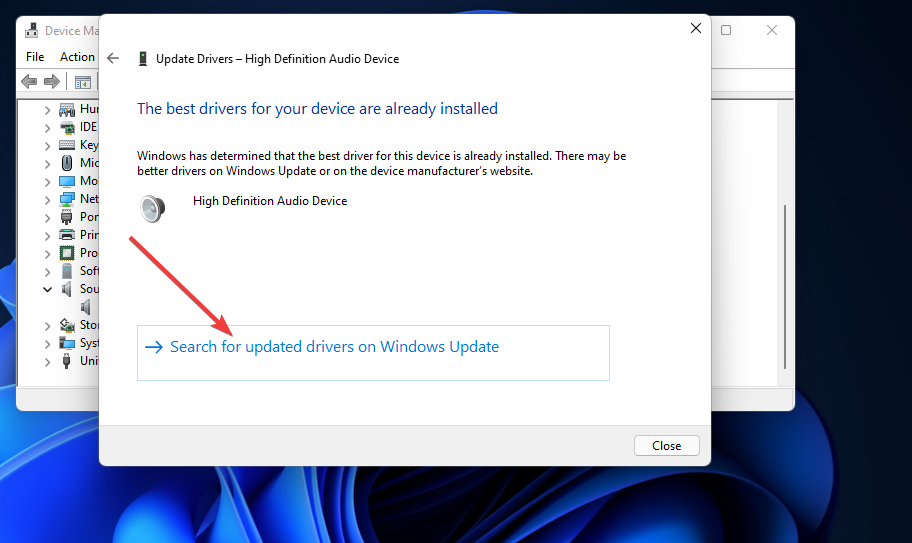
6. If selecting that option doesn’t install a new driver, select the Search for updated drivers on Windows Update option.
7. Next, press the Check for updates button on the Windows Update tab that opens.
8. Select to download and install available updates.
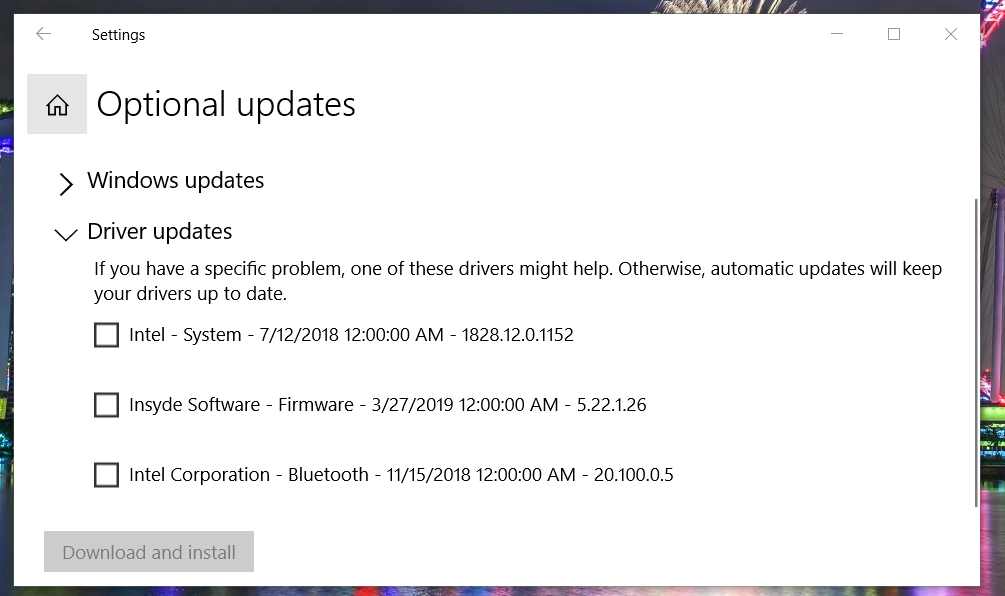
9. In addition, click on Advanced options, then Optional updates.
10. Select the checkboxes for optional driver updates, and then on Download & install.
Some users prefer to update drivers with third-party driver updater software, as it is a much faster solution. This third-party driver updater will scan your PC and display what devices on it need new drivers.
If your sound device is among them, you can select to download and install the latest driver for it within the software.
⇒ Get PC HelpSoft Driver Updater
4. Disable Driver Signature Enforcement
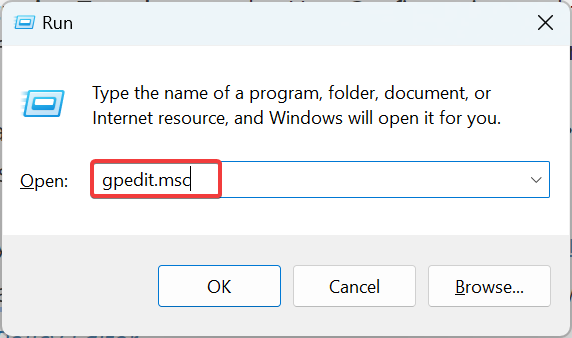
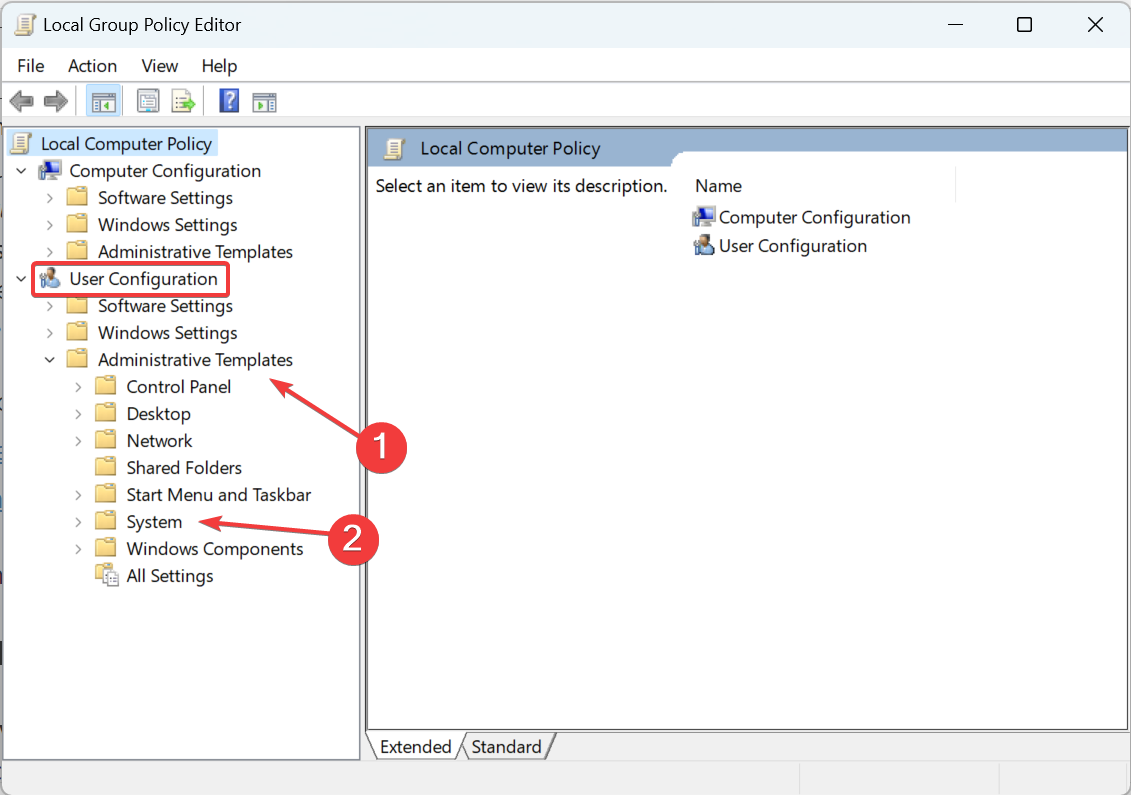
- Press Windows + R to open Run, type gpedit.msc in the text field, and hit Enter.
- Now, double-click Administrative Templates under User Configuration, and then on System.
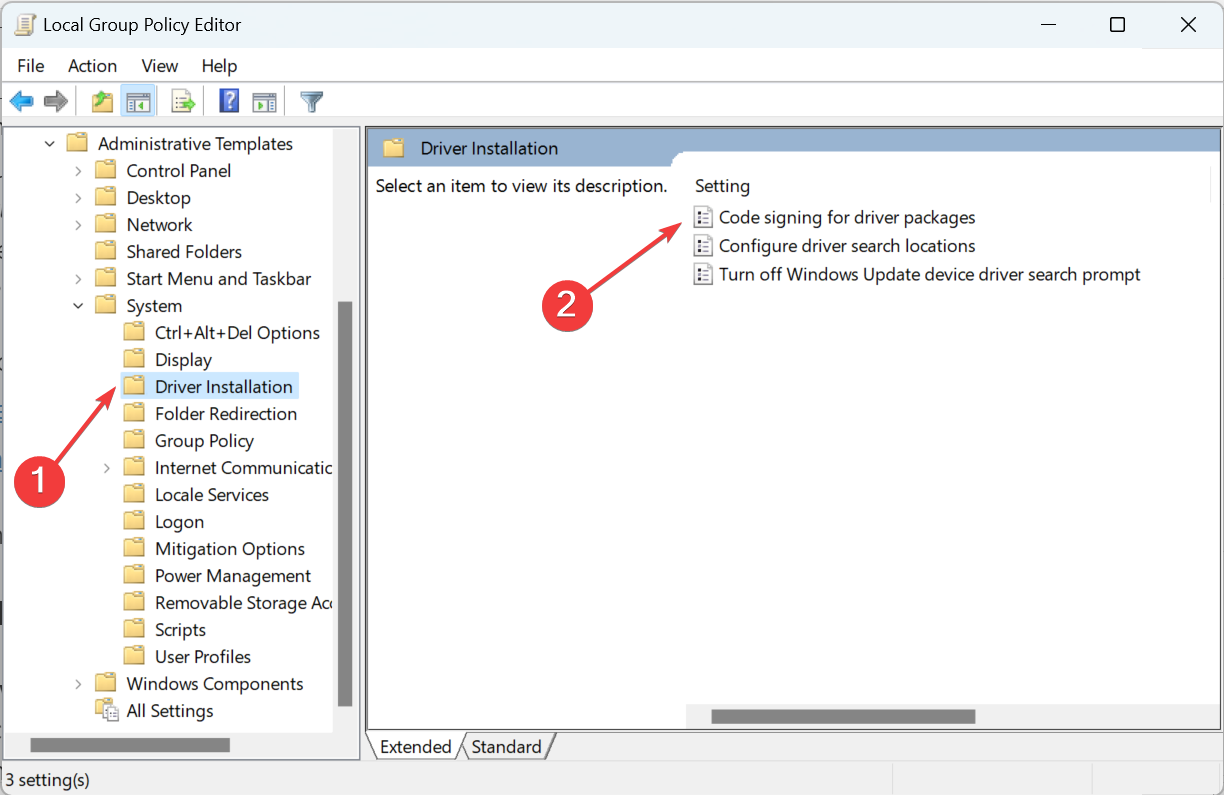
- Select Driver Installation from the left, and then double-click on Code signing for driver packages.
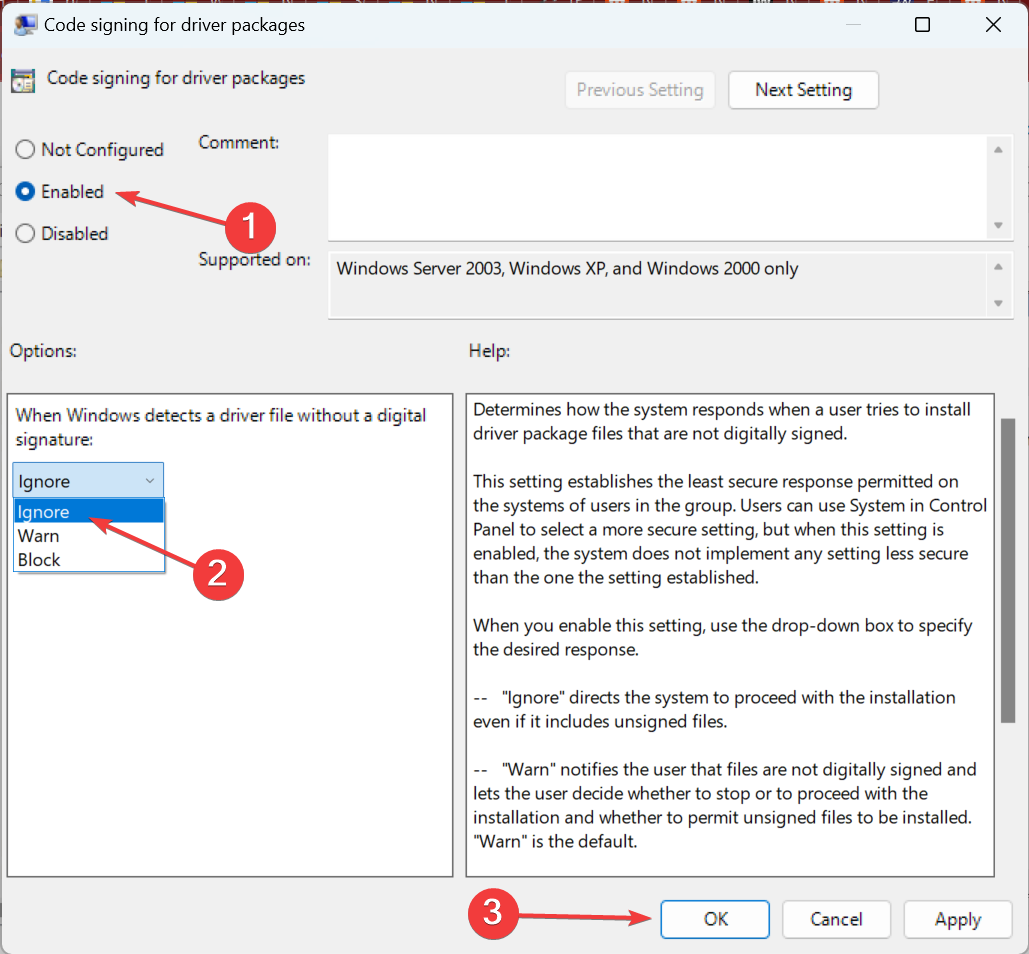
- Check the Enabled option, then from the When Windows detects a driver file without a digital signature dropdown menu, select Ignore, and finally click on OK to save the changes.
This is the quickest way, though you can also disable Driver Signature Enforcement after booting Windows in Recovery Mode. In case you are running the Home edition of Windows 11, you will have to manually install the Local Group Policy Editor.
5. Change Mono audio settings
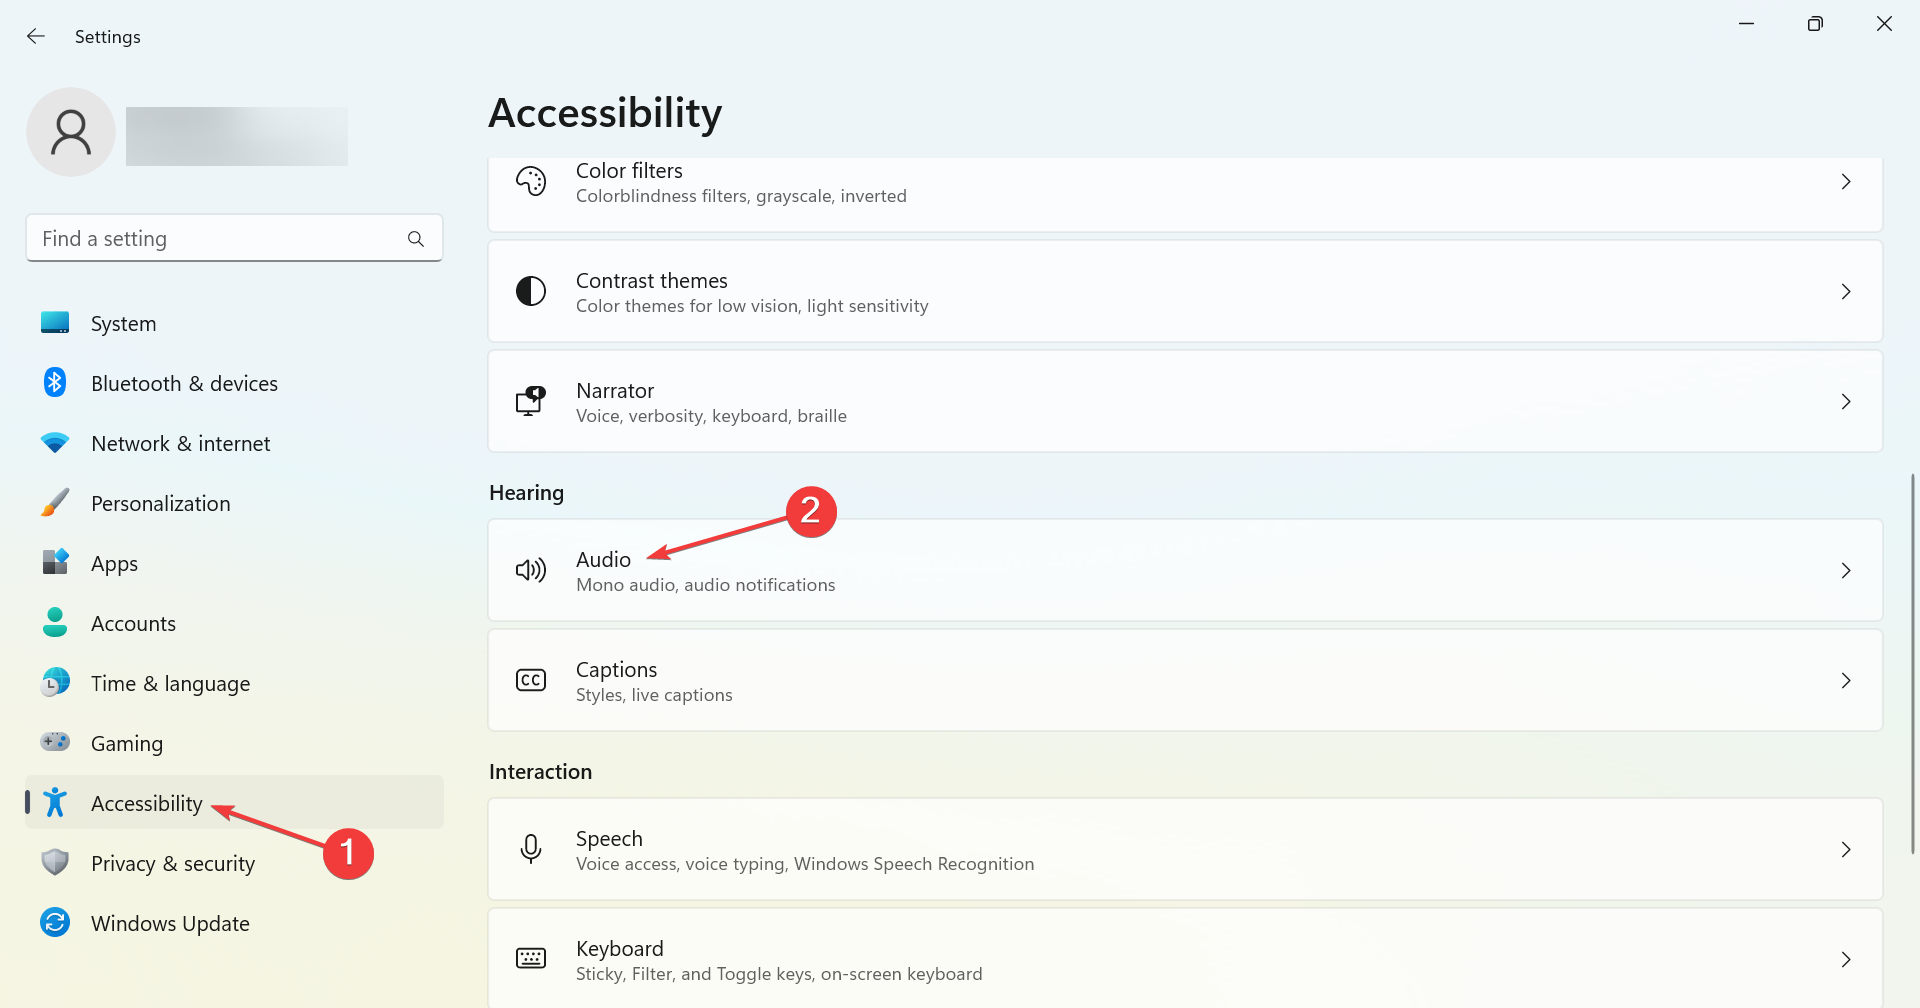
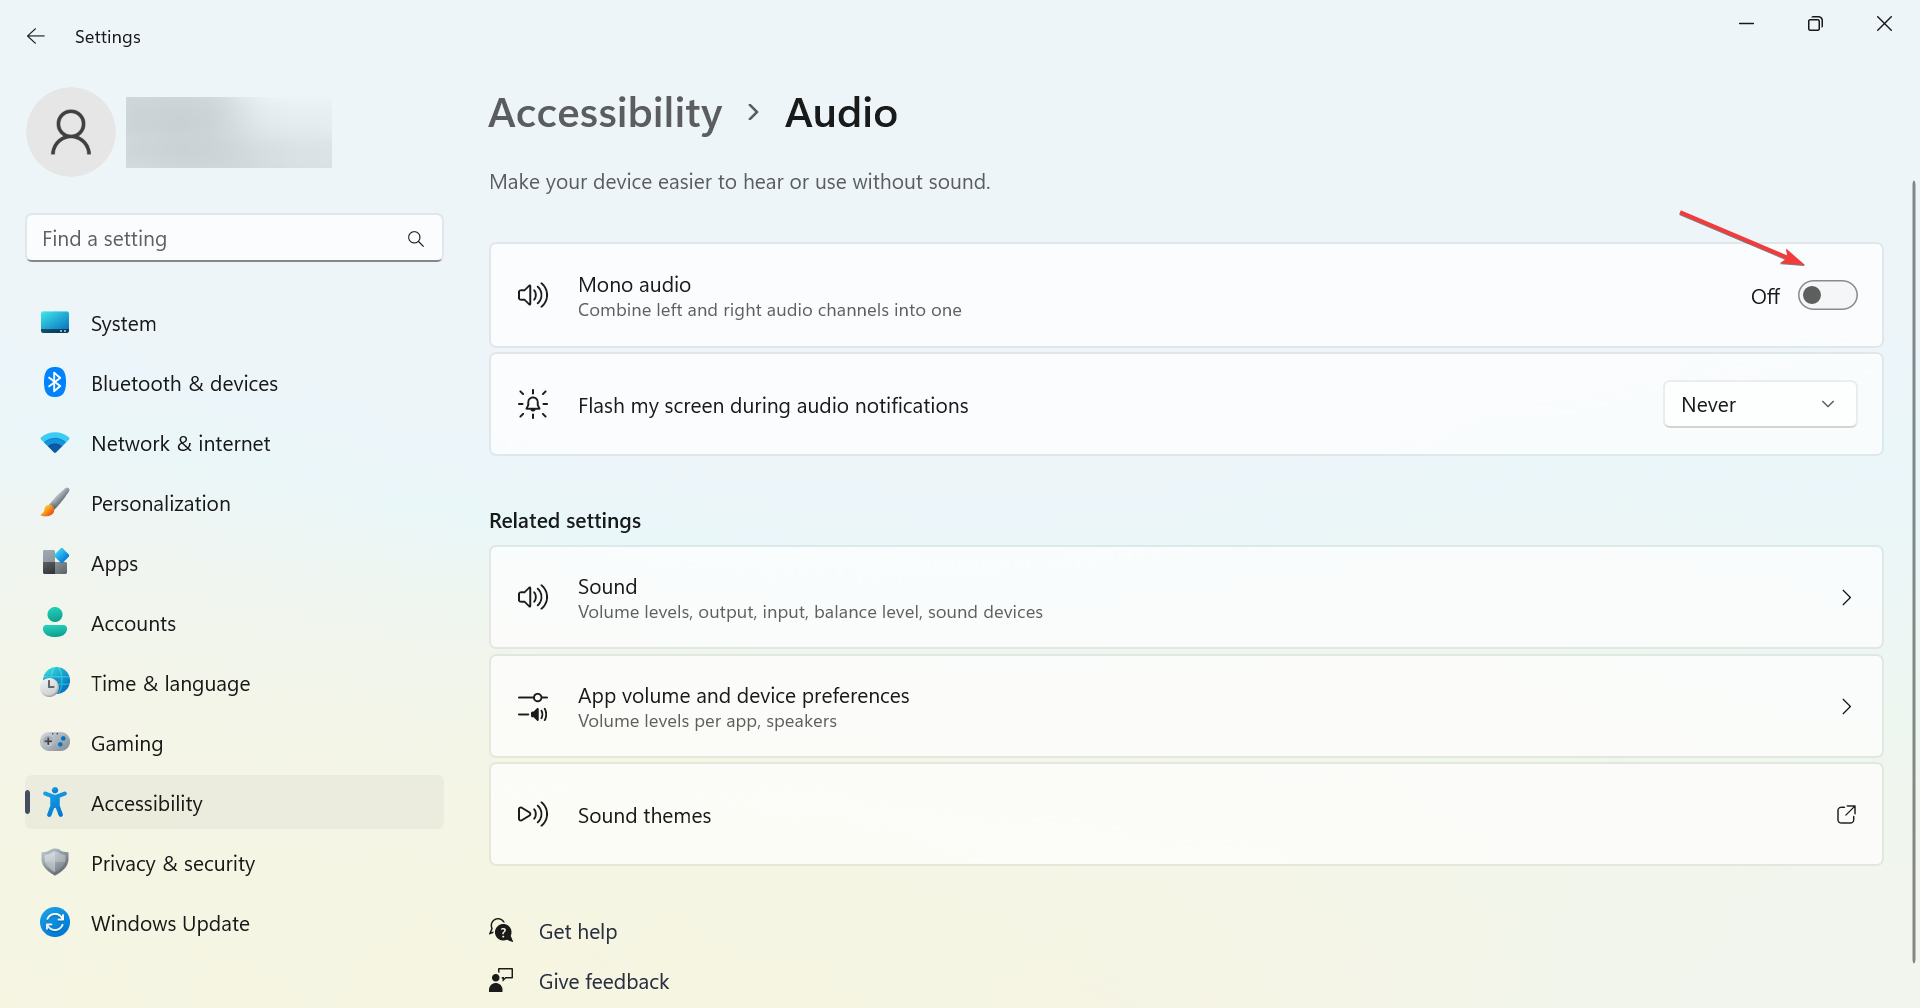
- Press Windows + I to open Settings, select Accessibility from the navigation pane, and then click on Audio under Hearing.
- Now, check the Mono audio setting. If it’s already Enabled, turn it off, while if it’s Disabled, click on the toggle to turn it on.
If no output devices are found in Windows 11, change the Mono audio setting and verify if that fixes the problem.
6. Uninstall the last Windows Update
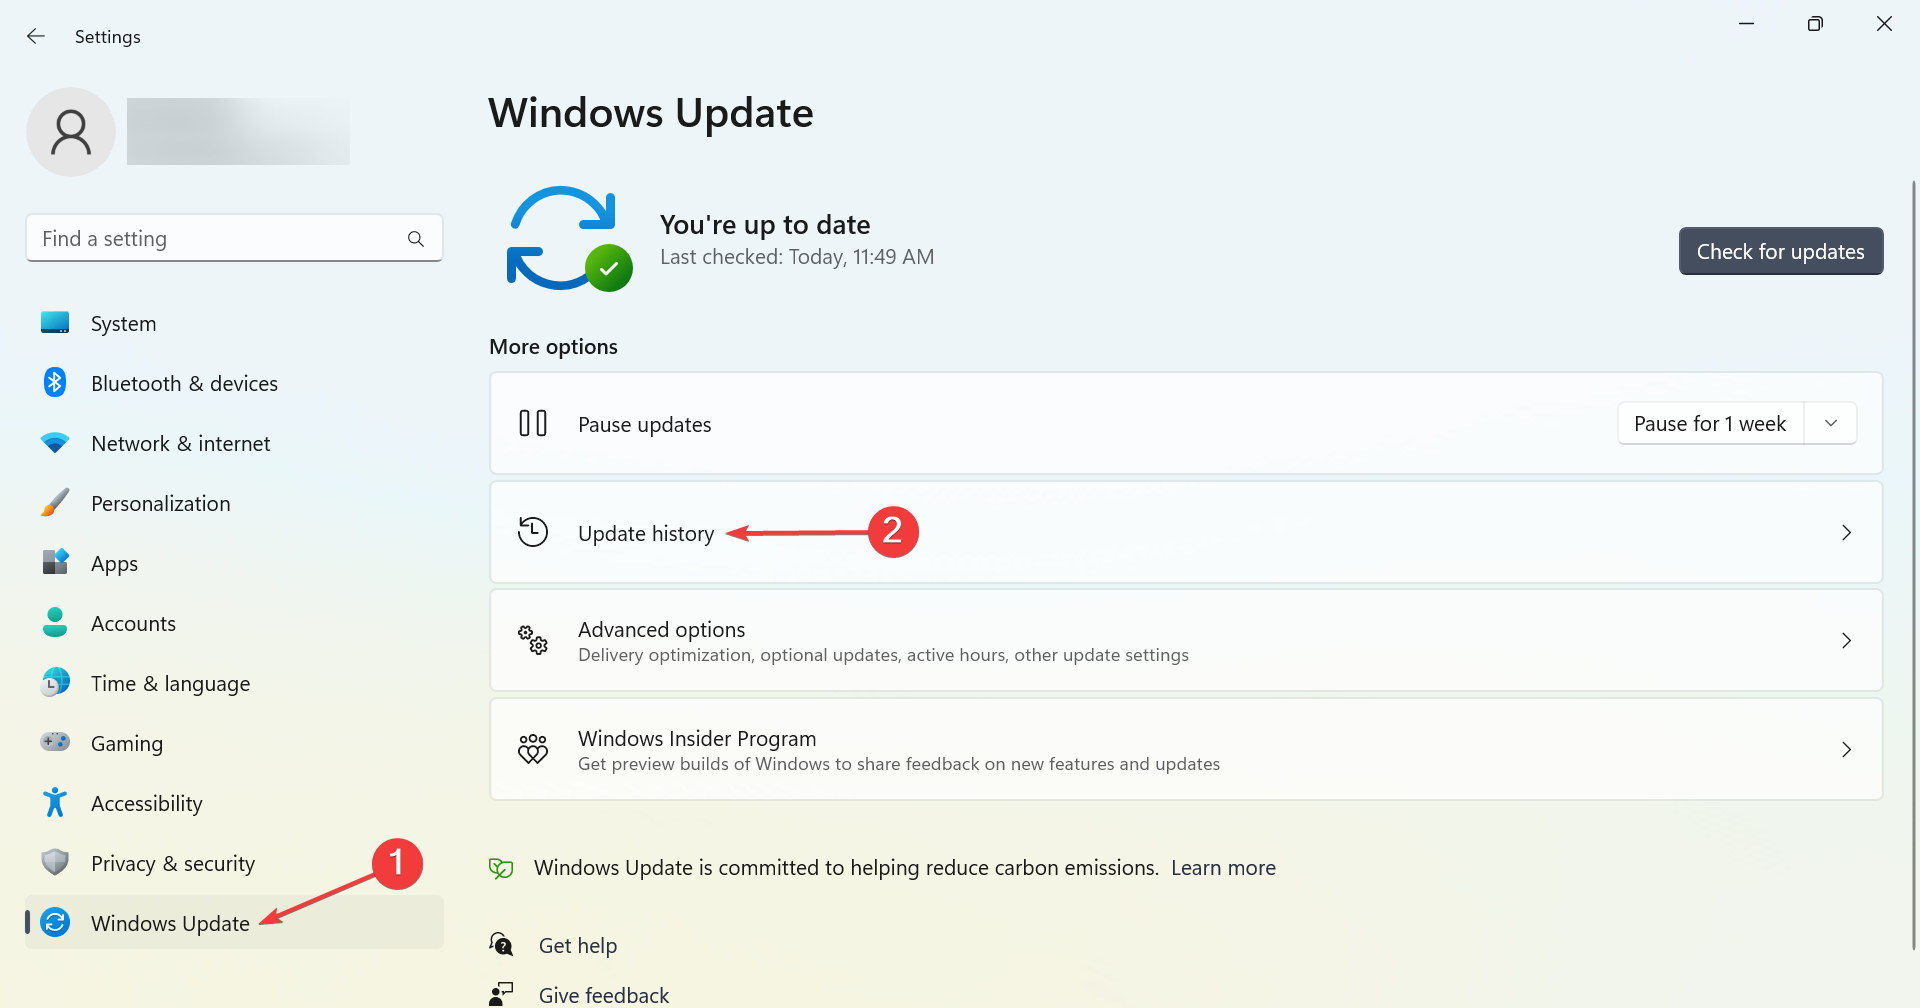
- Press Windows + I to open Settings, select Windows Update from the left, and then click on Update history.
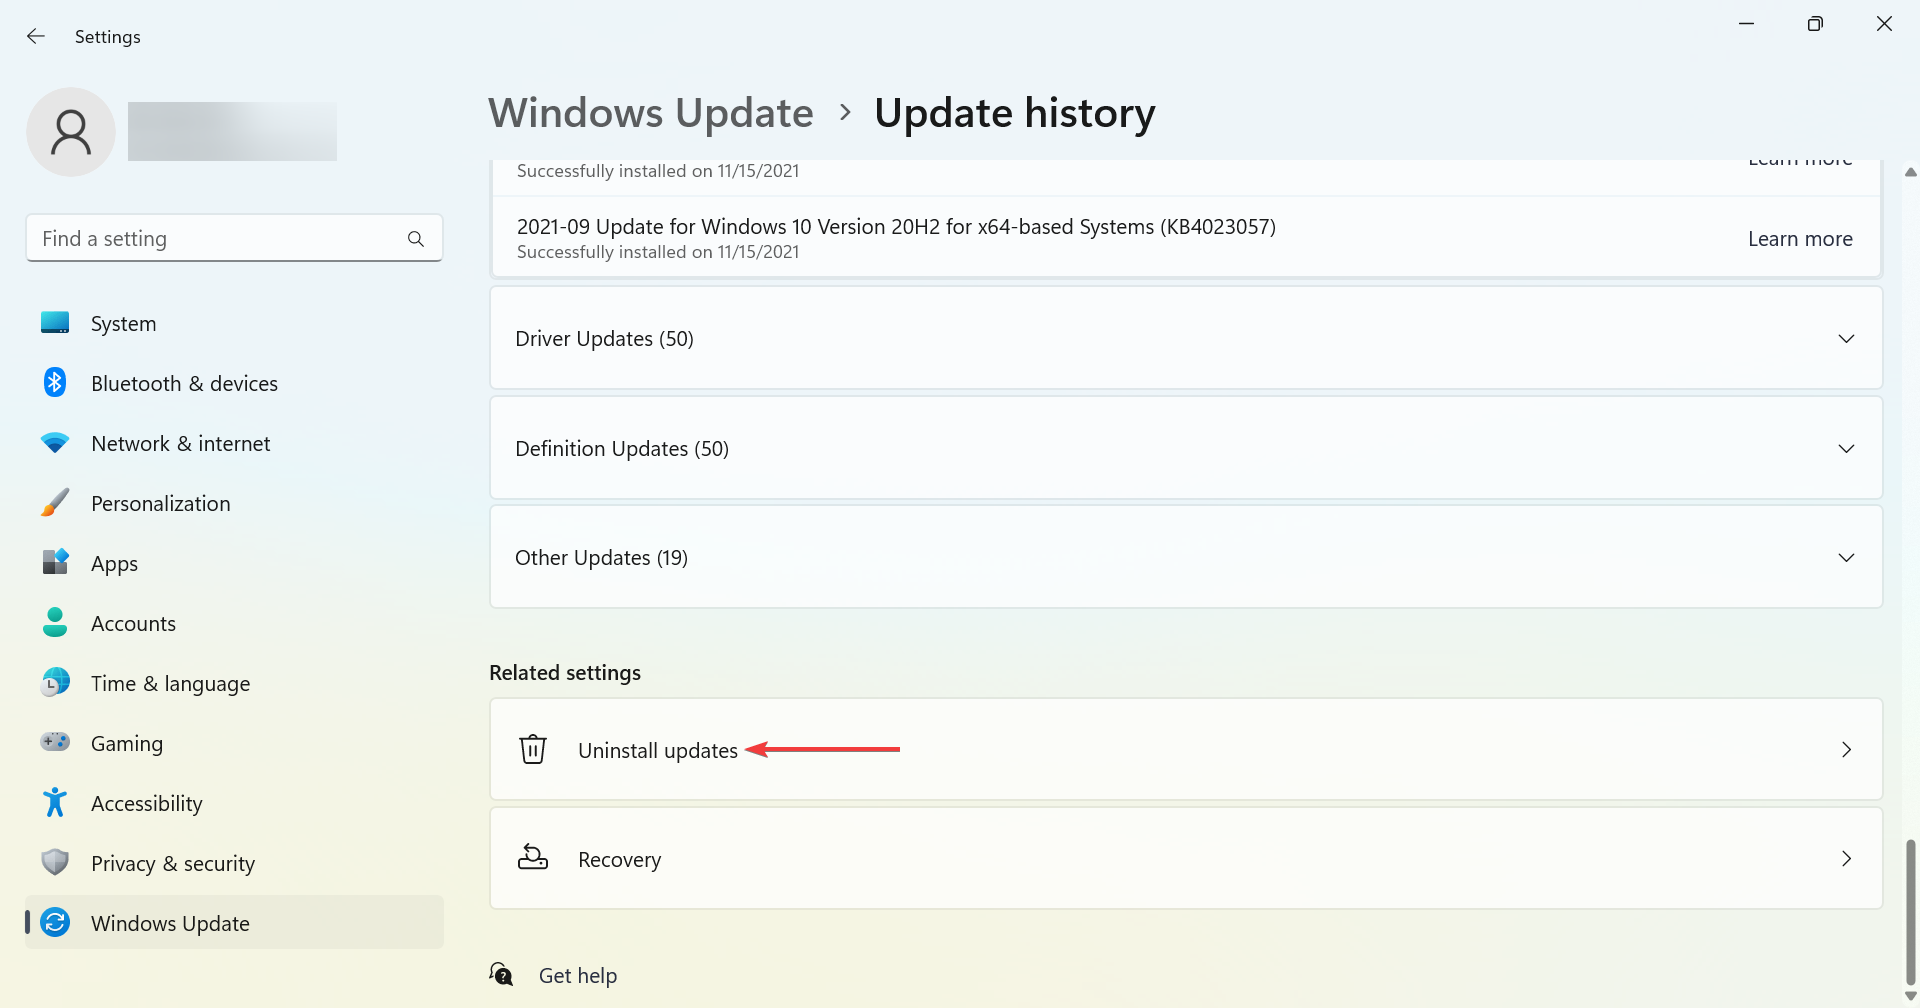
- Now, scroll down to the bottom and click on Uninstall updates.
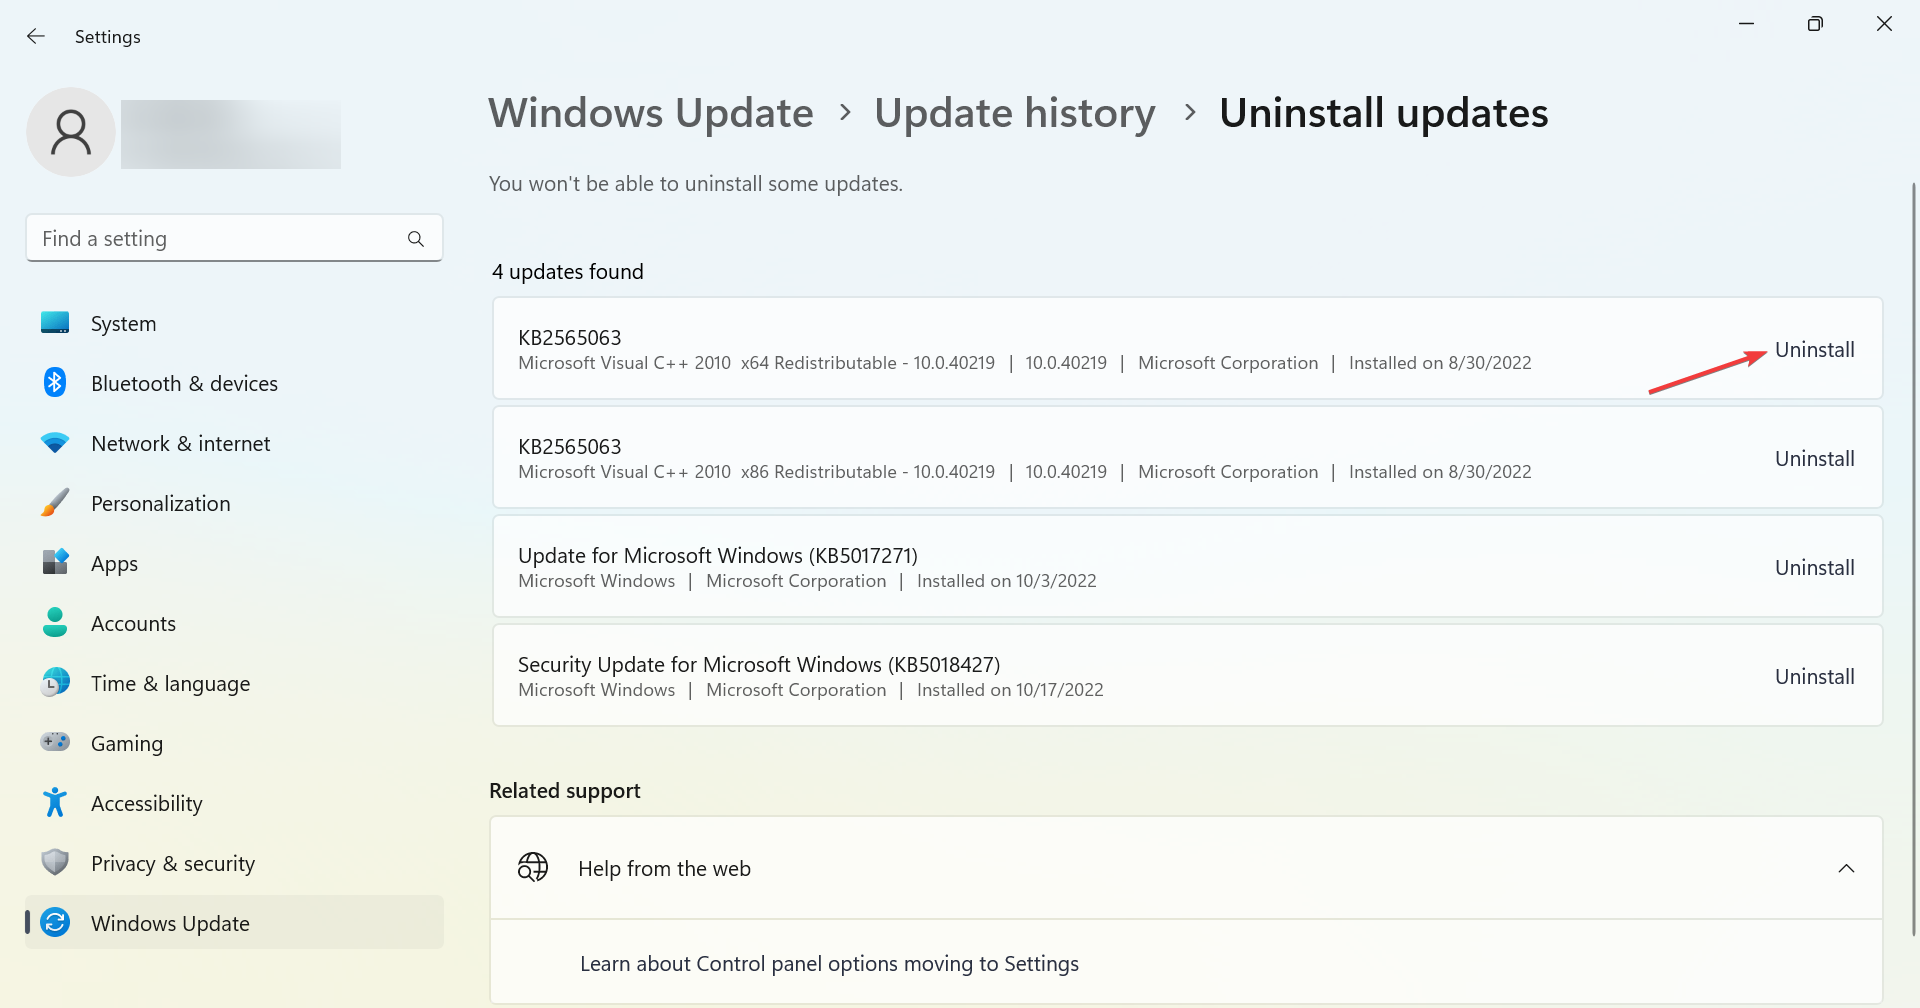
- Click on Uninstall next to the last installed update.
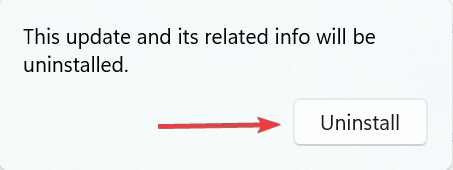
- Again, click Uninstall in the confirmation prompt.
If no output devices were found after Windows 11 update, it could be a bug in the last installed version of the OS. And the simplest solution here would be to uninstall that version. Once done, make sure to disable the automatic installation of Windows updates.
Now, all you have to do is wait for a newer version to be released, install it, and again enable automatic updates.
There might also be more ways to fix the No audio output device installed issue. Some solutions are common here and when Windows can’t find an audio device. So, you may try those as well.
Once you’ve managed to fix this issue, don’t miss our guide on how to change output device on Windows 11.
Many also reported that Windows 11 keeps changing audio output, but we have a guide that addresses that issue.
Users who have fixed this sound error with different methods are welcome to share their alternative resolutions below.





User forum
0 messages