Change Output Device on Windows 11 [How to]
You can change the output device right from the Taskbar
If you have both speakers and headphones, it’s important to know how to change the output device on Windows 11 to ensure that you’re using the right one for the occasion.
Many issues can occur if you don’t select the right output device, such as no audio on your PC, so in today’s guide, we’re going to show you how to quickly and easily select the right audio device.
Is there a shortcut to change sound output on Windows 11?
It’s not directly possible to change the sound output with a keyboard shortcut, however, you can use one of the following shortcuts to open a menu that allows you to choose the output device:
- Ctrl + Windows + V – This will open a Taskbar menu and let you change the output device.
- Ctrl + G – Using this shortcut you’ll open a Game Bar, and from there you can change your sound settings.
How do I select an output device in Windows 11?
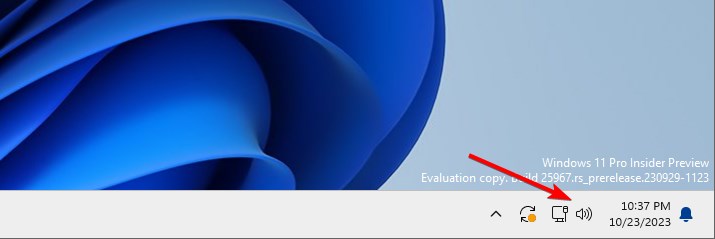
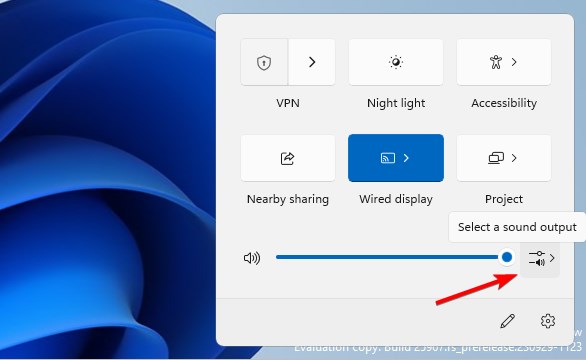
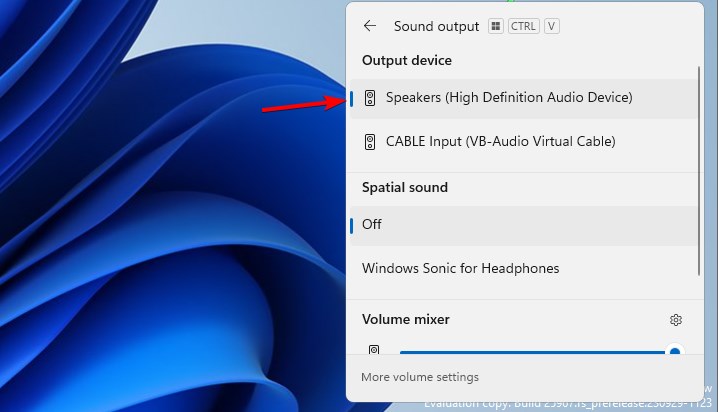
1. Using the Taskbar volume icon
- Click the volume icon on the Taskbar.
- Next, click on Select a sound output icon.
- Lastly, select the desired device from the Output device list.
In case you can’t perform these steps, we have a great guide on what to do if volume icon is missing that can help you.
To better understand all your playback and recording options, you can also read our detailed guide on how to change sound settings in Windows 11 before proceeding with the steps below.
2. Use the Volume Mixer
- In the Taskbar, right-click the volume icon and choose Open volume mixer.
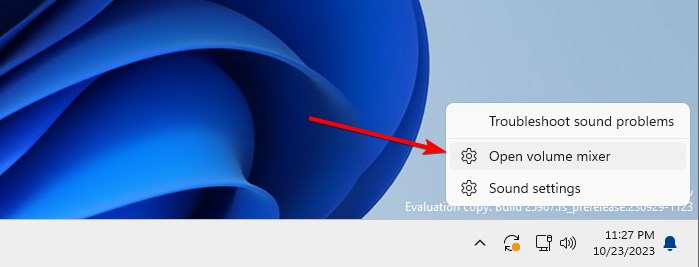
- Locate the Output device section and select your desired output device.
- The changes will be automatically saved.
Do keep in mind that many users reported that Volume Mixer keeps resetting, but we have a guide that addresses this issue.
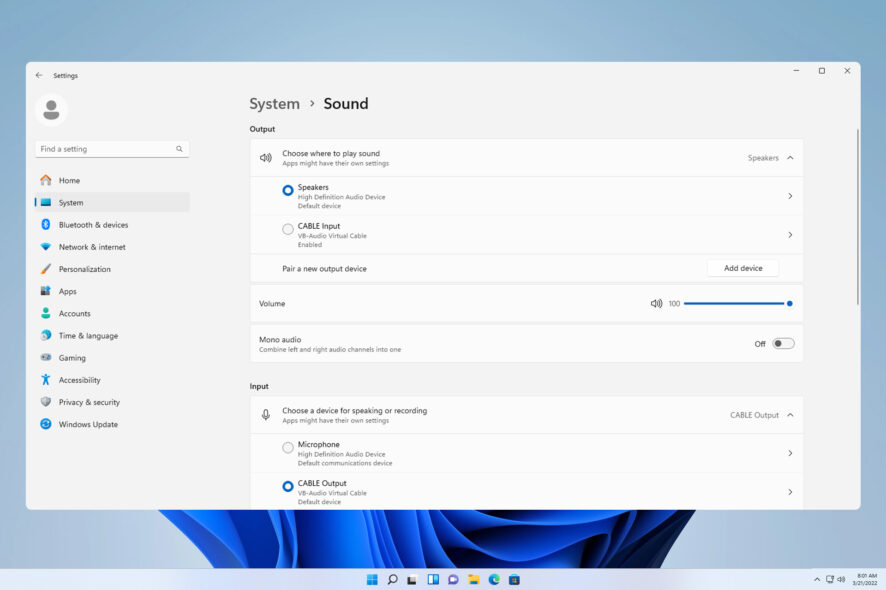
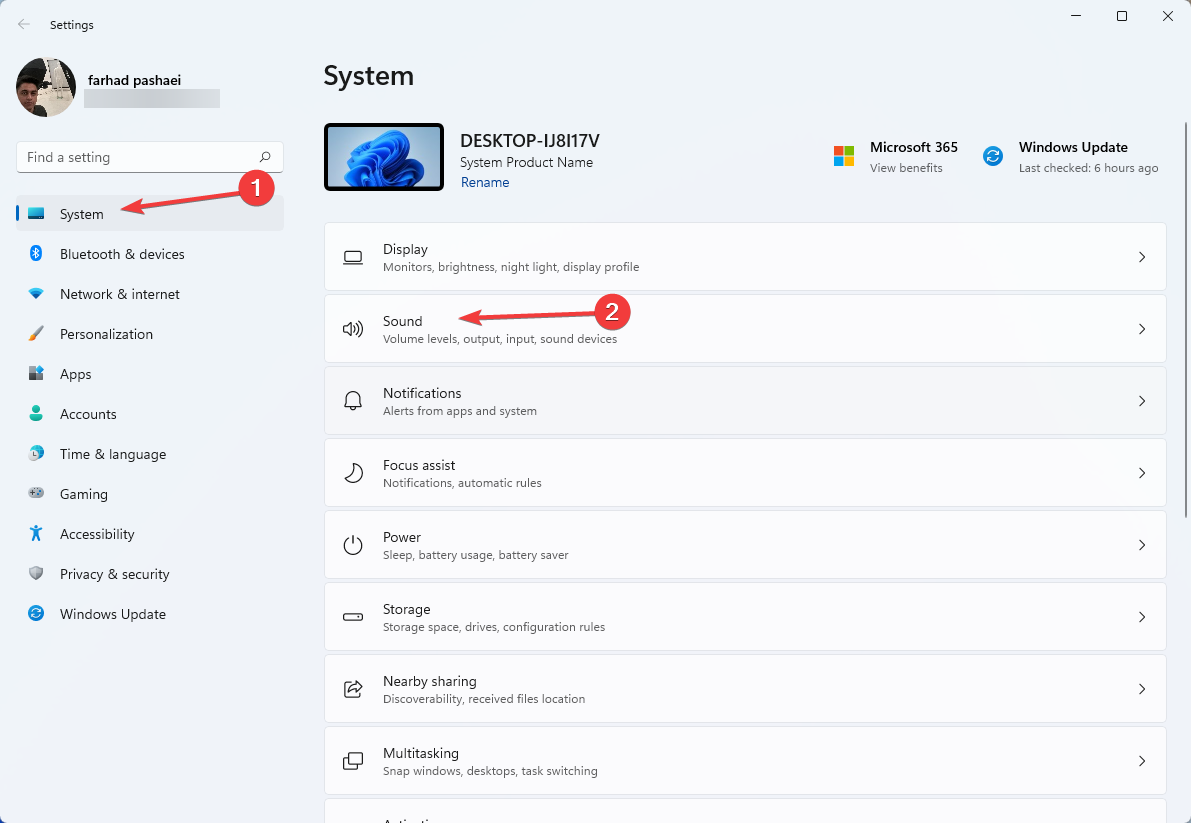
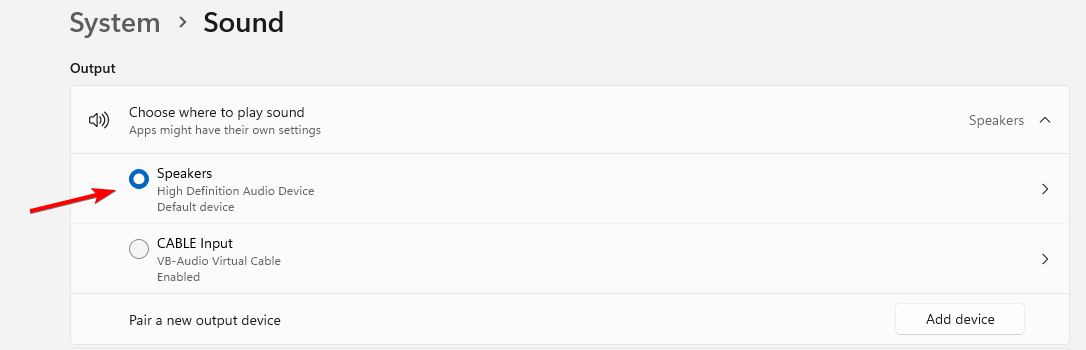
3. Change Sound settings
- Press the Windows key + I to open the Settings app.
- Navigate to System and select Sound.
- In the Choose where to play the sound section select the desired output device.
Before changing output devices through the Sound menu, you can open Sound Settings in Windows 11 directly to access all available playback options faster.
4. From the Control Panel
- Press the Windows key + R and type control. Press Enter.
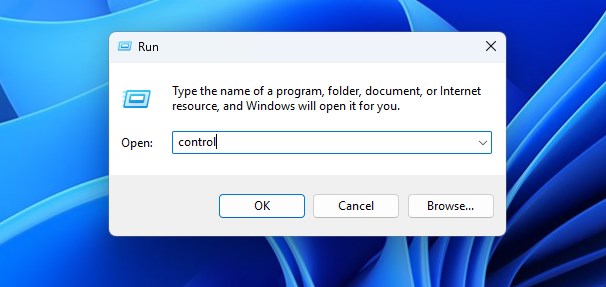
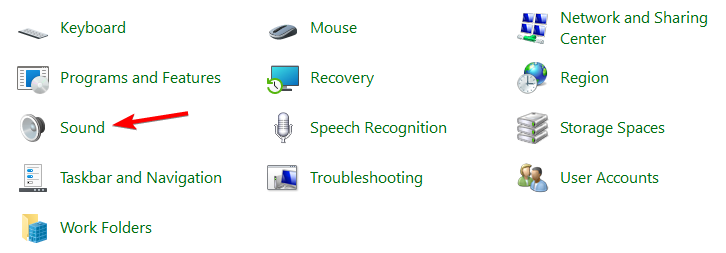
- When the Control Panel opens, click on Sound.
- Select the desired output device and click on Set Default.
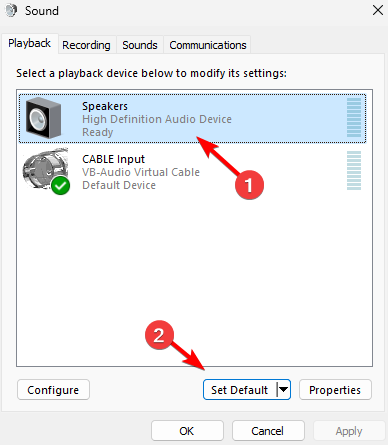
- Lastly, click Apply and OK to save changes.
5. Use the Game Bar
- Press the Windows key + G to open the Game Bar.
- In Windows Default Output select the desired output device.

- The changes will be automatically saved.
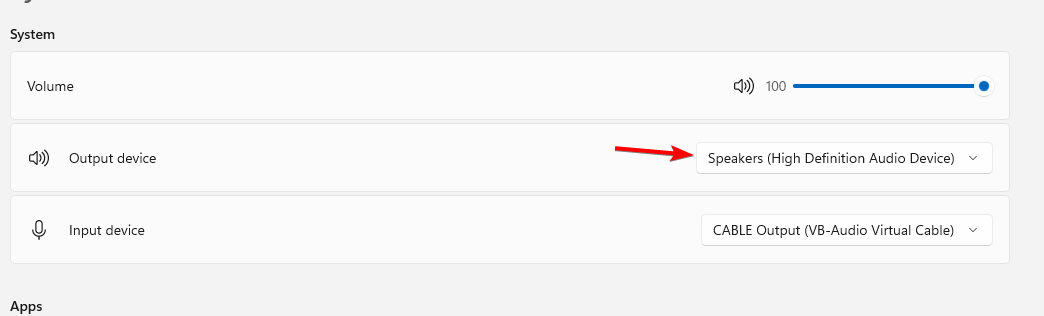
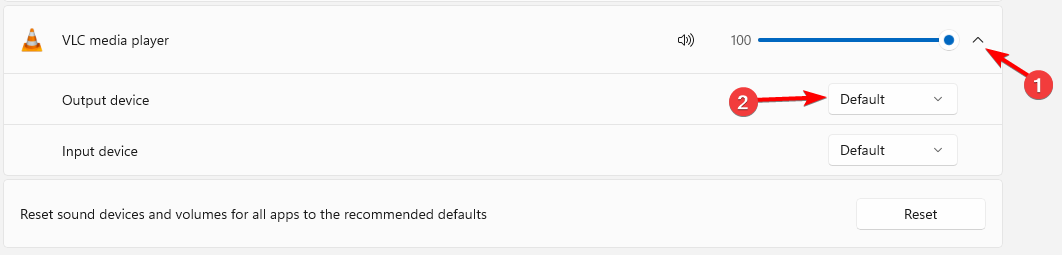
How do you choose output devices based on application?
- Open Volume Mixer on Windows 11.
- Next, locate the application that you want to change the output device for.
- Click the down arrow next to the volume slider and select the output device.
It’s pretty simple to change the output device on Windows 11, and this can be useful if Windows keeps changing the audio output on your PC. In case you encounter any problems with these devices, our no output devices found in Windows 11 guide should be able to help you.
To learn more about audio devices, we have a great guide on how to change default speakers on Windows 11, so don’t miss it. You can also enable or disable sound devices to fix issues when Windows stops detecting your available outputs.
What method do you use to change the output device on Windows 11? Let us know in the comments below!
Read our disclosure page to find out how can you help Windows Report sustain the editorial team. Read more


Improve this guide


User forum
0 messages