ADB Reboot Bootloader Not Working: How to Get It Fixed?
Check out these expert-recommended fixes
5 min. read
Updated on
Read our disclosure page to find out how can you help Windows Report sustain the editorial team. Read more

ADB reboot bootloader is an integral part of the Android ecosystem. It enables users to execute advanced tasks, including unlocking the bootloader, flashing firmware, and rooting the device. Unfortunately, many users have reported issues with the ADB reboot bootloader command not working.
This could be due to a faulty USB connection, debugging, or corrupt or wrong USB drivers. Whatever the reason may be, it can be fixed.
Here, we will discuss various troubleshooting methods to resolve this issue, along with the causes of its occurrence.
What does the ADB reboot bootloader do?
Android Debug Bridge (ADB) reboot bootloader is a command that can reboot your Android phone into bootloader mode. It is a separate boot mode from Android OS and helps root the device, unlocking its bootloader or flashing firmware.
The bootloader mode allows you to access partitions you can’t access from Android OS. Advanced users primarily use it to access specific system files and troubleshoot issues on the device.
What causes the ADB reboot bootloader not working issue?
The Android Debug Bridge reboot bootloader command might not work for several reasons. Some of the popular ones are listed below:
- The device is not connected correctly – If your Android is not connected to your computer correctly, this mode might not work. Check the USB cable and replug it to establish a connection.
- Outdated USB drivers – If your device is connected to a USB and your computer is missing the correct USB drivers, then the bootloader won’t work.
- USB debugging disabled – To enter developer mode, it is essential to turn on USB debugging. If it is not enabled, then you can face the issue.
- Outdated version of ADB – If you don’t have the latest version of ADB installed on your computer, you can get the issue.
How to get ADB reboot bootloader working?
Before moving to the troubleshooting steps, please go through these preliminary checks to fix the issue:
- Check the cable you use to connect your Android and computer for any physical damage.
- Make sure your Android and computer have no pending updates.
- Use USB 2.0 for lesser conflicts.
1. Update the USB drivers
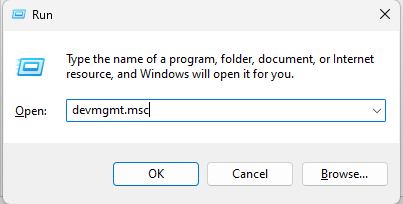
- Press Windows + R to open the Run window.
- Type devmgmt.msc and press Enter to open Device Manager.
- Go to the USB controller and expand it. Right-click on the driver listed and select Update driver.
- Now click Search automatically for drivers. Follow the onscreen prompts to complete the process.
- Download and install Outbyte Driver Updater.
- Launch the software.
- Wait for the app to detect all faulty drivers.
- Now, it will show you all the malfunctioning drivers listed to select the ones to Update or Ignore.
- Click on Update & Apply Selected to download and install the newest versions.
- Restart your PC to ensure the applied changes.

Outbyte Driver Updater
Secure your Windows PC with Outbyte from various errors caused by problematic drivers.2. Check if USB debugging is enabled
- Go to Settings.
- Click About Phone.
- Tap on Build Number (MUI) seven times to get into developer mode.
- Once done, close the Settings app.
- Relaunch the Settings, click Additional Settings, then tap Developers options.
- Tap on USB debugging to enable it.
- If it is enabled, disable it, wait for a few seconds, and will allow it again.
3. Clean Install of ADB drivers
- Download the ADB installer file. Then, extract the zip file and save it in the accessible location.
- Connect your Android to your PC, and double-click on the installer file. It will take you to the blue interface; type Y to continue.
- Again for the following prompt, Install ADB system-wide. Type Y.
- If you get a system path not specified error, press Windows + R to open the Run box.
- Type %userprofile% and press Enter. On the next window, create a folder and name it desktop.
- Now return to the window with the ADB installer file, and double-click it to run.
- Now type Y to initiate the process. Again type Y when it asks to install ADB system-wide.
- Once files are copied, type Y to install device drivers.
- Follow the onscreen instructions to complete the process.
- The last window will show the Status as Ready to use; click Finish.
4. Check if the ADB daemon is running in the background
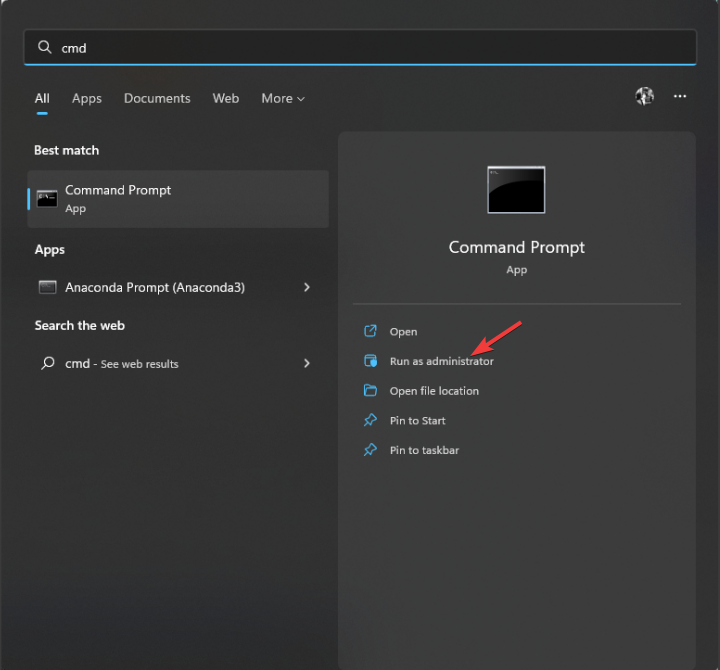
- Press the Windows key, type CMD and click Run as administrator.
- Type the following command and press Enter:
adb devices - You will get a list of devices. If you see your device name, it is correctly connected to your computer.
5. Check OEM lock is enabled
You must check if OEM locks your device if nothing works for you. Some devices come with an OEM lock, which stops the user from flashing firmware and unlocking the bootloader. First, you need to check on the device manufacturer’s website or device manual. If that’s the case, you need to connect your device to the computer and use a tool to unlock your device.
So, these are the methods you need to follow to fix the issue of the ADB reboot bootloader. Try them and let us know which worked for you in the comments below.
Before you go, don’t miss our guide on what to do if the ADB command is not found since it covers a similar subject.


User forum
0 messages