Fix: Broadcom WiFi can't find wireless network

After upgrading to Windows 10 some users report that they cannot find any wireless networks and that can be a major problem since most of us use internet on daily basis. If you’re having this issue you might want to check some of these solutions below.
What to do if Broadcom WiFi cannot find any wireless networks
Table of contents:
- Upgrade your wireless adapter drivers
- Disable unsupported VPN software
- Delete your wireless profile
- Run the Troubleshooter
- Reset your router
- Check if the network is enabled
- Reset the network
Fix: Broadcom WiFi won’t connect
1. Upgrade your wireless adapter drivers
Usually these kind of problems are caused by driver incompatibility, but you can try to fix that by installing the latest Windows 10 drivers.
If you’re having a built-in WiFi card you might want to download the latest drivers for your motherboard, but if you’re using a dedicated WiFi card make sure that you download drivers from the WiFi card manufacturer. Make sure that you download the latest drivers, preferably one optimized for Windows 10.
If there are no Windows 10 drivers available you can always install Windows 8 drivers in compatibility mode. To install drivers in compatibility mode do the following:
- Find the driver setup file, and right-click it.
- Choose Properties from the menu.
- Go to Compatibility tab.
- Find “Run this program in compatibility mode for” and choose Windows 8 from the list.
- Click OK and Apply to save the changes and then run the setup.
Update drivers automatically
If you don’t want the hassle of searching for drivers on your own, you can use a tool that will do this for you automatically. Of course, as you’re not able to connect to the internet at the moment, this tool won’t be useful.
However, once you get online, it will help you to keep all your drivers up to date, so you won’t be in this situation anymore.
We strongly recommend updating drivers automatically and safely with a full-dedicated tool that will help you to avoid permanent damage to your PC by downloading and installing the wrong driver versions.
One of our top recommendations when it comes to driver utilities is PC HelpSoft Driver Updater. It is lightweight with a straightforward user interface.
After you download and install the software, let it scan your PC and identify whether you have any outdated or damaged drivers.
It has a large driver database and automatically finds the perfect version for your specific hardware. You can set it up to regularly update your drivers and never think about it again.
⇒ Get PC HelpSoft Driver Updater
2. Disable unsupported VPN software
If you’ve upgraded from Windows 8 to Windows 10 you might have unsupported VPN software installed. To uninstall it, follow these steps:
- Open Command Prompt as administrator. You can open it by pressing Windows Key + X and choosing Command Prompt (Admin) from the list.
- Enter netcfg –s n in Command Prompt.
- You should get a list of networking protocols, drivers and services. Search the list for DNI_DNE. If the DNI_DNE is
- present proceed to the next step. If there’s no DNI_DNE on your list, skip this solution.
- Enter the following line into the Command Prompt and press Enter:
- reg delete HKCRCLSID{988248f3-a1ad-49bf-9170-676cbbc36ba3} /va /f

- reg delete HKCRCLSID{988248f3-a1ad-49bf-9170-676cbbc36ba3} /va /f
- Next, enter in this:
- netcfg -v -u dni_dne

- netcfg -v -u dni_dne
- Restart your computer and see if the issue is resolved.
We hope that at least one of these solutions helped you with your problem with Broadcom WiFi. However, if you didn’t solve the problem, even after applying these fixes, you can check out our article about problems with WiFi adapters in Windows 10, and maybe you’ll find the solution there.
3. Delete your wireless profile
If updating the Broadcom driver didn’t get the job done, we’re going to try resetting your network profile. The first thing you need to do is to delete it:
- Go to Search, type cmd, and open Command Prompt as Administrator.
- When Command Prompt stats type in the following command and press Enter: netsh wlan delete profile name=”WirelessProfileName” (be sure to replace WirelessProfileName with the actual name of your wireless connection)
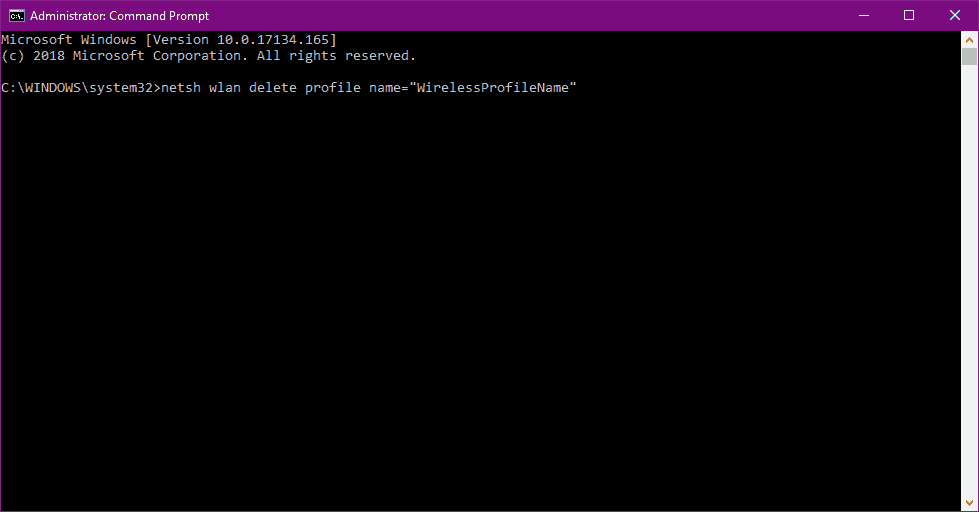
Once you reconnect, the new wireless profile will be created automatically.
4. Run the Troubleshooter
Now, let’s try Windows 10‘s built-in troubleshooting tool. This tool can resolve various system issues, including our network problem. Heres how to run it:
- Go to Settings.
- Head over to Updates & Security > Troubleshoot.
- Select Internet Connections, and go to Run the Troubleshooter.
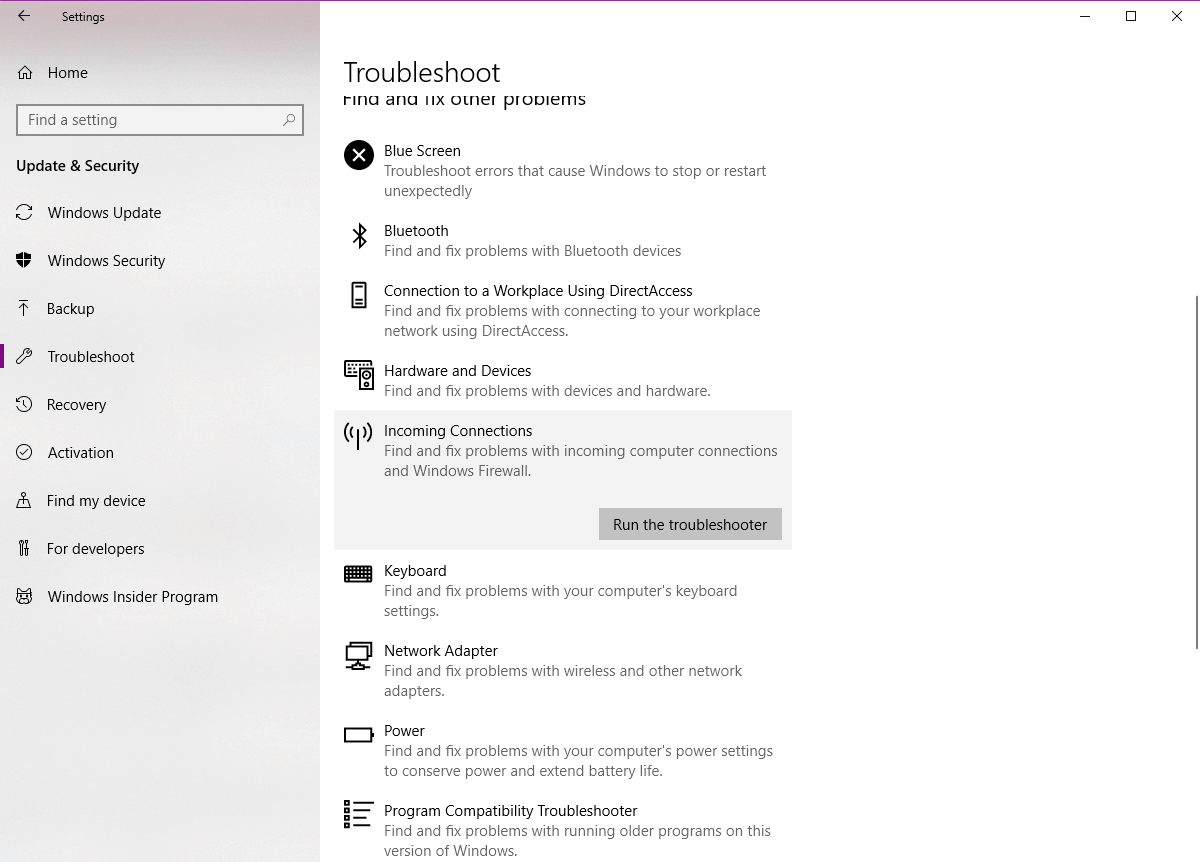
- Follow further on-screen instructions and let the process finish.
- Restart your computer.
5. Reset your router
The problem can be caused by improper router configuration, and of course, you can fix it by resetting your router. To do that, just press the reset button on your Realtek router, or open the router settings and select the reset option.
Before resetting your router you might want to save and export your configuration so you don’t have to enter it manually.
For more information on how to reset your router or how to export your router’s configuration, be sure to check your router’s manual.
6. Check if the network is enabled
Although it sounds unlikely, it’s possible that your Broadcom device isn’t even enabled. So, make sure to eliminate that possibility:
- Go to Search, type devicemngr, and open Device Manager.
- When Device Manager opens, locate your wireless adapter and double click it to open its properties.
- Go to Driver tab and look for Enable button. If you don’t see the Enable button, it means that your device is enabled and working.
7. Reset the network
If none of the previous solutions worked, the last thing we’re going to try is resetting the network. Here’s how to do that:
- Go to the Settings.
- Navigate to Network & Internet > Status.
- Scroll down and locate the Network reset option. This feature allows you to set your network component to default. You might need to reinstall certain network software afterward.
- Go to Reset now, and click Yes.

- Wait until your PC restarts and then check if your Ethernet connection is available.
If you have any comments or questions, just reach to the comments section below.
Read our disclosure page to find out how can you help Windows Report sustain the editorial team. Read more


Improve this guide


User forum
2 messages