How to Fix Windows Update Error 0x8007001F in Windows 11
Fix Windows 11 update errors by fixing corrupted user accounts
![]() 3 min. read
3 min. read
![]() Updated on
Updated on
Share this article

Improve this guide
Read our disclosure page to find out how can you help Windows Report sustain the editorial team Read more
Key notes
- 0x8007001f error in Windows 11 will prevent you from installing the latest updates.
- In most cases, this issue is caused by a corrupted user profile or file system corruption.
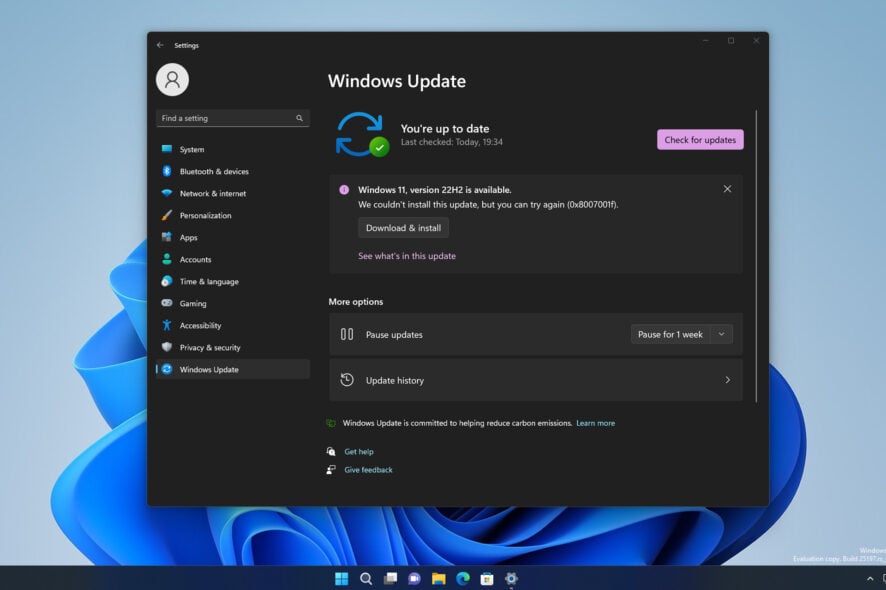
The 22H2 update for Windows 11 has been available for a while yet, some users have reported error 0x8007001f on Windows 11 while trying to upgrade.
This error is common, and we already wrote about Windows 10 update error 0x8007001f. However, in today’s guide, we’re going to focus exclusively on the latest version of Windows.
Why does 0x8007001f error occur on Windows 11?
There are multiple reasons for this, but here are a few common ones:
- Corrupted user profiles – If any user profile on your PC is corrupted, you’ll get this error. To fix it, you need to remove user accounts that are affected.
- Corrupted system files – In case your system files get corrupted you won’t be able to perform updates. If that happens, it’s crucial that you repair corrupted system files.
How can I fix the 0x8007001f error on Windows 11?
1. Run the SFC utility
- Open Windows 11’s Run dialogue by right-clicking Start and selecting that accessory’s shortcut on the menu.

- Enter the following Run dialogue command:
cmd
- Press the Ctrl + Shift + Enter key combination to open Command Prompt as an administrator.
- First, type this image repair command in the Prompt and press Enter:
DISM /Online /Cleanup-Image /RestoreHealth
- Input and execute this command for the System File Checker scan:
sfc /scannow
- Wait for the scan to show a Windows Resource Protection outcome in the Command Prompt. It could take about 20 minutes or so.


Corrupted files can cause many errors, including Something went wrong Windows Update error on Windows 11.
A great help for this matter would be specialized software, as it can perform the above process in an automatic way.
2. Remove all non-essential user accounts
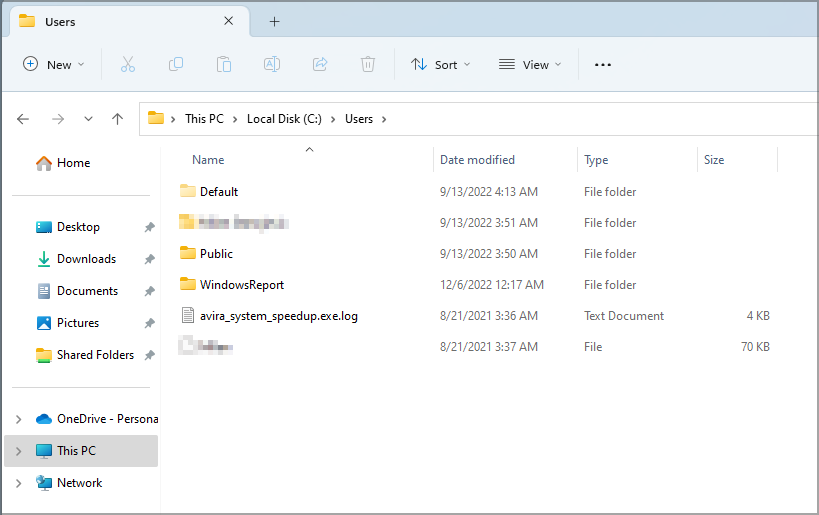
- Open File Explorer.
- Navigate to
C:\Users
- Move all folders to the Desktop or any other location except the following ones:
- Your user folder. In our case, that’s WindowsReport.
- Default
- Public
- After moving the other directories, try to perform the upgrade again.
3. Modify the registry
 NOTE
NOTE
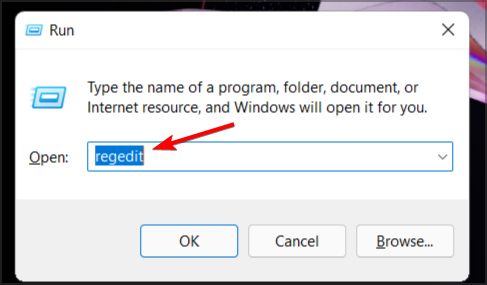
- Press the Windows key + R and enter regedit. Press Enter.

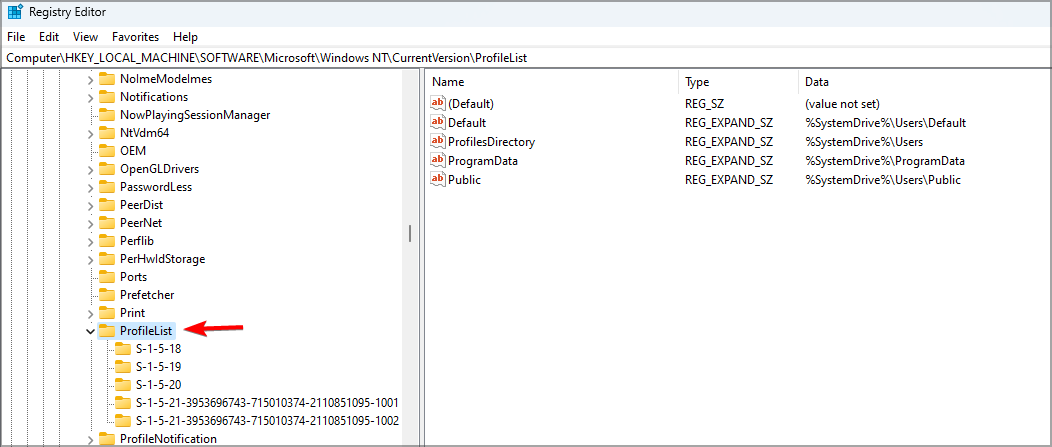
- Navigate to the following key:
Computer\HKEY_LOCAL_MACHINE\SOFTWARE\Microsoft\Windows NT\CurrentVersion\ProfileList
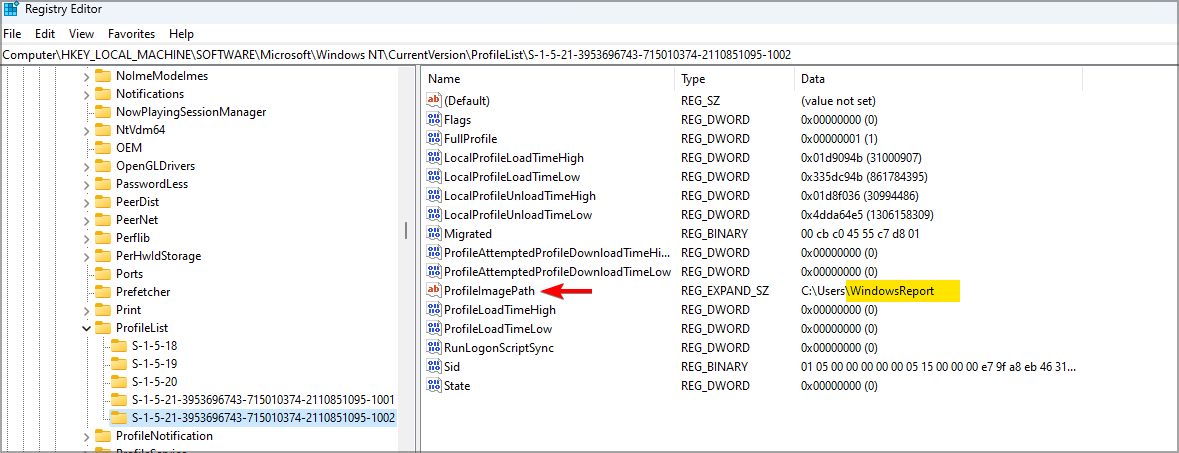
- Now go to the keys with long names. Check ProfileImagePath in order to verify the name of the account. In our case, that’s WindowsReport.

- Next, delete all other keys with long names except the one that matches your profile. To do that, right-click the key you want to remove and click Delete.
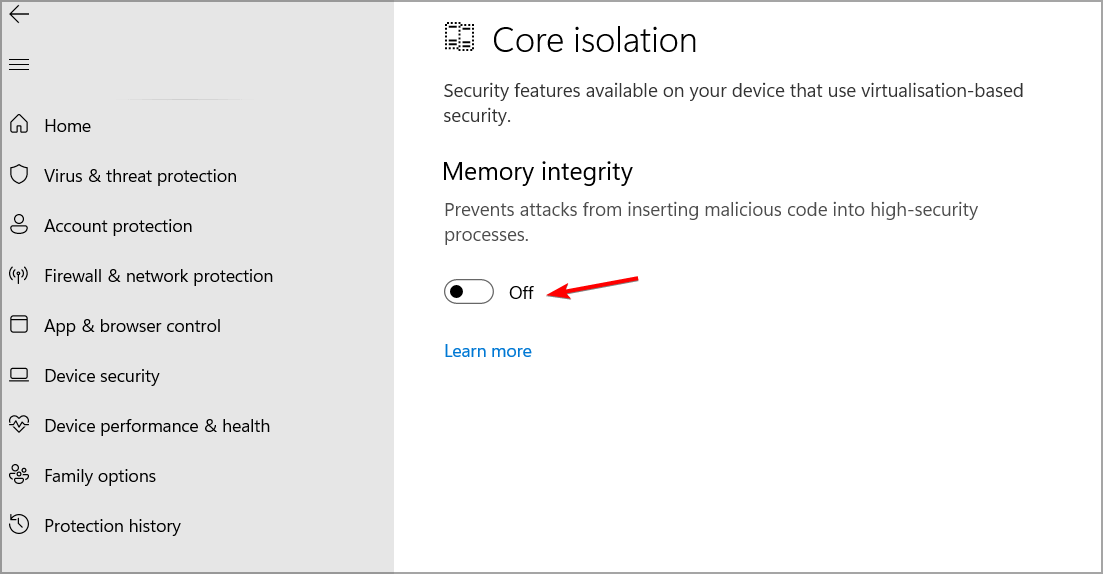
4. Disable Core Isolation
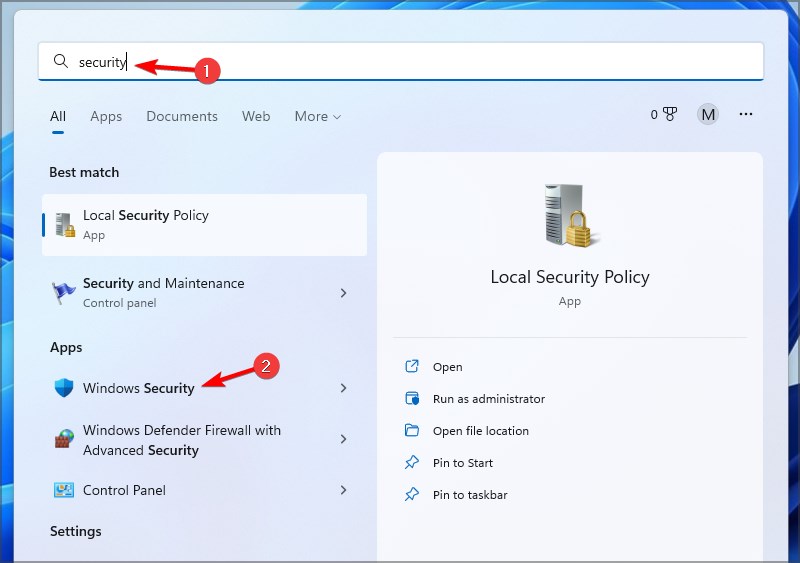
- Press the Windows key + S and enter security. Select Windows Security.

- Navigate to Device security and click on Core isolation details.
- Now set Memory integrity to Off.

If the update process completes successfully, and you don’t get the 0x8007001f Windows 11 version 22H2 error, be sure to enable this feature again.
Error 0x8007001f on Windows 11 can cause various issues and prevent you from upgrading, so be sure to fix it using our solutions. In case you’re having a different issue, visit our Windows 11 update error guide for more solutions.
If you’re having additional problems, don’t miss our guide on how to solve Windows Update error 0x8024d001.
Did you find a different way to fix this problem? Let us know in the comments section below.