Windows Mixed Reality is Not Installing? Here's What to do
Repair any corrupt system files to get things running
6 min. read
Updated on
Read our disclosure page to find out how can you help Windows Report sustain the editorial team. Read more
Key notes
- As per user forums, Windows 11 and Mixed Reality don't work well, at least in the early versions.
- Users who couldn't install it reported that a Windows update fixed things.
- Keep reading to find out more solutions that work.
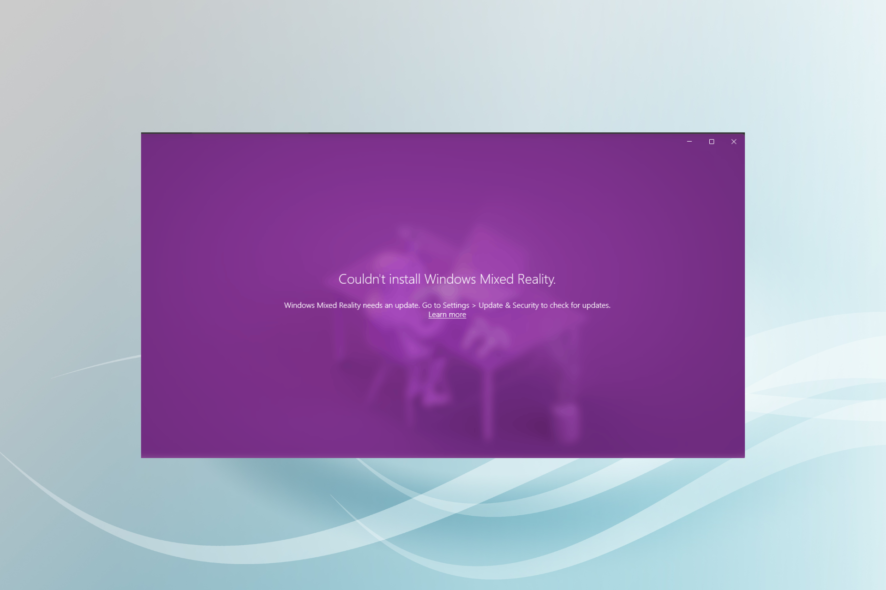
Windows Mixed Reality allows users to experience virtual reality with a compatible headset. The latter is a critical requirement, but users experienced issues even with a headset. More often than not, Windows Mixed Reality was not installing.
The error message read, Couldn’t install Windows Mixed Reality, and a reboot didn’t fix the problem. You can’t be certain whether it’s issues with the installation process or another reason to blame, given the lack of error codes.
Why is Windows Mixed Reality not installing?
- Your PC doesn’t meet the minimum system requirements for the Mixed Reality Portal.
- A bug in the installed version of the Windows.
- The installed driver or Mixed Reality headsets are not compatible.
- Corrupt system files.
What can I do if Windows Mixed Reality can’t be installed?
Before we start with the slightly complex solutions, try these quick ones first:
- Make sure your PC meets the minimum system requirements if you face frequent Windows Mixed Reality issues.
- Check for an unstable Internet connection. If that’s the case, switch to Ethernet instead of Wi-Fi or vice-versa when Windows Mixed Reality won’t install after update
- Plug the headset into another compatible USB 3.0 port.
- When getting the error message, unplug the headset, retry the installation without closing the error message, and check whether Windows Mixed Reality is still not installing.
If none work, move to the fixes listed next.
1. Update Windows
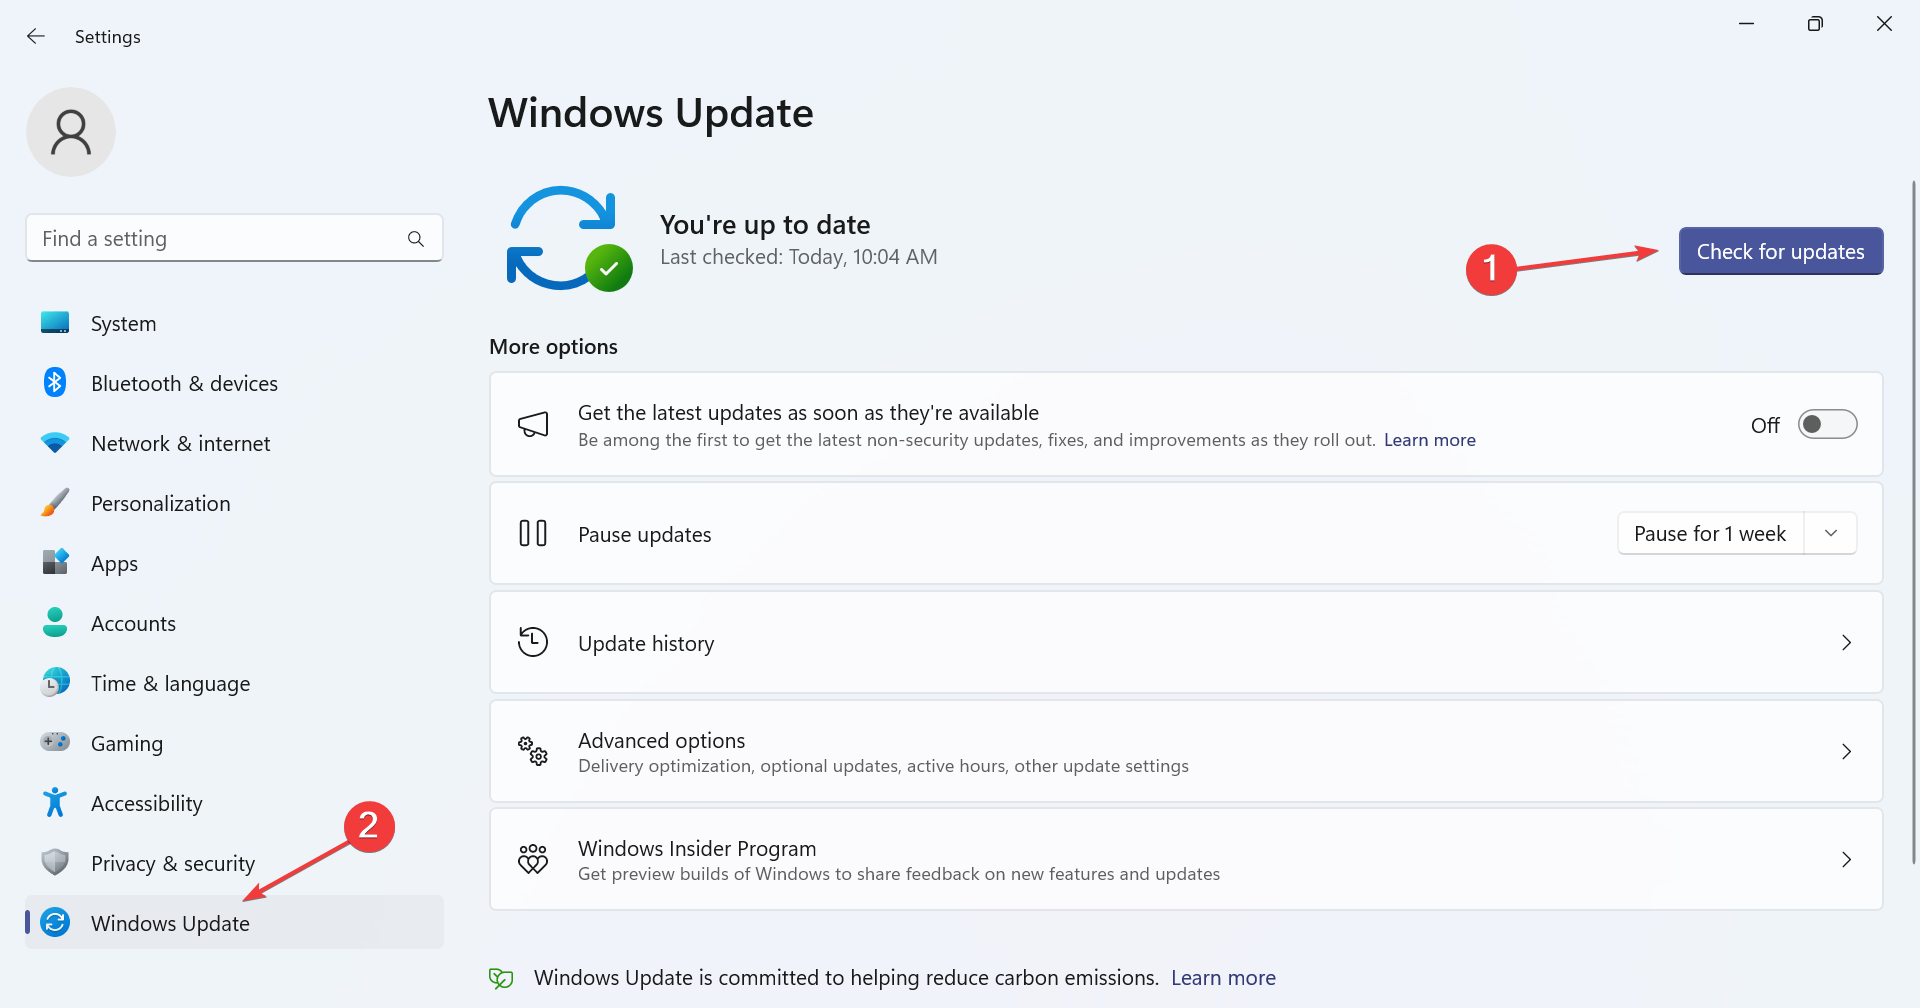
- Press Windows + I to open Settings, go to Windows Update from the navigation pane, and click on Check for updates.
- If an update is listed after the scan, click on Download & install.
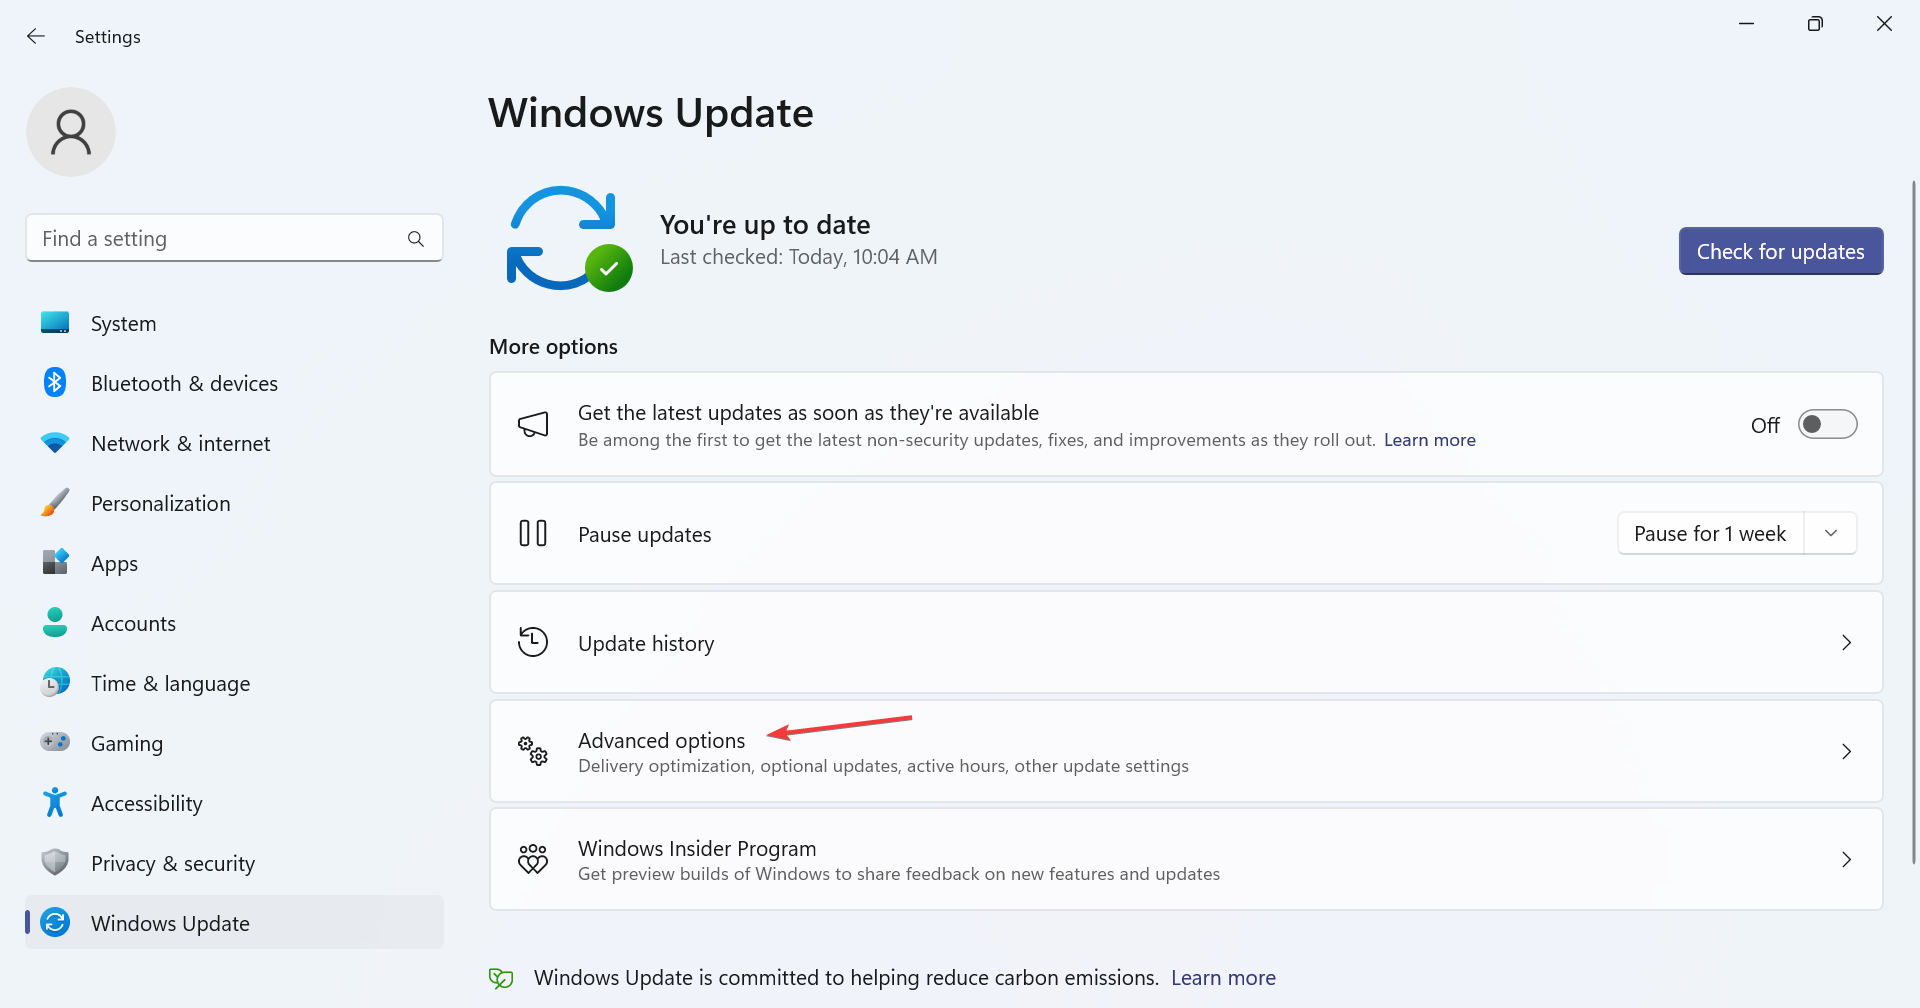
- Now, click on Advanced options.
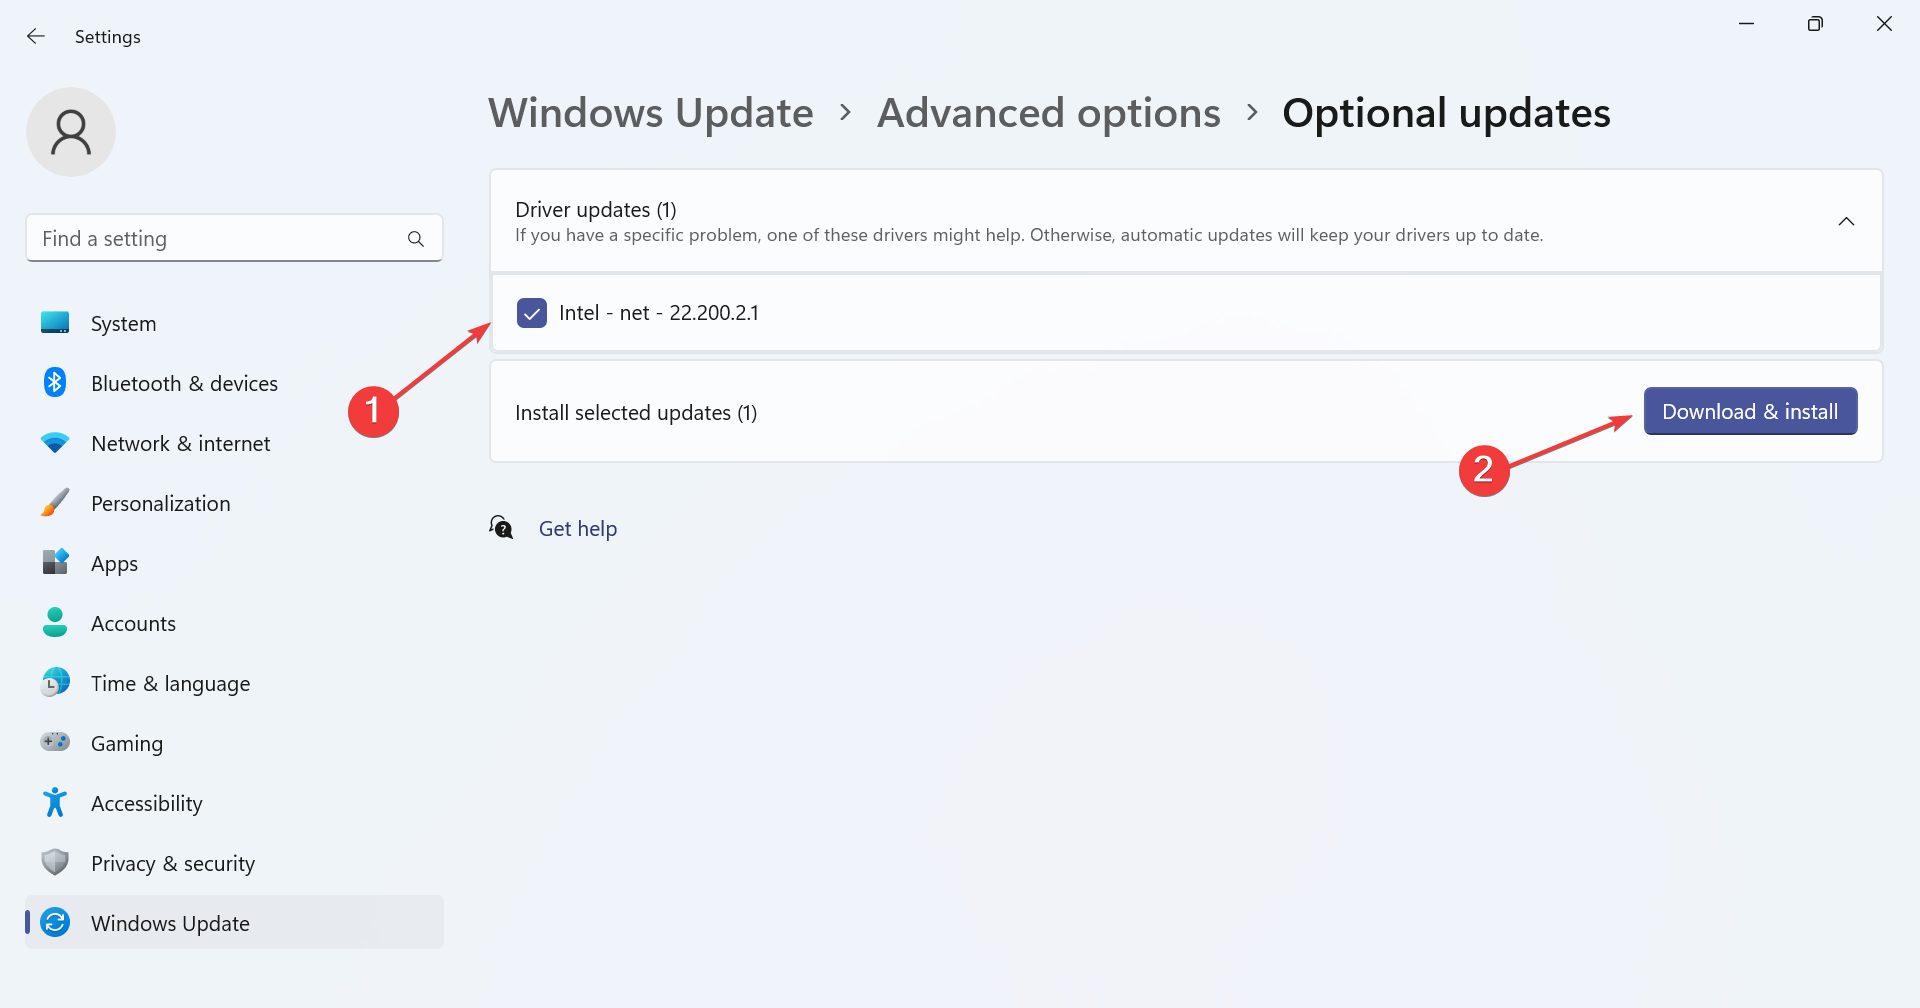
- Click Optional updates under Additional options.
- Expand all the entries here, tick the checkboxes for available updates, and click Download & install.
2. Install the latest drivers
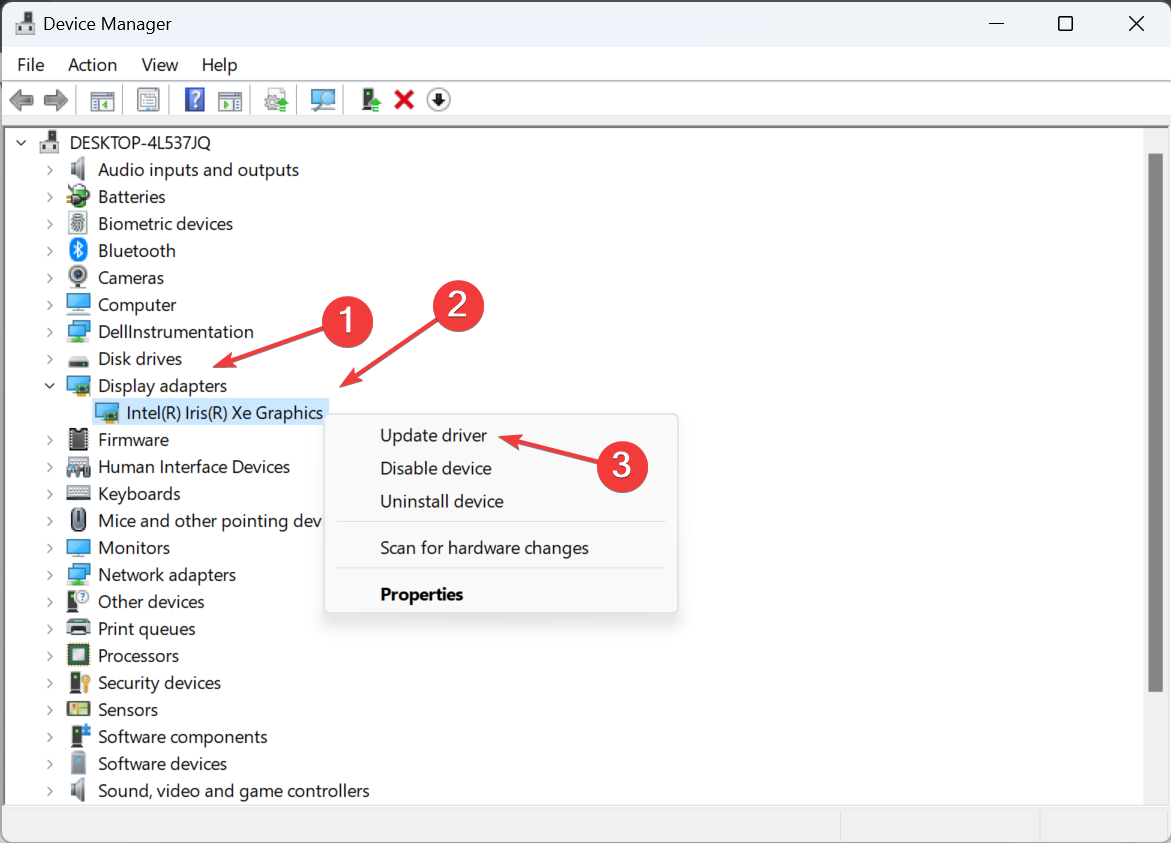
- Press Windows + X to open the Power User menu, and select Device Manager from the list.
- Expand the Display adapters entry, right-click on the graphics adapter, and select Update driver.
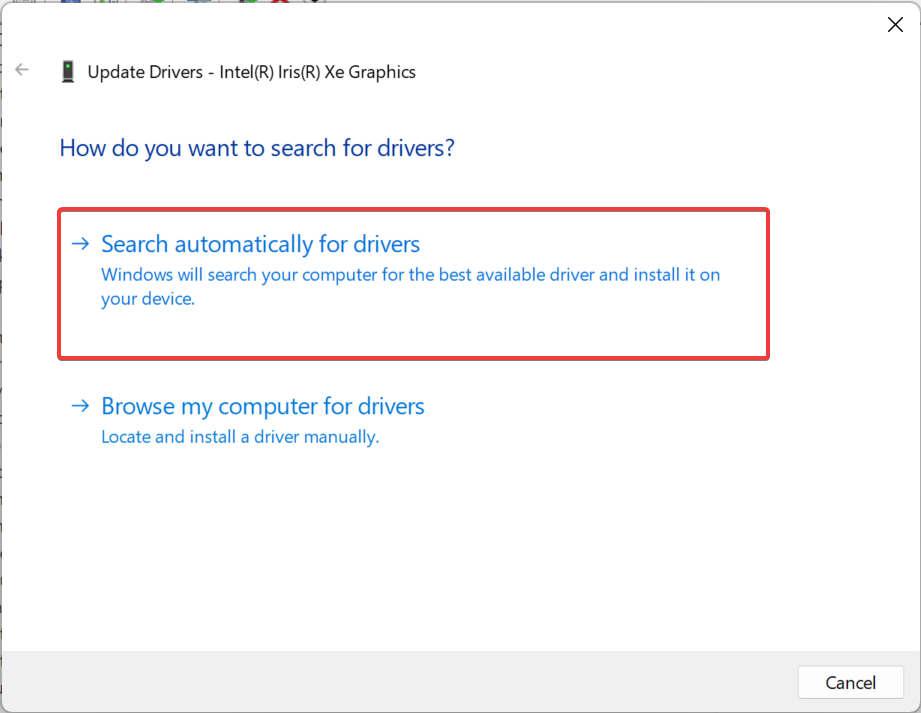
- Choose Search automatically for drivers and let Windows find the best driver available locally and install it.
- Finally, restart the computer and try setting up Windows Mixed Reality.
Often, an outdated driver may trigger issues and be the reason Windows Mixed Reality is not installing. In this case, update the graphics driver.
If Windows can’t find a newer version, head to the manufacturer’s website, locate the latest version, and manually install the driver. Similarly, you should update the headset drivers as well.
- Download and install the Outbyte Driver Updater app.
- Launch the software and wait for the app to detect all incompatible drivers.
- Now, it will show you a list of all faulty drivers to select the ones to Update or Ignore.
- Click on Update & Apply Selected to download and install the newest versions.
- Restart your PC to ensure the applied changes.

OutByte
Keep your GPU in a flawless state without worrying about possible driver issues.3. Repair the corrupt system files
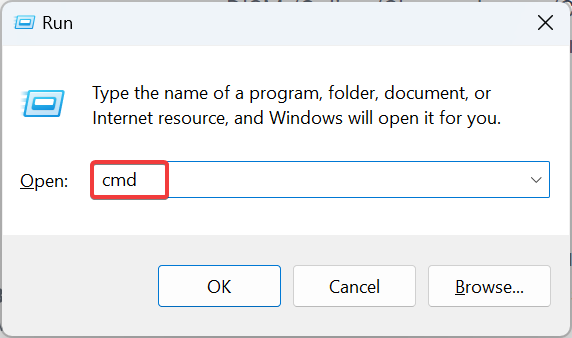
- Press Windows + R to open Run, type cmd, and hit Ctrl + Shift + Enter.
- Click Yes in the UAC prompt.
- Now, paste the following commands individually and hit Enter after each:
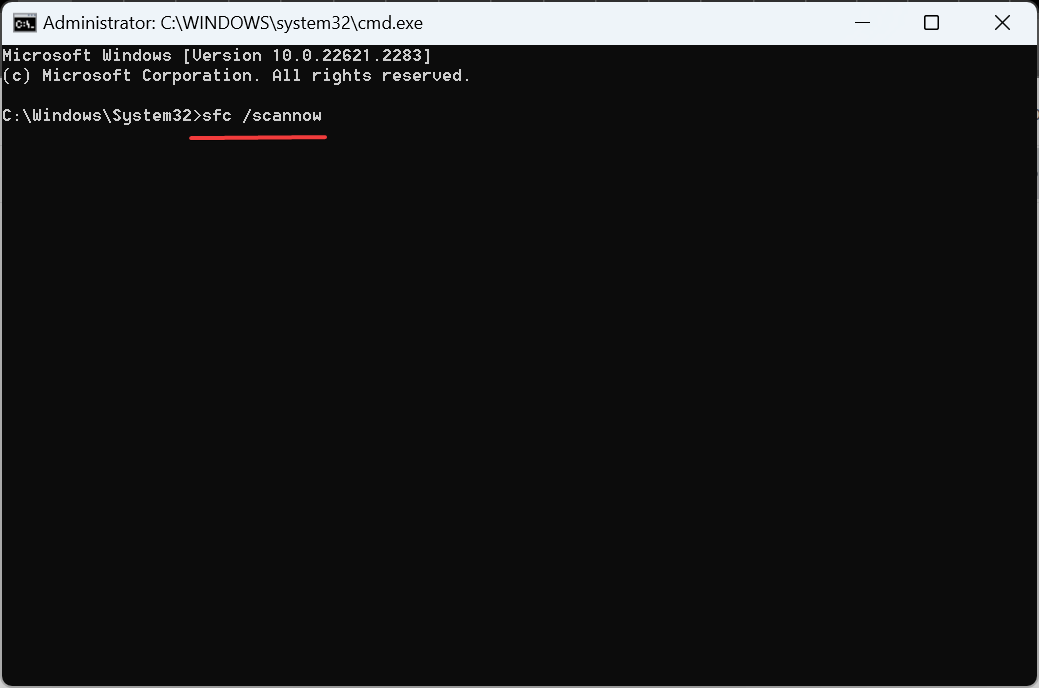
DISM /Online /Cleanup-Image /CheckHealthDISM /Online /Cleanup-Image /ScanHealthDISM /Online /Cleanup-Image /RestoreHealth - Execute the following command to run the SFC scan:
sfc /scannow - Finally, reboot the PC.
Corrupt system files could be why you couldn’t install Windows Mixed Reality, and it says, needs an update, even when running the latest version of the OS. Simply run the DISM commands and the SFC scan to fix things.
4. Reinstall the Mixed Reality software
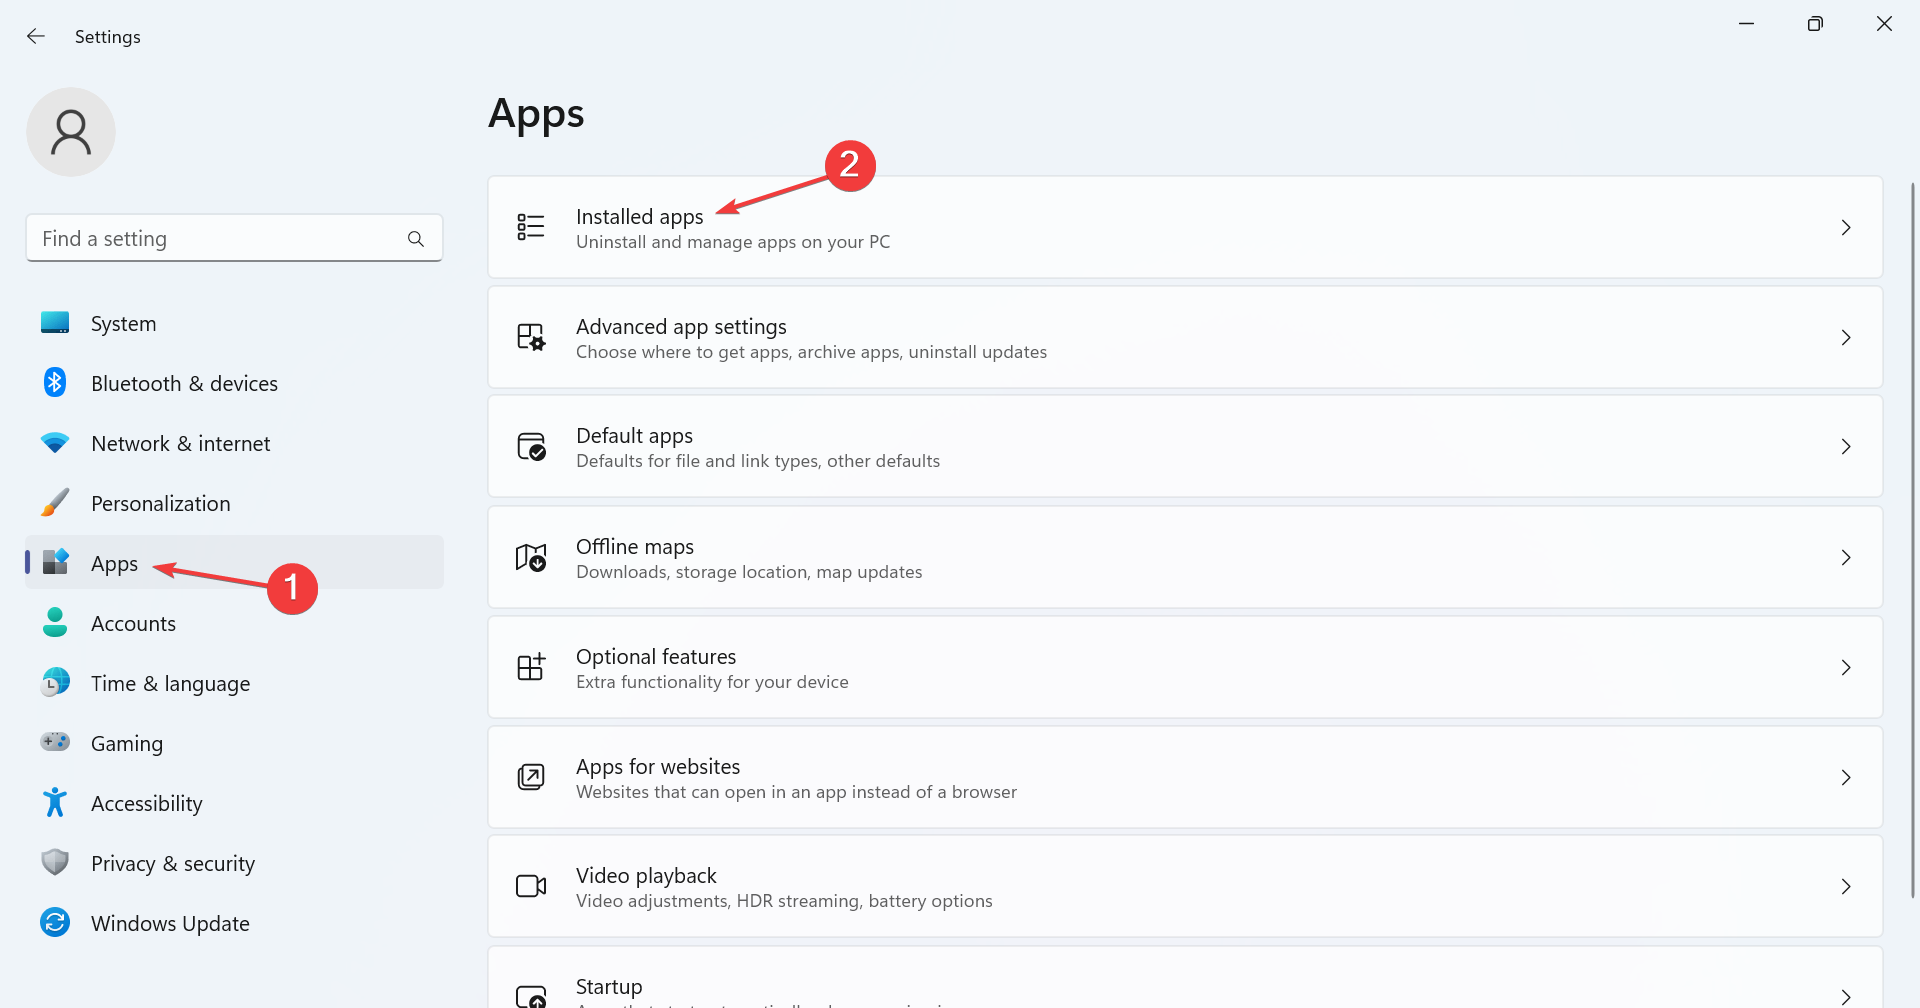
- Press Windows + I to open Settings, go to Apps from the left pane, and click on Installed apps.
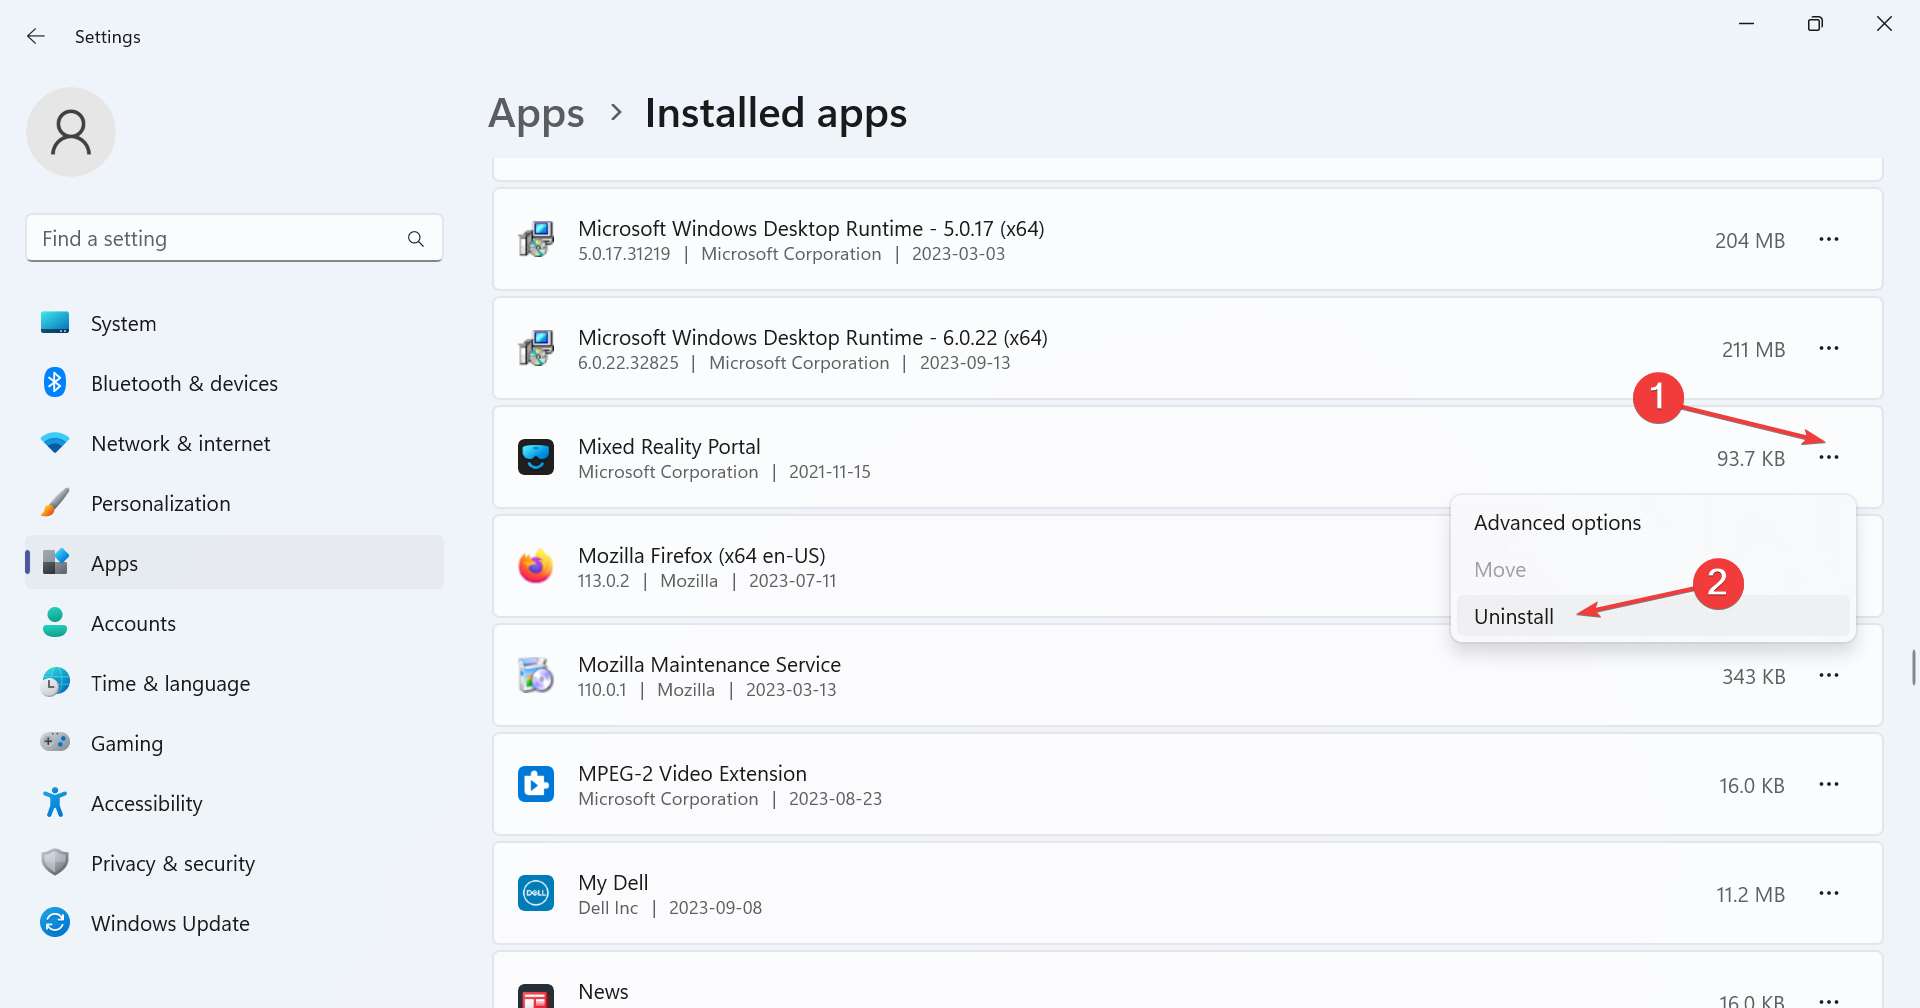
- Click the ellipsis next to Mixed Reality Portal, and select Uninstall.
- Again, click Uninstall in the confirmation prompt.
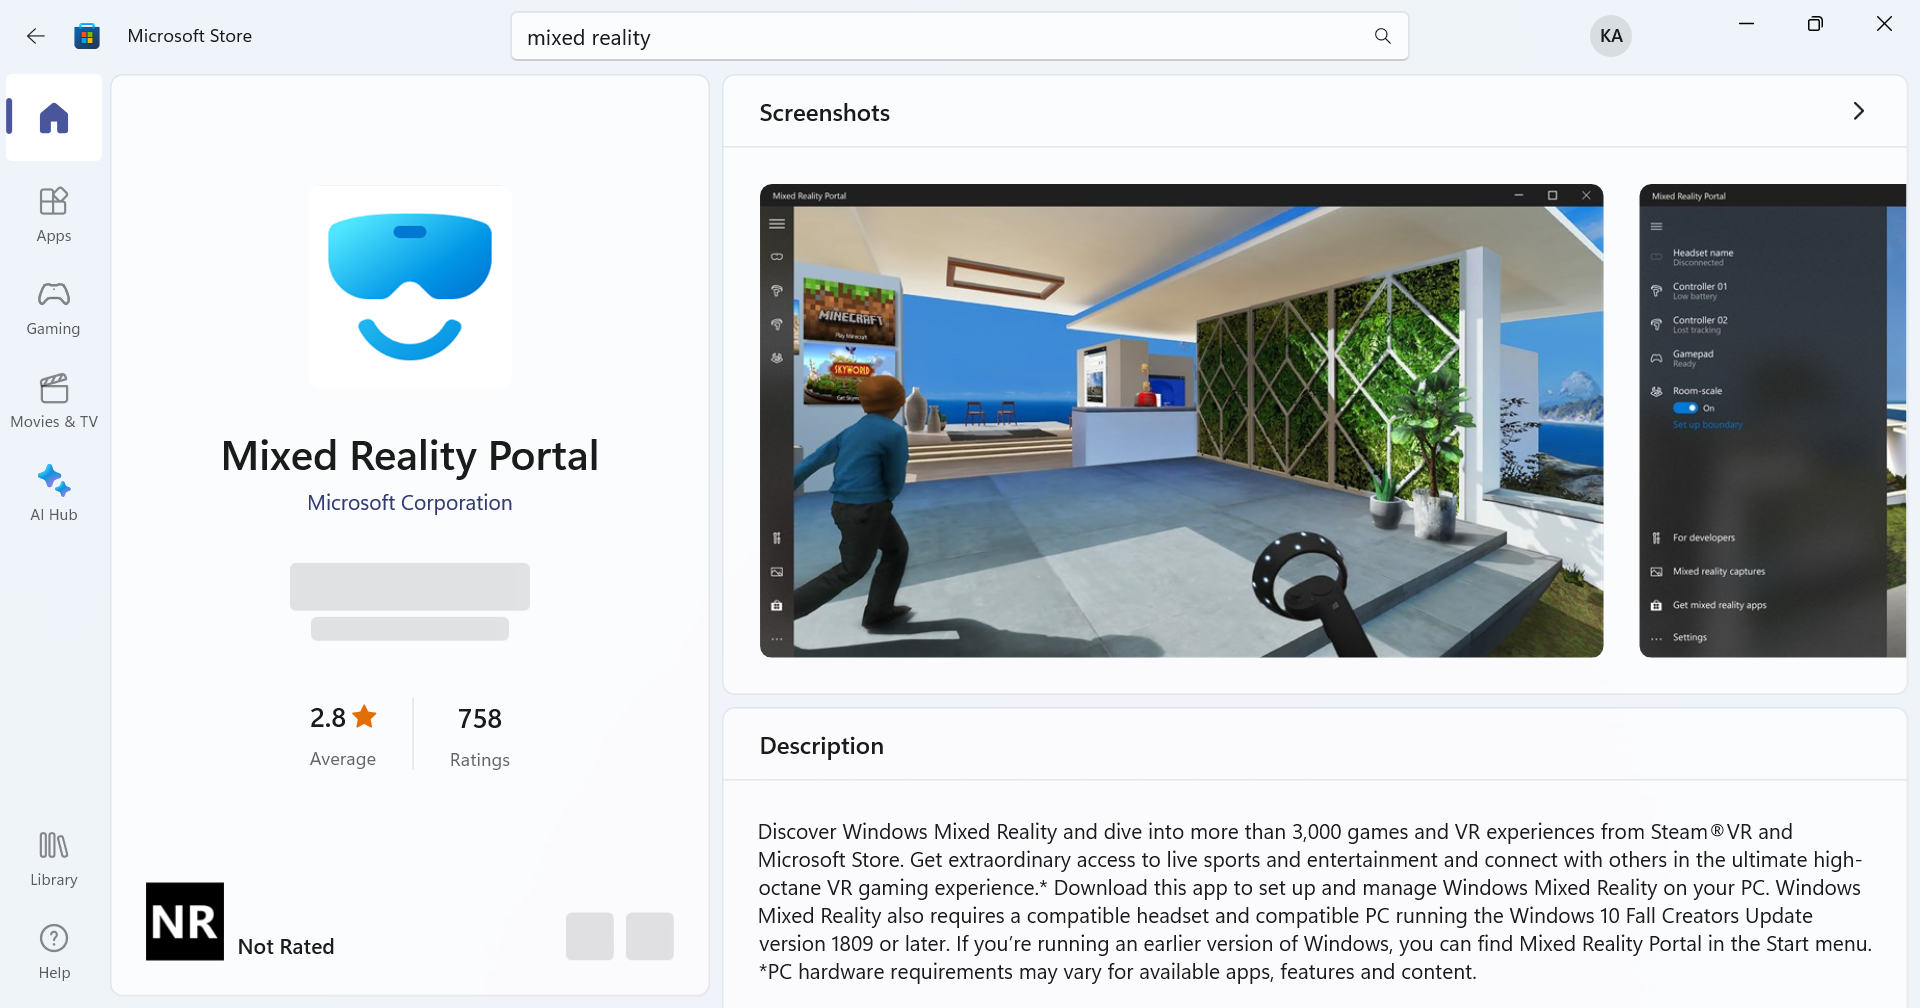
- Now, open the Microsoft Store, search for Windows Mixed Reality, and click on the Get button to install it.
5. Reinstall the Analog.Holographic capability
- Unplug the HMD (Head Mounted Device).
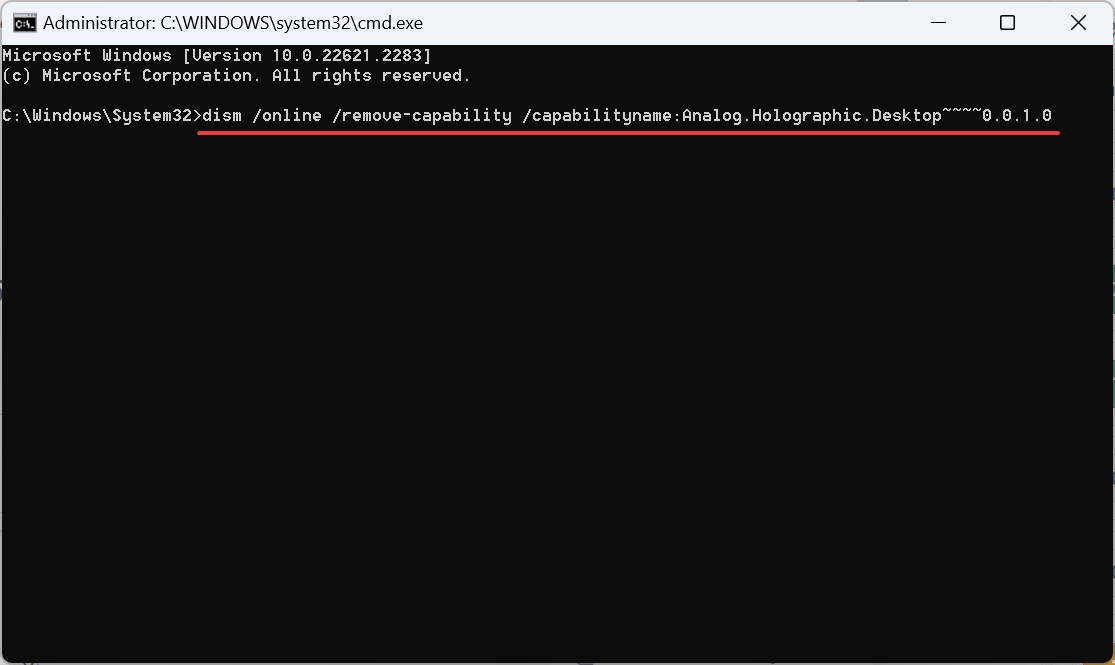
- Press Windows + S to open Search, type Command Prompt in the text field, right-click on the relevant search result, and select Run as administrator.
- Click Yes in the prompt.
- Now, paste the following command and hit Enter:
dism /online /remove-capability /capabilityname:Analog.Holographic.Desktop~~~~0.0.1.0 - Finally, check for Windows updates and install any available components.
6. Make changes to the registry
- Disconnect the HMD.
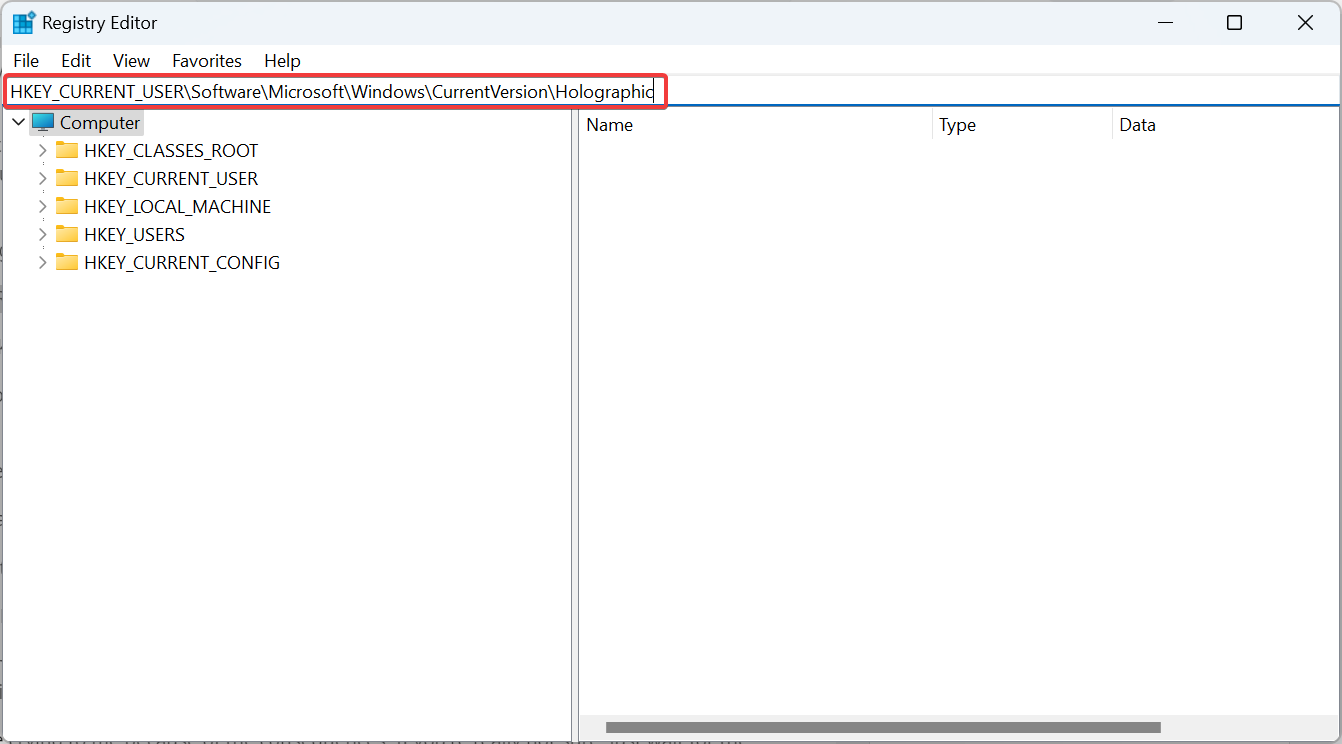
- Press Windows + R to open Run, type regedit in the text field, and hit Enter.
- Click Yes in the confirmation prompt.
- Paste the following path in the address bar and hit Enter or navigate to it:
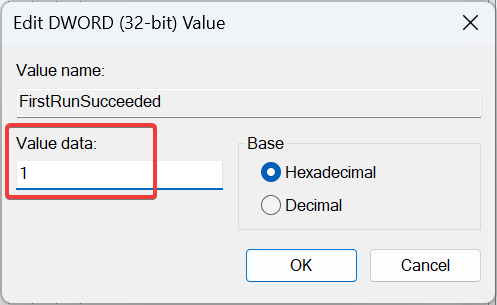
HKEY_CURRENT_USER/Software/Microsoft/Windows/CurrentVersion/Holographiclem_with/ - Now, double-click the FirstRunSucceeded key, change its Value data to 1, and click OK to save the changes.
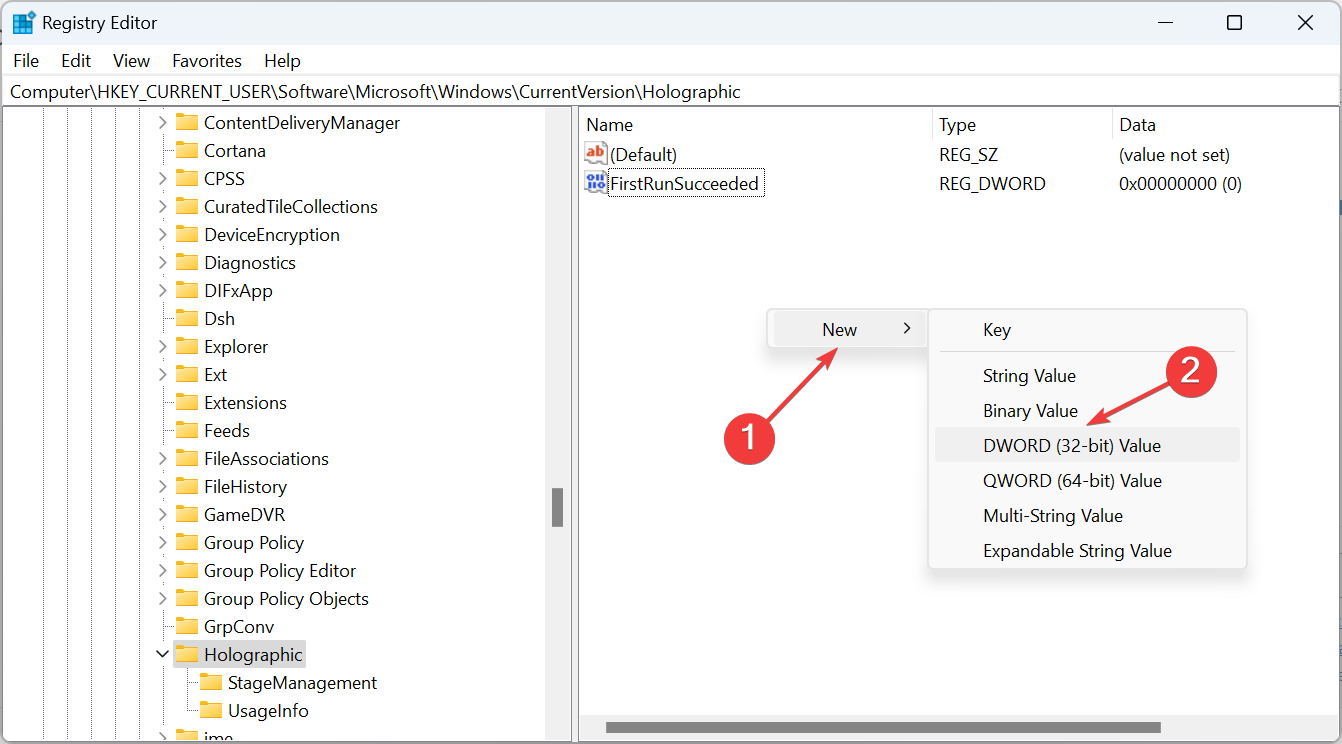
- Right-click on the empty portion, hover the cursor over New, select DWORD (32-bit) Value, and name it AllowFailedSystemChecks (if it doesn’t already exist).
- Double-click the newly created DWORD and set its Value data to 1.
- Similarly, create the OnDeviceLearningCompleted DWORD (if it doesn’t already exist) and set the Value data to 1.
- Now, reboot the PC, reinstall WMR, connect the Head Mounted Device, and it should work properly without throwing any errors.
7. Perform an in-place upgrade
- Go to Microsoft’s official website, choose the OS edition and product language, and then download the Windows 11 ISO.
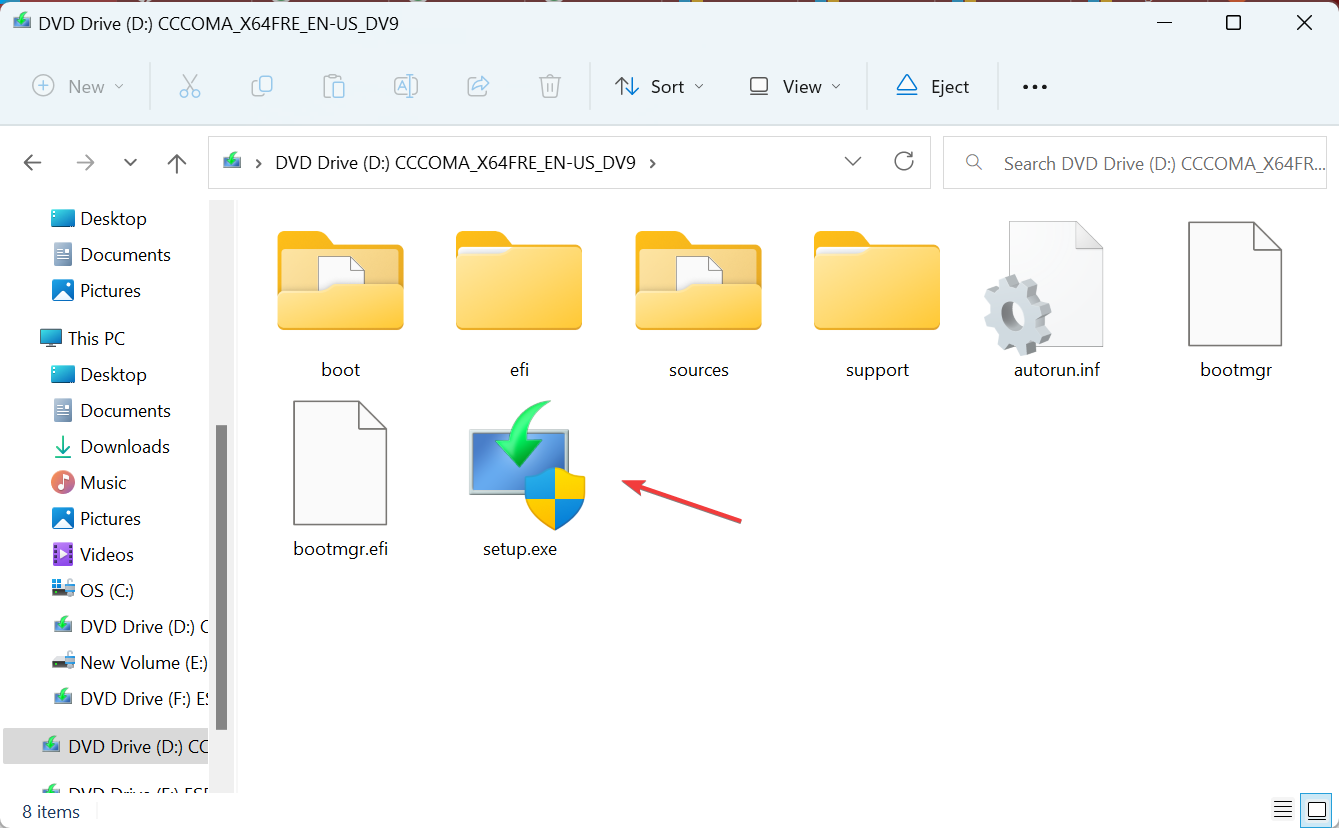
- Run the ISO file and click Open in the confirmation box.
- Double-click the setup.exe file.
- Click Yes in the confirmation box.
- Click Next in the Windows 11 setup.
- Read Microsoft’s license terms, and click Accept to agree to these.
- Verify that the setup reads, Keep personal files and apps, and then click Install.
- Wait for the repair upgrade to complete.
An in-place upgrade can fix things when Windows Mixed Reality is not installing, and you don’t lose any files or apps, as is the case with a reinstall using a bootable USB. And you should now be able to use the reality portal.
What do you need for Windows Mixed Reality?
- OS: Windows 10 version 20H2 or newer ( All editions except the N version and Windows Pro in S mode).
- Processor: Intel Core i5 4590 (4th generation, quad-core or better), AMD Ryzen 5 1400 3.4Ghz (quad-core or better)
- Storage space: 10 GB or more
- RAM: 8 GB DDR3
- Graphics driver: WDDM (Windows Display Driver Model) 2.2
- Graphics card: NVIDIA GTX 1060 (or better) DX12-capable discrete GPU, AMD RX 470/570 (or better) DX12-capable discrete GPU
- Display: Integrated or external VGA (800 x 600 or better)
- Graphics display port: HDMI 2.0 or DP (DisplayPort) 1.2
- Bluetooth version: Bluetooth 4.0
- USB: USB 3.0
- Headset framerate: 90 Hz
Once you have fixed things that lead to Windows Mixed Reality not installing, learn how to use the Mixed Reality Portal.
And if you find Mixed Reality USB 3.0 not working after the installation, updating the OS will do the trick!
For any queries or to share what worked for you, drop a comment below.





User forum
2 messages