How to Change the Microsoft Planner Background
You may also change the theme in Planner, not only the background
2 min. read
Published on
Read our disclosure page to find out how can you help Windows Report sustain the editorial team. Read more

Changing the background in Microsoft Planner can give your workspace a fresh and personalized look, making it more enjoyable to use. If you’re wondering how to change the Microsoft Planner background, follow these straightforward solutions to customize your Planner to your liking.
How do I change the background of Microsoft Planner?
1. Changing backgrounds in Microsoft Planner
- Go to the Microsoft Planner page and log in with your Microsoft account.
- Choose the specific plan where you want to change the background.
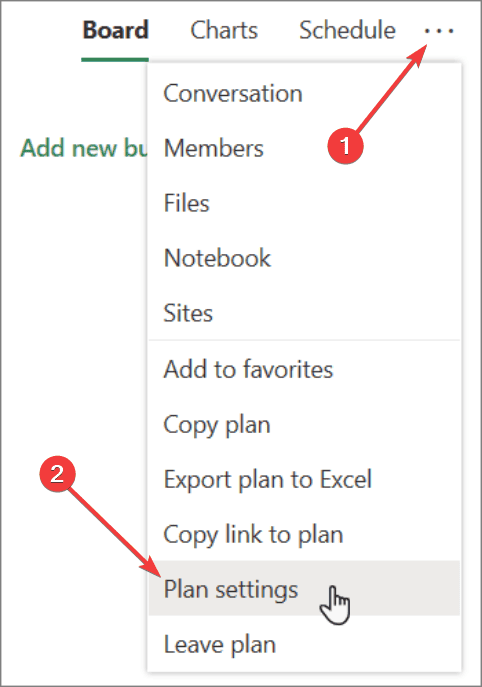
- Click the More button, which looks like three dots (…), at the top of the plan screen.
- From the dropdown menu, select Plan settings.
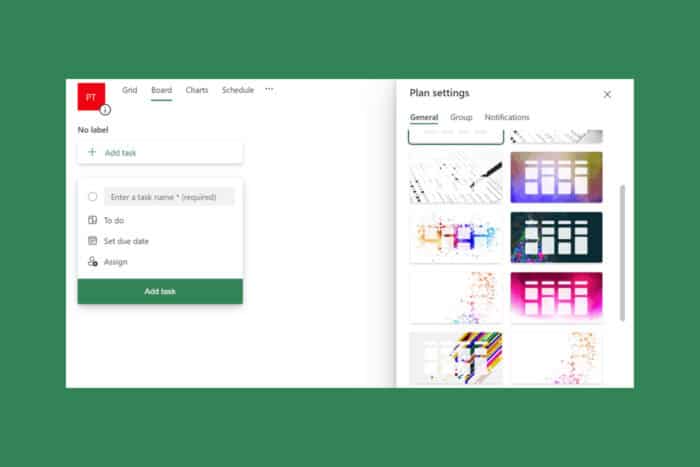
- On the right side of the screen, the General tab will appear. You can now choose from a variety of recommended background images provided by Planner.
- Click on the preferred background to apply it to your plan. The new background will enhance the visual appeal of your Planner board.
By following these steps, you can easily customize the appearance of your Planner board, making it more visually appealing and easier to identify among other plans.
2. Changing the theme in Microsoft Planner
- Go to the Microsoft Planner page and log in with your Microsoft account.
- Click the Settings button located in the top-right corner of the screen.
- Under the Themes section, choose from a variety of available themes.
- To see more theme options, click on View all.
- Select the theme you prefer by clicking on it. The theme will be applied to your Planner interface, giving it a fresh look.
Changing the theme enhances the overall user experience by allowing you to personalize the look and feel of your Planner, making it more enjoyable to use.
So, now you know how to change the Microsoft Plan background and theme and customize it to your needs. If you’re looking for more tips, here’s how to create custom fields in Microsoft Planner.
Did you know that Microsoft Planner Copilot helps you create and track your projects faster? Click the highlighted link for more information.
If you have any questions or know about different ways to change the background of Microsoft Planner, let us know in the comments below.


User forum
0 messages