How to change offline Outlook Data File (.ost) location in Microsoft Outlook on Windows 10
3 min. read
Updated on
Read our disclosure page to find out how can you help Windows Report sustain the editorial team Read more

If you tried to change the location of the offline Outlook Data File (.ost) in Microsoft Outlook, you have seen that the browse button is disabled.
This is due to the deprecation of the classic offline mode in Outlook, which is an online mode connection to Microsoft Exchange Server.
This is what happens when you try to do something offline using a tool designed for online use.
But the good news is that there is a fix for this.
Users have also described this issue on Microsoft’s forum:
My current default location for my OST file is C:Users…*** Email address is removed for privacy ***
I have been trying to change the location to D:Users…*** Email address is removed for privacy ***, but nothing I try seems to work.
In Outlook, I go to change the location of the data file, but it doesn’t allow me to edit or change the file. […]
How can I change the location in which outlook points to the data file for my email? It is pulling the emails off of the exchange server, but caching them to my OST file on my local C drive, instead of my other local D drive?
Here’s how to change the location of the offline Outlook Data File:
1. Create a new Outlook Profile and change the location of the .ost file
- Go to Control Panel > type mail to search for the Mail item > open it.
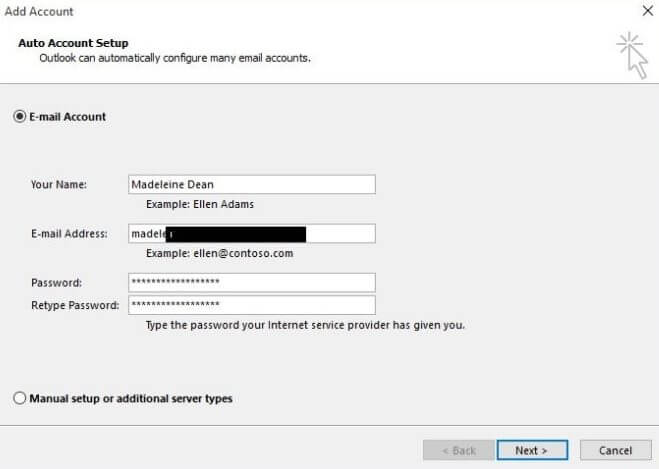
- Click on Show Profiles > click Add and type a name for the profile > click OK.
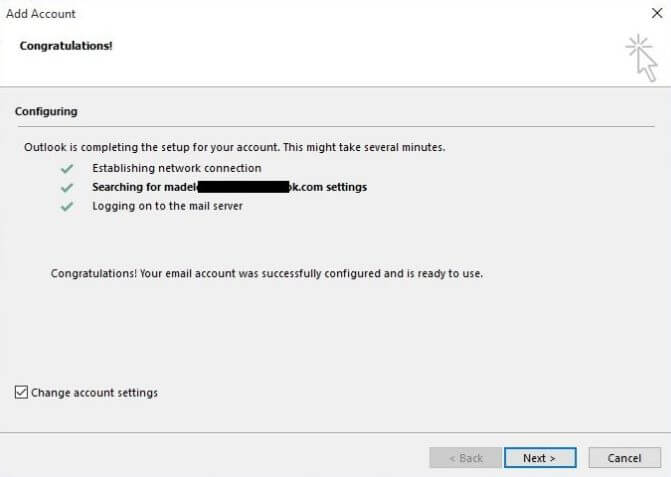
- Click on Next and wait for the setup to complete.
- Select the Change account settings check case > click on Next.
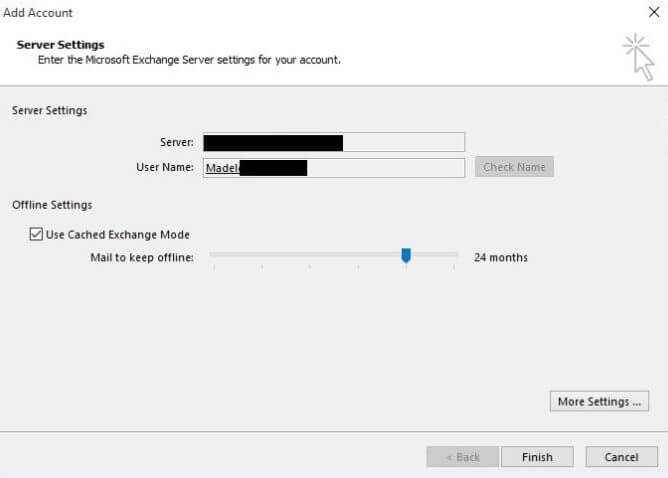
- In the Server Settings windows, select More Settings.
- In the Microsoft Exchange Windows, click on the Advanced tab and then on Outlook Data File Settings.
- In the new windows that appears on the screen, click on Browse and then on Open.
- Click on Finish to complete the email account setup.
- Return to the profile list >Control Panel > type mail to search for the Mail item > open it> Click Show Profiles.
- Select the optimized profile> check the Always use this profile box > click OK.
Need to sync your files? Here’s the best software to help you with that!
2. Change the location via the ForceOSTPath registry entry
We suggest you to back up the registry before you change the settings. If you modify the registry incorrectly, you can use the back up to restore the registry.
If you also want to monitor registry changes, this tool can help you.
- Type regedit in the search box > click OK.
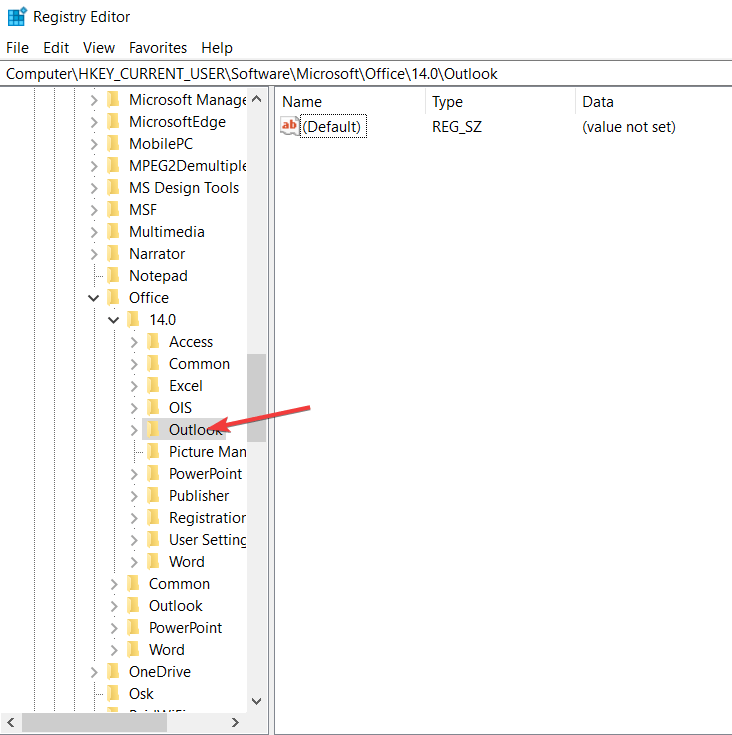
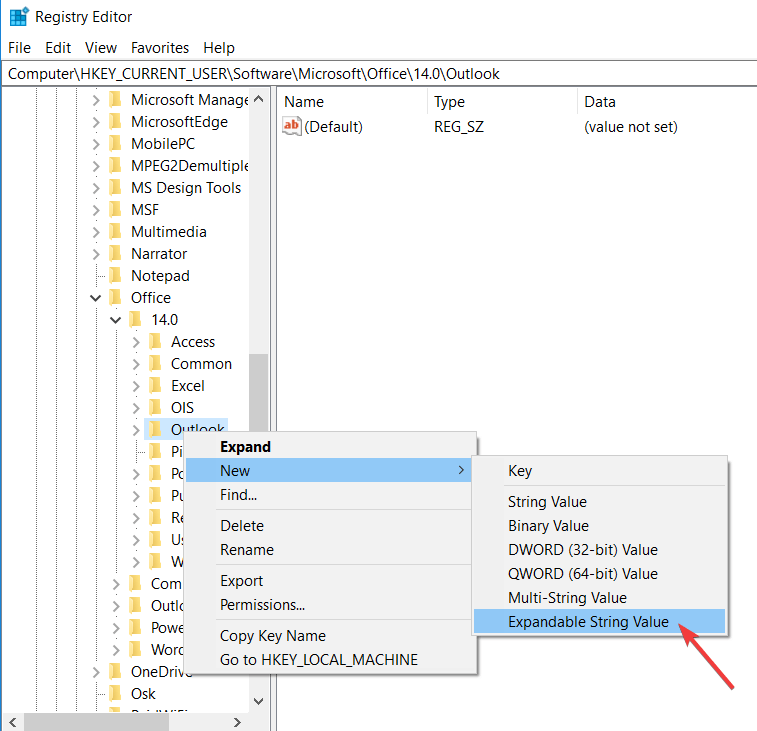
- Locate the following registry subkey: HKEY_CURRENT_USERSoftwareMicrosoftOfficexx.0Outlook
( xx.0 represents your Office version (14.0 = Office 2010). - Right-click Outlook > New > click on Expandable String Value.
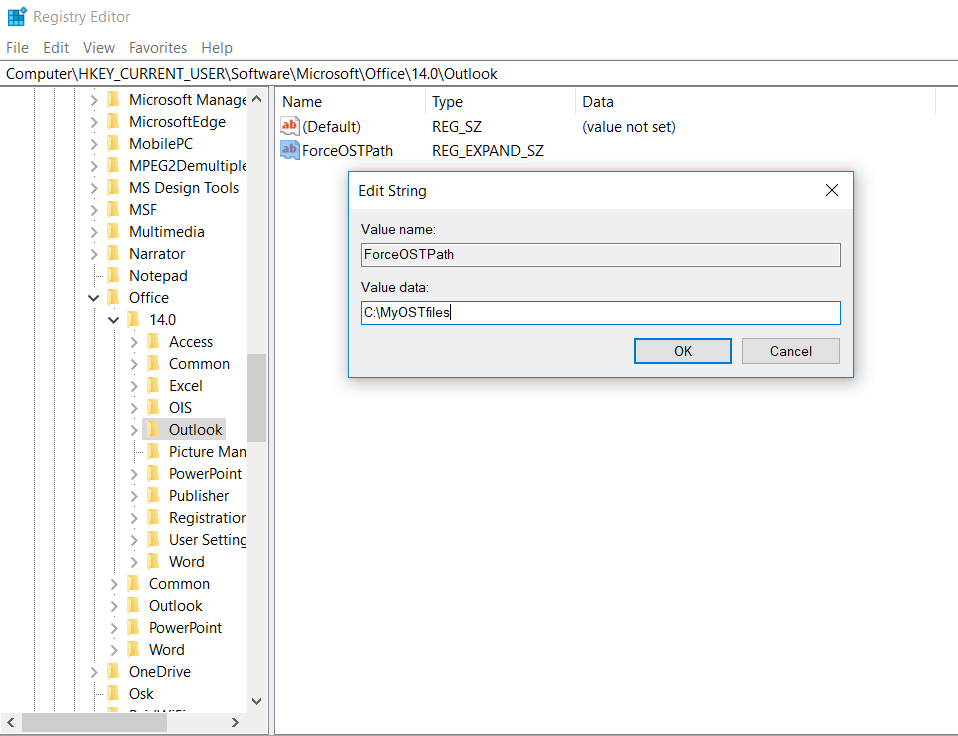
- Type ForceOSTPath> press Enter.
- Right-click ForceOSTPath, and then click on Modify.
- In the Value data box, type the path where you want to store the .ost file (C:MyOSTfiles) > click OK.
- Remove and re-add your account. Setting the Registry value does not affect existing accounts. You can also use Microsoft FixIt tool if you don’t want to use the regedit path.
If the following solutions were helpful, please let us know in the comment section below.
RELATED STORIES YOU NEED TO CHECK OUT:

