How to Fix Google Chrome Black Screen (Step-by-Step)

Encountering a Google Chrome black screen can be frustrating, especially if it happens when opening the browser or during regular browsing. This issue can occur on both Windows 10 and Windows 11 and may show as a completely black page, a flashing black window, or Chrome opening to a blank screen.
The problem is often linked to GPU hardware acceleration, outdated browser data, incompatible extensions, or conflicts with your graphics drivers. Below are effective ways to fix the Google Chrome black screen and get your browser working normally again.
How can I fix the black screen in Google Chrome?
Table of contents
- How can I fix the black screen in Google Chrome?
- 1. Disable Chrome’s hardware acceleration
- 2. Disable plugins to fix Chrome flashing black screen
- 3. Disable Chrome flags to fix the Chrome black screen after sleep
- 4. Resize the window to fix Chrome’s black screen when playing videos
- 5. Run in Compatibility mode to fix Chrome black screen when scrolling
- 6. Add -no-sandbox launch parameter
- 7. Reinstall Chrome
- How do you reset Google Chrome?
1. Disable Chrome’s hardware acceleration
- Create a Google Chrome shortcut on Desktop (in case you don’t have it).
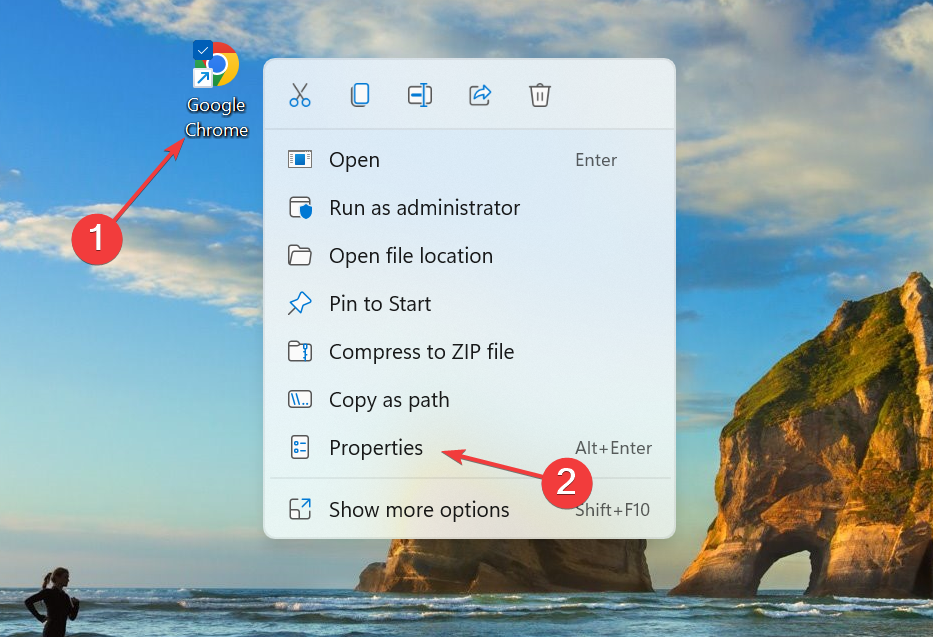
- Right-click the shortcut, and select Properties.
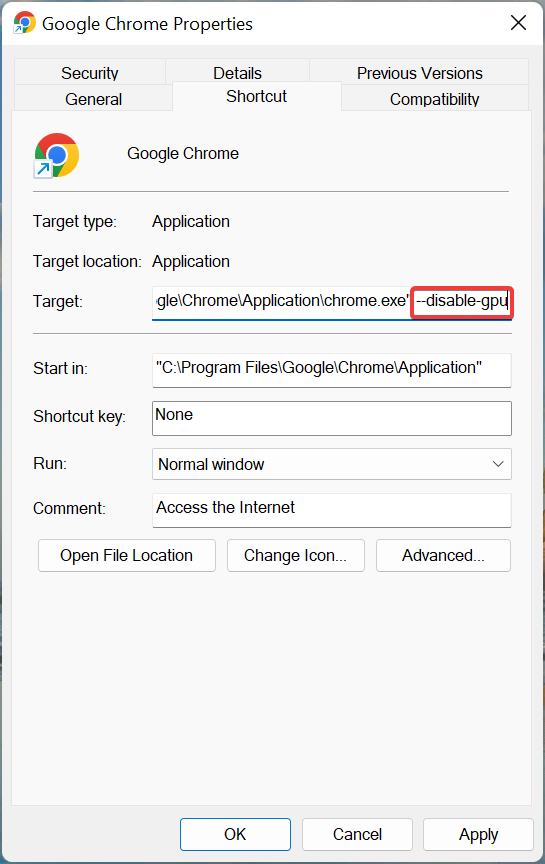
- In the Target text field, add the following text: “[space]–disable-gpu” (so the path should look like chrome.exe” –disable-gpu”).
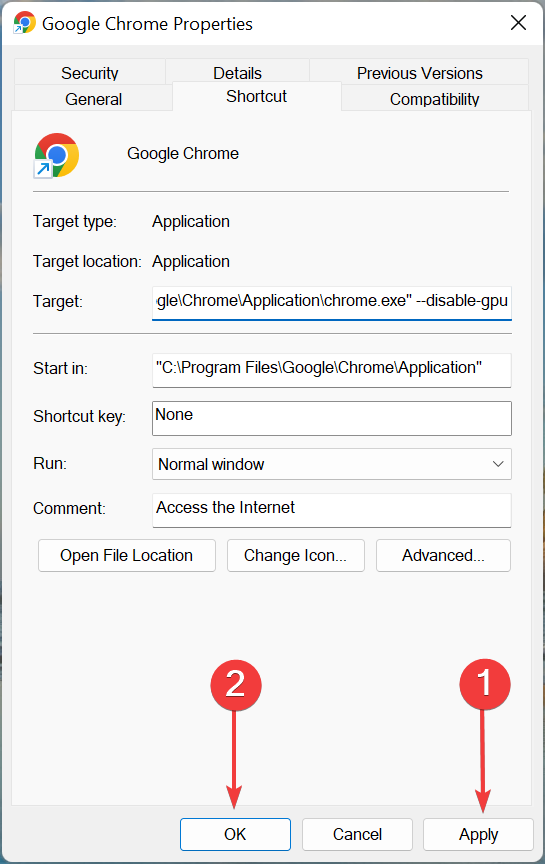
- Click on Apply and then on OK to save the changes.
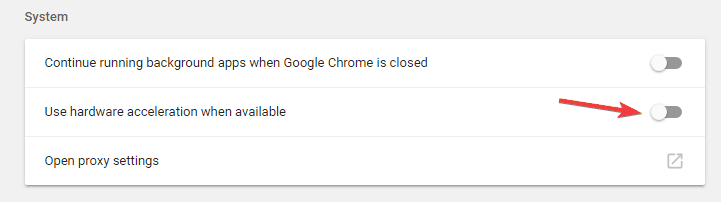
- Now, open Chrome, paste the following in the address bar, and hit Enter:
chrome://settings/system - Next, just disable the Use hardware acceleration when available option.
- Restart Chrome.
The most common workaround for black screen issues in Google Chrome is to disable GPU compositing on all pages.
This solution proved to be the right one in most of the cases, and for the majority of users. However, if you’re still experiencing the black screen issues in Google Chrome, move on to another solution.
2. Disable plugins to fix Chrome flashing black screen
- Click the Menu icon and choose More tools > Extensions.
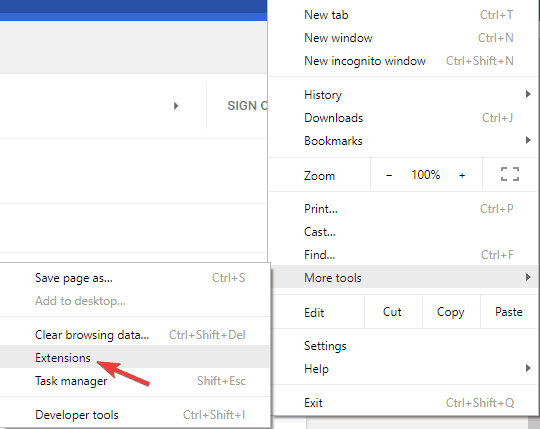
- A list of all extensions will now appear. Disable all extensions by clicking the switch icon next to the extension’s name.

- After disabling all extensions, restart Chrome and check if the problem is still there.
If you’re wondering why has your google screen gone black, the issue might be related to extensions.
A plugin might not be fully compatible with your version of Chrome or it might be buggy causing the issue to appear.
To fix the problem, you need to find and disable the problematic plugin.
If the issue doesn’t reappear, you can start enabling extensions one by one until you find the one that is causing the issue. Once you find it, you can keep it disabled or remove it from Chrome.
3. Disable Chrome flags to fix the Chrome black screen after sleep
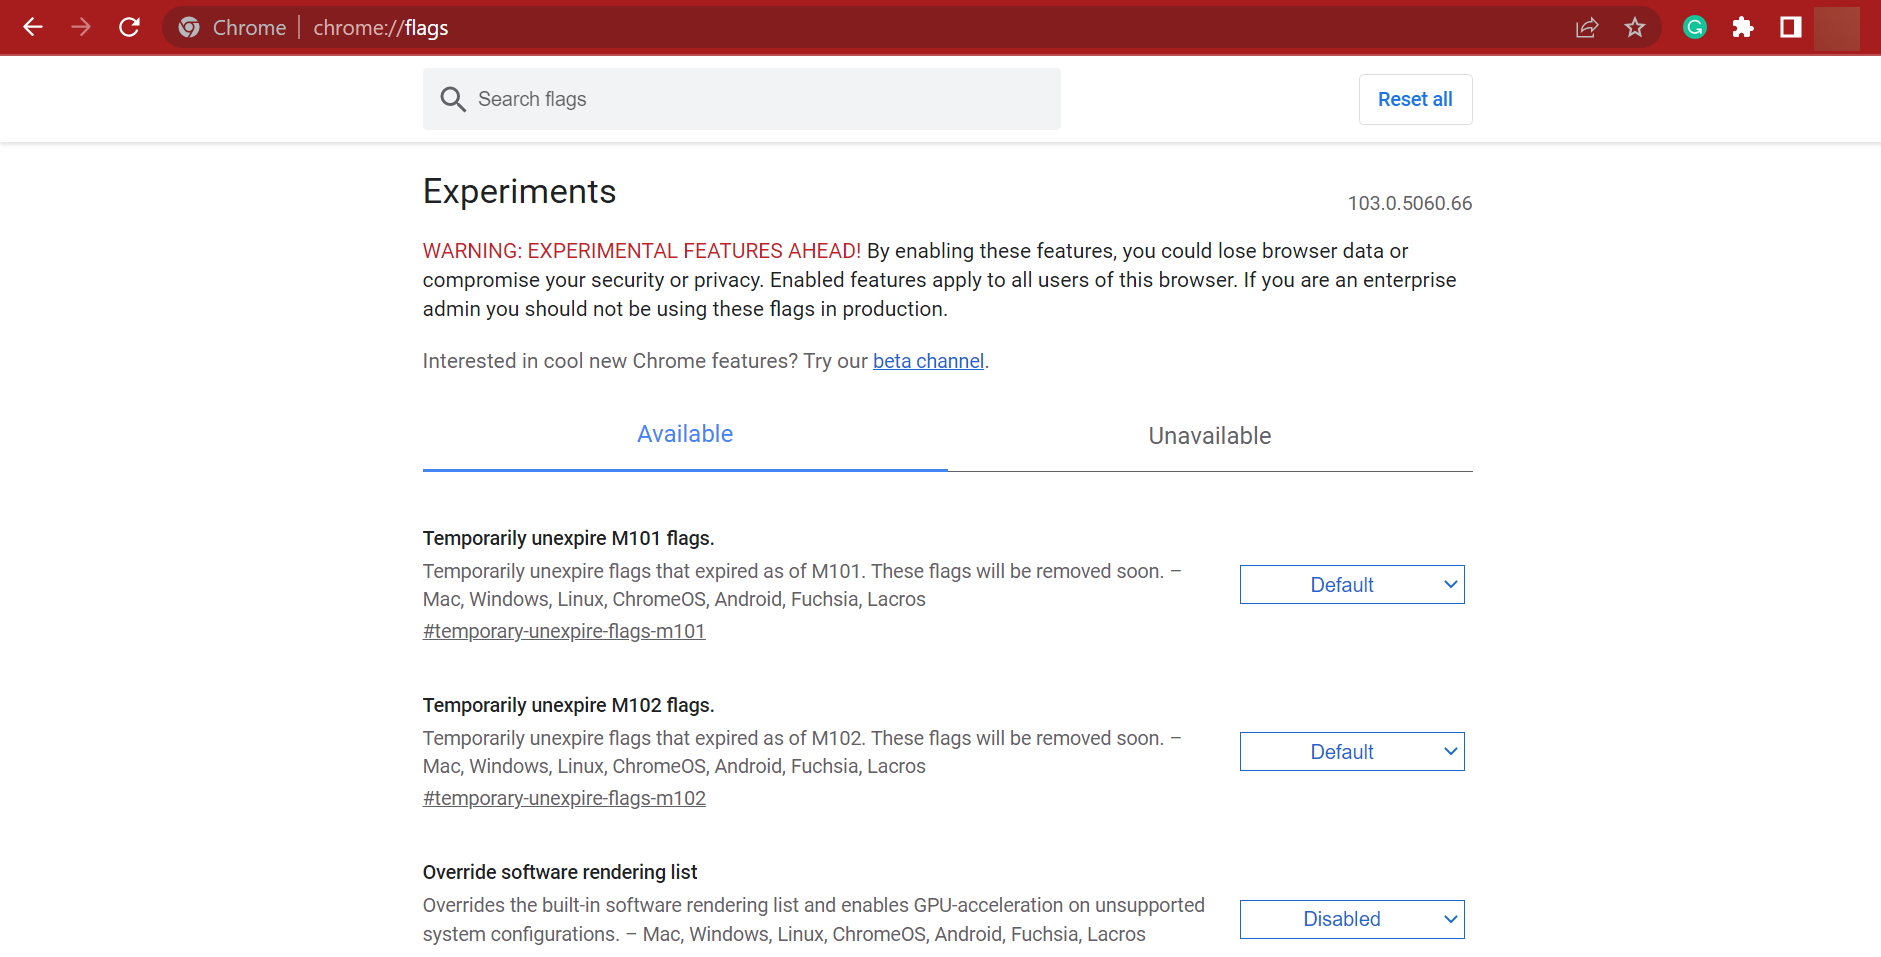
If Google turned black on your PC, you can disable some Chrome flags, in order to fix this problem. Flags are experimental features and can introduce instability. So, it’s recommended that you proceed with extreme caution when enabling these.
Now, if the problem started after enabling a flag, disable it right away. To view all the flags available on Chrome, paste this in the address bar and hit Enter:chrome://flags/
This solution proved to be helpful only to some users, as others reported it as unsuccessful. Nevertheless, you should try it, and see if disabled flags make any difference.
4. Resize the window to fix Chrome’s black screen when playing videos
According to users, you might be able to fix this problem simply by resizing Chrome. To do that, just click and hold Google’s title bar in order to resize it.
After doing that, restore Chrome back to the original size and check if the problem is still there.
Keep in mind that this is just a workaround, so it won’t permanently solve this issue. If the black screen reappears, simply resize your browser again and the problem will be temporarily solved.
5. Run in Compatibility mode to fix Chrome black screen when scrolling
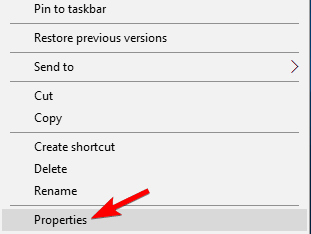
- Locate the Chrome shortcut, right-click it and choose Properties from the menu.
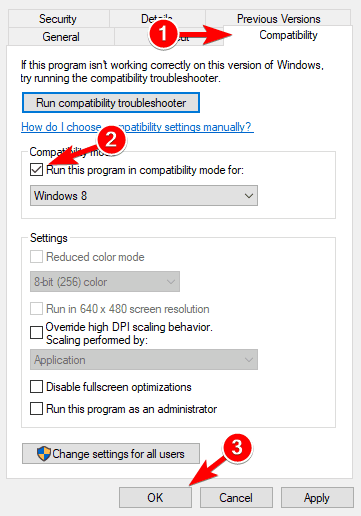
- When the Properties window opens, navigate to the Compatibility tab and check Run this program in compatibility mode for.
- Now select the desired version of Windows. Many users recommend using Windows 7, so you might do that.
- Lastly, click Apply and OK to save changes.
Compatibility mode is a useful feature of Windows that allows you to run older applications.
Speaking of which, many users reported that they fixed black screen issues in Google Chrome simply by enabling Compatibility mode.
After enabling Compatibility mode, try starting Chrome again. If the issue reappears, repeat the same steps, but this time click Change settings for all users button.
In addition, you might want to try different versions of Windows and check if that helps. Also, this method would come in handy if you find the Chrome black screen to flicker continuously.
6. Add -no-sandbox launch parameter
- Right-click Chrome’s shortcut. Choose Properties from the menu.
- Navigate to the Shortcut tab and in the Target field add –no-sandbox at the end. Now click Apply and OK to save changes.
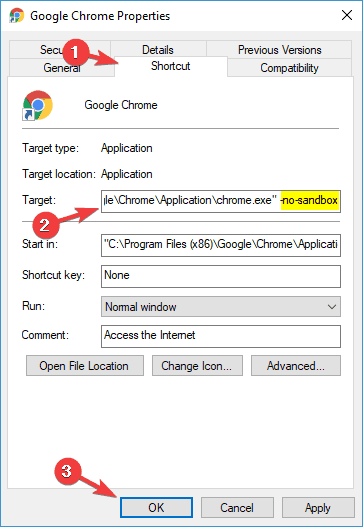
According to users, you might be able to fix Chrome black screen issues on Windows 10 by adding a -no-sandbox parameter to Chrome’s shortcut.
In case you don’t know, Google Chrome uses a Sandbox mode in order to separate its processes.
This means that even if your browser encounters malware, the malware will be contained thanks to the Sandbox mode.
As you can see, Sandbox mode is a useful security feature, but sometimes it can cause Google Chrome display issues. To fix the problem, some users are suggesting disabling Sandbox mode.
7. Reinstall Chrome
According to users, sometimes in order to fix the black screen in Chrome, you need to reinstall it completely. Reinstalling Chrome might remove all your bookmarks and history, so you should export them or enable syncing.
There are several ways to uninstall Chrome, but the best one is to use uninstaller software. In case you’re not familiar, uninstaller software is a special application that will remove the selected application along with all of its files and registry entries.
There are many great uninstaller applications for Windows 10, so go over the list and use the one suitable for your PC. Once you remove Chrome with one of the tools, install it again, and check if the problem is resolved.
Furthermore, a professional uninstaller application will do complete scans of your PC after uninstallation to eliminate excess data. As a result, you get a clean PC, as if Google Chrome had never been installed on your computer.
How do you reset Google Chrome?
- Click the Menu icon in Chrome and choose Settings from the menu.

- When the Settings tab opens, scroll down and click Advanced.

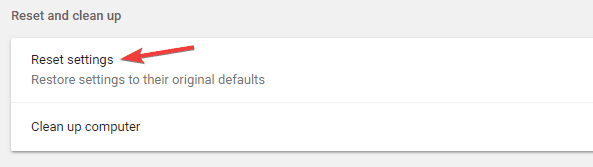
- Navigate to Reset and clean up section and click Reset settings.
- Click the Reset button to confirm.
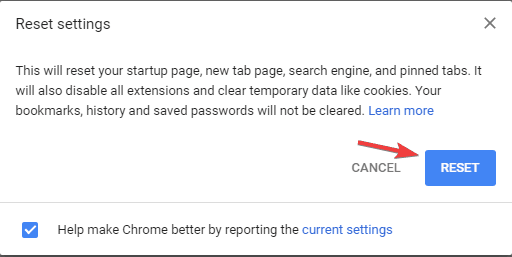
If you’re having problems with Chrome, you might be able to solve them simply by resetting Chrome to default. By doing that you’ll reset all its settings and remove all extensions.
Keep in mind that this will remove all your bookmarks and history, so be sure to enable syncing or exporting your data. You can do that easily with a few efficient tools.
By following these steps, you should be able to fix the Google Chrome black screen in Windows 10 issue.
Let us know which solutions worked best for you by leaving us a message in the comments section below.
Read our disclosure page to find out how can you help Windows Report sustain the editorial team. Read more


Improve this guide


User forum
8 messages