Fix: Colors Change While Gaming on Windows 11
Recalibrating your color profile will give you consistent colors
4 min. read
Updated on
Read our disclosure page to find out how can you help Windows Report sustain the editorial team. Read more
Key notes
- If your display driver is not optimized for gaming, you may notice that your colors seem washed out.
- Each operating system has its own display requirements suitable for each game.
- Keep reading to find out how to maintain the true colors while gaming.
If you notice that the color saturation changes while playing games, then there’s a good chance you have some kind of screen tearing problem.
It can become difficult to get the right color combinations, especially if it changes every time, but here is an easy tutorial to ensure your colors are consistent throughout.
So what causes these colors to change while gaming? In most cases, the issue occurs due to incompatibility between graphics drivers and games you’re playing. Some games require specific drivers to work properly and in their absence, you may encounter black screen issues.
Another possible cause could be your monitor. If you are using an older monitor that does not have any type of calibration software installed, then it is possible that the colors being displayed by your monitor could be off from what they should be.
How can I fix my color profile if it changes while gaming on Windows 11?
Before embarking on the slightly technical steps, try the following basic workarounds:
- Make sure you’re using the latest version of Windows 11.
- Check that your PC meets the minimum system requirements for the specific game.
- Verify that your monitor is plugged in directly to the computer, not through a USB hub.
- Disconnect any unused outputs such as HDMI and only leave the one for your monitor.
- Ensure you’re running the latest version of your game.
If all the above are in check and your monitor still changes colors when you open a game, proceed to the steps below:
1. Reset display color settings
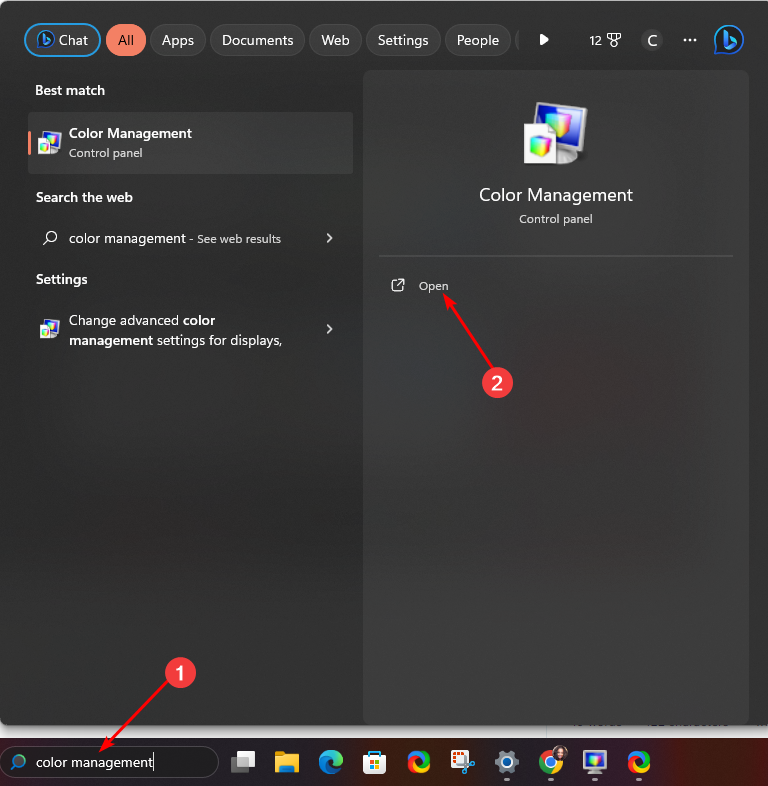
- Click on the Search bar icon, type Color Management, and click Open.
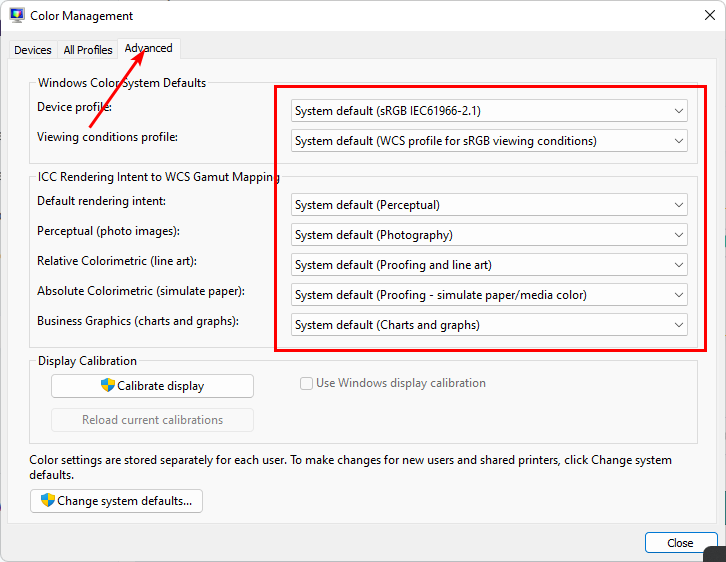
- Navigate to the Advanced tab.
- Ensure each entry is set to System default.
2. Recalibrate display colors
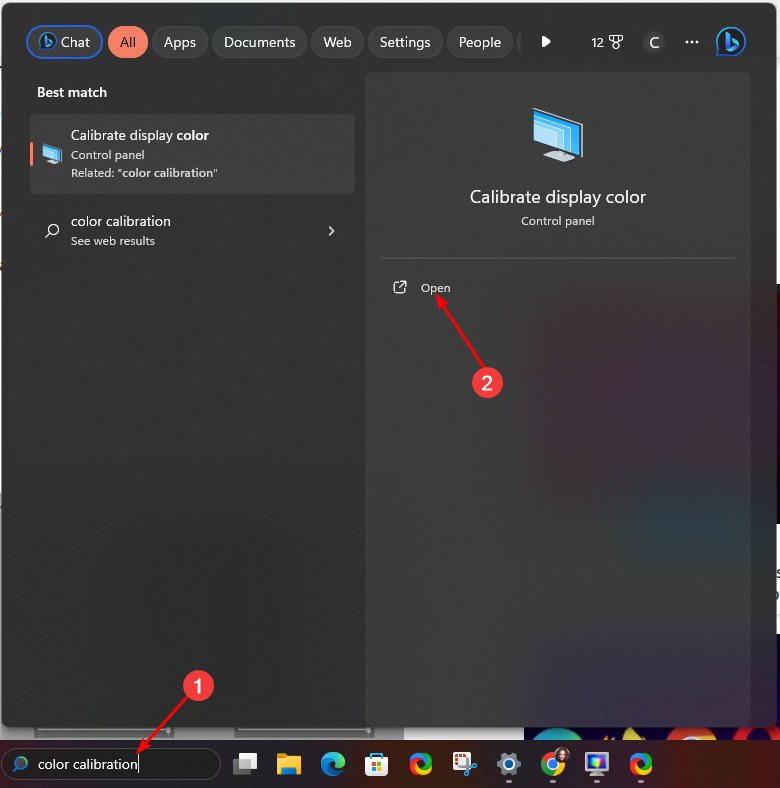
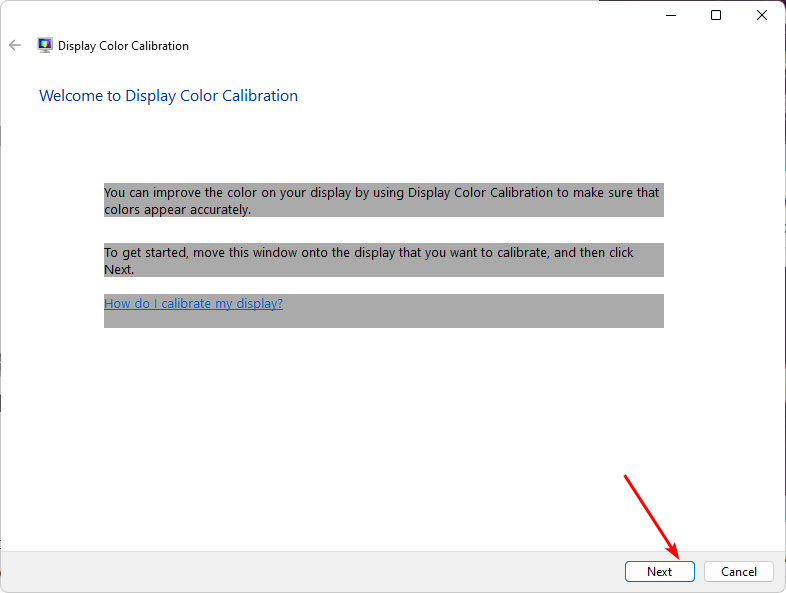
- Click on the Search bar icon, type Color calibration, and click Open.
- Follow the on-screen prompts and hit Next.
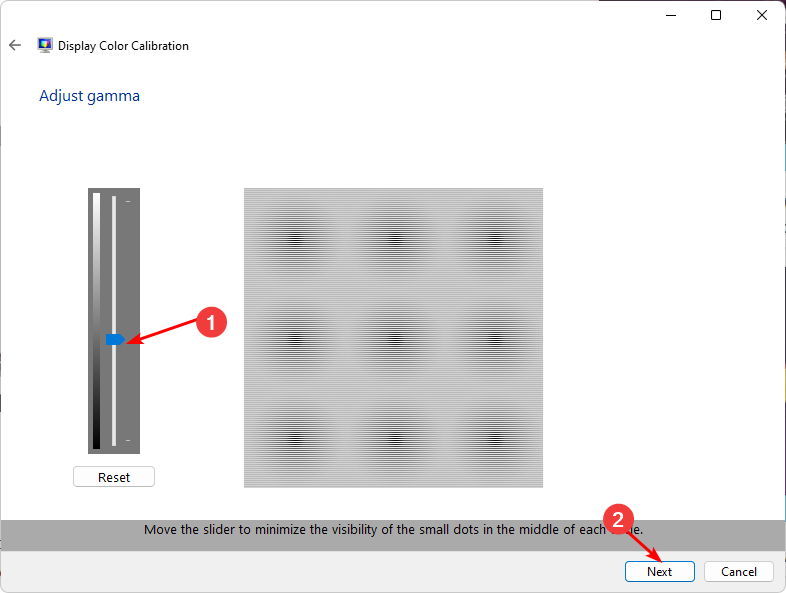
- Click and hold the slider to adjust the settings to a calibration of your preference.
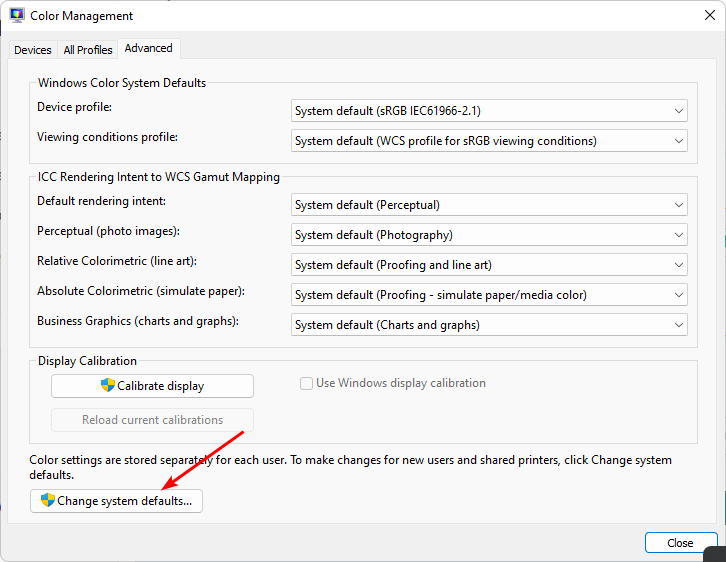
- Go back, click on the Search bar icon, type Color management, and click Open.
- Navigate to the Advanced tab and select Change system defaults.
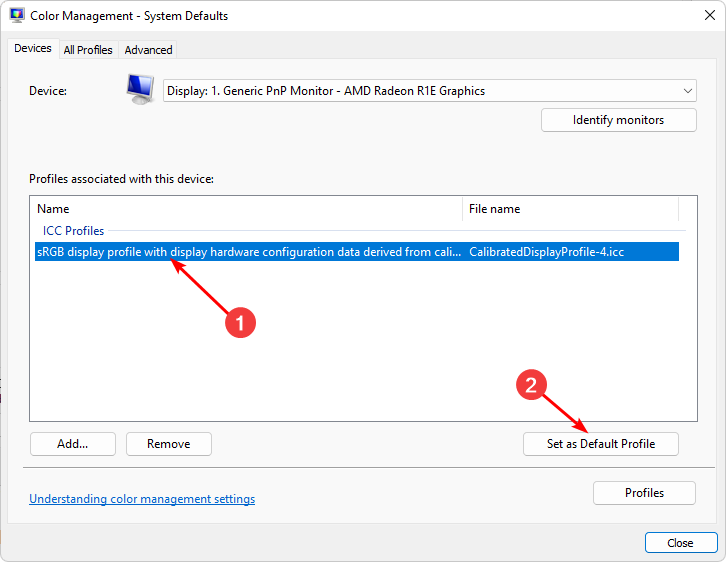
- Select the display profile and click on Set as Default profile.
3. Update your video card
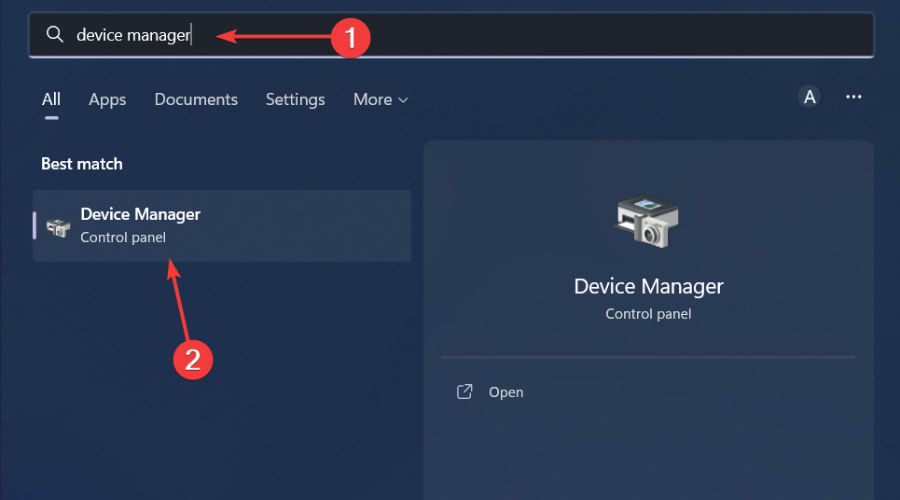
- Click the Search icon, type Device Manager in the search bar, and click Open.
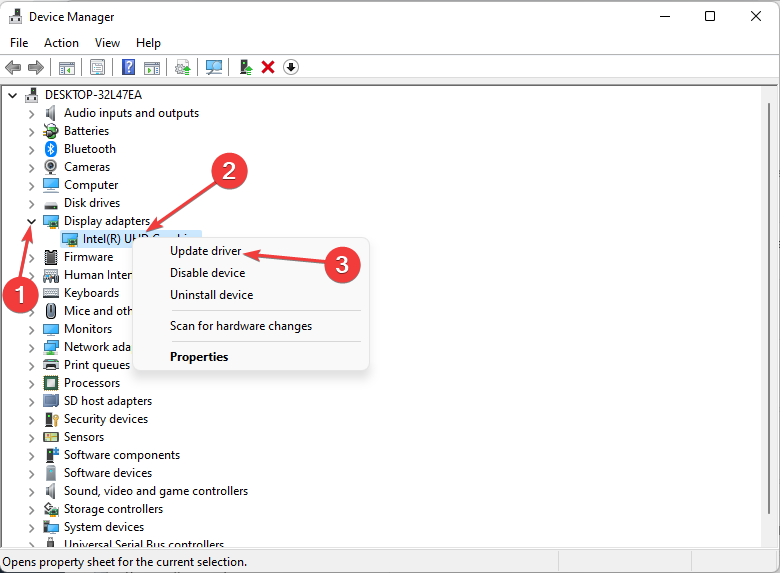
- Navigate to Display adapters to expand, right-click on your graphics card, and select Update driver.
- Select Search automatically for drivers.
In some instances, updating your drivers manually could still present problems because Windows can sometimes match you with the wrong drivers. A more sure way of getting the correct drivers would be to use an automatic tool.
Outbyte solution is the best in the game. It contains a massive database and will automatically scan your system for any outdated, damaged, or missing drivers and then match you with the right ones.
- Download and install the Outbyte Driver Updater app.
- Launch the software and wait for the app to detect all incompatible drivers.
- Now, it will show you a list of all faulty drivers to select the ones to Update or Ignore.
- Click on Update & Apply Selected to download and install the newest versions.
- Restart your PC to ensure the applied changes.

OutByte
Keep your GPU in a flawless state without worrying about possible driver issues.4. Disable GPU acceleration
- Hit the Windows key and select Settings.
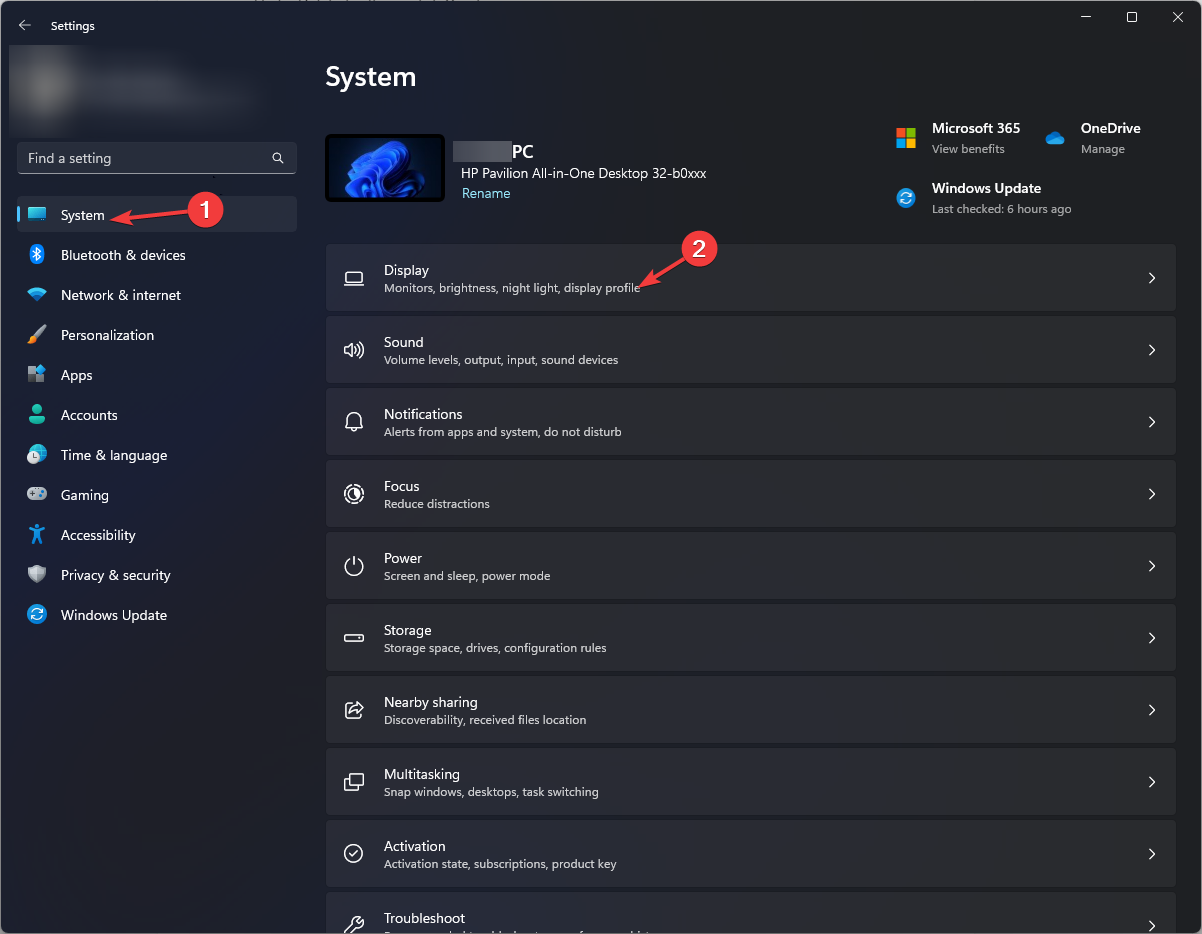
- Click on System on the left pane, then Display on the right pane.
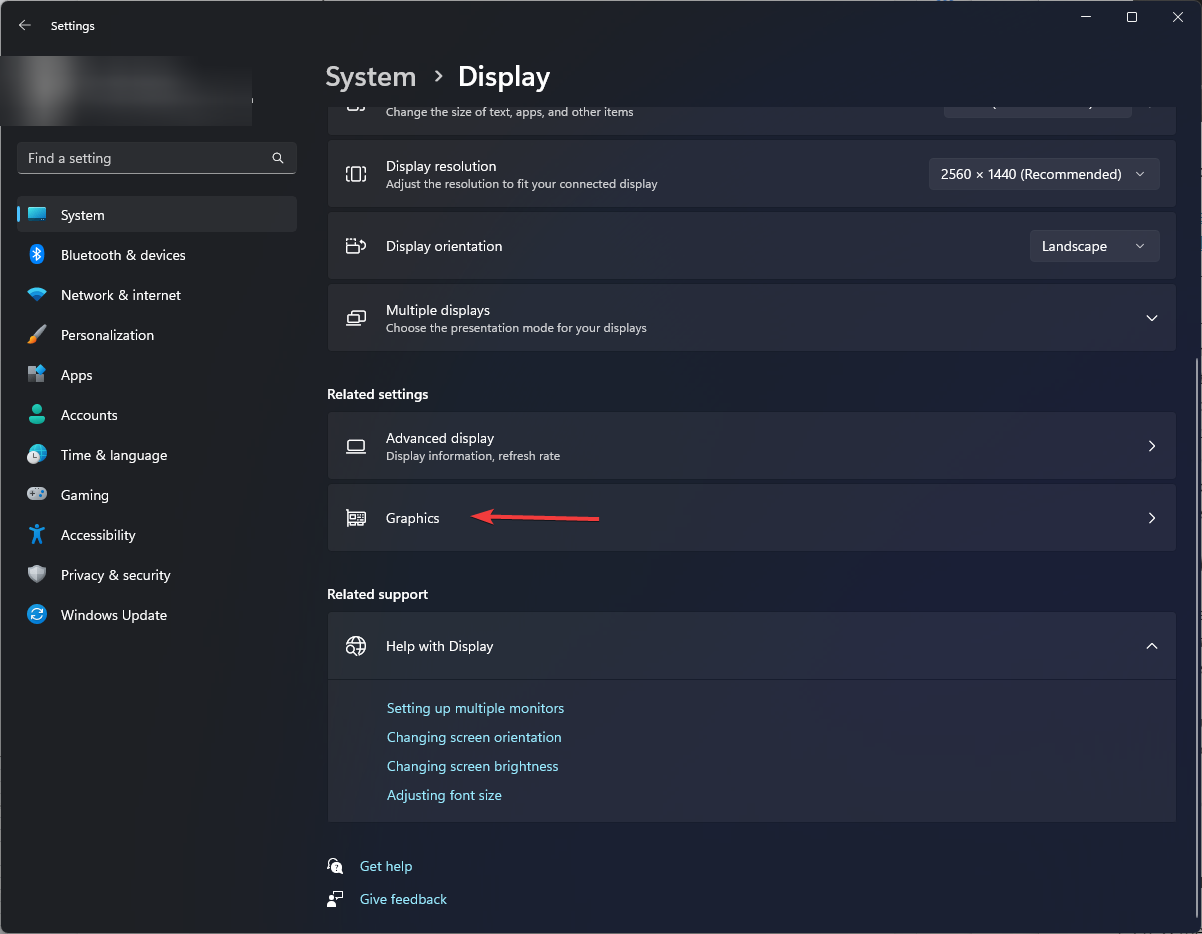
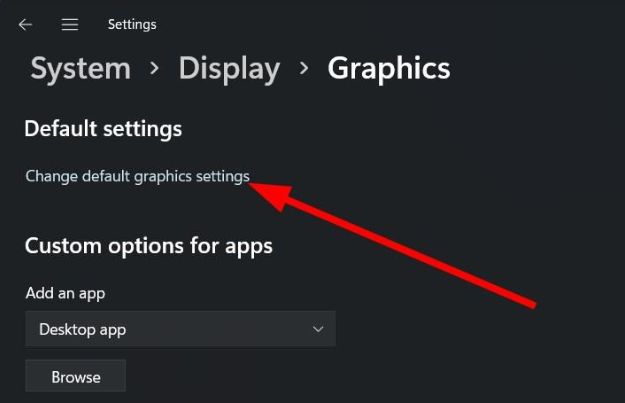
- Scroll down and select Graphics.
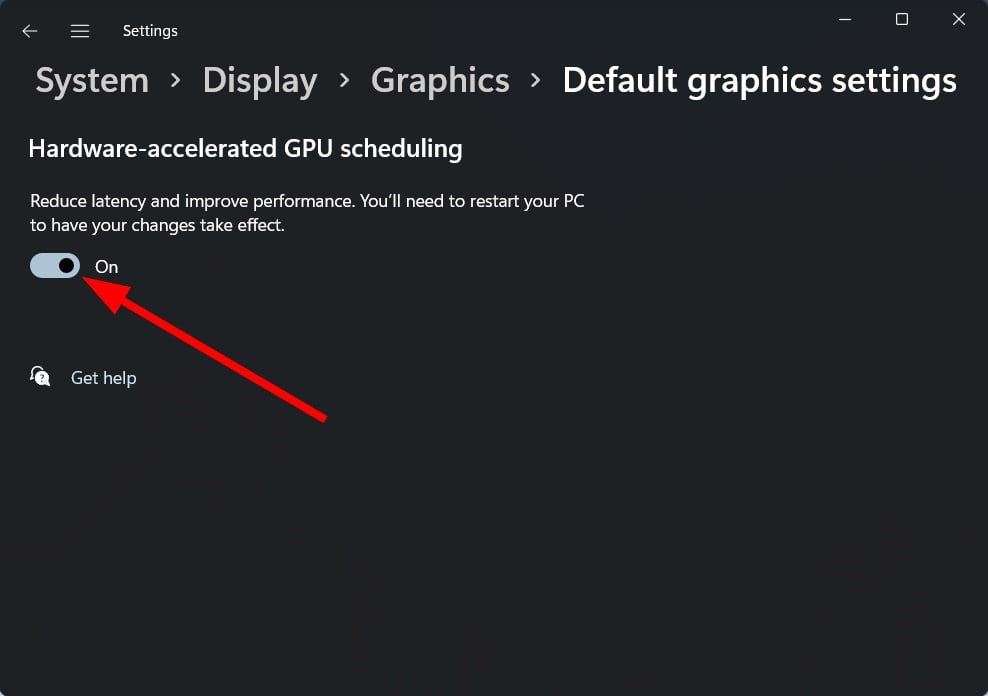
- Select the Change default graphics settings option.
- Now, toggle off the Hardware-accelerated GPU scheduling option.
Although hardware acceleration helps games run better, with less lag and fewer FPS drops, it can cause some issues with screen colors.
If your GPU is responsible for handling colors, it’s possible that colors could be off or inaccurate because they’re being handled differently than usual. This is particularly true with older monitors that were not designed to work with it.
What are the best graphics settings to use on Windows 11?
Although Windows 11 has been feted to offer the best gaming performance yet, you still need to tweak some settings to get an all-rounded elevated performance.
You already have features like DirectX 12 and HDR enabled by default, so the rest is really up to you to optimize your gaming. Some of the key gaming settings that will definitely give you an immersive experience include:
- Adjusting your screen resolution
- Closing resource-intensive apps and processes
- Using a dedicated GPU
- Updating your graphic drivers
- Disabling animations
In addition, a good gaming laptop can make all the difference, but if you’re on a budget laptop, we recommend using integrated graphics instead of dedicated graphics cards.
This is because they tend to consume less power and generate less heat than their dedicated counterparts. If you insist on a discrete GPU, you may encounter a white screen while gaming because of overheating.
So, there you have it. Hopefully, these suggestions will help you get your display color calibration back on track.
Have you applied any of these changes, and has the color calibration settled? We’d love to hear your feedback, so let us know in the comment section below.





User forum
0 messages